Hardwood floors have always been my favorite part of my home. There’s just something about the warm glow they give to a room, the subtle grain patterns, and that satisfying sound of footsteps across smooth wood. But as much as I love my floors, keeping them clean has always been a challenge.
For years, I relied on store-bought hardwood floor cleaners. I tried the “premium” brands, the ones that promise streak-free shine and deep cleaning.
At first, I was thrilled. But after a few months, I started noticing dull spots, sticky patches, and even some discoloration in high-traffic areas. Worse, the chemical smell lingered for hours, and I started worrying about my kids crawling around on freshly cleaned floors—or my pets walking through the residue.
That’s when I decided it was time to take matters into my own hands. I wanted a solution that was safe, natural, affordable, and actually worked. I turned to DIY hardwood floor cleaners, and I haven’t looked back since.
Why DIY Works Better for Me
There are a few reasons I prefer making my own hardwood floor cleaner instead of buying commercial products:
- Cost Savings
Let’s be honest—high-end floor cleaners can cost $10–$15 per bottle. Over a year, that adds up. My DIY solution costs less than a dollar per batch, and a single batch lasts me weeks.
- Control Over Ingredients
When I mix my own cleaner, I know exactly what’s going into it. No hidden chemicals, no artificial fragrances, and no harsh solvents. I can tweak the recipe to make it extra safe for kids, pets, or sensitive noses.
- Gentle on Hardwood
Some commercial cleaners contain ingredients that, over time, dull the finish or even damage the wood. My DIY version cleans without harming the surface and even adds a subtle shine.
- Customizable Scent and Shine
I love adding essential oils like lemon, lavender, or orange. They leave my home smelling fresh without overwhelming the senses. Some days I even add a little olive oil for extra luster, and it works wonders.
- Satisfying to Make
There’s something empowering about creating a solution that works just as well (or better) than what you buy. Mixing a few household ingredients and seeing my floors gleam gives me a sense of accomplishment that no store-bought cleaner ever did.
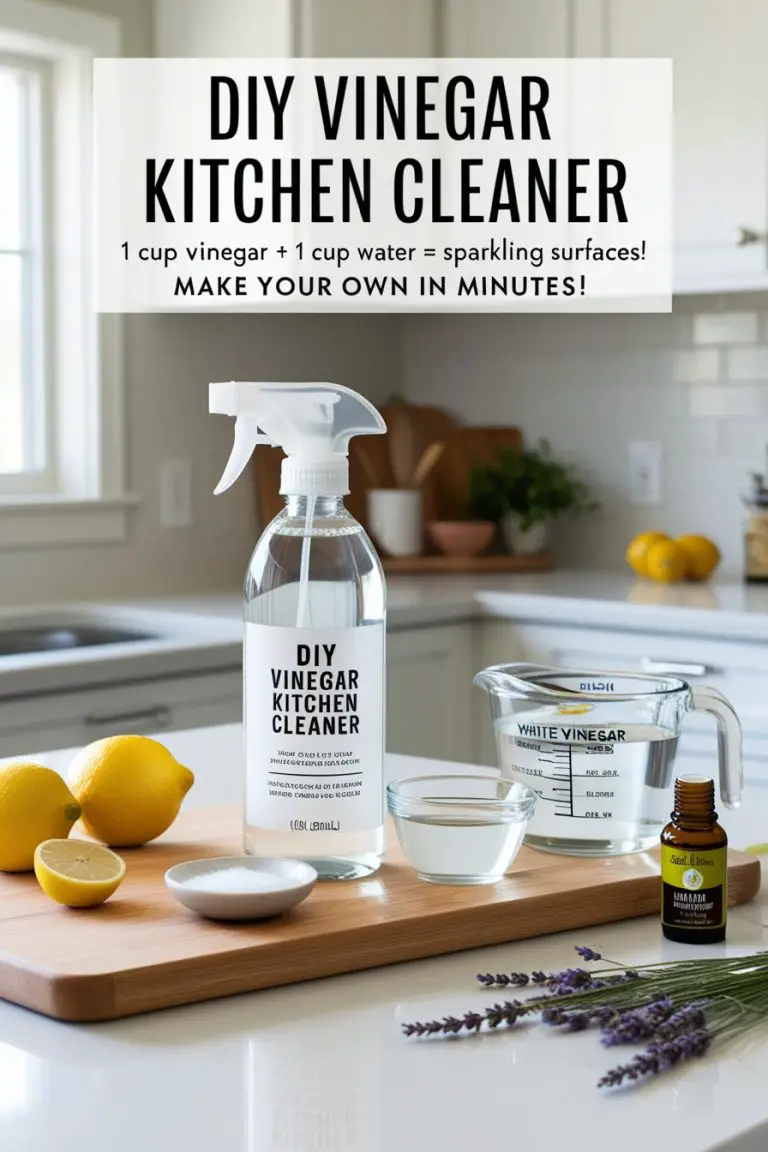
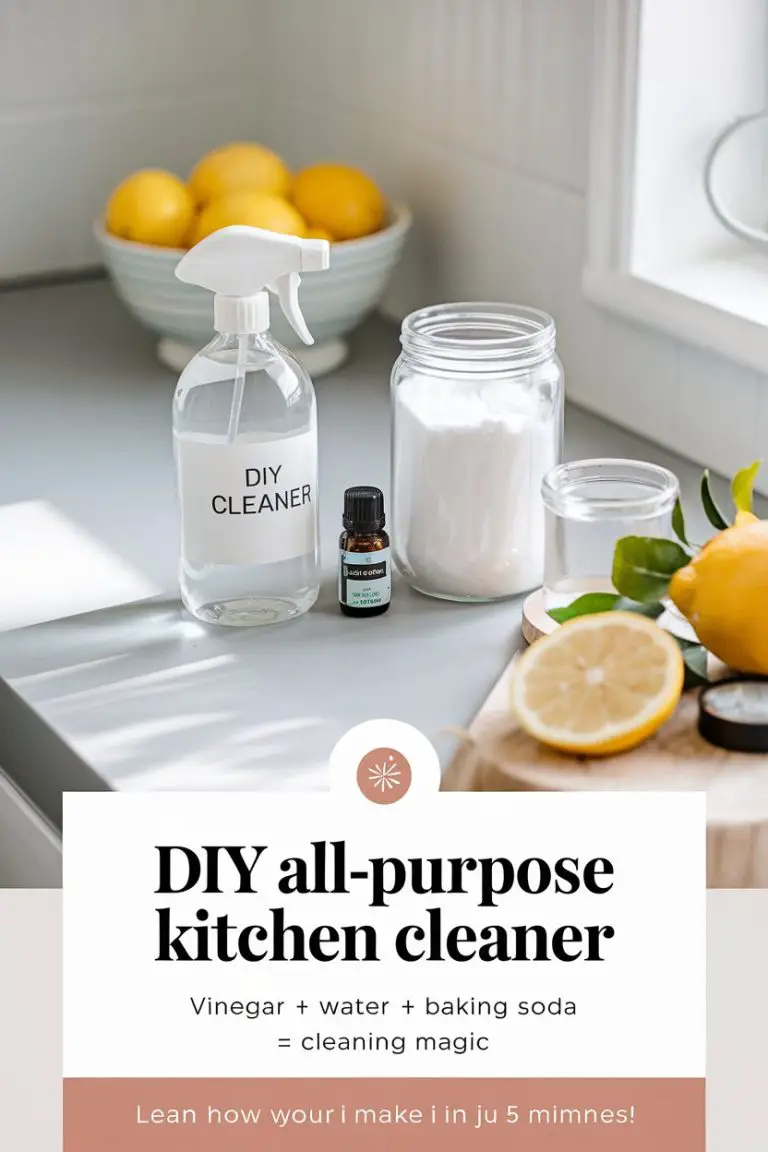
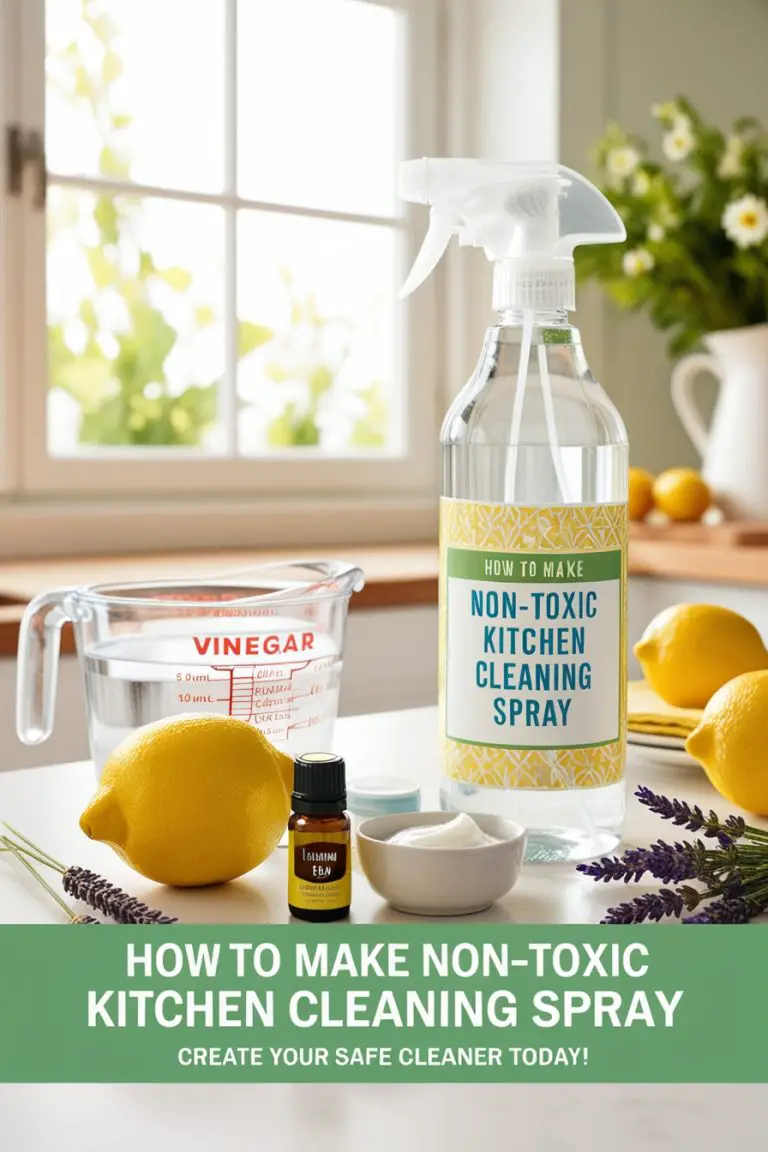
My Go-To DIY Hardwood Floor Cleaner Recipe
After experimenting with different combinations, I finally settled on a recipe that works perfectly for my hardwood floors. It’s simple, natural, and inexpensive—but most importantly, it actually cleans, shines, and protects the wood.
Ingredients & Why They Work
Here’s what I use for one batch:
- ½ cup white vinegar
Vinegar is a natural disinfectant and cleaner. It cuts through dirt, grime, and sticky residue left behind by daily life. Some people worry vinegar might damage wood, but when properly diluted in warm water, it’s safe for most finished hardwood floors. The key is never to oversaturate the wood, which I’ll cover in the mopping section.
- 1 tablespoon olive oil
Olive oil isn’t just for cooking! It adds a gentle conditioning effect that keeps hardwood looking glossy and prevents it from drying out. I sometimes swap it with almond or jojoba oil for a slightly different finish, but olive oil is my personal favorite.
- 5–10 drops of essential oil (optional)
This is purely for scent. Lemon, lavender, or orange are my top choices because they leave a fresh, clean smell without the overpowering chemical fragrance of store-bought cleaners. Plus, some essential oils have mild antibacterial properties.
- 1 gallon warm water
Warm water helps dissolve grime more effectively than cold water. It also keeps the vinegar and oil mixture evenly combined, making mopping easier.
How I Mix It
- I start with a clean, large bucket.
- Pour in 1 gallon of warm water.
- Add the vinegar, olive oil, and essential oil drops.
- Stir gently. I avoid vigorous shaking because I don’t want the oil and water to separate into large droplets. A gentle swirl is enough to combine them.
Variations I’ve Tried
Over the months, I’ve tested a few tweaks to the recipe:
- Streak-Free Shine: Swapping half the vinegar for rubbing alcohol gives a slightly faster drying solution and leaves zero streaks. Perfect for sunny rooms where streaks are obvious.
- Extra Conditioning: A few extra drops of olive or almond oil on particularly dry floors makes them gleam. I reserve this for my living room and hallways, which see heavy traffic.
- Kid & Pet-Friendly Version: Skipping the essential oils entirely keeps the solution completely scent-free and safe for crawling babies or curious pets.
This recipe is flexible, forgiving, and customizable. Over time, I’ve found that adjusting the oil and essential oils slightly depending on the season or my cleaning needs gives the best results.
Why I Love This Recipe
What I love most is the balance between cleaning power and gentleness. My floors are spotless, shiny, and healthy-looking, without any of the chemical residue I used to worry about.
Plus, making it is quick—just five minutes from start to finish. I can whip up a batch before tackling the kitchen or living room and know I’m doing something safe and effective for my home.
What You’ll Need + Step-by-Step Instructions for Cleaning Hardwood Floors
Cleaning hardwood floors doesn’t have to be complicated, but using the right tools makes a huge difference. Over the years, I’ve learned that a few simple items can make the process faster, safer, and more effective.
What You’ll Need
Here’s my go-to toolkit for hardwood floor cleaning:
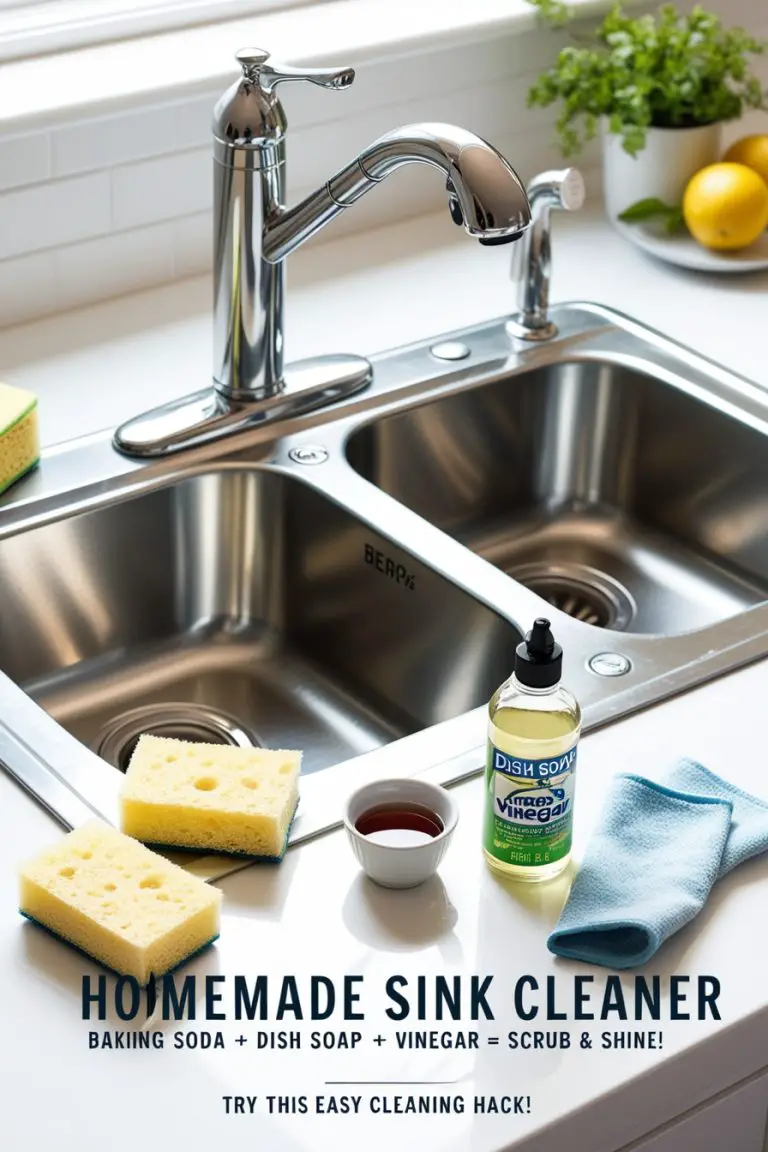
- Microfiber Mop – I swear by microfiber. It picks up dust and dirt without scratching the floor, unlike traditional string mops. Plus, it distributes the DIY cleaner evenly.
- Bucket – A large bucket for mixing your solution. I prefer one with a spout so I can pour small amounts into a spray bottle if needed.
- Measuring Cup & Spoon – Accuracy matters, especially for vinegar and olive oil. Too much vinegar can be harsh, and too much oil can leave greasy residue.
- Soft Cloth or Towel – For spot drying or buffing the floor after mopping. A microfiber cloth works best.
- Optional Spray Bottle – Great for targeted cleaning on sticky spots or high-traffic areas.
Step-by-Step Instructions
Now that your tools and solution are ready, here’s how I clean my floors. I follow these steps to avoid streaks, water damage, and other common pitfalls:
- Start with a Clean Slate
I always sweep or vacuum the floor first. Dust, crumbs, and pet hair can turn into mud if mopped over with liquid. Taking five minutes to remove debris makes a huge difference in results.
- Prepare Your Mop
Dip your microfiber mop into the DIY solution and wring it out well. The goal is a damp mop, not a soaking mop. Too much water can seep into the wood and cause warping over time.
- Mop in Sections
I work in small sections, moving along the grain of the wood. This helps lift dirt without pushing it around. For high-traffic areas like the kitchen or hallway, I give an extra pass, but lightly.
- Spot Cleaning
For stubborn spills or sticky patches, I spray a small amount of the cleaner directly onto the spot and let it sit for 30–60 seconds. Then I gently wipe with a microfiber cloth. Avoid scrubbing hard, as this can damage the finish.
- Buff the Floor
After mopping, I take a dry microfiber cloth or a dry mop to buff any areas that look slightly dull or wet. This not only prevents streaks but also enhances the natural shine of the wood.
- Check for Residue
Sometimes olive oil can leave a slight residue if too much is used. I quickly go over these spots with a clean, dry cloth to remove it. Over time, you’ll get a feel for the perfect oil-to-water ratio for your floors.
My Personal Tips
- Frequency Matters: I mop high-traffic areas once a week and less-used rooms every two weeks.
- Temperature Tip: I use warm, not hot, water. Hot water can damage the finish over time.
- Storage Tip: I usually make enough solutions for one cleaning session. If you store leftover cleaner, keep it in a glass jar for up to one week and shake gently before use.
Pro Tips for the Best Results
- Always Sweep or Vacuum First
Before any mopping, I remove dust, dirt, and pet hair. This prevents scratches and ensures the cleaning solution isn’t just spreading debris around. I especially focus on corners, under furniture, and along baseboards.
- Wrangle the Water
The biggest mistake people make is using too much water. Hardwood doesn’t like standing water—it can warp, stain, or weaken the finish. I always wring my mop until it’s damp, not dripping. A microfiber mop makes this easy because it holds just the right amount of liquid.
- Follow the Grain
Mopping with the grain of the wood, rather than against it, lifts dirt more effectively and reduces the risk of streaks. This little detail makes a noticeable difference in shine and overall finish.
- Spot Buffing
After mopping, I always go over high-traffic areas with a dry cloth or dry mop. It removes any lingering moisture, oil residue, or streaks, leaving floors smooth and polished.
- Frequency Matters
I mop high-traffic areas, like the kitchen and hallway, once a week. Bedrooms and less-used rooms can wait for two weeks. Over-cleaning with liquid can actually be harmful, so moderation is key.
Safety Notes: When Not to Use Vinegar
While vinegar is safe for most finished hardwood floors, there are exceptions:
- Waxed Floors: Vinegar can strip wax, leaving floors dull.
- Unfinished Wood: It can penetrate and damage the surface.
- Engineered Wood: Check the manufacturer’s guidelines—some finishes are sensitive to acidic cleaners.
Quick Test: Apply a few drops of your cleaner on an inconspicuous spot. Wait 10–15 minutes and check for any discoloration or damage before full application.
Optional Variations I Love
Over the years, I’ve experimented with my base recipe to adapt to different situations:
- Streak-Free Shine
I sometimes replace half the vinegar with rubbing alcohol. Alcohol evaporates quickly, leaving a crystal-clear, streak-free finish. Perfect for sunny rooms or gloss-finish floors. - Extra Conditioning
Adding a few extra drops of olive oil or almond oil to the solution enhances shine and nourishes dry floors. I use this occasionally on high-traffic areas like living rooms or hallways. - Fresh Scent
Essential oils like lemon, lavender, or orange make the home smell clean and inviting without overpowering fragrance chemicals. I even mix lemon and lavender for a fresh, relaxing aroma during spring cleaning. - Kid & Pet-Friendly Version
For households with crawling babies or curious pets, I skip essential oils entirely. The solution is completely safe, odor-free, and still cleans just as effectively.
Common Mistakes to Avoid
- Using Too Much Oil
It’s tempting to add extra olive or almond oil to make floors shinier, but too much can leave a greasy residue. Stick to the recommended 1 tablespoon per gallon of water, or buff with a dry cloth if needed. - Over-Saturating the Floor
Hardwood doesn’t like water sitting on it. Always wring out your mop so it’s damp, not dripping. Over-saturation can warp or stain your floors, especially near baseboards or furniture legs. - Skipping Pre-Cleaning
Mopping over dirt, dust, or crumbs spreads debris around and can create scratches. Sweep or vacuum thoroughly before using your DIY solution. - Scrubbing Too Hard
For tough stains, a gentle wipe with a microfiber cloth works better than aggressive scrubbing. Harsh scrubbing can damage the wood finish and leave scratches. - Spraying Directly on Floors
While convenient, spraying can lead to uneven wet spots. I prefer dipping a mop or cloth into the cleaner, then applying it evenly.
Extra Floor Care Tips
- Vacuum or Sweep Daily
Especially in high-traffic areas or homes with pets, daily dust removal prevents dirt from grinding into the wood. - Use Furniture Pads
Protect floors from scratches by placing felt pads under chairs, tables, and sofas. I even rotate rugs occasionally to prevent uneven wear. - Buff for Shine
After mopping, buff high-traffic areas with a dry microfiber cloth. It removes excess moisture and oil while enhancing the natural luster. - Seasonal Adjustments
- Winter: Wood can dry out; I use a slightly higher conditioning oil ratio to prevent cracks.
- Summer: Dust and grit are more common; I focus on light, frequent cleaning rather than heavy oil applications.
- Avoid Steam Mops
Though convenient, steam can warp or strip hardwood finishes. Stick to damp microfiber mops for safe cleaning.
FAQs About DIY Hardwood Floor Cleaning
Q: Can vinegar damage hardwood?
A: Vinegar is safe when diluted properly. Never oversaturate your floors, and avoid using it on waxed or unfinished wood.
Q: How often should I clean my floors with this solution?
A: High-traffic areas once a week, bedrooms or less-used rooms every two weeks. Spot-clean as needed.
Q: Can I store leftover cleaner?
A: Yes, in a glass jar for up to one week. Shake gently before use.
Q: Will this work on laminate or vinyl?
A: Yes, but avoid vinegar on laminate with a wax finish. Test first in a small area.
Q: How do I remove tough stains?
A: Use a damp microfiber cloth with a little more vinegar, let it sit briefly, then gently wipe. Avoid scrubbing hard.
Q: Is it safe for pets and children?
A: Absolutely, especially if you skip essential oils. My kids and dog roam freely right after I clean, and I never worry about chemical exposure.
A Small Challenge for You
If you’ve been hesitating to switch to DIY cleaners, I challenge you to try this recipe this week. Clean one room, notice how it smells, looks, and feels under your feet.
Compare it to your old store-bought routine. I promise, once you see the shine, the ease, and the natural freshness, you might never go back.
And the best part? Once you master this basic recipe, you can experiment with variations, scents, and techniques to make it your own. Your hardwood floors will thank you, your family will breathe easier, and you’ll feel that satisfying sense of accomplishment that comes from doing it yourself.

Emma Vanderlyn is a home enthusiast with a passion for all things natural and eco-friendly. With years of experience experimenting with DIY solutions, she’s dedicated to creating safe, effective, and budget-friendly cleaning recipes that are kind to both your home and the planet. Emma believes that a clean home shouldn’t come at the cost of harsh chemicals, and her easy-to-follow guides make natural cleaning accessible to everyone.
When she’s not whipping up a new cleaner in her kitchen, Emma can be found researching the latest in green living or transforming her space with mindful, stylish decor ideas. She’s here to share her love of natural living and help you create a home that shines—naturally.