Keeping vinyl floors clean can feel like a constant battle. Dirt, spills, and scuff marks can quickly dull their shine, and commercial cleaners often come with harsh chemicals that are tough on your wallet and even tougher on your health.
That’s where a DIY vinyl floor cleaner comes in. With just a few simple ingredients you probably already have at home, you can create a solution that is safe, effective, and gentle on your floors. Not only will this cleaner leave your vinyl sparkling, but it’s also eco-friendly and cost-effective.
By the end of this guide, you’ll know exactly how to make your own cleaner, tackle stubborn stains, and maintain your floors so they stay beautiful for years—without any harsh chemicals or expensive products.
Ready to make your vinyl floors shine naturally? Let’s dive in.
Table of Contents
- Why Choose a DIY Vinyl Floor Cleaner?
- Things to Know About Cleaning Vinyl Floors
- Ingredients You’ll Need for DIY Vinyl Floor Cleaner
- Step-by-Step DIY Vinyl Floor Cleaner Recipe
- How to Clean Vinyl Floors Effectively
- Handling Tough Stains on Vinyl
- Maintenance Tips for Long-Lasting Vinyl Floors
- Frequently Asked Questions
- Conclusion
Why Choose a DIY Vinyl Floor Cleaner?
There’s a reason DIY cleaners have become a household favorite—especially for vinyl floors. Here’s why making your own cleaner is often better than relying on store-bought products:
Health & Safety Benefits
Many commercial cleaners contain harsh chemicals that can irritate your skin, eyes, or respiratory system. A DIY cleaner uses natural, non-toxic ingredients that are safe for your family and pets.
Cost-Effective Solution
Instead of spending money on pricey branded cleaners, you can make a batch of DIY vinyl floor cleaner for just a few dollars. A little goes a long way, meaning more cleaning for less money.
Environmentally Friendly
Fewer chemicals mean less pollution in your drains and reduced plastic waste from disposable bottles. It’s a small change that can make a big difference for the environment.
Gentle on Vinyl Floors
Vinyl is durable, but it’s sensitive to strong chemicals or abrasive scrubbing. A homemade cleaner protects the finish, prevents discoloration, and avoids streaking while still being effective against dirt and grime.
Customizable Scents and Boosters
With a DIY cleaner, you can add essential oils for a pleasant fragrance or baking soda for extra stain-fighting power—something you rarely get with commercial options.
Things to Know About Cleaning Vinyl Floors
Before you dive into mixing your DIY cleaner, it’s important to understand a few key tips that will keep your vinyl floors looking flawless and prevent accidental damage.
1. Avoid Harsh Chemicals
Vinyl floors can be sensitive to ammonia, bleach, or abrasive scrubbing powders. These can cause discoloration, dullness, or even cracks over time. Stick to gentle, natural cleaning agents for long-lasting results.
2. Cleaning Frequency Matters
To maintain that fresh, polished look, sweep or vacuum your vinyl floors at least 2–3 times a week. For mopping, once a week or as needed for spills is usually sufficient. Over-cleaning with water or harsh chemicals can damage the floor’s protective layer.
3. Choose the Right Tools
- Mops: Microfiber mops are gentle yet effective at picking up dirt. Avoid string mops that hold excess water.
- Cloths & Brushes: Soft microfiber cloths or sponges work best. Use soft-bristle brushes only for stubborn spots.
4. Common Mistakes to Avoid
- Soaking the floor: Too much water can seep into seams and cause warping.
- Leaving residue: Not rinsing properly can leave a sticky film.
- Overusing vinegar: High concentrations can dull vinyl over time, so moderation is key.
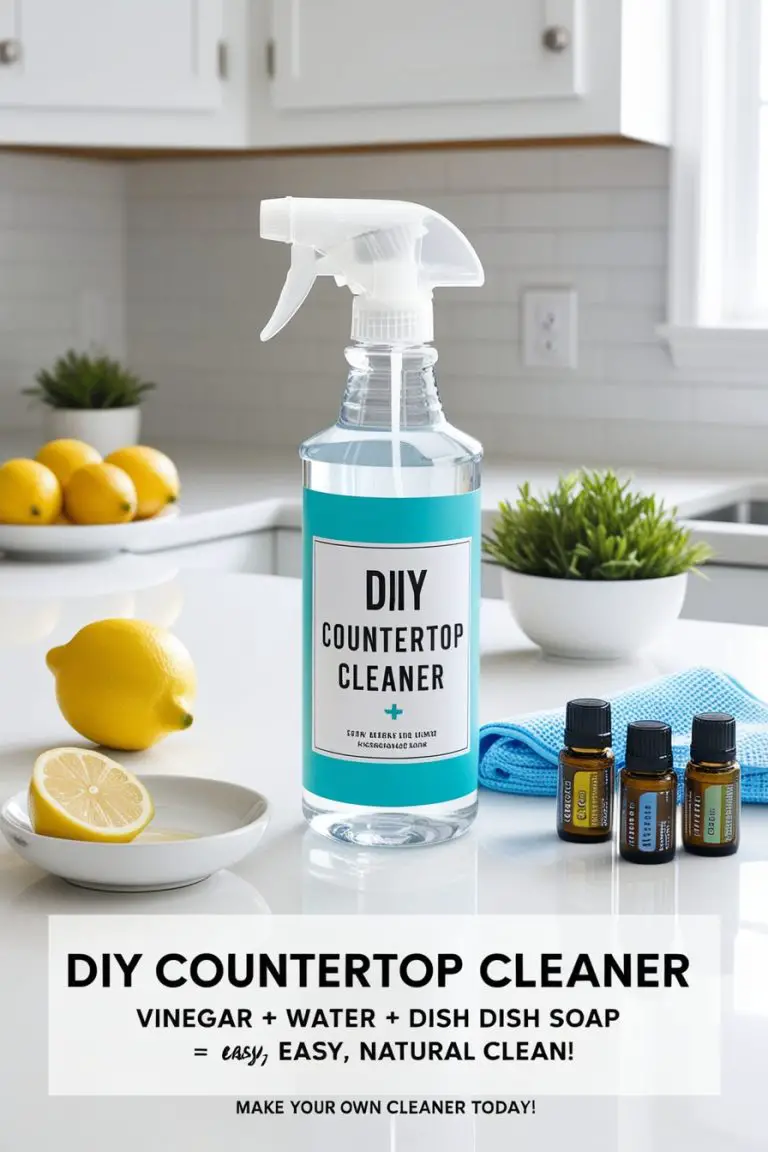
Ingredients You’ll Need for DIY Vinyl Floor Cleaner
One of the best things about making your own vinyl floor cleaner is that the ingredients are simple, affordable, and likely already in your kitchen or pantry. Here’s what you’ll need and why each ingredient matters:
Primary Ingredients
- Warm Water
- Acts as the base for your cleaner.
- Helps dissolve dirt and grime without damaging the vinyl.
- Acts as the base for your cleaner.
- Mild Dish Soap
- Examples: Dawn, Seventh Generation, or any gentle, non-abrasive soap.
- Cuts through grease and sticky residues effectively while being safe on vinyl.
- Examples: Dawn, Seventh Generation, or any gentle, non-abrasive soap.
- White Vinegar (Optional)
- Adds a natural disinfecting power.
- Helps remove light stains and dull spots.
- Note: Use sparingly—too much vinegar can affect the vinyl’s finish.
- Adds a natural disinfecting power.
Optional Boosters
- Baking Soda
- Great for scrubbing stubborn stains or scuff marks.
- Use only as a spot cleaner to avoid scratching the floor.
- Great for scrubbing stubborn stains or scuff marks.
- Essential Oils
- Adds a pleasant fragrance.
- Some oils, like tea tree or lavender, have mild antibacterial properties.
- A few drops are sufficient—too much can leave a residue.
- Adds a pleasant fragrance.
Tips for Selecting Ingredients
- Avoid harsh soaps or cleaners with bleach, ammonia, or abrasives.
- Stick to natural oils and mild detergents to protect your vinyl.
- Measure carefully to ensure the solution is strong enough to clean but gentle enough to protect the floor.
Step-by-Step DIY Vinyl Floor Cleaner Recipe
Now that you have your ingredients ready, it’s time to make your gentle yet effective vinyl floor cleaner. Follow these steps carefully to ensure the best results:
Ingredients You’ll Need:
- 1 gallon of warm water
- ½ cup mild dish soap
- ¼ cup white vinegar (optional)
- 5–10 drops of essential oil (optional, for fragrance)
Step 1: Prepare the Solution
- Pour 1 gallon of warm water into a large bucket.
- Add ½ cup of mild dish soap and stir gently to combine.
- If using, add ¼ cup white vinegar for extra cleaning power.
- Add essential oils if desired for a fresh scent.
Step 2: Mix Thoroughly
- Stir the mixture until all ingredients are fully blended.
- Avoid creating too many suds—they can leave streaks on vinyl floors.
Step 3: Pre-Clean Your Floor
- Sweep or vacuum your vinyl floors to remove loose dirt and debris.
- This ensures your cleaner works effectively without grinding dirt into the surface.
Step 4: Apply the Cleaner
- Dip a microfiber mop into the solution and wring out excess liquid.
- Mop your floors gently, moving in straight lines rather than circular motions to avoid streaks.
Step 5: Spot Clean Stubborn Areas
- For tough spots or stains, dip a soft cloth or sponge in the solution.
- Gently rub the area until the stain lifts.
- For very stubborn marks, sprinkle a tiny amount of baking soda on the spot first.
Step 6: Rinse (Optional but Recommended)
- If you notice any soap residue, mop the floor with plain warm water.
- This will prevent stickiness or streaking and keep your vinyl looking polished.
Step 7: Dry Your Floor
- Use a clean microfiber cloth or towel to dry the floor.
- Avoid letting water sit on the vinyl to prevent warping.
How to Clean Vinyl Floors Effectively
Making your DIY cleaner is only half the battle—using it correctly ensures your vinyl floors stay sparkling, streak-free, and damage-free. Here’s how to get the best results:
1. Pre-Cleaning is Key
- Sweep, dust, or vacuum your floors to remove loose dirt, dust, and debris.
- This prevents scratches and ensures your cleaner works on the actual grime rather than pushing dirt around.
2. Choosing the Right Mop Method
- Microfiber Mop: Best for everyday cleaning and streak-free results.
- Spray Method: For small areas, pour the cleaner into a spray bottle and lightly mist before mopping.
- Avoid String Mops: They can hold too much water, which may seep into vinyl seams.
3. Mopping Technique
- Dip your mop into the solution and wring out excess liquid—vinyl shouldn’t be soaked.
- Mop in straight lines instead of circular motions to reduce streaks.
- For larger areas, work in sections to ensure even coverage.
4. Rinsing Tips
- If you see any soap residue or film, rinse the mop in plain water and mop the floor again.
- Residue can make floors sticky and attract dirt faster.
5. Drying Properly
- Use a clean, dry microfiber cloth or towel to remove any excess water.
- Ensure the floor is completely dry to avoid warping or dull spots.
6. Quick Daily Touch-Ups
- For light dirt or spills, use a spray bottle of your DIY cleaner and a microfiber cloth.
- This keeps your floors looking polished without a full mop every day.
Handling Tough Stains on Vinyl
Even with regular cleaning, vinyl floors can get stubborn stains, scuff marks, or spills that require a little extra attention. Here’s how to tackle them safely without damaging your floors:
1. Common Stains on Vinyl
- Food spills (sauces, oils)
- Ink or marker stains
- Shoe scuff marks
- Pet accidents or muddy footprints
2. Spot Cleaning with DIY Cleaner
- Pour a small amount of your DIY vinyl floor cleaner directly onto a clean microfiber cloth or sponge.
- Gently rub the stained area in circular motions until the mark lifts.
- Wipe the area with a damp cloth to remove any residue.
3. Baking Soda for Extra Tough Stains
- For stubborn scuff marks or dried spills, sprinkle a tiny amount of baking soda on the spot.
- Dampen a cloth with your cleaner and gently rub the stain.
- Rinse thoroughly with warm water and dry the area.
4. Avoid Abrasives
- Never use steel wool, rough scrubbers, or harsh chemicals—they can scratch or discolor your vinyl.
- Stick to soft cloths, sponges, and gentle scrubbing methods.
5. Immediate Action Helps
- The sooner you address spills or stains, the easier they are to remove.
- Keep a small spray bottle of your DIY cleaner handy for quick spot cleaning.
Maintenance Tips for Long-Lasting Vinyl Floors
Keeping your vinyl floors looking their best isn’t just about cleaning—it’s about consistent care and smart habits. Here’s how to maintain that polished look for years:
1. Stick to a Regular Cleaning Schedule
- Sweep or vacuum 2–3 times per week to remove dust and debris.
- Mop with your DIY vinyl floor cleaner once a week or as needed for spills.
- Consistency prevents dirt from building up and reduces the need for heavy scrubbing.
2. Protect Floors from Furniture and Foot Traffic
- Use felt pads or protective mats under furniture legs to prevent scratches.
- Encourage family members to remove shoes or use rugs in high-traffic areas.
- Avoid dragging heavy furniture across the floor.
3. Quick Cleanup of Spills
- Address spills immediately using your DIY cleaner and a microfiber cloth.
- Prevents stains from setting and keeps floors hygienic.
4. Avoid Harsh Products
- Steer clear of ammonia, bleach, abrasive powders, and high-pH cleaners.
- These can dull, discolor, or damage your vinyl floors over time.
5. Occasional Deep Cleaning
- For a deeper clean, use your DIY solution with a soft mop and slightly more elbow grease.
- Rinse thoroughly afterward to prevent soap residue.
6. Keep Floors Dry
- Excess water can seep into seams and cause warping.
- Always dry the floor with a microfiber cloth or towel after mopping.
Frequently Asked Questions
Even the best DIY cleaner can raise questions, so here are answers to the most common concerns about cleaning vinyl floors:
Q1: Can vinegar damage vinyl floors?
- Vinegar is safe in small amounts, but using too much or undiluted vinegar can dull or discolor the finish over time.
- Stick to the recommended ¼ cup per gallon of water in your DIY solution.
Q2: Can I store the DIY cleaner long-term?
- Yes! Store your solution in a sealed spray bottle or container for up to 2–3 weeks.
- Shake gently before each use, and discard if it smells off or changes color.
Q3: Can I use this cleaner on other surfaces?
- It works on laminate, linoleum, and sealed tile, but avoid using it on natural stone, unsealed wood, or delicate surfaces, as vinegar or soap may damage them.
Q4: How often should I mop my vinyl floors?
- Sweep or vacuum 2–3 times per week.
- Mop with the DIY cleaner once a week or as needed for spills and sticky spots.
Q5: Can I add more essential oils?
- A few drops are enough. Too much oil can leave a slippery residue or attract dust.
Conclusion
Keeping vinyl floors clean doesn’t have to involve harsh chemicals, expensive products, or endless scrubbing. With this DIY vinyl floor cleaner, you get a solution that is safe, affordable, effective, and eco-friendly.
Not only does it remove dirt, grease, and spills, but it also protects your floors from streaks, scratches, and discoloration. Plus, with optional essential oils or baking soda, you can customize it to tackle tough stains and leave your home smelling fresh.
By following this guide, you now have everything you need to:
- Make your own gentle vinyl floor cleaner
- Clean effectively without damaging your floors
- Maintain a sparkling, streak-free finish over time
- Handle tough stains and high-traffic areas with confidence
Take control of your floor cleaning routine today—ditch harsh chemicals, save money, and enjoy the satisfaction of naturally beautiful vinyl floors.

Emma Vanderlyn is a home enthusiast with a passion for all things natural and eco-friendly. With years of experience experimenting with DIY solutions, she’s dedicated to creating safe, effective, and budget-friendly cleaning recipes that are kind to both your home and the planet. Emma believes that a clean home shouldn’t come at the cost of harsh chemicals, and her easy-to-follow guides make natural cleaning accessible to everyone.
When she’s not whipping up a new cleaner in her kitchen, Emma can be found researching the latest in green living or transforming her space with mindful, stylish decor ideas. She’s here to share her love of natural living and help you create a home that shines—naturally.