Laminate floors are everywhere for a reason—they’re affordable, durable, and look great in any room. But cleaning them?
That’s a whole different story. Too much water can warp them, harsh chemicals leave streaks, and store-bought cleaners often promise sparkle but deliver sticky residue instead.
That’s where a DIY solution comes in. With a few simple ingredients from your kitchen, you can make a cleaner that’s safe, effective, and budget-friendly. No streaks. No fumes. No stress.
In this guide, I’ll show you a foolproof laminate floor cleaner recipe, alternative versions for different needs, and expert tips to keep your floors looking flawless.
Stick around—you’ll discover mistakes most people make, easy hacks to avoid them, and why your laminate can finally shine like new without ever touching a commercial bottle.
Table of Contents
- Why Clean Laminate Floors the Right Way?
- What You’ll Need: Ingredients & Supplies
- DIY Laminate Floor Cleaner Recipe
- How to Clean Laminate Floors with the DIY Cleaner
- Alternative DIY Laminate Cleaner Recipes
- Pro Tips for Maintaining Laminate Floors
- Common Mistakes to Avoid
- FAQs About DIY Laminate Floor Cleaners
- Conclusion
Why Clean Laminate Floors the Right Way?
Laminate flooring is built to be durable, but it’s not indestructible. The surface is made of multiple layers, including a photographic layer that mimics wood or stone and a protective coating on top. That top layer is what gives laminate its beautiful finish—and also what needs the most gentle care.
If you use the wrong products or cleaning techniques, you can quickly run into problems like:
- Swelling and warping – Too much water can seep into the seams, causing the boards to bubble or lift.
- Dullness and streaking – Harsh cleaners often leave behind residue that makes laminate look cloudy instead of shiny.
- Scratches – Abrasive pads or strong chemicals can wear down the protective coating.
- Sticky residue – Using the wrong type of soap or too much product can leave your floor tacky, attracting more dirt instead of cleaning it.
Benefits of DIY Cleaners for Laminate Floors
- Safe for your floors: Gentle, non-abrasive ingredients protect the laminate coating.
- Budget-friendly: Most recipes cost pennies per batch compared to $10+ commercial bottles.
- Eco-conscious: Fewer chemicals going down the drain means a greener home.
- Customizable: Want a fresh lemon scent or lavender calmness? A few drops of essential oil make it yours.
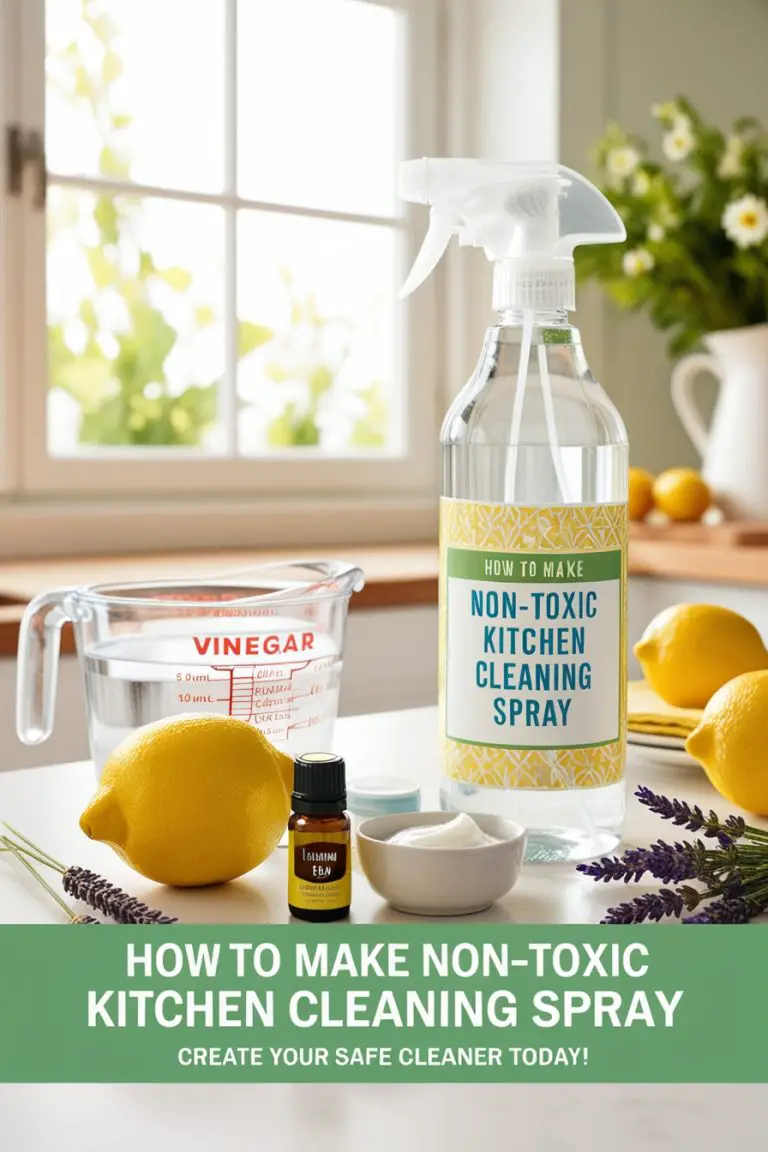
What You’ll Need: Ingredients & Supplies
Before we dive into the recipe, let’s gather the essentials. The beauty of this DIY laminate floor cleaner is that it uses everyday household items—no need to buy anything fancy. Each ingredient serves a purpose, and together, they create a solution that’s tough on dirt but gentle on your floors.
Core Ingredients
- Distilled Water
- Why: Prevents mineral buildup and streaks (especially if you have hard tap water). Keeps the solution pure and residue-free.
- Why: Prevents mineral buildup and streaks (especially if you have hard tap water). Keeps the solution pure and residue-free.
- Rubbing Alcohol (Isopropyl Alcohol)
- Why: Helps floors dry quickly, which is crucial for laminate. It also disinfects lightly, cutting through grime without leaving streaks.
- Why: Helps floors dry quickly, which is crucial for laminate. It also disinfects lightly, cutting through grime without leaving streaks.
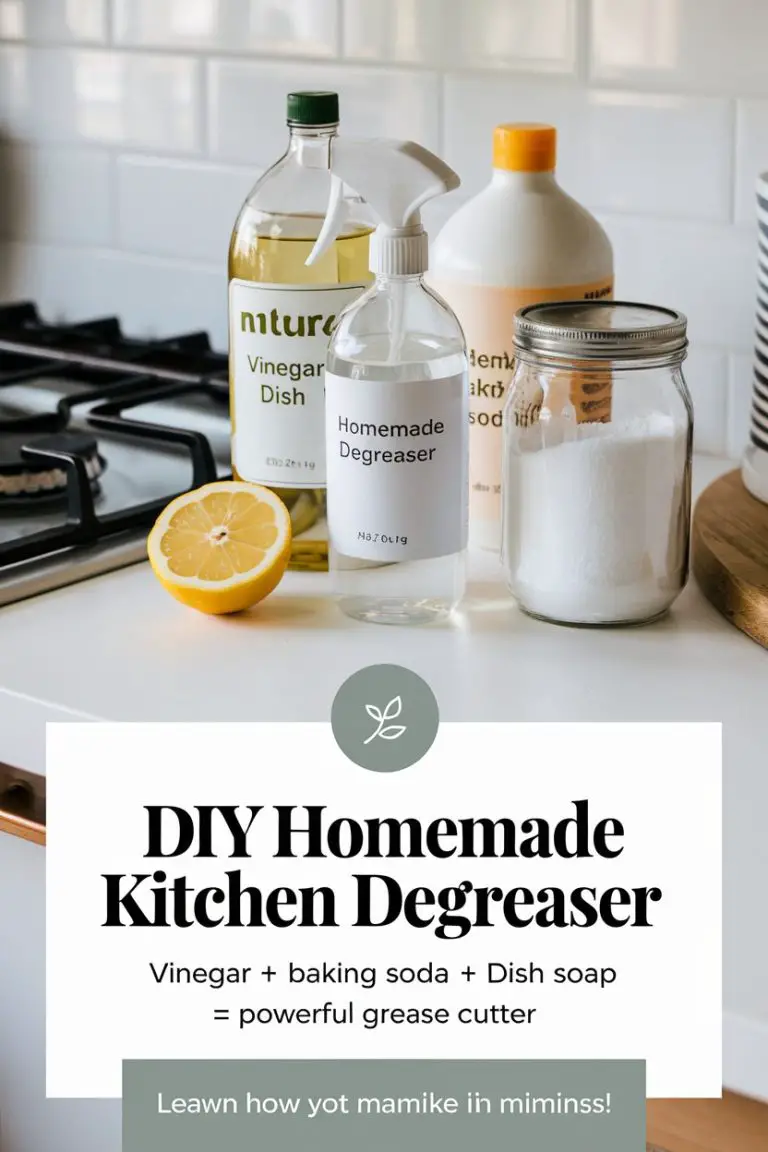
- White Vinegar
- Why: Naturally cuts through grease, lifts dirt, and deodorizes. It’s a powerhouse cleaner—but when diluted properly, it’s safe for laminate.
- Why: Naturally cuts through grease, lifts dirt, and deodorizes. It’s a powerhouse cleaner—but when diluted properly, it’s safe for laminate.
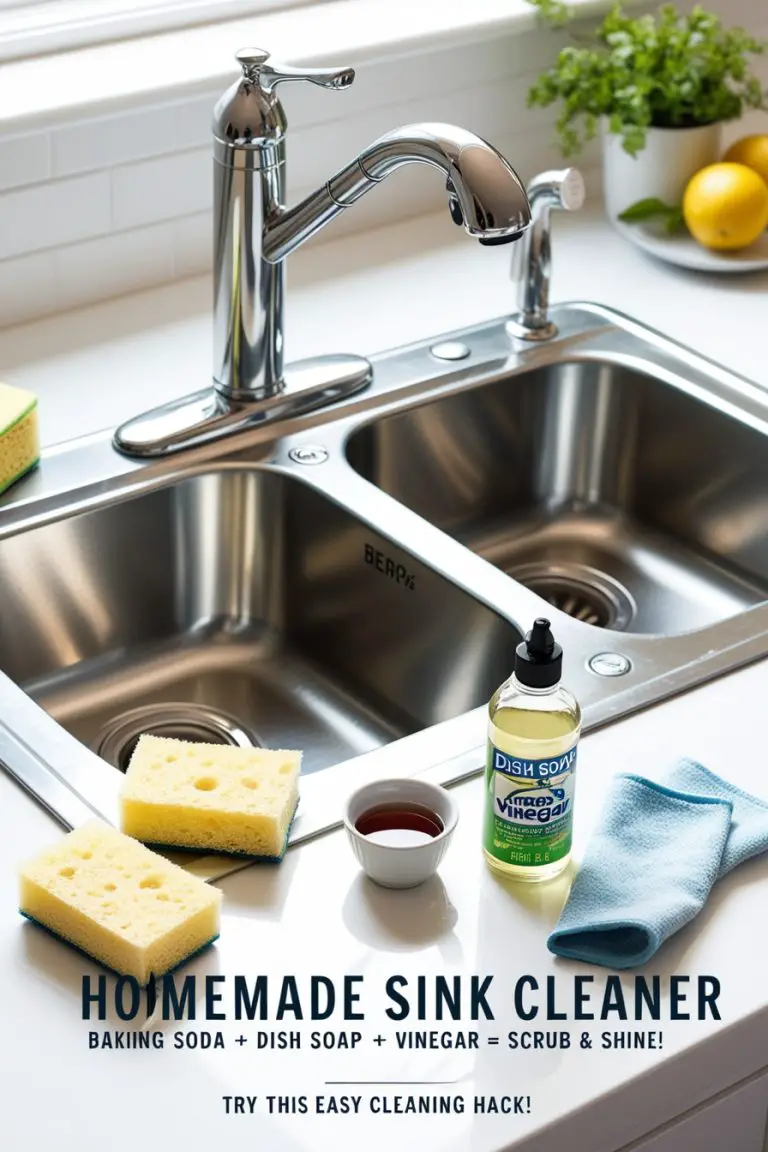
- Mild Dish Soap (optional)
- Why: A drop or two is all you need to break down sticky messes or oily footprints. Just don’t overdo it, or you’ll end up with streaks.
- Why: A drop or two is all you need to break down sticky messes or oily footprints. Just don’t overdo it, or you’ll end up with streaks.
- Essential Oils (optional)
- Why: Not necessary for cleaning power, but a few drops of lemon, lavender, or eucalyptus can make your home smell amazing.
- Why: Not necessary for cleaning power, but a few drops of lemon, lavender, or eucalyptus can make your home smell amazing.
Supplies
- Spray Bottle – For easy application. A fine mist prevents over-wetting the floors.
- Microfiber Mop or Cloth – Gentle, absorbent, and perfect for streak-free cleaning. Avoid string mops that hold too much water.
- Measuring Cups/Spoons – To get the right balance of ingredients.
💡 Pro Tip: If you don’t have distilled water on hand, you can boil tap water, let it cool, and use that instead—it’s a good DIY substitute.
Now that you know what each ingredient does and why it matters, we’re ready to mix everything into the perfect streak-free solution.
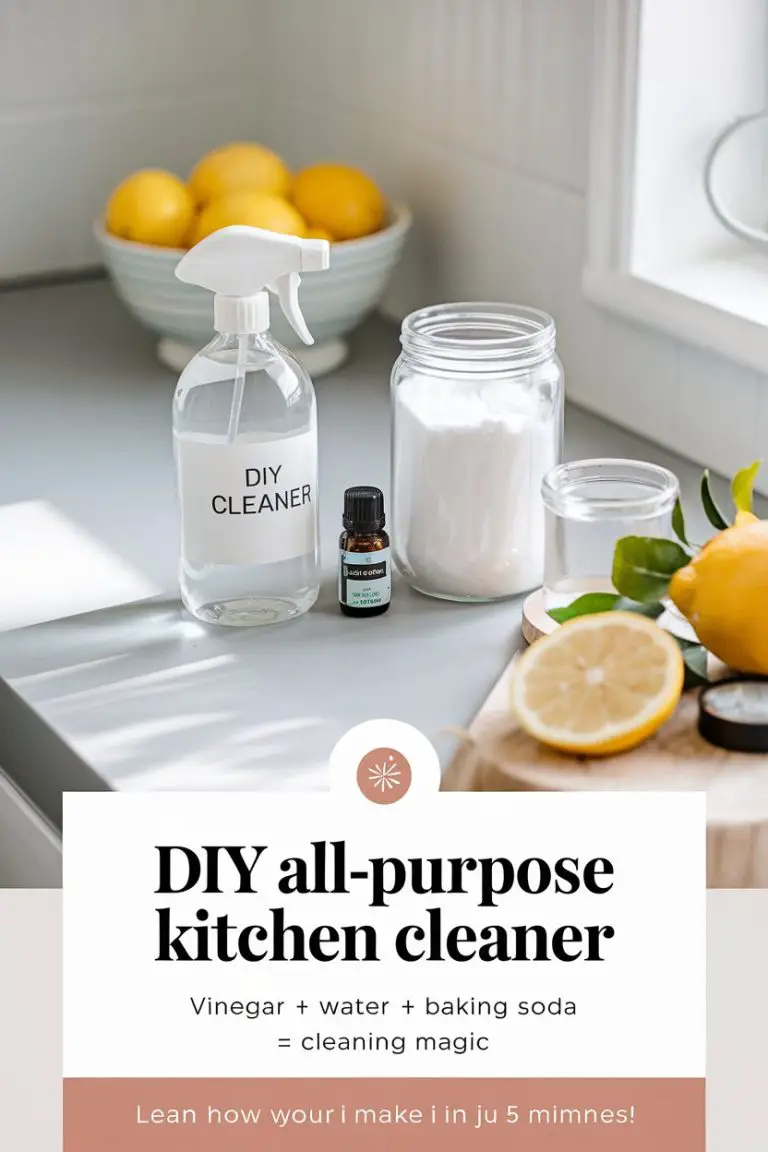
DIY Laminate Floor Cleaner Recipe
After testing different combinations, this is the recipe I swear by. It’s streak-free, fast-drying, and leaves your floors looking shiny without that dreaded cloudy film.
Base Recipe (Streak-Free Everyday Cleaner)
Ingredients:
- 2 cups distilled water
- 1 cup rubbing alcohol (70% is ideal)
- 1 cup white vinegar
- 2–3 drops of mild dish soap (optional, for extra cleaning power)
- 5–10 drops of essential oil (optional, for scent—lemon and lavender are my favorites)
Instructions:
- Grab a clean spray bottle (16–20 oz works perfectly).
- Pour in the distilled water first, then add the rubbing alcohol and vinegar.
- If using, add just a drop or two of dish soap. Less is more—you don’t want suds.
- Add your chosen essential oil drops for a fresh fragrance.
- Screw on the spray top and shake gently to combine.
That’s it—you’ve got a homemade cleaner ready to go!
💡 Pro Tip: Always label your spray bottle so you know what’s inside, especially if you keep multiple DIY cleaners around the house.
This mix is strong enough to tackle daily dirt and grime but gentle enough for regular use. It’s also quick-drying, which is exactly what laminate needs.
How to Clean Laminate Floors with the DIY Cleaner
Having the right cleaner is only half the battle—using it correctly is what keeps your laminate looking brand-new. Here’s my simple step-by-step routine:
Step 1: Sweep or Vacuum First
- Always remove dust, crumbs, and pet hair before applying liquid.
- Use a soft-bristle broom or a vacuum designed for hard floors (no beater bar, which can scratch).
Step 2: Lightly Mist the Floor
- Spray a fine mist of your DIY laminate cleaner directly onto the floor or onto a microfiber mop pad.
- Less is more here—never soak laminate with liquid, as water can seep into seams and cause swelling.
Step 3: Mop Gently with Microfiber
- Glide a microfiber mop across the floor in back-and-forth motions.
- For tough spots (like sticky spills), spray a little extra cleaner and let it sit for 1–2 minutes before wiping.
Step 4: Let It Air-Dry
- Thanks to the rubbing alcohol, your floors will dry quickly.
- No rinsing is needed—the cleaner leaves no residue behind.
💡 Extra Shine Tip: After mopping, buff the floor with a dry microfiber cloth. It gives your laminate a polished, streak-free finish.
This method works great for everyday cleaning. For larger messes or high-traffic areas, you can repeat the process more often without worrying about damage.
Alternative DIY Laminate Cleaner Recipes
Sometimes one recipe isn’t enough. Depending on your floors, lifestyle, or preferences, you might want a slightly different mix. Here are a few tried-and-true alternatives:
1. Soap-Free Everyday Cleaner
Best for: People who want a zero-streak, ultra-simple formula.
Ingredients:
- 2 cups distilled water
- 1 cup rubbing alcohol
- 1 cup white vinegar
Why it works: With no soap, there’s zero chance of streaks or residue. It’s great for regular upkeep when floors aren’t heavily soiled.
2. Essential Oil Boosted Cleaner
Best for: Households that want cleaning + aromatherapy.
Ingredients:
- Base recipe (distilled water, alcohol, vinegar)
- 10–15 drops of essential oil (lemon, eucalyptus, or lavender are top choices)
Why it works: Adds a fresh scent and mild antibacterial benefits depending on the oils you use. Perfect if you want your home to smell clean and inviting after mopping.
3. Quick Spot-Cleaner Spray
Best for: Small spills, sticky spots, or pet messes.
Ingredients:
- 1 cup distilled water
- ½ cup rubbing alcohol
- ½ teaspoon mild dish soap
Why it works: The smaller batch is easy to keep in a small spray bottle for spot cleaning. It’s stronger on sticky spills thanks to a touch of soap but still safe for laminate.
💡 Pro Tip: Rotate between these recipes depending on your needs. For everyday use, stick with the base or soap-free version. Use the spot-cleaner only when necessary so you don’t overdo it with soap.
Pro Tips for Maintaining Laminate Floors
Cleaning is important, but how you maintain your laminate floors makes all the difference in how long they look shiny and new. Here are my top tips:
1. Clean High-Traffic Areas More Often
- Entryways, kitchens, and hallways need weekly cleaning.
- Bedrooms or less-used spaces can be cleaned every 2 weeks.
- Regular upkeep prevents dirt and grit from scratching the surface.
2. Use the Right Mop
- Always stick to a microfiber mop. It’s soft, absorbent, and leaves floors streak-free.
- Avoid sponge mops or string mops—they hold too much water and can cause warping.
3. Avoid Standing Water
- Laminate doesn’t like moisture. If you spill something, wipe it up immediately.
- Never soak the floor or leave wet towels/rugs sitting on it.
4. Protect with Rugs and Mats
- Place mats at entryways to catch dirt and moisture.
- Use area rugs in high-traffic zones to prevent wear.
- Add felt pads under furniture legs to stop scratches.
5. Buff for Extra Shine
- After mopping, run a dry microfiber cloth over the surface.
- This quick step gives laminate a polished, like-new finish.
6. Store Cleaner Safely
- DIY solutions last up to 1 month when made with distilled water and alcohol.
- Store at room temperature and shake gently before each use.
💡 Bonus Tip: If your laminate starts to look dull, skip adding more soap. Instead, clean with the soap-free recipe and buff—it’ll restore the shine naturally.
Common Mistakes to Avoid
Even with the best cleaner, laminate floors can lose their shine if you make these common mistakes. Keep these in mind to protect your investment:
1. Using Too Much Water
- The #1 mistake! Laminate is not waterproof, and excess water can seep into seams, causing swelling, bubbling, or warping.
- Always use a fine mist—never pour cleaner directly onto the floor.
2. Choosing Harsh Chemicals
- Bleach, ammonia, and strong alkaline cleaners can strip the protective coating.
- Stick with gentle DIY solutions or laminate-specific products.
3. Overusing Soap or Detergents
- More soap ≠ more clean. Instead, it leaves behind streaks and sticky residue.
- Only use a drop or two of dish soap when absolutely necessary.
4. Scrubbing with Abrasive Tools
- Steel wool, scrub pads, or stiff brushes can scratch the laminate surface.
- Always use microfiber mops or soft cloths.
5. Skipping Regular Cleaning
- Dust and grit act like sandpaper underfoot, dulling the surface over time.
- Even if your floors look “clean,” regular sweeping and light mopping are essential.
💡 Remember: Laminate floors are low-maintenance, but they’re not no-maintenance. Gentle, consistent care keeps them looking like new for years.
FAQs About DIY Laminate Floor Cleaners
1. Can vinegar damage laminate floors?
Not when used in the right proportion! Diluted with water (like in our recipe), vinegar is safe for laminate. Avoid using it full-strength, as the acidity can harm the protective layer.
2. Is rubbing alcohol safe on laminate?
Yes! It helps floors dry quickly and reduces streaks. Just make sure to dilute it with water and never soak the floor.
3. Can I use dish soap every time?
No—too much soap can leave residue and streaks. Use a drop or two only when dealing with greasy messes. For regular cleaning, stick to the soap-free or base recipe.
4. How often should I deep clean laminate floors?
Weekly or biweekly is ideal, depending on traffic. High-traffic areas like kitchens and hallways may need weekly cleaning, while less-used rooms can be cleaned every 2 weeks.
5. Will this DIY cleaner work on wood or vinyl floors?
It’s designed specifically for laminate. While it may be safe for vinyl, hardwood floors require special cleaners—too much water or vinegar can damage them. Always check your floor manufacturer’s recommendations.
6. Can I store the DIY cleaner?
Yes! Store it in a sealed spray bottle at room temperature. Shake gently before each use. It usually stays effective for up to 1 month.
Conclusion
Keeping laminate floors clean doesn’t have to be complicated—or expensive. With this DIY laminate floor cleaner recipe, you can enjoy streak-free, shiny floors without harsh chemicals, strong fumes, or costly store-bought solutions.
By following the steps in this guide—using the right ingredients, applying the solution properly, and maintaining your floors with care—you’ll protect your laminate investment and extend its life. The best part? You can customize the cleaner with essential oils for a fresh, inviting scent, and rotate between variations to tackle different cleaning needs.
So grab your spray bottle, microfiber mop, and a few simple ingredients, and give your floors the gentle, effective clean they deserve. Once you try it, I promise you’ll wonder why you ever bought commercial cleaners in the first place!

Emma Vanderlyn is a home enthusiast with a passion for all things natural and eco-friendly. With years of experience experimenting with DIY solutions, she’s dedicated to creating safe, effective, and budget-friendly cleaning recipes that are kind to both your home and the planet. Emma believes that a clean home shouldn’t come at the cost of harsh chemicals, and her easy-to-follow guides make natural cleaning accessible to everyone.
When she’s not whipping up a new cleaner in her kitchen, Emma can be found researching the latest in green living or transforming her space with mindful, stylish decor ideas. She’s here to share her love of natural living and help you create a home that shines—naturally.