Halloween is such a fun time to get creative with your home decor. One of my favorite ways to welcome the spooky season is with a Halloween wreath.
It’s the perfect touch for your front door, a wall, or even inside your home. A wreath sets the mood before anyone steps inside, and it’s an easy way to show your holiday spirit.
Whether you like creepy and gothic styles or prefer something cute and playful, Halloween wreaths offer endless possibilities.
The best part?
You can buy one or make your own to fit your unique style and budget. In this guide, I’m sharing 15 Halloween wreath ideas with detailed design descriptions and simple DIY instructions.
You’ll find everything you need to create eye-catching wreaths that make your space festive and fun.
Let’s dive in!
Table of Contents
- 15 Halloween Wreath Ideas
- 1. Classic Black & Orange Mesh Wreath
- 2. Gothic Raven Feather Wreath
- 3. Pumpkin & Gourd Harvest Wreath
- 4. Skull & Bone Creepy Wreath
- 5. Glitter & Glam Halloween Wreath
- 6. Pastel Pink Spooky Wreath
- 7. Witch Hat & Broomstick Wreath
- 8. Cobweb & Spider Wreath
- 9. LED Light-Up Halloween Wreath
- 10. Candy Corn Color Wreath
- 11. Haunted Mansion Vintage Wreath
- 12. Skeleton Hand Wreath
- 13. Monster Eye Wreath
- 14. Nature-Inspired Fall Foliage Wreath
- 15. Minimalist Black & White Wreath
- DIY vs. Store-Bought Halloween Wreaths
- Step-by-Step DIY Halloween Wreath Guide
- Safety & Maintenance Tips
- Conclusion
15 Halloween Wreath Ideas
Ready for some inspiration? Here are 15 Halloween wreath ideas to suit every taste. Each one brings something unique, so you’ll find something that feels just right for your home.
1. Classic Black & Orange Mesh Wreath
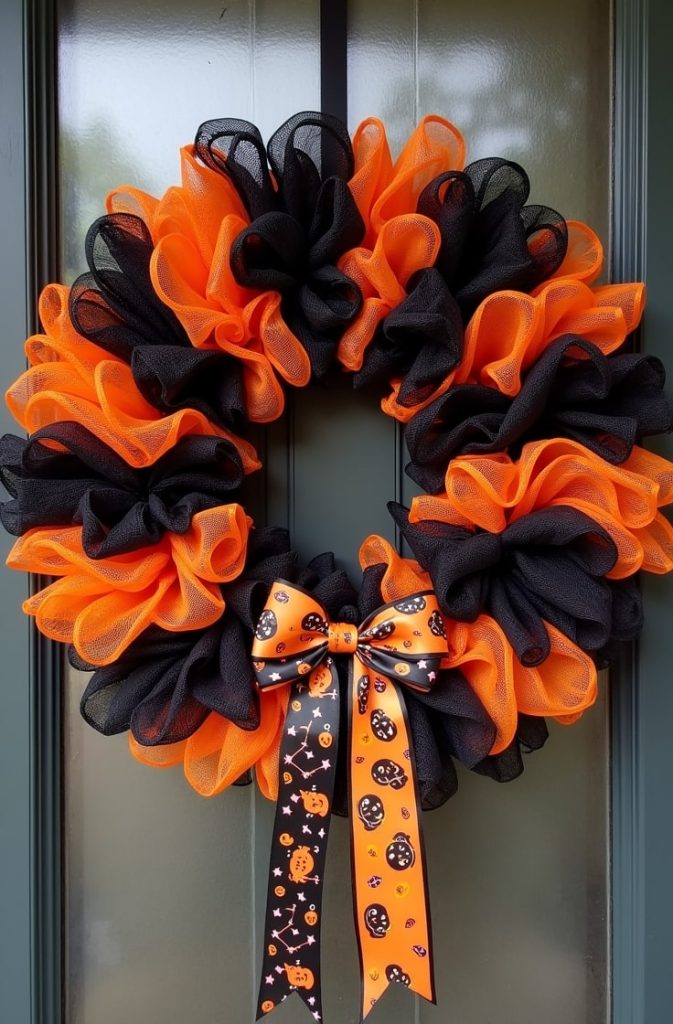
Nothing says Halloween like a bold black and orange mesh wreath. This classic is vibrant and versatile. You can find mesh ribbon at craft stores like Michaels or order it online from Amazon.
The fluffy texture adds volume, making your wreath pop. I love how it works both indoors and outdoors.
Hang it on your front door for instant curb appeal or above your fireplace for cozy vibes. It’s durable, affordable, and screams Halloween spirit.
Materials Needed:
- Black and orange deco mesh rolls
- Wire wreath frame
- Pipe cleaners or floral wire
- Halloween ribbon (optional)
DIY Steps:
- Attach pipe cleaners evenly around your wire wreath frame.
- Gather a section of orange mesh and secure it to the frame using pipe cleaners.
- Alternate with black mesh sections, securing each with pipe cleaners.
- Fluff the mesh to create a full, ruffled look.
- Add a decorative ribbon or bow if you want.
2. Gothic Raven Feather Wreath
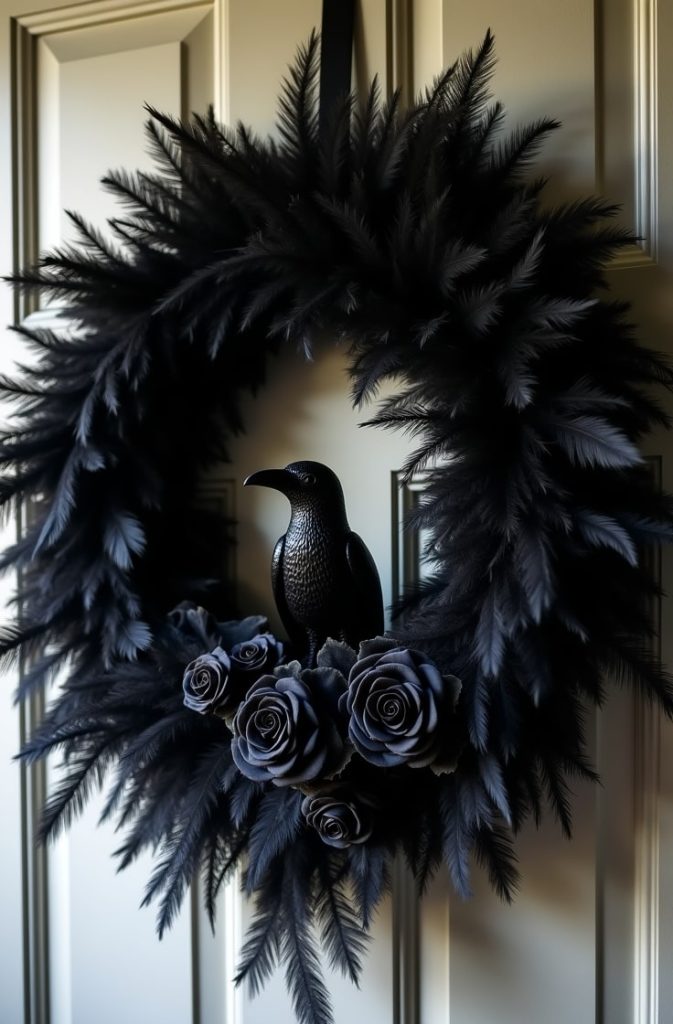
Want a wreath that feels like it stepped out of a Poe poem? Try a gothic raven feather wreath. Use faux black feathers, black roses, and a raven figurine for dark elegance.
I found gorgeous feathers and florals on Etsy, but Hobby Lobby has great options too. This wreath is perfect for a moody, sophisticated Halloween vibe.
Place it indoors for a dramatic entryway statement or outside if it’s sealed against the elements. It’s hauntingly beautiful!
Materials Needed:
- Black feather boa or faux feathers
- Black artificial roses
- Wire wreath base
- Hot glue gun
DIY Steps:
- Wrap the feather boa around the wreath base, securing with glue or wire.
- Glue black roses around the wreath in clusters or evenly spaced.
- Add any extra spooky touches, like small plastic spiders or a dark ribbon bow.
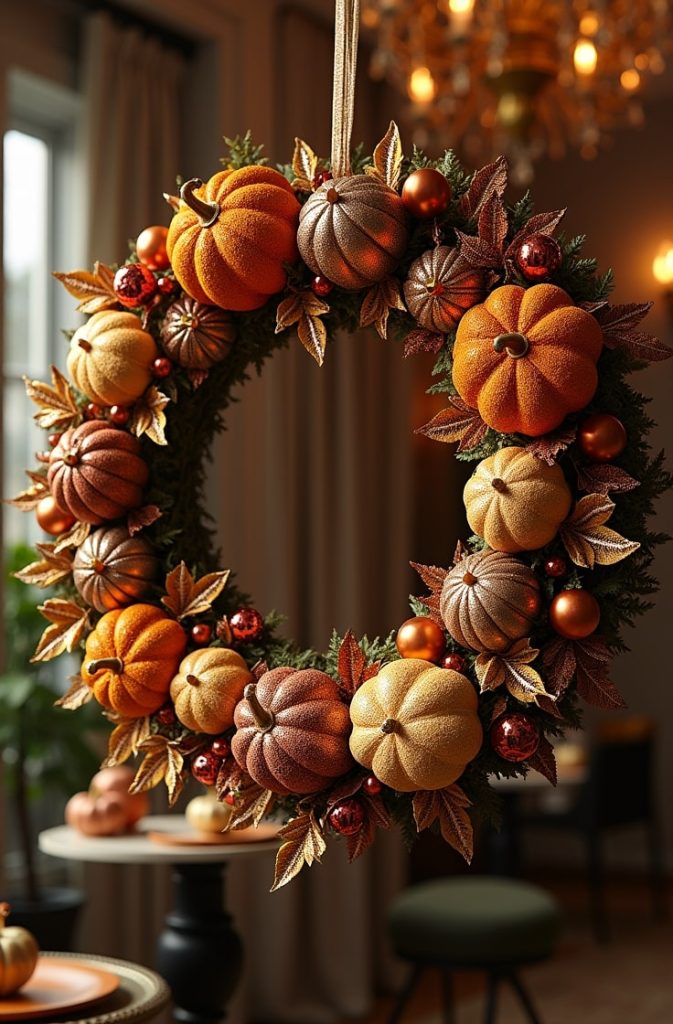
3. Pumpkin & Gourd Harvest Wreath
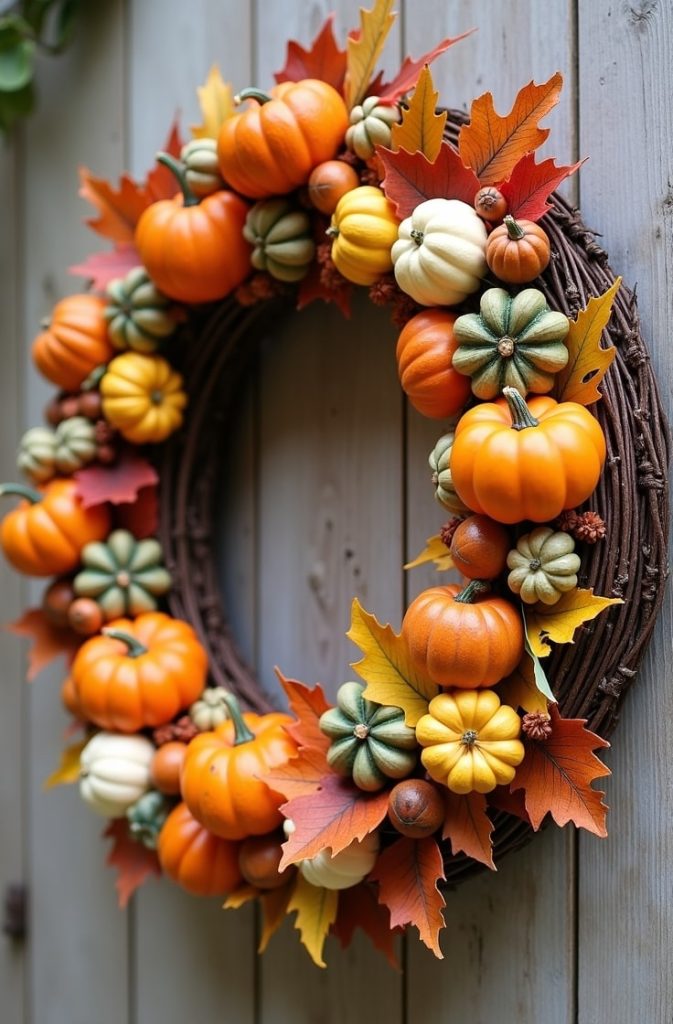
This wreath blends Halloween with cozy fall vibes. Mini pumpkins, gourds, and autumn leaves create a warm, seasonal look.
You can find faux pumpkins at Target or dollar stores, which keep costs low. I love how this wreath transitions from Halloween to Thanksgiving with ease.
It’s ideal for a rustic or farmhouse-style home. Hang it on your porch to welcome guests with harvest charm.
Materials Needed:
- Foam wreath base
- Mini faux pumpkins and gourds
- Artificial fall leaves
- Hot glue gun
DIY Steps:
- Glue artificial leaves around the foam wreath base to create a full background.
- Attach mini pumpkins and gourds on top of the leaves, spacing them evenly.
- Fill any gaps with extra leaves or small berries.
4. Skull & Bone Creepy Wreath
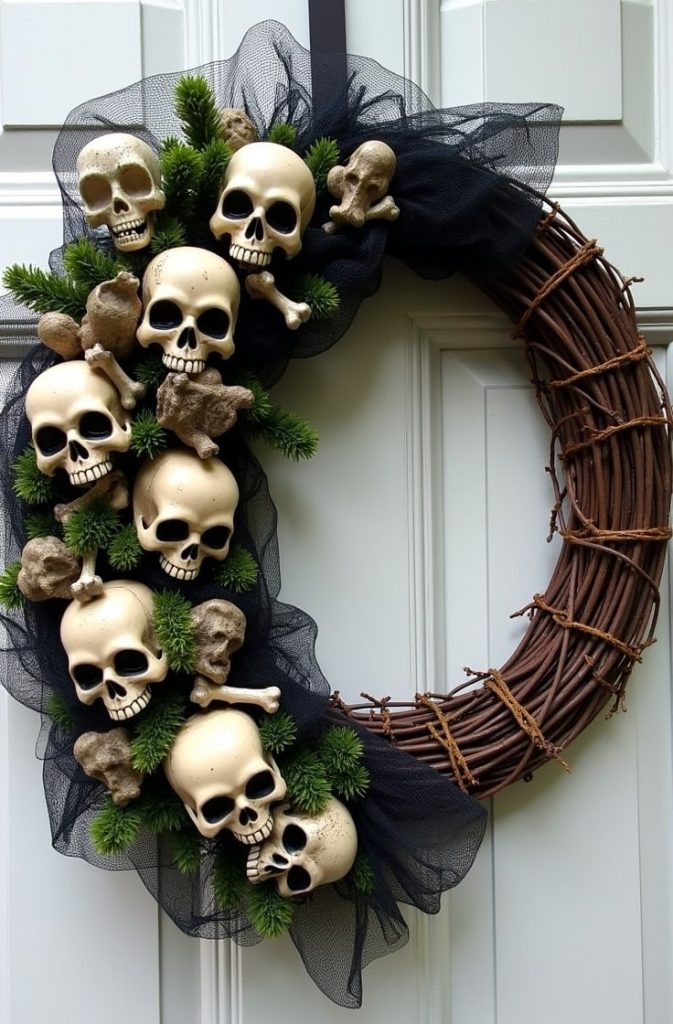
For a true haunted house feel, go for a skull and bone wreath. Plastic skulls and bones on a grapevine base create a spooky effect. Add eerie moss or cobwebs for extra creepiness.
Party City and craft stores stock these supplies. I made one last year, and it was a hit with trick-or-treaters! This wreath works best outdoors but can chill your indoor space too. It’s perfect for a bold, creepy statement.
Materials Needed:
- Wire wreath frame
- Plastic skulls and bones
- Black mesh or fabric
- Hot glue gun
DIY Steps:
- Wrap black mesh around the frame to cover it.
- Arrange plastic skulls and bones on the mesh, securing with glue.
- Optionally, add some fake cobwebs or small spiders.
5. Glitter & Glam Halloween Wreath
Love a little sparkle? A glitter and glam wreath is your pick. Use metallic spray paint, sequins, and glittery accents in gold, silver, or jewel tones. Joann or online retailers have plenty of sparkly décor.
This wreath feels chic and upscale, perfect for a Halloween party. I hung one above my dining table last year, and it stole the show. It’s best indoors to keep the glitter intact, but a sealed version could work outside.
Materials Needed:
- Foam wreath base
- Glitter pumpkins and ornaments
- Metallic ribbon
- Hot glue gun
DIY Steps:
- Attach glittery pumpkins and ornaments all over the wreath base.
- Add metallic ribbon in bows or curls around the wreath.
- Finish by adding glittery spray for extra shine.
6. Pastel Pink Spooky Wreath
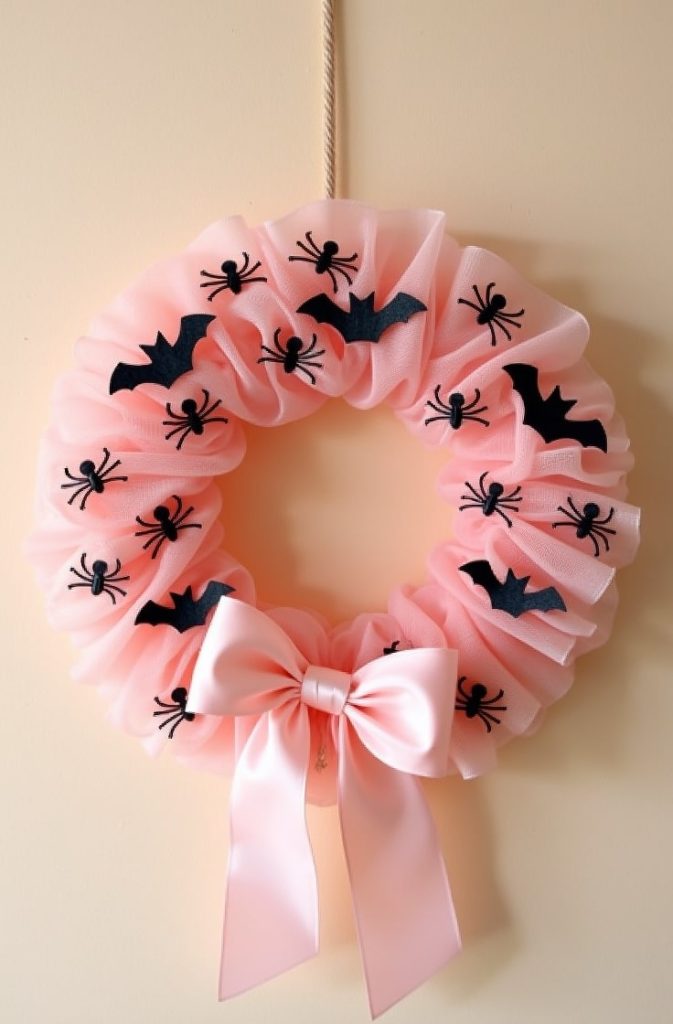
Who says Halloween can’t be cute? A pastel pink spooky wreath is playful and unexpected. Use pink ribbons, ghost figures, and bat accents for a “cute Halloween” theme.
Etsy has adorable pastel Halloween décor, or you can DIY with craft store finds. This wreath is great for kid-friendly spaces or whimsical homes. I love how it softens the spooky season while still feeling festive.
Materials Needed:
- Pink mesh or tulle
- Mini black bats or spiders
- Pink ribbon
- Wire wreath frame
DIY Steps:
- Wrap the pink mesh or tulle around the frame, securing with wire.
- Attach mini black bats or spiders evenly spaced.
- Add a large pink ribbon bow for a finishing touch.
7. Witch Hat & Broomstick Wreath
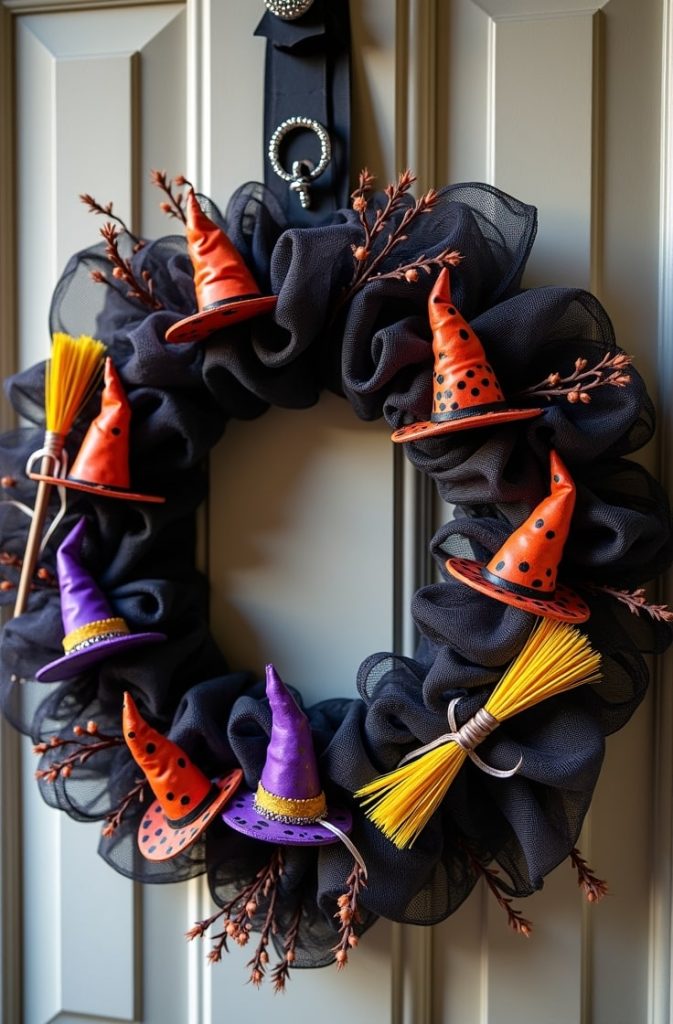
This wreath is pure Halloween magic. Incorporate mini witch hats and broomsticks into a straw or foam wreath base.
Add green or purple ribbons for a pop of color. Spirit Halloween and Amazon carry witch-themed props.
I made one with a tiny broomstick, and it looked like a witch parked her gear on my door! This wreath works indoors or out and adds a fun, witchy vibe.
Materials Needed:
- Foam wreath base
- Small witch hats and broomsticks (available at craft stores)
- Black mesh or ribbon
- Hot glue gun
DIY Steps:
- Cover the wreath base with black mesh or ribbon.
- Glue witch hats and broomsticks at intervals around the wreath.
- Add a bow or hanging ribbon at the top.
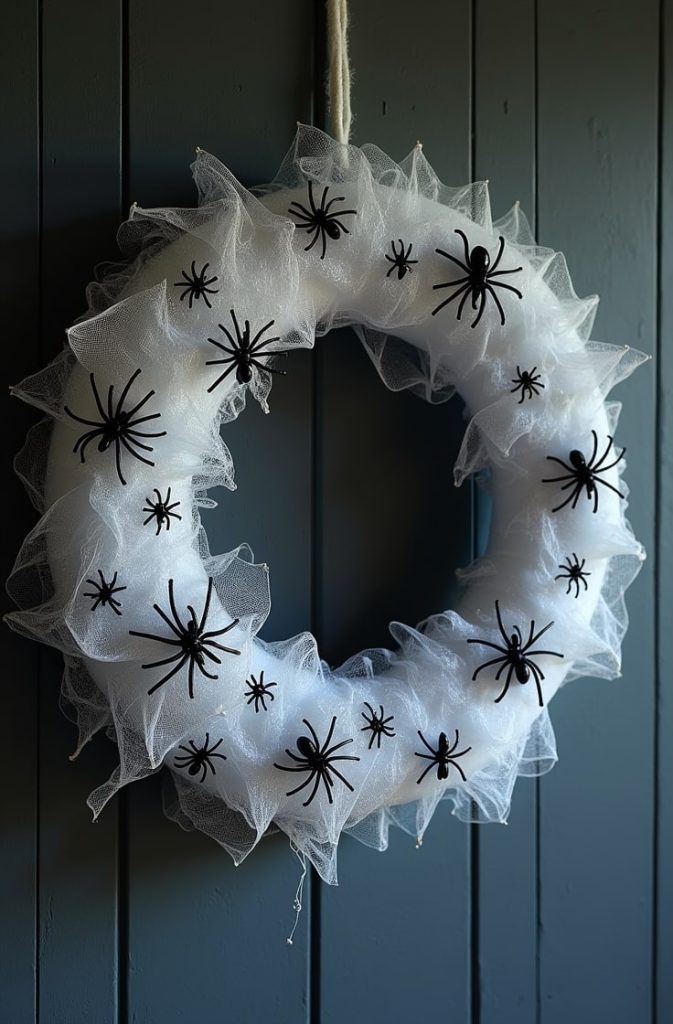
8. Cobweb & Spider Wreath

For an easy DIY, try a cobweb and spider wreath. Stretch faux cobwebs over a wire frame and add plastic spiders for a creepy effect. Dollar stores sell affordable cobweb material and spiders.
I whipped one up in under an hour, and it looked terrifyingly awesome. This wreath is perfect for beginners and works indoors or outdoors. It’s a budget-friendly way to spook up your space.
Materials Needed:
- Wire wreath frame
- Fake cobweb material
- Plastic spiders
- Hot glue gun
DIY Steps:
- Stretch fake cobwebs across the wreath frame.
- Glue plastic spiders on top of the webbing.
- For added effect, spray a little white spray paint for a dusty look.
9. LED Light-Up Halloween Wreath
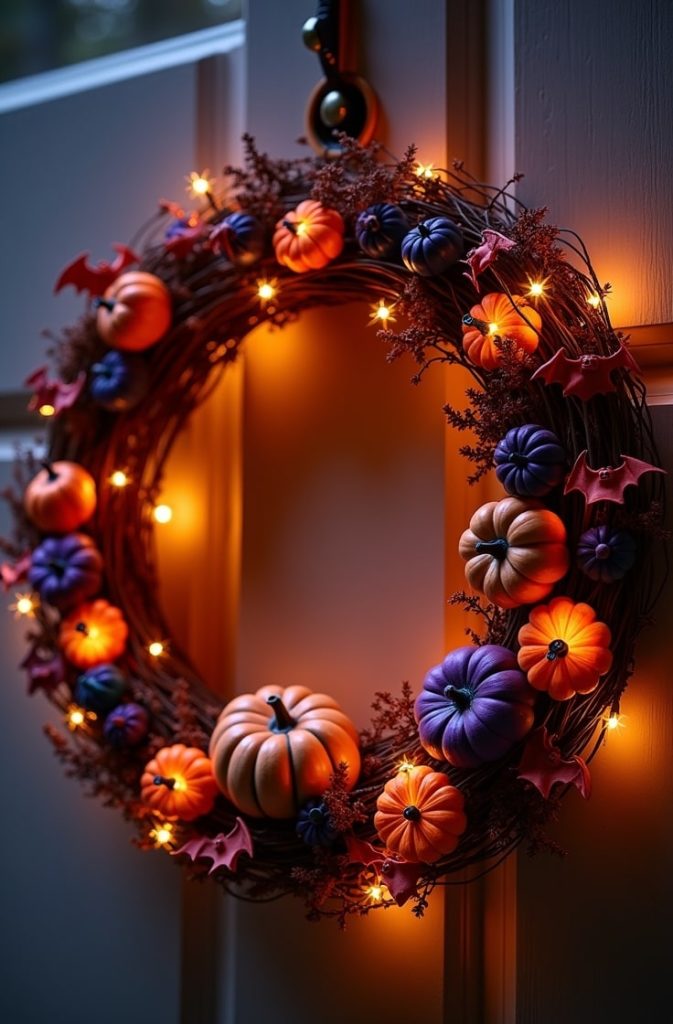
Want your wreath to glow at night? An LED light-up wreath adds ambiance. Weave battery-powered LED lights in orange, purple, or white into your wreath. Walmart and online stores sell affordable LED kits.
I added lights to a wreath last Halloween, and it looked magical after dark. Use it outdoors for visibility or indoors for a cozy glow. Just make sure the battery pack is weatherproof if it’s outside.
Materials Needed:
- Foam or wire wreath base
- Mini pumpkins, bats, or other decorations
- Battery-operated LED string lights
- Hot glue gun
DIY Steps:
- Attach your decorations to the wreath base.
- Wrap the LED lights around the wreath, hiding the battery pack behind decorations.
- Turn on the lights for a glowing effect.
10. Candy Corn Color Wreath
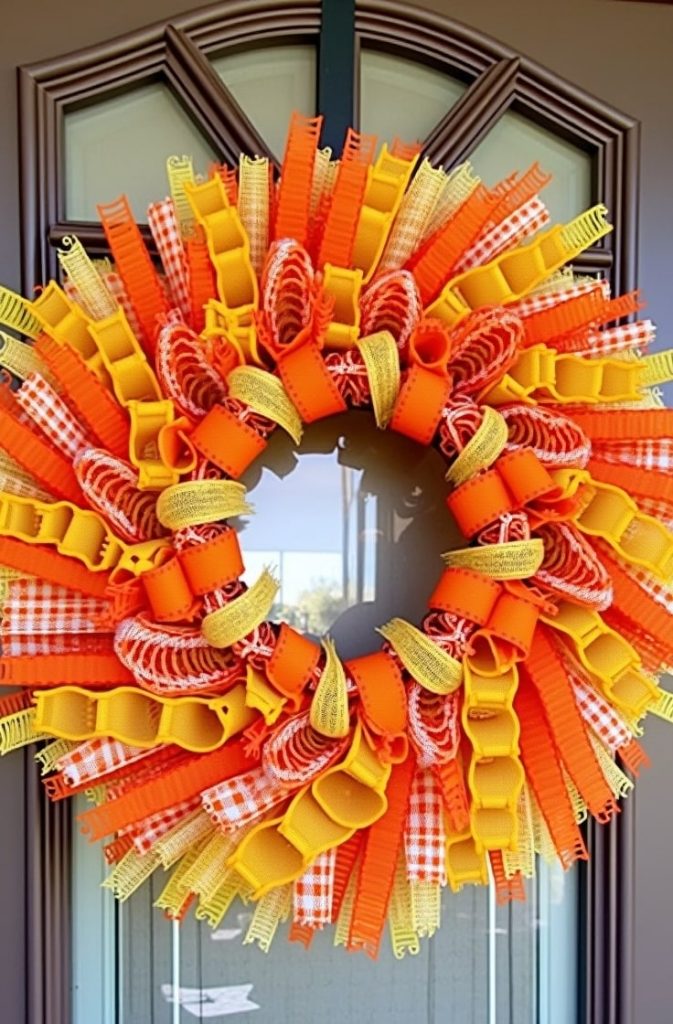
This wreath is a kid-friendly delight. Use candy corn’s yellow, orange, and white palette with ribbons, pom-poms, or painted accents. Craft stores have all the supplies you need. I made one for my niece’s Halloween party, and the kids loved it.
This wreath is fun and colorful, perfect for a cheerful Halloween vibe. It works indoors or out, adding a sweet touch to your décor.
Materials Needed:
- Orange, white, and yellow deco mesh
- Wire wreath frame
- Pipe cleaners
DIY Steps:
- Attach pipe cleaners around the wreath frame.
- Twist sections of orange, yellow, and white mesh, attaching them alternately.
- Fluff and adjust for fullness.
11. Haunted Mansion Vintage Wreath
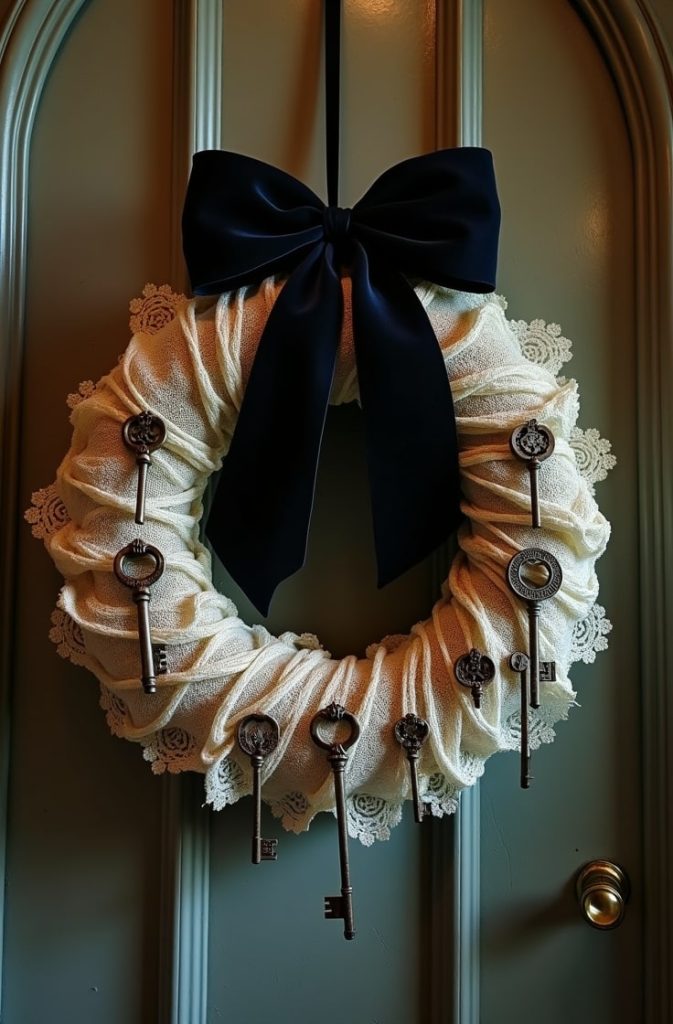
For a mysterious, vintage look, try a haunted mansion wreath. Use antique keys, lace, and aged fabrics on a dark base. Thrift stores or Etsy are great for finding vintage-inspired pieces. I love how this wreath feels like it belongs in an old, creepy mansion.
It’s best indoors to protect delicate materials, but it can work outside with proper sealing. This wreath adds a touch of eerie elegance.
Materials Needed:
- Wire wreath frame
- Old lace and burlap strips
- Antique keys
- Hot glue gun
DIY Steps:
- Wrap the frame with lace and burlap strips alternately.
- Glue antique keys sporadically around the wreath.
- Add a dark ribbon bow at the top.
12. Skeleton Hand Wreath
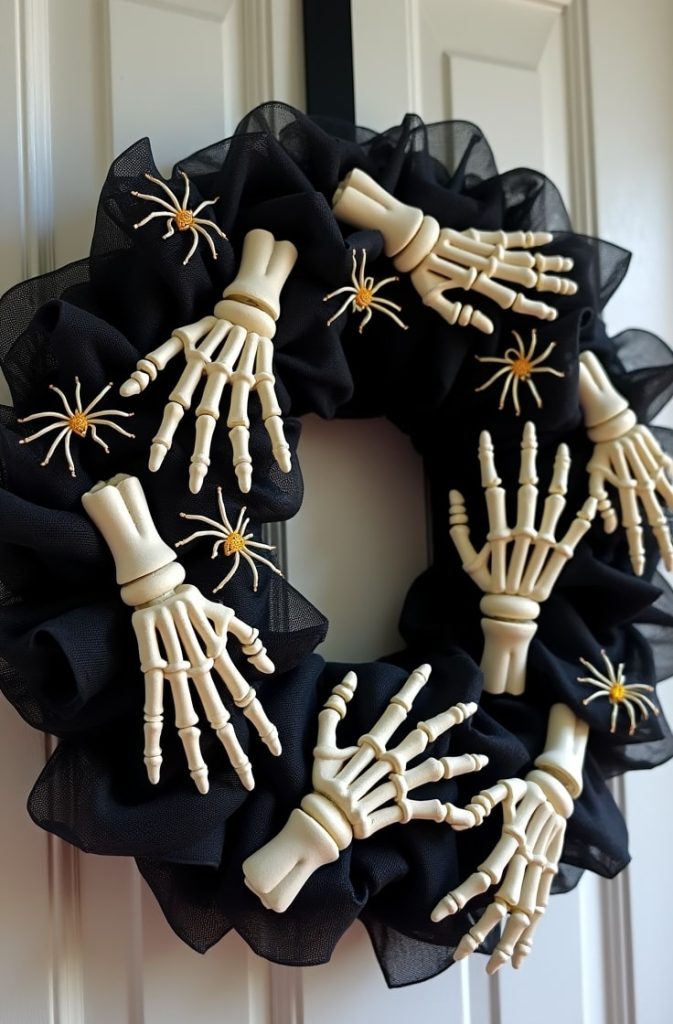
Want a playful scare? A skeleton hand wreath is the way to go. Arrange plastic skeleton hands to look like they’re grabbing the wreath.
Add black or red ribbons for drama. Halloween specialty stores like Spirit Halloween sell skeleton hands. I made one last year, and it got laughs and gasps from visitors. This wreath is great for indoor or outdoor use and adds a fun, spooky twist.
Materials Needed:
- Foam wreath base
- Plastic skeleton hands
- Black mesh or fabric
- Hot glue gun
DIY Steps:
- Cover the wreath base with black mesh.
- Glue skeleton hands evenly around the wreath, fingers pointing outward.
- Add small accents like spiders or bats.
13. Monster Eye Wreath
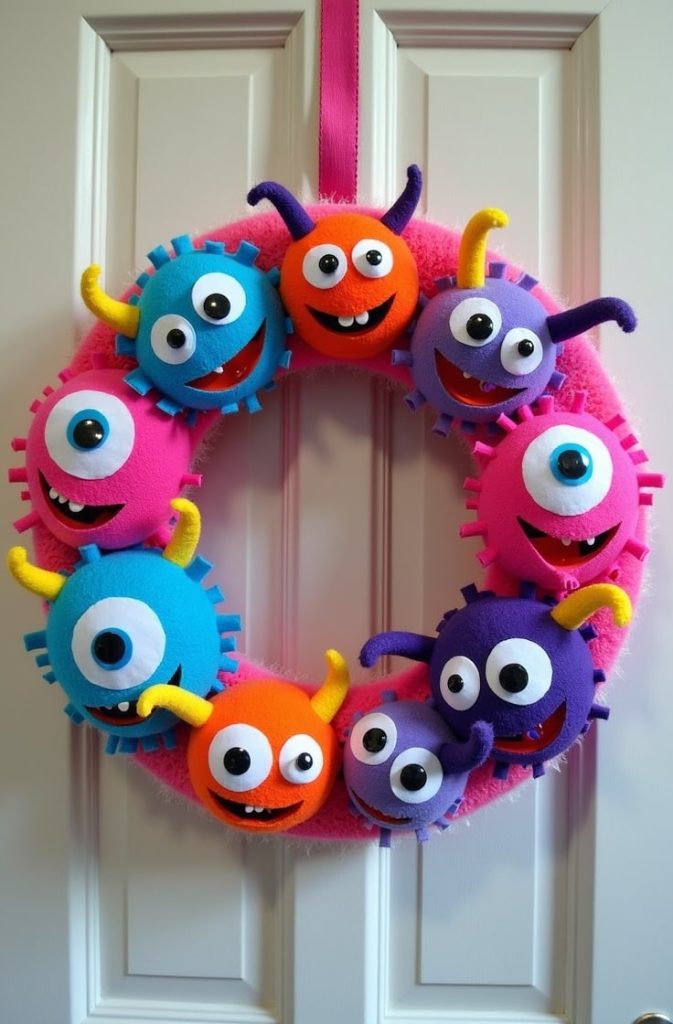
This wreath is goofy and kid-friendly. Use googly eyes or painted ping-pong balls to create a monster eye effect. Dollar Tree and craft stores have affordable eyes.
I made one for my front door, and the neighborhood kids adored it. This wreath is perfect for a lighthearted Halloween vibe. It works indoors or out, bringing a playful monster charm to your home.
Materials Needed:
- Foam wreath base
- Large googly eyes
- Colored foam sheets or felt
- Hot glue gun
DIY Steps:
- Cover the wreath base with felt or foam.
- Glue googly eyes all around the wreath.
- Cut and add monster features like horns or mouths.
14. Nature-Inspired Fall Foliage Wreath
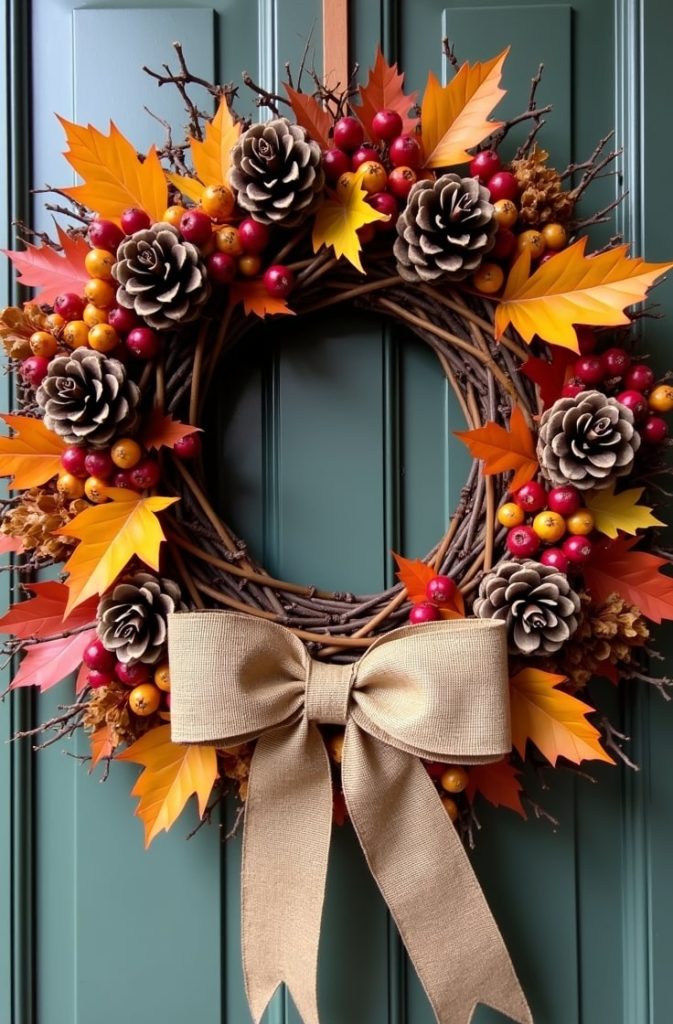
Blend Halloween with autumn’s beauty using a nature-inspired wreath. Colorful leaves, pinecones, and subtle spooky accents like bats create a cozy look.
Michaels has great foliage supplies. I love how this wreath feels warm yet festive. It’s perfect for rustic or natural homes and works indoors or outdoors. This wreath is a great way to ease into the fall season.
Materials Needed:
- Foam or wire wreath base
- Artificial fall leaves
- Pinecones and berries
- Hot glue gun
DIY Steps:
- Glue leaves all around the wreath base.
- Attach pinecones and berries evenly spaced.
- Add a burlap bow for a rustic finish.
15. Minimalist Black & White Wreath
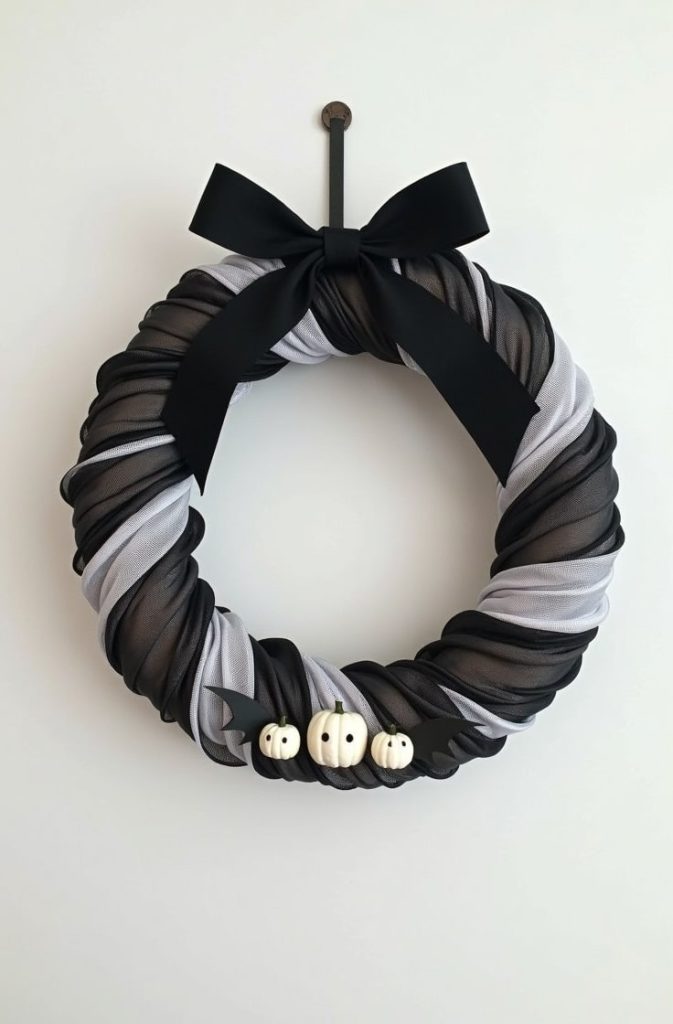
For a sleek, modern look, try a minimalist black and white wreath. Use monochrome ribbons, geometric shapes, and simple accents. Target and online stores have minimalist décor options.
I hung one in my modern apartment, and it looked so chic. This wreath is best indoors but can work outside with durable materials. It’s perfect for contemporary homes that want a subtle Halloween touch.
Materials Needed:
- Wire wreath base
- Black and white ribbon
- Minimalist black and white accents (like small pumpkins or bats)
- Hot glue gun
DIY Steps:
- Wrap black and white ribbon alternately around the frame.
- Attach simple accents evenly around the wreath.
- Tie a neat bow with black and white ribbon.
DIY vs. Store-Bought Halloween Wreaths
When it comes to Halloween wreaths, choosing between making your own and buying one can feel tricky. I’ve tried both options, and each has its own advantages depending on what you want and how much time you have.
DIY wreaths are fantastic if you love getting hands-on and want something truly unique. You control every detail — from the colors to the materials and the overall style. This means you can perfectly match your wreath to your home’s decor or your personal taste.
Plus, creating your own wreath can be very rewarding and relaxing. And often, it costs less than buying a finished product, especially if you reuse supplies or shop sales.
On the other hand, store-bought wreaths offer great convenience. They save you time and effort, especially if you have a busy schedule or aren’t confident in your crafting skills.
Many stores offer high-quality, professionally made wreaths that look fantastic right out of the box. The downside is that some can be pricey, especially branded or limited-edition designs.
For many, the best approach is a mix of both. Buying a plain or simple wreath base and adding your own DIY touches lets you enjoy the creativity while saving time. This way, you get a personalized wreath without starting completely from scratch.
Step-by-Step DIY Halloween Wreath Guide
Ready to make your own wreath? Here’s a simple guide to create a custom Halloween masterpiece. I’ve made a few myself, and it’s easier than it looks!
Materials
- Base wreath (grapevine, foam, or wire, $5-$15 at craft stores)
- Hot glue gun and glue sticks ($5-$10)
- Decorative pieces (ribbons, faux spiders, skulls, pumpkins, etc., $5-$20)
- Scissors and wire cutters ($3-$10)
- Optional: spray paint, battery-powered LED lights, or floral wire ($3-$15)
Steps
- Pick a base wreath. Grapevine is rustic, foam is lightweight, and wire is versatile. Secure any loose ends with hot glue.
- Plan your design. Lay out your décor pieces before gluing to visualize the look.
- Attach larger items first. Glue or wire on pumpkins, witch hats, or skulls to create a focal point.
- Layer ribbons or mesh. This adds texture and fills gaps. I like to loop ribbons for a fluffy effect.
- Add smaller accents. Think spiders, feathers, or googly eyes for personality.
- Finish with lights or touches like cobwebs or glitter. Test lights before securing them.
- Create a hanging loop with ribbon or use a wreath hanger ($2-$5).
Customization Tips
Make it personal! Add family initials with wooden letters or themed charms like bats or ghosts. Spray paint your base to match your color scheme—I used purple for a witchy vibe once. Mix textures like burlap, mesh, and feathers for depth. I love experimenting with different combos to make each wreath unique.
Safety & Maintenance Tips
Keeping your Halloween wreath safe and well-maintained helps it last year after year and keeps your home worry-free. If you use real candles or lights on your wreath, be very careful.
Real flames can be a fire hazard, especially if your wreath includes flammable materials like paper, fabric, or dried leaves. I always recommend using battery-operated LED lights instead. They look just as cozy and spooky but are much safer and last longer without needing replacement.
If you hang your wreath outdoors, weather can be a challenge. Rain, wind, and sun can damage delicate materials and fade colors. Choose wreaths made from weatherproof or sturdy materials if you plan to leave them outside.
Alternatively, you can bring your wreath indoors during bad weather to protect it.
After Halloween is over, take time to care for your wreath. Gently dust off any dirt or spider webs and store it in a sturdy box or sealed bag.
Keeping all the small decorations together prevents pieces from getting lost. Proper storage means your wreath will be ready to shine again next season.
Conclusion
Halloween wreaths are a wonderful way to add personality and spirit to your home. Whether you prefer classic, spooky, playful, or elegant styles, there’s a wreath idea here for you.
With the step-by-step guides, you can confidently create your own wreath or customize a store-bought one. Get started early, and enjoy making your home a festive Halloween haven!

Jenny is a passionate writer specializing in home decor, design, and styling. With years of experience in transforming spaces, she shares expert tips on creating beautiful, functional homes. From interior design trends to DIY decor ideas, Jenny’s work helps homeowners craft spaces that reflect their unique style. Whether it’s a cozy living room, a modern kitchen, or a serene bedroom, her articles offer practical advice and inspiration to elevate any home.