A clean bathroom is more than just visually appealing—it’s essential for hygiene, health, and comfort. Over time, soap scum, grime, dust, and bacteria can build up on every surface, from ceilings to floors, making even routine cleaning feel overwhelming.
That’s where a deep clean comes in. Unlike quick surface wipes, a deep clean tackles every corner, including showers, tubs, toilets, sinks, and countertops, leaving your space truly fresh and sanitized.
By following a systematic, top-to-bottom approach, you can transform even the messiest bathroom into a sparkling, inviting space.
This guide provides step-by-step instructions, practical tips, and smart strategies to help you clean efficiently and maintain long-lasting results.
Preparing for a Deep Clean
Before diving into scrubbing, spraying, and wiping, preparation is key. Taking the time to gather your supplies, organize the space, and plan your approach will make the deep clean faster, safer, and more effective.
1. Gather Your Cleaning Supplies
Having all the tools and products at your fingertips will save you from running around mid-clean. Here’s a checklist of essentials:
- Protective gear: Gloves, mask (especially if using strong cleaners), and old clothes you don’t mind getting dirty.
- Cleaning cloths and sponges: Microfiber cloths, scrub sponges, and Scrub Daddies or brushes for tough spots.
- Scrub brushes: Small brushes for grout and corners; a toothbrush works perfectly for tight areas like faucets and knobs.
- Vacuum or broom: A HEPA-filter vacuum is ideal for picking up dust, hair, and fine particles.
- Mop and bucket: For tile floors and larger wet areas.
- Cleaning products:
- Disinfectant sprays or wipes
- Bar Keeper’s Friend or equivalent powder cleanser
- White vinegar for natural cleaning
- Mild soap or all-purpose cleaner
- Disinfectant sprays or wipes
Optional tools that make deep cleaning easier include a drill brush attachment for scrubbing tubs or shower tiles, extendable dusters for ceilings, and a squeegee for glass doors.
2. Clear the Bathroom of Clutter
A deep clean works best when the bathroom is cleared of personal items. Remove:
- Towels, bath mats, and rugs
- Toiletries, soap dishes, and personal care items
- Decorative items like plants, candles, or storage containers
Clearing surfaces gives you complete access and prevents accidentally getting your items wet or damaged during cleaning.
3. Safety Tips
Bathrooms can harbor mold, bacteria, and slippery surfaces, so take precautions:
- Ventilation: Open windows or turn on the exhaust fan to reduce fumes from cleaning products.
- Handling chemicals: Never mix bleach with ammonia or vinegar—this can create toxic fumes. Always read labels and follow instructions.
- Avoid slips: Work from dry areas to wet areas when mopping, and keep a towel handy for spills.
- Protect your hands and skin: Gloves prevent irritation, especially when working with disinfectants or scrubbing powders.
4. Plan Your Approach
A structured plan will make deep cleaning less overwhelming:
- Top-to-bottom cleaning: Start with ceilings, light fixtures, and walls before moving to countertops, sinks, showers, and floors. Gravity will naturally bring dust and dirt downward, so cleaning top-down prevents re-soiling already cleaned areas.
- Work in sections: Focus on one area at a time. This helps maintain momentum and gives visible progress, which is satisfying and motivating.
How To Deep Clean Your Bathroom: Step-by-Step Process
I will walk you through every step in detail to deep clean your bathroom:
How To Clean Bathroom Ceiling and Walls
Many people overlook ceilings and walls during routine cleaning, but dust, cobwebs, and even baby powder or other fine particles can accumulate over time. Tackling these areas first ensures that any debris falls to the floor, which you can clean up later.
1. Dusting and Wiping Surfaces
Start with the ceiling, working your way down:
- Use an extendable duster or a microfiber cloth attached to a broom handle to remove dust and cobwebs.
- Pay special attention to corners and vents, where dirt tends to gather.
- For walls, lightly spray an all-purpose cleaner on a cloth (not directly on the wall) and wipe in sections, especially around the sink, toilet, and shower areas.
2. Cleaning Light Fixtures
Ceiling lights and wall sconces often collect dust and dead insects, which can go unnoticed:
- Turn off the lights and allow bulbs to cool.
- Carefully remove any lenses or covers.
- Wipe off dust, dirt, or insects with a damp cloth.
- For tough grime, use a mild soap solution or disinfectant.
- Dry thoroughly before reassembling.
Cleaning light fixtures at the start prevents dust from falling onto already-clean surfaces later, and it brightens the bathroom immediately.
3. Dealing with Stubborn Stains or Residue
Sometimes ceilings and walls have lingering stains, splashes, or powder residue (like baby powder or deodorant dust):
- Use a gentle scrub sponge or microfiber cloth with warm water and a small amount of mild detergent.
- Focus on high-traffic areas or spots near the shower and sink, where moisture and soap can leave marks.
- Avoid excessive scrubbing to prevent damaging paint or wallpaper.
4. Tips for Maintaining Walls and Ceilings
- Dust ceilings and walls monthly to prevent buildup.
- Clean walls near sinks and showers bi-weekly to reduce soap scum and water stains.
- For painted walls, test any cleaner in an inconspicuous spot to avoid discoloration.
Once your ceilings and walls are sparkling clean, it’s time to move down to the floors, which will capture all the dust and debris you’ve just dislodged. This top-to-bottom method ensures you’re not re-soiling areas you’ve already cleaned.
How To Clean Bathroom Floors
Floors are often the dirtiest part of the bathroom, collecting dust, hair, dirt, and even cleaning residues from above. Properly cleaning the floor is crucial for both hygiene and aesthetics.
1. Vacuuming for Dust and Debris
Before mopping, remove loose particles:
- Use a HEPA-filter vacuum if possible. HEPA filters trap fine dust, allergens, and even tiny particles like baby powder, preventing them from being redistributed into the air.
- Pay attention to corners, edges, and behind the toilet, where dust and hair accumulate.
- Vacuum any rugs or mats separately to remove embedded dirt.
Vacuuming first ensures that the mop doesn’t just spread dirt around, making your deep clean more effective.
2. Mopping Techniques for Tiles
Once the floor is free of loose debris, it’s time to mop:
- Fill a bucket with warm water and an appropriate floor cleaner or mild soap.
- Start mopping from the farthest corner of the bathroom, working your way toward the exit.
- For stubborn stains or sticky spots, scrub lightly with a soft-bristled brush.
- Rinse the mop frequently to avoid spreading dirt.
Read Also: How To Clean Bathroom Tiles Like A Pro
3. Tackling Grout
Grout often harbors mildew, soap scum, and stains that simple mopping can’t remove:
- Mix baking soda and water to form a paste, or use a commercial grout cleaner.
- Apply the paste to grout lines and scrub with a toothbrush or grout brush.
- Rinse thoroughly with warm water to remove residue.
- For stubborn mold or mildew, spray a solution of white vinegar and water, let sit for 10 minutes, then scrub.
4. Finishing Touches
- Dry the floor with a clean microfiber cloth or towel to prevent water spots.
- Replace rugs and mats only after the floor is fully dry to avoid trapping moisture.
- Sweep or vacuum between deep cleans to keep the floor tidy.
With the floors spotless, you’ve now cleared all dust and debris from the ceiling down to the ground. The next areas to tackle are the toilet and shower, which often require extra attention for deep cleaning.
How To Clean A Toilet In Your Bathroom
The toilet is often the most dreaded part of bathroom cleaning, but with the right approach, it can become one of the most satisfying areas to deep clean. A sparkling toilet not only looks better but also prevents the spread of germs and bacteria.
1. Dust and Debris Removal
Before applying cleaners:
- Use a dry cloth or duster to remove hair, dust, or loose debris around the toilet base, behind it, and on the tank lid.
- This ensures the disinfectant can work directly on the surfaces rather than being diluted by dirt.
2. Disinfecting
To effectively kill bacteria and germs:
- Spray the entire exterior and interior of the toilet with a disinfectant cleaner.
- Let the solution sit for 10 minutes. This contact time allows the disinfectant to penetrate stains and sanitize surfaces thoroughly.
- Pay special attention to frequently touched areas:
- Flush handle
- Toilet seat hinges
- Tank lid
- Flush handle
3. Layered Cleaning for Tough Stains
For toilets with buildup:
- Start with one round of scrubbing to remove surface stains.
- Rinse and repeat as necessary until all residue, mineral deposits, or discoloration is gone.
- Use a toilet brush with stiff bristles for the bowl and a smaller brush or cloth for tight areas.
4. Making It Shine
- After disinfecting and scrubbing, wipe down the exterior surfaces with a microfiber cloth.
- For extra shine, especially on ceramic or porcelain, a non-abrasive powder cleaner like Bar Keeper’s Friend can be used sparingly.
- Ensure the toilet is dry to prevent streaks or water spots.
5. Tips for Maintaining a Clean Toilet
- Wipe down the exterior daily or weekly to reduce buildup.
- Flush with the lid closed to prevent splashes.
- Consider using a toilet bowl tablet or cleaner for ongoing maintenance.
With the toilet sparkling, the next step is one of the most labor-intensive but visually rewarding parts: the shower and bathtub, where soap scum, hard water, and mildew tend to accumulate.
How To Clean Bathroom Shower & Bathtub
The shower and bathtub are high-moisture areas that naturally attract soap scum, hard water deposits, and mildew. Deep cleaning these areas not only restores shine but also prevents long-term damage and odors.
1. Removing Soap Scum and Hard Water Deposits
Soap scum and mineral deposits can be stubborn, but the right products make a huge difference:
- Use a powdered cleanser like Bar Keeper’s Friend or a vinegar-water solution.
- Spray or sprinkle the product generously over the tub or shower surfaces.
- Let it sit for a few minutes to break down tough residues.
2. Scrubbing Efficiently
Manual scrubbing can be tiring, so work smarter:
- Use a scrub brush or sponge for flat surfaces.
- For large areas, a drill brush attachment can save time and protect your back and arms.
- Focus on corners, ledges, and grout lines, where buildup is most common.
3. Cleaning Glass Doors
Shower doors often accumulate streaks and soap scum:
- Use a microfiber cloth or scrub sponge to wipe the glass.
- For extreme buildup, a squeegee with a vinegar solution works wonders.
- Dry the glass thoroughly to prevent water spots.
4. Tackling Hidden Areas: Shower Knobs and Fixtures
Small, often-forgotten spots can harbor mold and mildew:
- Remove any caps and unscrew the shower knob.
- Soak in white vinegar for 10–15 minutes.
- Scrub with a toothbrush to remove grime and mildew.
- Rinse and buff with a microfiber cloth before reassembling.
This small step elevates the overall cleanliness and gives your shower a polished, professional look.
5. Rinsing and Final Touches
- Thoroughly rinse all surfaces with warm water to remove residue.
- Dry with a clean towel to prevent streaks and water marks.
- Inspect grout and caulking for mold; treat any problem areas with a mild bleach solution if necessary.
6. Tips for Maintaining Your Shower and Tub
- Wipe down surfaces after each use to prevent soap scum buildup.
- Use a daily shower spray to reduce mineral deposits.
- Clean glass doors weekly to maintain clarity and shine.
With the shower and bathtub sparkling, the next step is Section 6: Sink, Vanity, and Countertops, including mirrors and fixtures, which are central to both hygiene and aesthetics.
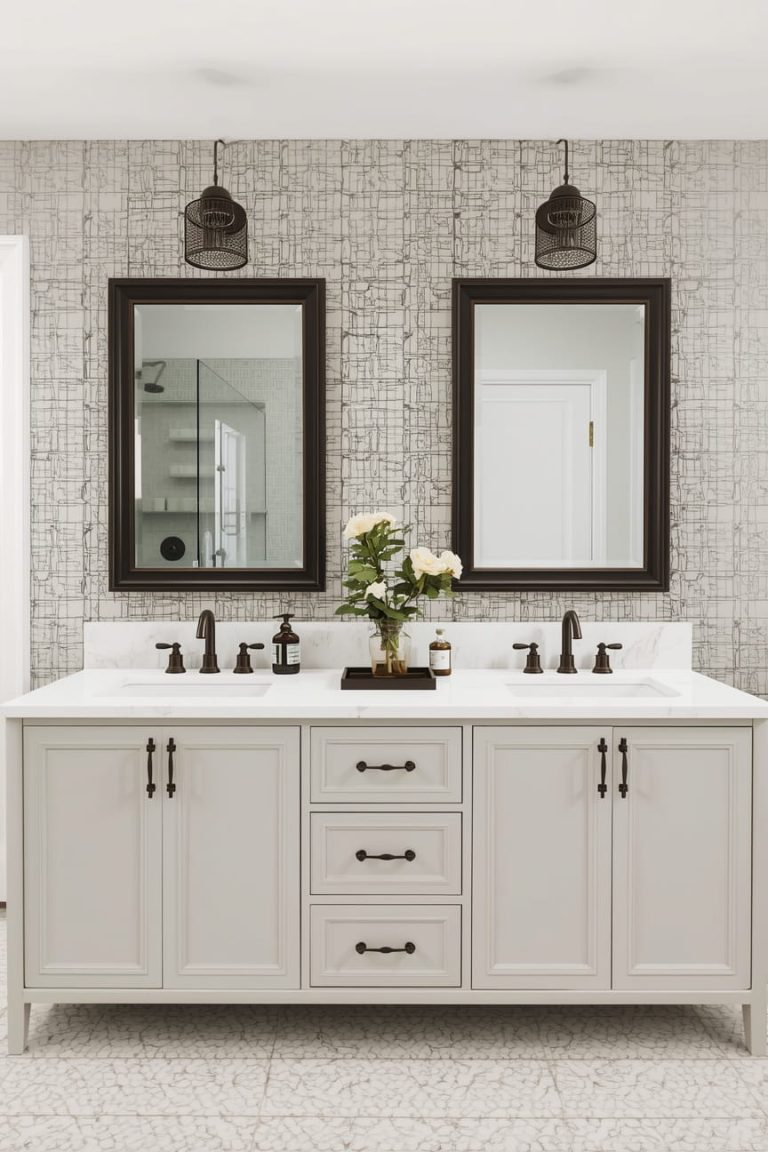
How To Clean Bathroom Sink, Vanity, and Countertops
The sink area is one of the busiest parts of the bathroom, collecting toothpaste residue, water spots, soap, and grime. Deep cleaning this area not only improves hygiene but also gives your bathroom a fresh, polished look.
1. Cleaning the Mirror
A streak-free mirror instantly brightens the space:
- Spray a glass cleaner or a vinegar-water solution onto the mirror.
- Wipe in vertical or horizontal strokes with a microfiber cloth.
- For stubborn spots like toothpaste splatters, gently scrub with a damp cloth.
- Avoid spraying cleaner directly onto the frame to prevent damage.
2. Disinfecting and Cleaning the Countertop
Countertops and sink areas can harbor bacteria and stains:
- Remove all items from the countertop.
- Spray a disinfectant over the entire surface, including the faucet handles.
- Let it sit for 10 minutes to maximize germ-killing power.
- Scrub the surface with a sponge or cloth, paying attention to edges and corners.
- Rinse with warm water and wipe dry.
3. Making Porcelain and Chrome Shine
To make sinks, faucets, and fixtures gleam:
- Sprinkle Bar Keeper’s Friend or another gentle powder cleanser on stubborn stains.
- Scrub gently with a non-abrasive sponge or brush.
- Focus on hard water buildup around the faucet and drain.
- Buff chrome fixtures with a dry microfiber cloth to restore shine.
4. Organizing and Finishing Touches
- Wipe down all items before returning them to the countertop.
- Arrange toiletries neatly to maintain a clean appearance.
- Replace any worn-out or stained items, such as soap dishes or toothbrush holders.
5. Maintenance Tips
- Wipe the sink and countertop daily to prevent buildup.
- Use a small toothbrush to clean around faucet bases weekly.
- Clean mirrors and fixtures weekly for a lasting polished look.
Finishing Touches
After tackling every major area of the bathroom, the finishing touches are what transform a clean bathroom into a truly sparkling, welcoming space. These steps help maintain cleanliness and add the final polish that makes the room feel refreshed.
1. Checking Overlooked Spots
Even after a deep clean, some areas can be easily missed:
- Baseboards and corners: Dust or mop carefully to remove residual dirt.
- Behind and around the toilet: Ensure no hair, dust, or cleaner residue remains.
- Door handles and light switches: Wipe with a disinfectant to remove germs.
- Vent covers: Dust or wipe down to prevent air blowing dirt onto clean surfaces.
2. Replace and Restock Items
- Return rugs, towels, and bathroom mats only after floors are dry.
- Restock essentials like toilet paper, hand soap, and toiletries neatly.
- Consider using matching containers or trays to keep items organized and reduce visual clutter.
3. Small Decorative Touches
- Add a plant or small decorative item for visual appeal.
- Ensure decorations are easy to remove for future cleaning.
- Even a simple candle or neatly folded towel can enhance the perception of cleanliness and calm.
4. Maintaining Your Clean Bathroom
A deep clean is most effective when combined with ongoing maintenance:
- Daily: Wipe the sink and counter, squeegee shower doors, and keep the floor dry.
- Weekly: Dust surfaces, disinfect the toilet, clean mirrors, and mop the floor.
- Monthly: Dust vents and high areas, scrub grout lines, and check for mildew or buildup.
5. Celebrate Your Effort
- Stand back and admire your sparkling bathroom.
- The satisfaction of seeing every surface clean and shining is one of the best rewards of a deep clean.
- If cleaning with family, take a moment to appreciate teamwork and the healthier, more inviting space you’ve created.
Conclusion and Bonus Tips
A deep-cleaned bathroom is more than just a visually pleasing space—it’s a healthier, fresher, and more comfortable environment for you and your family.
By following a systematic top-to-bottom, section-by-section approach, you can tackle even the toughest dirt, soap scum, and grime without feeling overwhelmed.
Key Takeaways
- Prepare first: Gather all tools, clear clutter, and protect yourself.
- Top-to-bottom approach: Start with ceilings and work down to floors to prevent re-soiling.
- Sectional cleaning: Focus on one area at a time for maximum efficiency.
- Use the right products and tools: Disinfectants, Bar Keeper’s Friend, vinegar, microfiber cloths, and scrub brushes make a huge difference.
- Maintenance is crucial: Regular quick cleaning prevents dirt from accumulating, making deep cleans easier in the future.

Emma Vanderlyn is a home enthusiast with a passion for all things natural and eco-friendly. With years of experience experimenting with DIY solutions, she’s dedicated to creating safe, effective, and budget-friendly cleaning recipes that are kind to both your home and the planet. Emma believes that a clean home shouldn’t come at the cost of harsh chemicals, and her easy-to-follow guides make natural cleaning accessible to everyone.
When she’s not whipping up a new cleaner in her kitchen, Emma can be found researching the latest in green living or transforming her space with mindful, stylish decor ideas. She’s here to share her love of natural living and help you create a home that shines—naturally.