Last Halloween, my toddler grabbed for the carving knife the second I set it down. My heart nearly stopped.
That was the moment I swore off carving until my kids were older. I felt guilty at first, like I was skipping the “real” Halloween tradition.
Then I tried painting instead. My daughter squealed with excitement. No knives. No danger. No stress. Just glue, glitter, and giggles.
You don’t need a single sharp tool to make a pumpkin your kids will be proud of.
Here are five ways to do it, all completely knife-free.
Top 5 Products to Make No-Carve Decorating Easier
- Crayola Pumpkin Decorating Kit – This kit includes markers, gems, and stencils, so kids can decorate independently without any sharp tools.
- FolkArt Acrylic Paint Multi-Pack – These paints dry quickly and give bold, opaque color that works well on any pumpkin surface.
- Self-Adhesive Foam Craft Pieces – These stick-on eyes, mouths, and shapes let toddlers build a face instantly with zero mess.
- Washi Tape Variety Pack – These tape rolls in different colors and patterns let kids design a pumpkin with no glue or drying time.
- Rhinestone and Gem Sticker Set – These pre-cut adhesive gems add instant sparkle without any liquid glue involved.
Stick-On Silly Face Pumpkin (Fastest Option)
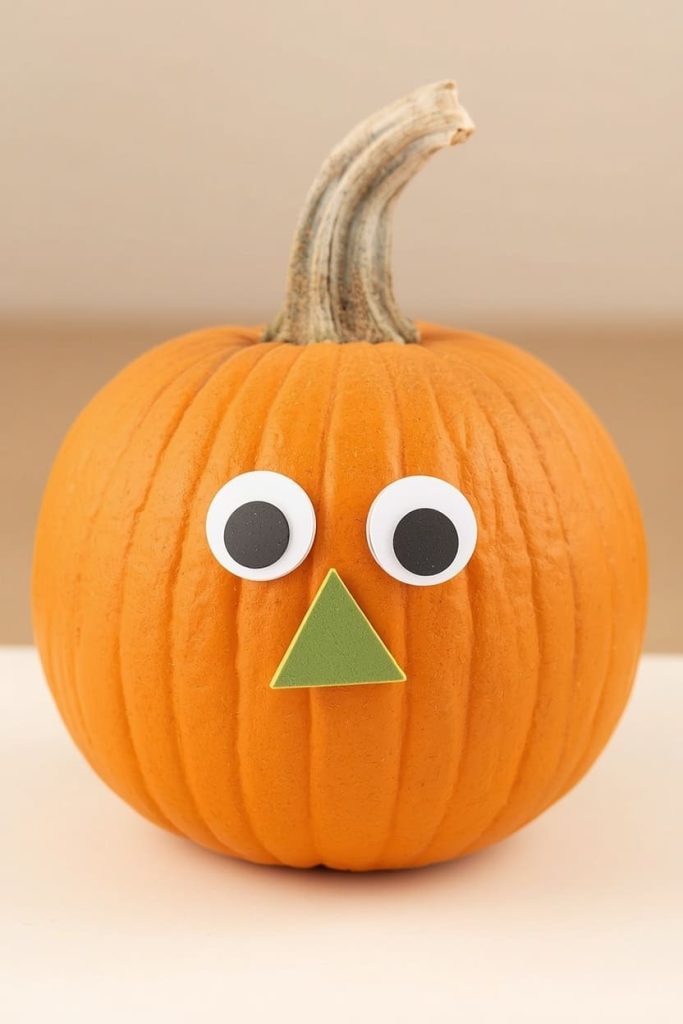
This is the one I reach for on busy nights. It takes minutes, and my toddler can do almost all of it herself.
What you’ll need:
- Foam stick-on eyes, mouth, and nose pieces
- A pumpkin (real or fake)
Steps:
- Wipe the pumpkin clean and make sure it’s completely dry.
- Lay the pieces out on a table first so your child can plan the face.
- Press each piece firmly onto the pumpkin’s surface.
- Rearrange freely — nothing is permanent, so mistakes don’t matter.
Time: 5–10 minutes.
Tip: Keep a few extra pieces on hand. Toddlers love swapping the face around more than once.
Painted Polka Dot Pumpkin
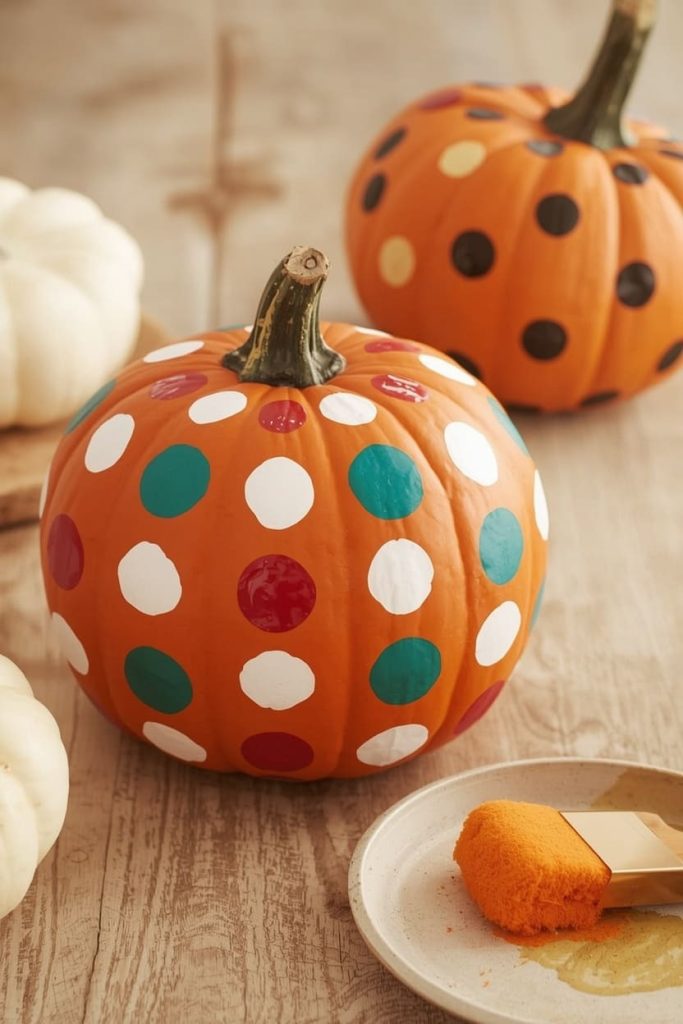
This one is simple, colorful, and forgiving of imperfect dots.
What you’ll need:
- Acrylic paint in 2–3 colors
- A round sponge or the end of a paintbrush
- A paper plate for paint
Steps:
- Pour small amounts of each paint color onto the plate.
- Dip the sponge or brush end into the paint.
- Dab dots all over the pumpkin in a random or patterned way.
- Let it fully dry before moving the pumpkin.
Time: 20 minutes, plus drying time.
Tip: Use a fresh sponge or brush end for each color so the dots stay crisp instead of muddy.
Washi Tape Stripe Pumpkin
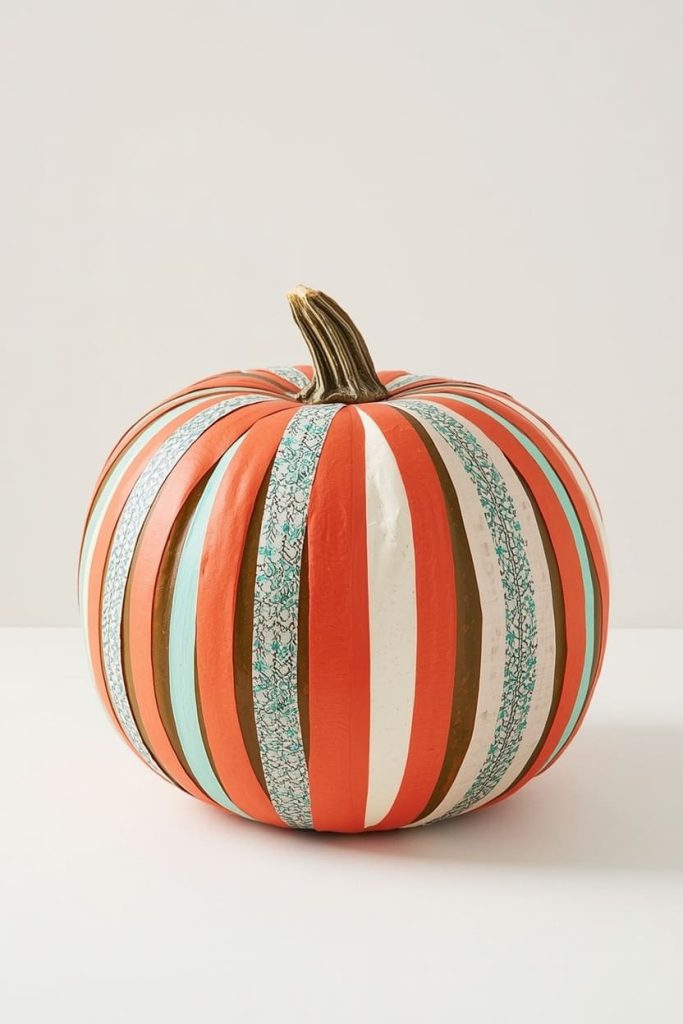
This idea is completely mess-free and looks surprisingly polished for how simple it is.
What you’ll need:
- A few rolls of washi tape
- Scissors (for the adult only, to trim tape ends)
Steps:
- Cut strips of tape in varying lengths.
- Apply them vertically or diagonally across the pumpkin’s surface.
- Overlap colors and patterns for a fun, layered look.
- Trim any excess tape at the top or bottom.
Time: 15 minutes.
Tip: Let your child choose the tape colors and placement. There’s no wrong way to do this one, which makes it great for confidence-building.
Sparkly Gem Pumpkin
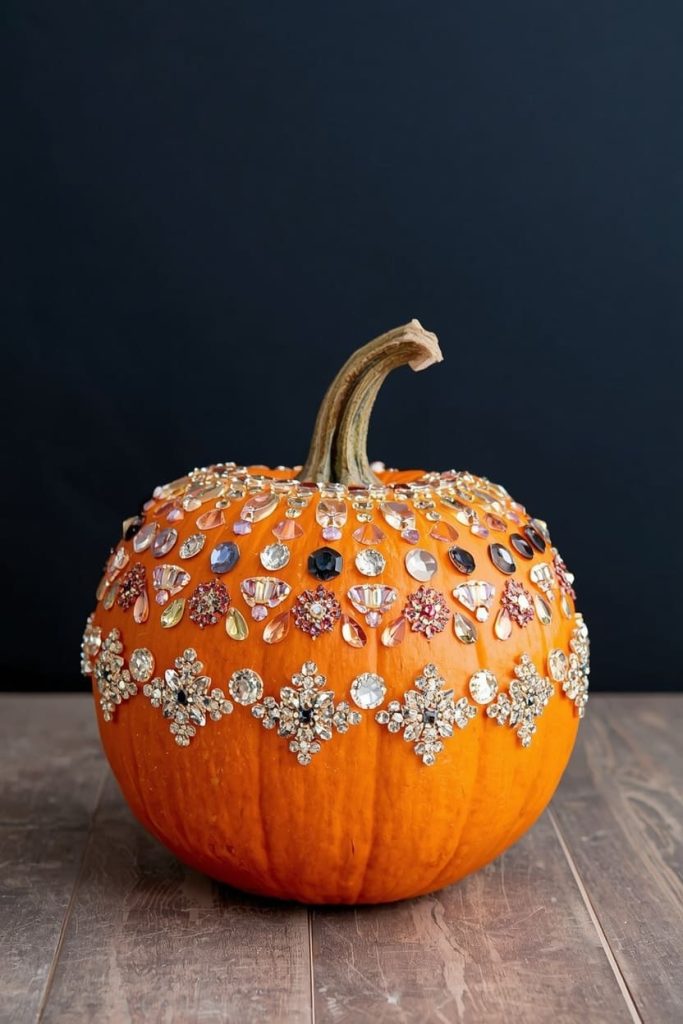
This is the go-to for a bit of glam without any liquid glue or drying time.
What you’ll need:
- Adhesive rhinestone or gem stickers
- A pumpkin
Steps:
- Clean and dry the pumpkin thoroughly.
- Peel the backing off each gem sticker.
- Press gems onto the pumpkin in a pattern, or scatter them randomly.
- Continue until you’re happy with the coverage.
Time: 15–20 minutes.
Tip: Start with larger gems for little hands, since smaller ones can be tricky for young fingers to peel and place.
Marker Face Pumpkin
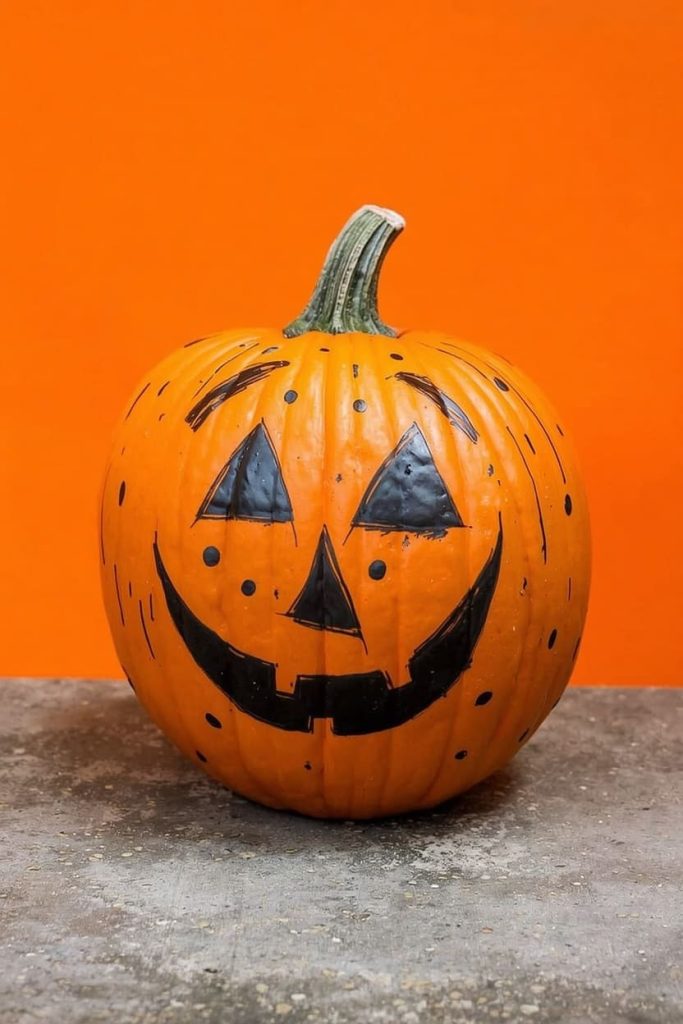
This is the simplest option of all, and it’s great for kids who love to draw.
What you’ll need:
- Washable paint markers designed for pumpkins or craft surfaces
- A pumpkin
Steps:
- Make sure the pumpkin’s surface is clean and dry.
- Let your child draw a face, pattern, or design directly onto the pumpkin.
- Add extra details like eyebrows, freckles, or patterns once the main design is done.
- Let the marker ink dry for a few minutes before touching.
Time: 10–15 minutes.
Tip: Practice on paper first if your child wants to plan out a specific face before committing to the pumpkin.
Why No-Carve Is a Better Option for Young Kids
Carving tools, even “kid-safe” ones, still involve some risk. No-carve methods remove that risk entirely.
- Zero sharp edges means no supervision panic over knives or saws.
- Faster completion time keeps young attention spans engaged from start to finish.
- Easy cleanup compared to scooping seeds and stringy pulp.
- More independence for kids, since they can do most steps without adult help at every stage.
Real Pumpkin vs. Fake Pumpkin: Which Works Best for No-Carve Decorating
Both work, but they serve different needs.
- Real pumpkins give you that classic look and smell, but painted or glued designs only last 1–2 weeks before the pumpkin starts to soften.
- Fake foam pumpkins are reusable year after year, so if your child creates a design they love, you can keep it forever.
- Fake pumpkins are also more forgiving with glue and adhesive-based projects, since there’s no moisture underneath to loosen the bond.
How to Prep a Pumpkin for No-Carve Decorating
A little prep makes every project turn out better.
- Wipe down the outside with a damp cloth to remove dirt or wax residue.
- Dry it completely before painting, taping, or adding stickers. Moisture prevents proper adhesion.
- Set up a workspace with a plastic tablecloth or newspaper underneath, especially for paint or glitter projects.
- Test small areas first if you’re unsure how paint or adhesive will react to the pumpkin’s surface.
How to Keep No-Carve Decorations From Falling Off or Fading
You want your child’s hard work to last as long as possible.
- Let paint dry completely before moving or displaying the pumpkin, ideally for a full hour.
- Keep decorated pumpkins out of direct sun and rain, since both cause fading and peeling.
- Bring pumpkins inside overnight if possible, especially for glued or taped designs.
- Spray a light clear sealant over painted designs to help them resist smudging and moisture.
FAQs
Is no-carve decorating safe for toddlers?
Yes. No-carve methods involve no sharp tools, making them one of the safest Halloween activities for toddlers and young children.
Will paint or glue damage a real pumpkin?
No. Acrylic paint and craft glue sit on the surface and don’t damage the pumpkin underneath, though the pumpkin will still eventually soften naturally over time.
Can I decorate a fake pumpkin the same way?
Yes. Foam and plastic pumpkins work well with paint, tape, gems, and stickers, and the design typically lasts much longer than on a real pumpkin.
How long do no-carve decorations last?
Painted or taped designs usually last 1–2 weeks on a real pumpkin if kept indoors or shaded. Fake pumpkins can hold designs indefinitely.
What’s the best paint for pumpkins?
Washable acrylic craft paint works well. It’s affordable, dries quickly, and is easy to wipe off small hands and surfaces if needed.
Can babies or very young toddlers participate?
Yes, with supervision. Stick-on foam pieces and gem stickers are the easiest options for very young children, since there’s no paint or glue involved.
What if my child loses interest halfway through?
That’s completely normal. Simple projects like the stick-on face or washi tape pumpkin can be finished quickly, so there’s less pressure to complete something elaborate.
You don’t need a knife, a steady hand, or hours of free time to make Halloween special with your kids. Pick one of these ideas, gather what you already have, and let your child lead the way. The mess-free, worry-free version of pumpkin decorating might just become your new favorite tradition.

Jenny is a passionate writer specializing in home decor, design, and styling. With years of experience in transforming spaces, she shares expert tips on creating beautiful, functional homes. From interior design trends to DIY decor ideas, Jenny’s work helps homeowners craft spaces that reflect their unique style. Whether it’s a cozy living room, a modern kitchen, or a serene bedroom, her articles offer practical advice and inspiration to elevate any home.