Every October, I set a big cardboard box on the kitchen table, and my kids know exactly what it means: pumpkin night has arrived.
A few years back, my daughter cried after her older cousin carved a “scary” pumpkin with jagged teeth, and that’s when I realized something — not every pumpkin needs fangs.
We started experimenting with paint, googly eyes, and fabric scraps instead of knives, and honestly, our porch has never looked cuter.
If you’re looking for pumpkin ideas that are sweet, safe, and totally huggable, you’re exactly where you need to be.
My Top 3 Amazon Picks for This Project
- Craft Smart Acrylic Paint Set — a budget-friendly multi-color set that gives you everything you need for bright, opaque pumpkin designs without hunting for individual bottles.
- Pumpkin Masters Stencil Kit — pre-cut stencils take the guesswork out of symmetrical faces and shapes, which is a lifesaver if drawing freehand isn’t your thing.
- Fiskars Soft Grip Foam Carving Tools — these kid-safe tools let little hands help scoop and shape foam pumpkins without any risk of a real blade.
Painted Pastel Pumpkin Family
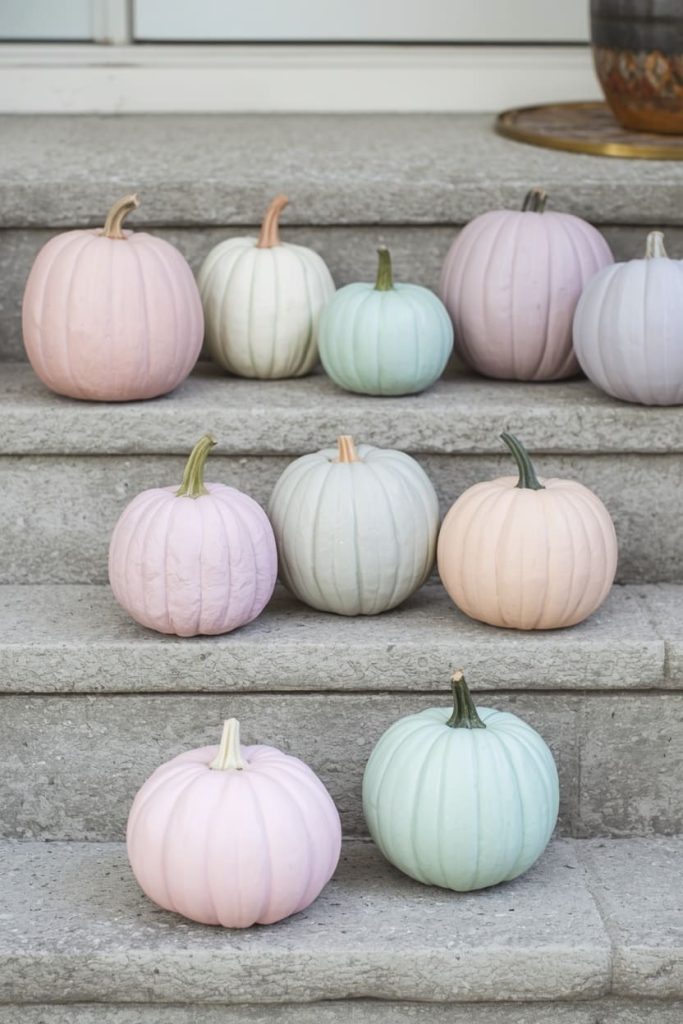
This one started as a happy accident when I ran out of orange paint and grabbed pastels instead — and it’s been our go-to ever since.
What you’ll need: A few pumpkins in different sizes, pastel acrylic paints (blush pink, sage green, cream, lavender), paintbrushes, and a paper plate for mixing.
- Wipe down each pumpkin so the surface is clean and dry.
- Assign one pastel color per pumpkin — this creates a “family” look when grouped together.
- Paint the entire pumpkin in one smooth coat, letting the stem stay natural for contrast.
- Let dry for about an hour, then add a second coat if needed for full coverage.
- Arrange the pumpkins by size on your porch steps like a little pastel family portrait.
Family tip: Let each child claim one pumpkin as “theirs” to paint — it turns a craft project into a keepsake.
Googly-Eyed No-Carve Monsters (The Friendly Kind)
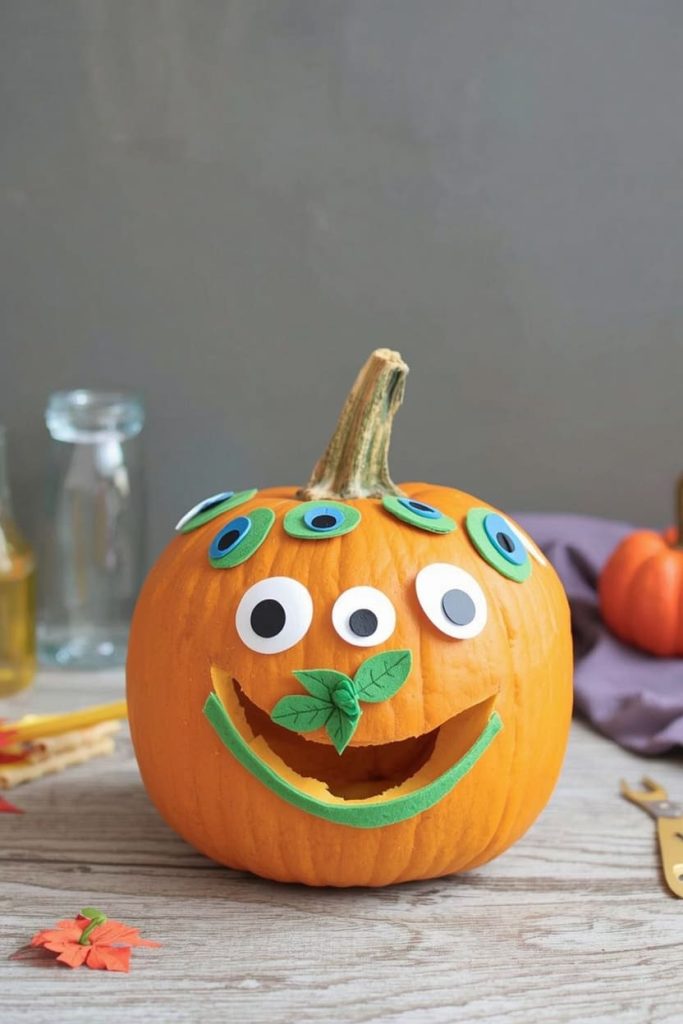
If your kids love monsters but you want to keep things sweet, this idea gives you the best of both worlds.
What you’ll need: Pumpkins, craft glue or hot glue (adult-assisted), an assortment of googly eyes in different sizes, and felt scraps for mouths and eyebrows.
- Choose a pumpkin shape that already has a fun, lumpy personality — those work best here.
- Cut simple mouth and eyebrow shapes from felt.
- Glue on googly eyes first, placing them slightly off-center for a silly expression.
- Add the felt mouth in a smile or surprised “O” shape.
- Finish with felt eyebrows to give your monster more personality.
Family tip: Let kids handle the eye placement — the more mismatched and wonky, the cuter the result.
Fabric-Wrapped Cottagecore Pumpkins
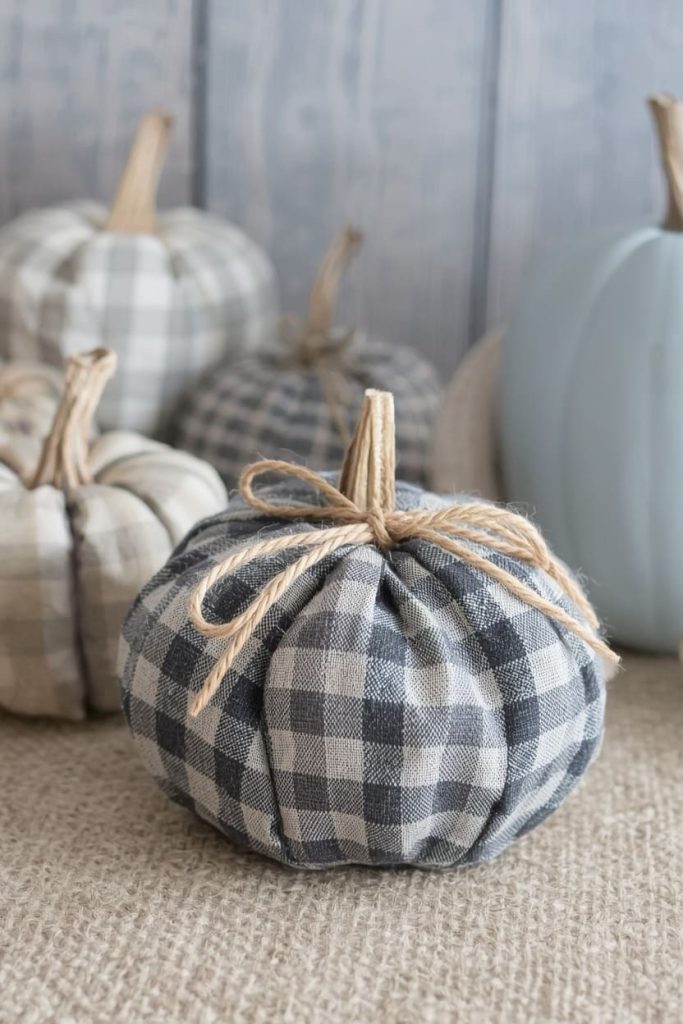
This idea came from a fall bedsheet I could no longer use, and now it’s become one of my favorite home-decor moments each season.
What you’ll need: Small to medium pumpkins, scraps of cotton or gingham fabric, twine, scissors, and hot glue.
- Cut fabric into squares large enough to loosely wrap around each pumpkin.
- Place the pumpkin in the center of the fabric square and gather the edges up around the stem.
- Secure the gathered fabric at the stem using a small dab of hot glue.
- Wrap twine around the gathered fabric near the stem and tie into a small bow.
- Trim any excess fabric so the wrap sits neatly.
Family tip: Let kids pick their own fabric patterns from a scrap bin — mixing prints actually makes the display look more charming.
Painted Pumpkin Patch Characters (Farm Animal Theme)
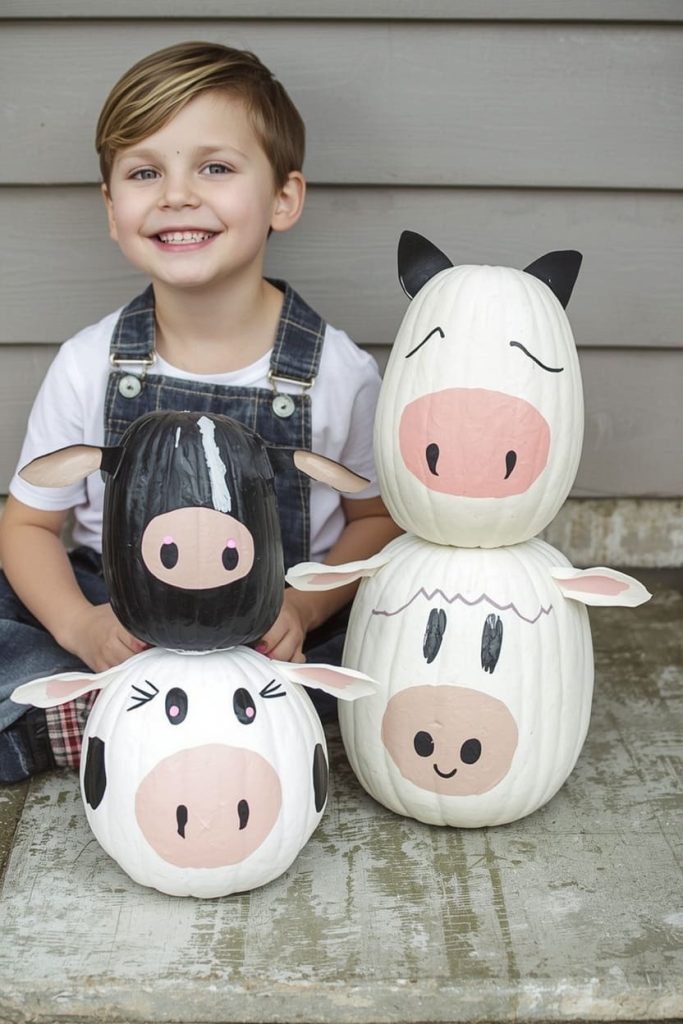
This is the idea that gets the most compliments when neighbors walk by, and it doubles as a fun animal-recognition activity for younger kids.
What you’ll need: Pumpkins in varying shapes, white and black acrylic paint, pink paint for details, and thin paintbrushes.
- Choose pumpkin shapes that resemble the animal you’re going for — round for a pig, taller for a cow.
- Base-coat the pumpkin in white if you’re doing a cow or sheep design.
- Add black paint patches for a cow, or curly wool texture dots for a sheep.
- Paint on simple facial features — dot eyes, a snout shape, and small ears using felt or paint.
- Let dry fully before displaying together as a mini pumpkin farm.
Family tip: Assign each child a different animal to paint, then line them up like a barnyard scene on your steps.
Nature-Foraged Pumpkin Crowns
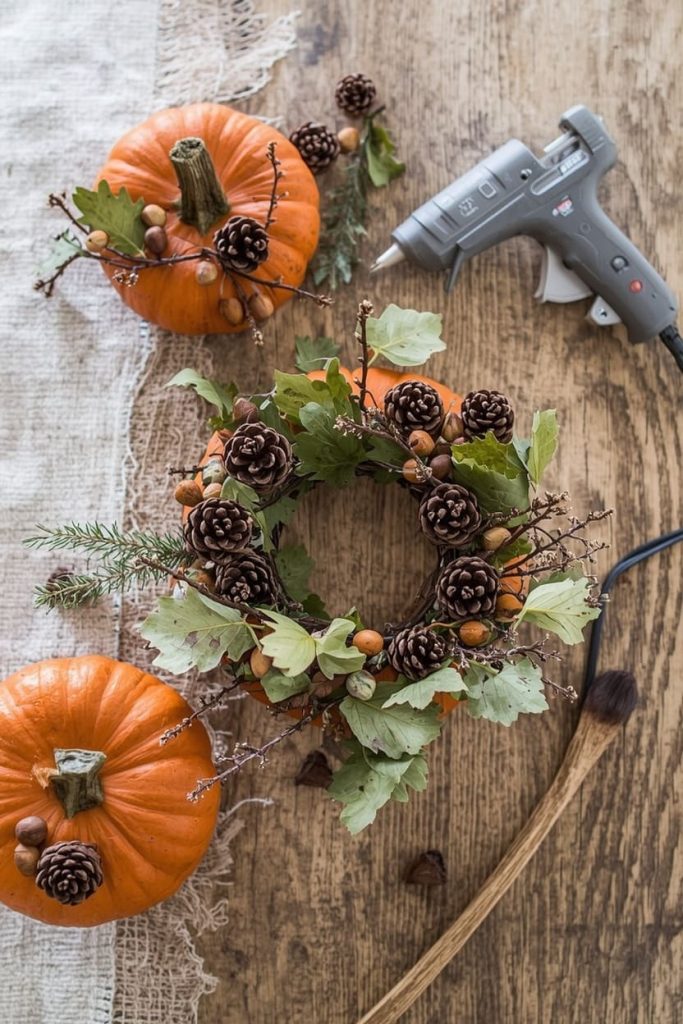
We stumbled onto this one during a nature walk when my son insisted on collecting “pumpkin jewelry,” and it turned into a genuinely beautiful centerpiece idea.
What you’ll need: Pumpkins, a hot glue gun, and foraged items like small pinecones, acorns, dried leaves, and twigs.
- Take a walk with your kids and collect small natural items that could sit nicely on top of a pumpkin.
- Arrange the items around the pumpkin’s stem in a loose, wreath-like pattern before gluing anything down.
- Once you’re happy with the layout, glue each piece in place one at a time.
- Add a few leaves tucked between the pinecones for fullness.
- Display these on a mantel or dining table for an easy centerpiece.
Family tip: Turn the foraging walk itself into part of the activity — it keeps younger kids engaged before the crafting even begins.
How to Keep Your No-Carve Pumpkins Looking Fresh Longer
Painted and decorated pumpkins actually last longer than carved ones since you’re not exposing the inside to air. Keep them out of direct sunlight and rain when possible, since moisture speeds up softening. A thin coat of clear sealant spray over painted designs can also help protect the color and add a few extra weeks of display life.
Making Pumpkin Decorating an Actual Family Tradition
The projects matter less than the ritual you build around them. Try setting a specific day each year — like the first Saturday of October — as your official “pumpkin day.” Play fall music, set out cider or hot chocolate, and let each family member choose their own project from this list so everyone has ownership over their creation.
Choosing the Right Pumpkin for Each Idea
Not every pumpkin shape works for every project, so it helps to shop with your idea in mind. Round, symmetrical pumpkins work best for painted faces and stencils, while tall or lumpy pumpkins are perfect for animal characters and monsters. Smaller pumpkins are ideal for fabric wrapping and foraged crowns since they’re easier to handle and display in groups.
Frequently Asked Questions
How do I keep a painted pumpkin from rotting? Painted pumpkins last longer than carved ones since the inside stays sealed, but you can extend their life further by keeping them dry, out of direct sun, and off damp ground.
What’s the easiest no-carve pumpkin idea for toddlers? The googly-eyed monster pumpkin is the easiest for toddlers since it only requires gluing pre-made pieces, with no painting precision required.
Can I reuse my pumpkins for these crafts every year? Real pumpkins are best for one season, but if you want a reusable option, foam pumpkins work with every idea on this list and can be stored and repainted annually.
How far in advance can I decorate my pumpkins before Halloween? Painted and fabric-wrapped pumpkins can be done up to 3–4 weeks ahead, while foraged or fresh-material designs are best done closer to the day since natural items can dry out or shift.
What paint works best for pumpkin projects? Acrylic craft paint is the best choice since it’s affordable, dries quickly, and adheres well to pumpkin skin without needing a primer.

Jenny is a passionate writer specializing in home decor, design, and styling. With years of experience in transforming spaces, she shares expert tips on creating beautiful, functional homes. From interior design trends to DIY decor ideas, Jenny’s work helps homeowners craft spaces that reflect their unique style. Whether it’s a cozy living room, a modern kitchen, or a serene bedroom, her articles offer practical advice and inspiration to elevate any home.