Last October, I stood in my kitchen at 9 PM with a pumpkin, a butter knife, and zero plan.
My daughter wanted a “spooky pumpkin” for the porch. I wanted to go to bed. Carving felt like a whole production. So I grabbed some paint instead.
Fifteen minutes later, we had a glittery ghost pumpkin drying on the counter. No mess. No knife. No stress.
That night changed how I do Halloween decor. You don’t need to carve to make something cute. You just need the right ideas.
Here are five that actually work.
Top 3 Products to Make Pumpkin Decorating Easier
- Crayola Pumpkin Decorating Kit – This kit comes with markers, gems, and stencils, so kids can decorate safely without any sharp tools.
- FolkArt Acrylic Paint Multi-Pack – These paints are affordable, dry fast, and give you bold, opaque color on any pumpkin surface.
- Martha Stewart Pumpkin Carving Tool Alternative Kit (No-Carve Push-In Pieces) – These push-in foam and plastic pieces let you build a face instantly without cutting anything.
Painted Ghost Pumpkin (Perfect for Beginners)
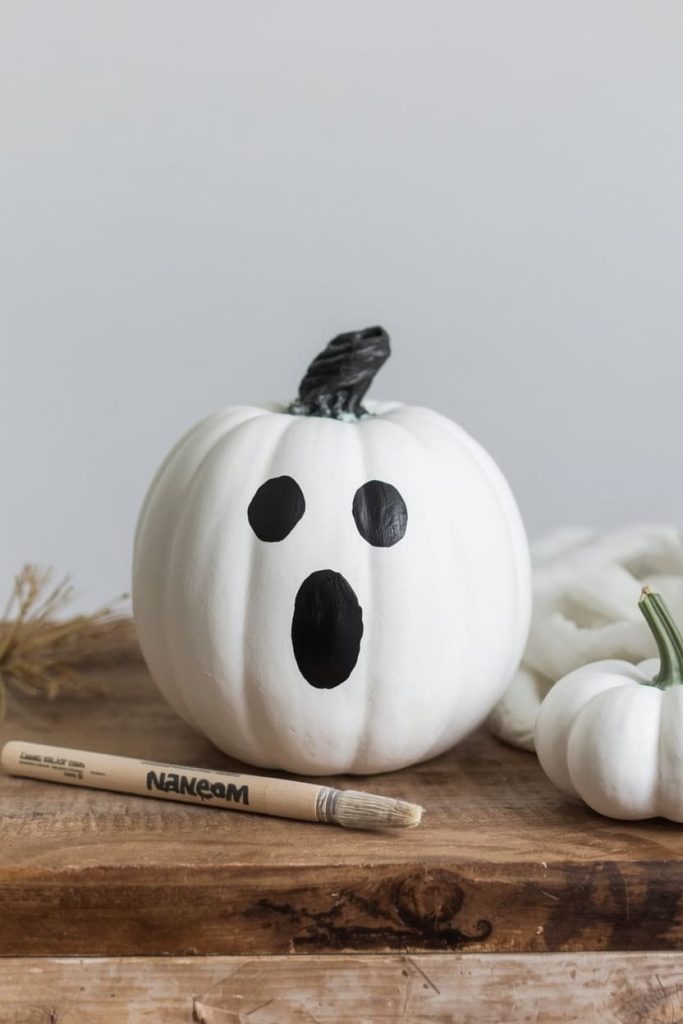
This one’s my go-to when I have zero time. It looks elegant, and it takes almost no skill.
What you’ll need:
- White acrylic paint
- A foam brush
- Black paint marker
- A pumpkin (real or fake)
Steps:
- Wipe your pumpkin clean and dry.
- Paint the entire pumpkin white using two thin coats. Let it dry between coats.
- Once fully dry, use the black paint marker to draw a simple ghost face — two dots and an oval mouth.
- Let it set for an hour before moving it outside.
Time: About 30 minutes, plus drying time.
Kid-friendly tip: Let your kids do the white base coat with a sponge. It’s forgiving, so mistakes just look “textured.”
Glam Sequin and Glitter Pumpkin
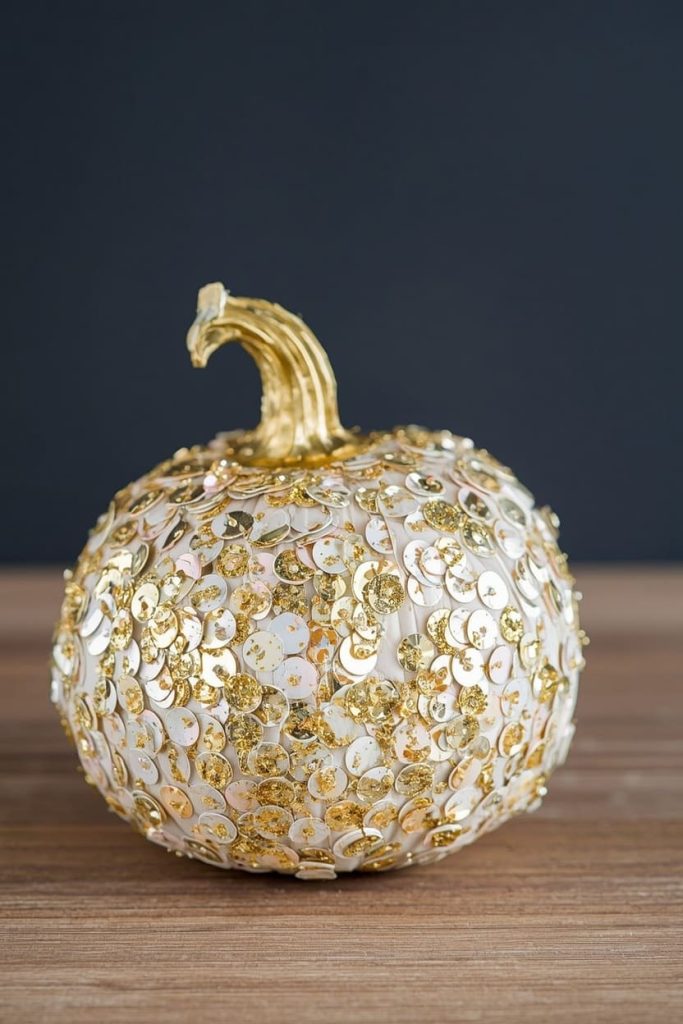
If you want something that looks fancy but took you ten minutes, this is it.
What you’ll need:
- Craft glue or Mod Podge
- Fine glitter or sequins
- A foam brush
- A pumpkin
Steps:
- Brush a thin layer of glue over one section of the pumpkin at a time.
- Sprinkle glitter or press sequins onto the wet glue.
- Shake off excess over a trash bag or newspaper.
- Repeat until you’ve covered the areas you want.
- Let it dry for at least an hour before handling.
Time: 15–20 minutes of actual work.
Kid-friendly tip: Do this one outside or over a big tray. Glitter gets everywhere, and your future self will thank you.
Painted Watercolor-Style Pumpkin
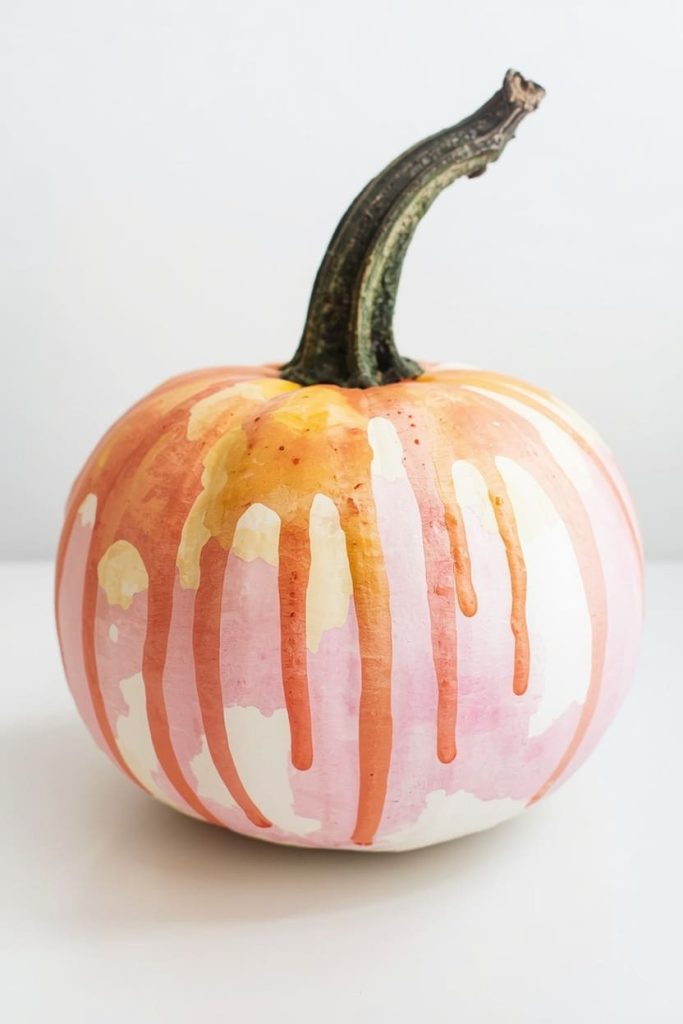
This one gives you a soft, artsy look without any precision required.
What you’ll need:
- Acrylic paint in 2–3 fall colors
- A spray bottle with water
- A paper towel
Steps:
- Dot small amounts of paint randomly across the pumpkin.
- Spritz lightly with water so the colors start to blend and drip.
- Dab gently with a paper towel to soften any harsh lines.
- Let it air dry fully before displaying.
Time: 20 minutes.
Kid-friendly tip: Kids love the spray bottle step. Let them control the water so they feel like they’re “painting” too.
Stick-On Face Pumpkin (No Mess, No Paint)
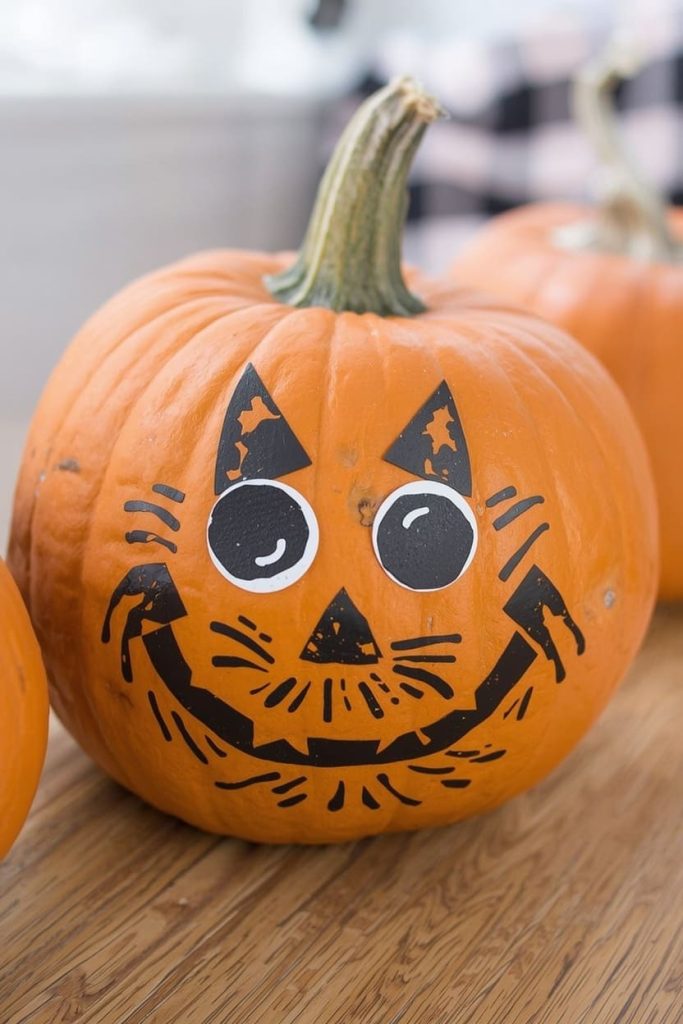
Some days you don’t even want paint drying time. This idea is instant gratification.
What you’ll need:
- Foam stick-on eyes, mouths, or a pre-made kit
- A pumpkin
Steps:
- Lay out your pieces on a table first to plan the face.
- Press each piece firmly onto the pumpkin.
- Adjust as needed — nothing is permanent, so you can move pieces around.
Time: 5–10 minutes.
Kid-friendly tip: This is the easiest one for toddlers. There’s no paint, no glue, and no waiting.
Washi Tape Pumpkin (Modern and Mess-Free)
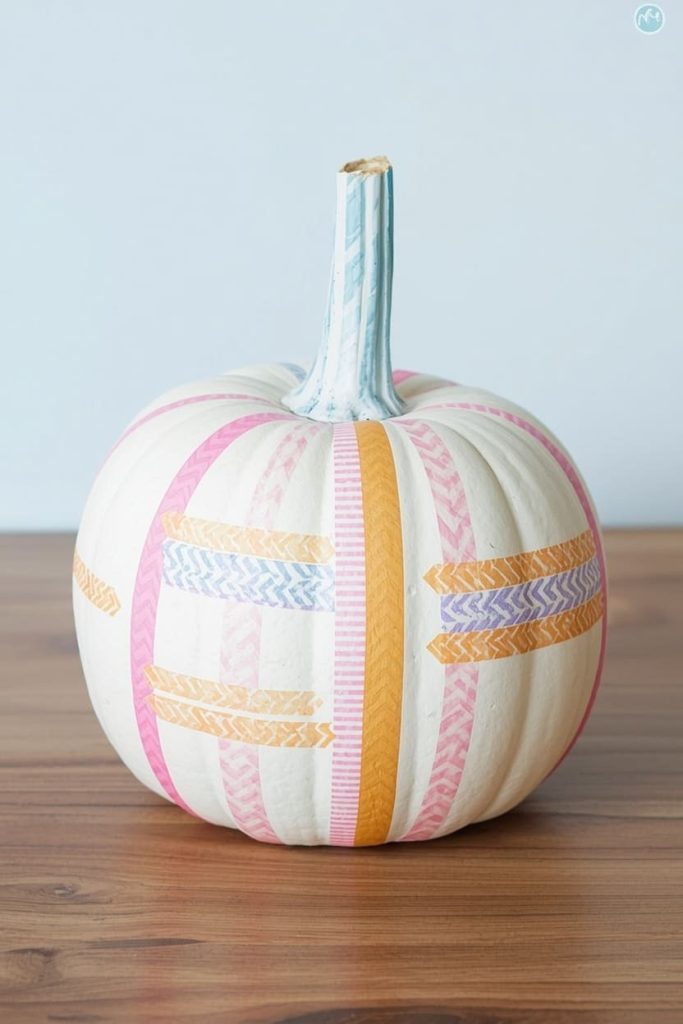
This idea is great if you want something that looks intentional and modern, fast.
What you’ll need:
- A few rolls of washi tape in coordinating colors
- Scissors
- A pumpkin
Steps:
- Cut strips of washi tape in varying lengths.
- Apply them vertically, horizontally, or in a chevron pattern across the pumpkin.
- Trim any overhang at the top and bottom with scissors.
Time: 15 minutes.
Kid-friendly tip: Let kids pick their own tape colors and pattern. There’s no wrong way to do this one.
Tips for Choosing the Right Pumpkin for No-Carve Decorating
Not every pumpkin works the same for these projects. Here’s what to look for:
- Smooth surface: Pumpkins with fewer ridges hold paint and tape better.
- Flat-ish front: A flatter side makes it easier to draw or stick on faces evenly.
- Firm skin: Avoid soft spots. They usually mean the pumpkin is already starting to rot.
- Consider fake pumpkins: Foam pumpkins last for years and are perfect if you want to reuse your design next season.
How to Make Your Pumpkin Decorations Last Longer
You put in the work, so you want it to last through Halloween night at least. Here’s how:
- Keep real pumpkins out of direct sun. Heat speeds up rotting.
- Bring pumpkins inside at night if possible, especially in humid climates.
- Spray a light coat of clear sealant over painted designs to protect them from moisture.
- Use fake pumpkins for anything glitter or sequin-based. They won’t rot, and your glam design stays intact for years.
Safety Tips When Decorating With Kids
Decorating with kids is half the fun, but a few precautions go a long way:
- Skip any tools with sharp edges. Stick to paint, tape, and stick-on pieces.
- Use washable, non-toxic paint made for kids’ crafts.
- Supervise glitter and small embellishments around toddlers, since they can be a choking hazard.
- Cover your workspace with a plastic tablecloth or newspaper before you start.
FAQs
How do I keep painted pumpkins from rotting?
Keep them dry, out of direct sun, and off damp ground. A light layer of clear sealant also helps slow down decay.
What’s the best paint for pumpkins?
Acrylic craft paint works best. It’s affordable, dries quickly, and gives solid coverage on the bumpy pumpkin surface.
Can I decorate a fake pumpkin the same way?
Yes. Foam and plastic pumpkins take paint, glue, and tape just as well as real ones, and they last much longer.
Do I need to prime the pumpkin before painting?
No priming is needed for real pumpkins. Just make sure the surface is clean and dry before you start.
How long do no-carve pumpkin decorations last?
Painted or taped designs on a real pumpkin usually last 1–2 weeks if kept indoors or shaded. Fake pumpkins last indefinitely.
Are these ideas okay for young toddlers?
Yes, especially the stick-on face and washi tape ideas. They involve no paint drying time and no sharp tools.
What if my pumpkin already has a soft spot?
Skip painting over it. The paint won’t stick well, and it usually means the pumpkin will rot faster regardless.
You don’t need carving skills or hours of free time to make something you’re proud to put on your porch. Pick one idea, grab what you already have at home, and give yourself 15–20 minutes. That’s really all it takes.

Jenny is a passionate writer specializing in home decor, design, and styling. With years of experience in transforming spaces, she shares expert tips on creating beautiful, functional homes. From interior design trends to DIY decor ideas, Jenny’s work helps homeowners craft spaces that reflect their unique style. Whether it’s a cozy living room, a modern kitchen, or a serene bedroom, her articles offer practical advice and inspiration to elevate any home.