I’m thrilled to share a guide that’ll transform your windows into a holiday masterpiece. Whether you’re aiming to impress the neighbors or create a cozy vibe indoors, Christmas window decorations are a fun, creative way to spread cheer.

I’ve put together 15 ideas that range from simple to show-stopping, all designed to spark joy and fit any budget or skill level. Let’s dive in and make your windows the talk of the season!
Table of Contents
- Preparation and General Tips
- The 15 Christmas Window Decoration Ideas
- 1. Fairy Light Curtains
- 2. Paper Snowflakes
- 3. Window Wreaths
- 4. Garland Drapes
- 5. Festive Window Clings and Decals
- 6. LED Candle Displays on Sills
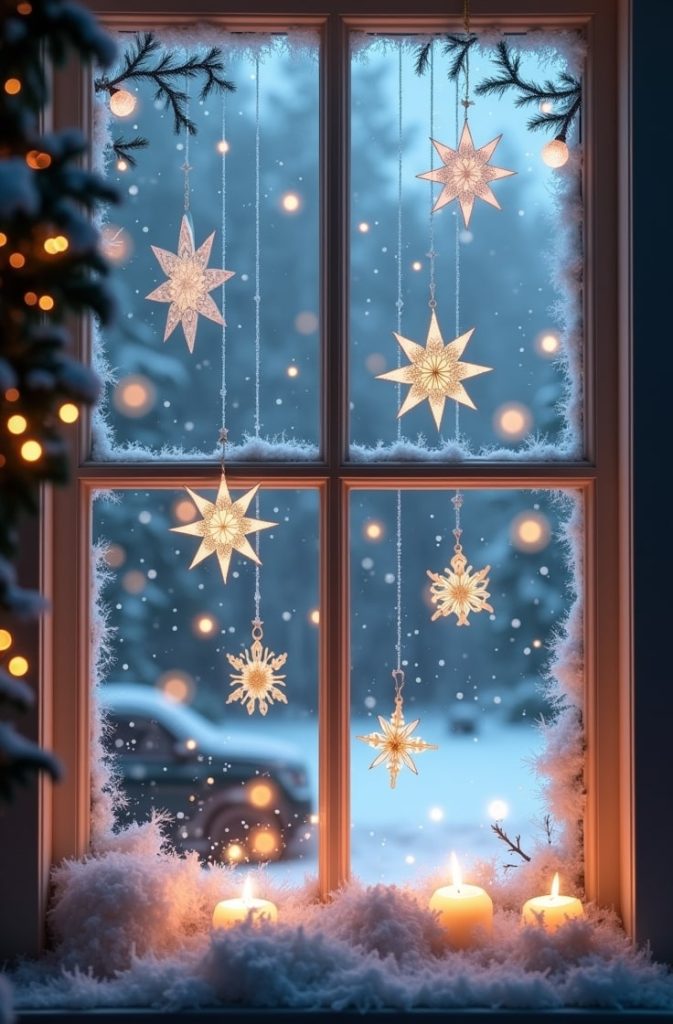
- 7. Hanging Ornaments
- 8. Christmas Tree Silhouettes
- 9. Character Cutouts (e.g., Santa, Elves)
- 10. Faux Frosted Glass
- 11. Ribbon and Bow Accents
- 12. Nativity Scene Silhouettes
- 13. Hanging Stockings
- 14. Pine Cone and Branch Clusters
- 15. DIY Advent Calendar Windows
- Advanced Customization and Combinations
- Conclusion
Preparation and General Tips
Before we jump into the decorations, let’s set you up for success. You don’t need a fancy toolkit or a big budget to make your windows shine. Here’s what you’ll need to know.
Tools and Materials Basics
Most of these projects use items you likely have at home or can grab affordably. Think scissors, tape, glue guns, and suction cup hooks. Dollar stores are great for basics like ribbons and paper. For specialty items like LED lights or vinyl clings, check online retailers like Amazon or craft stores like Michaels. I’ll list specific materials for each idea, so you’re never left guessing.
Safety Guidelines
Safety comes first! Always use LED lights to avoid fire risks—incandescent bulbs can get too hot. If you have kids or pets, secure decorations to prevent them from pulling things down. Use non-damaging adhesives like command strips or suction hooks to protect your windows. For outdoor-facing decorations, ensure they’re weather-resistant to handle snow or rain.
Design Principles
Want your windows to pop? Stick to a color scheme—classic red, green, and gold for traditional vibes, or icy blues and silvers for a wintery feel. Layer elements like lights and garlands for depth. Balance symmetry by placing larger items evenly, but don’t be afraid to add a quirky touch, like an off-center bow. Your windows should feel festive, not cluttered.
Budget Breakdown
You can make most of these decorations for under $10 using household items or dollar store finds. Some, like LED light setups, might run $10–50 if you’re buying new. A few fancier options, like pre-lit wreaths, could hit $50 or more, but I’ll offer cheaper alternatives for each. You’ll always know what you’re spending.
Installation and Removal Best Practices
Install decorations with temporary fixes like suction hooks or removable tape to avoid damage. Clean windows before applying clings or sprays to ensure they stick. When the season’s over, remove adhesives gently with warm soapy water to keep your glass spotless. Store reusable items like lights or wreaths in labeled bins for next year.
Thematic Adaptations
Your decorations can match your style. Love a traditional Victorian look? Go for evergreen wreaths and warm lights. Prefer modern minimalism? Try sleek LED outlines or monochromatic decals. For kid-friendly fun, add playful characters like Santa or snowmen. I’ll show you how to tweak each idea to fit your vibe.
The 15 Christmas Window Decoration Ideas
Now, the fun part! Here are 15 decorations, each with a description, materials, steps, variations, tips, and solutions for potential challenges. Let’s make your windows sparkle.
1. Fairy Light Curtains
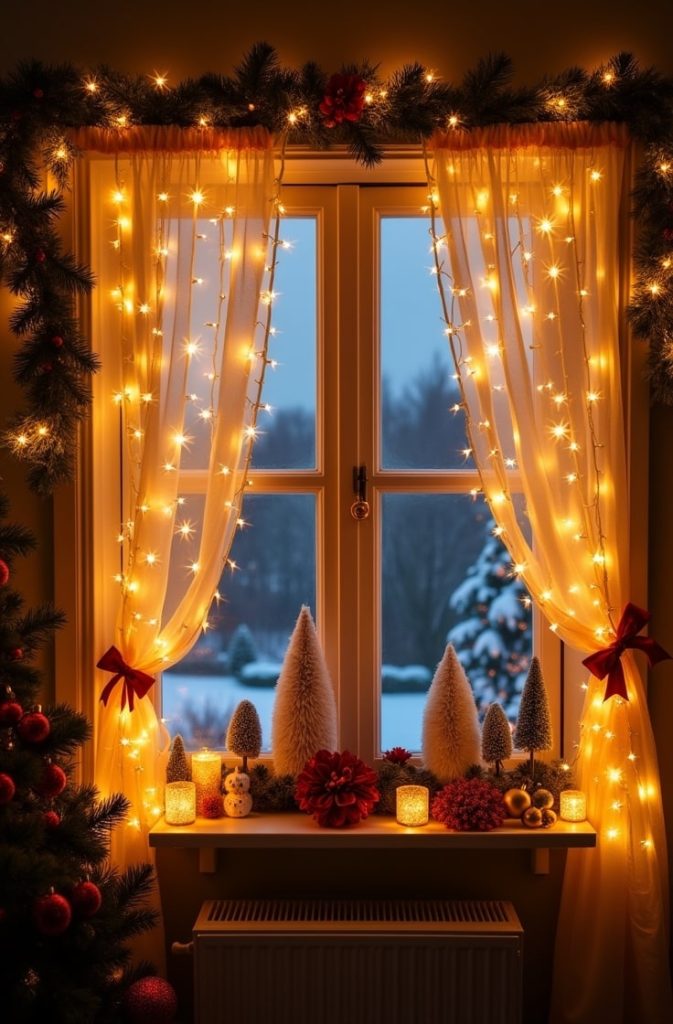
Description: Imagine a cascade of twinkling lights draped across your window like a starry night. Fairy light curtains create a warm, glowing backdrop that looks stunning from inside and out.
Materials: LED fairy lights (10–20 feet), suction cup hooks, extension cord (optional).
Step-by-Step:
- Measure your window’s width to determine how many light strands you need.
- Attach suction cup hooks along the top window frame, spacing them evenly.
- Drape fairy lights vertically from each hook, letting them hang naturally.
- Plug into an outlet or use an extension cord if needed.
- Adjust strands for even spacing and turn on the lights.
Variations: Use warm white for a cozy feel or colored lights for a playful vibe. Add a twinkling effect with a controller for extra magic.
Tips: Set a timer to save energy and turn lights on/off automatically. Pair with sheer curtains to diffuse the glow. Test lights before hanging to avoid duds.
Challenges: Tangled wires can be a headache. Untangle them before starting and store them loosely coiled. If cords are visible, tuck them behind curtains or use cord clips.
2. Paper Snowflakes
Description: Delicate paper snowflakes floating across your window mimic a gentle snowfall. They’re affordable, customizable, and perfect for all ages.
Materials: White paper (printer or craft), scissors, fishing line, tape.
Step-by-Step:
- Cut paper into squares (6×6 inches works well).
- Fold each square diagonally, then fold again into a smaller triangle.
- Cut small shapes along edges to create unique patterns.
- Unfold carefully to reveal the snowflake.
- Tie fishing line to each snowflake and tape to the top window frame.
Variations: Add glitter for sparkle or use colored paper for a bold twist. Create 3D snowflakes by layering two cutouts and gluing them together.
Tips: Download free snowflake templates online for easy patterns. Hang in clusters for a dramatic effect. Use double-sided tape for secure placement.
Challenges: Paper can tear easily. For durability, use cardstock or laminate your snowflakes. If they curl, press them flat under a book before hanging.
3. Window Wreaths
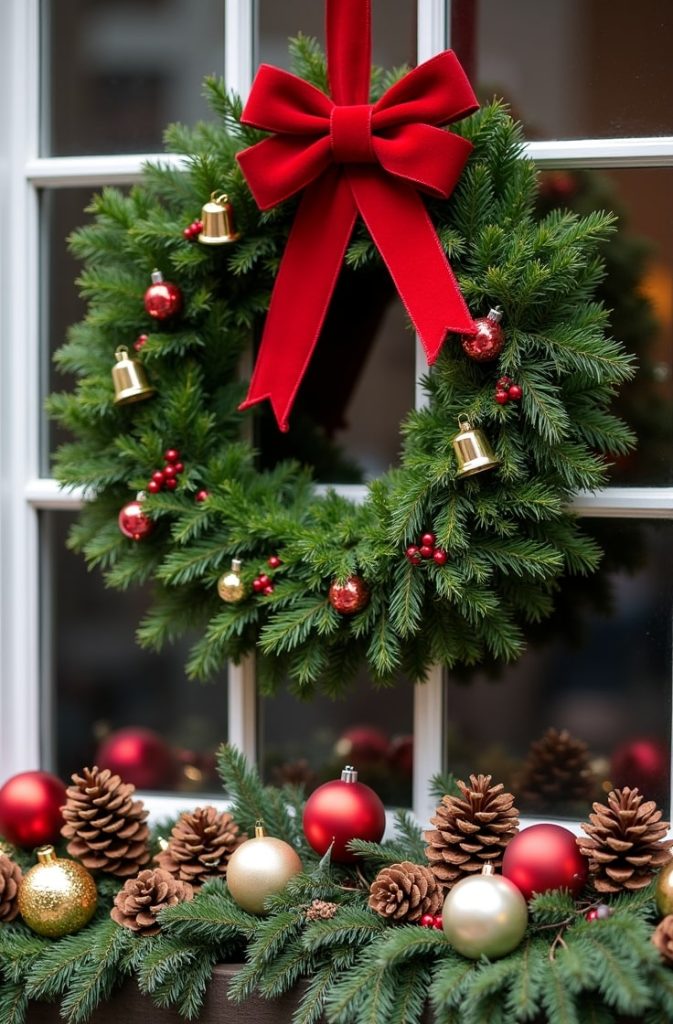
Description: A classic wreath hung in your window screams holiday cheer. It’s a focal point that works for any style, from rustic to elegant.
Materials: Pre-made wreath (faux or real evergreen), ribbon, suction cup hook, ornaments (optional).
Step-by-Step:
- Choose a wreath sized for your window (12–18 inches for most).
- Tie a ribbon loop around the wreath for hanging.
- Attach a suction cup hook to the window’s center.
- Hang the wreath and adjust for balance.
Variations: Go traditional with red berries and pinecones or modern with metallic spray-painted wreaths. Add mini ornaments for extra flair.
Tips: Add battery-operated lights for a nighttime glow. Ensure the wreath’s size matches your window’s proportions. Secure ribbon tightly to avoid slipping.
Challenges: Heavy wreaths can stress glass. Opt for lightweight foam or plastic bases. If suction cups fail, use a stronger hook rated for the weight.
4. Garland Drapes
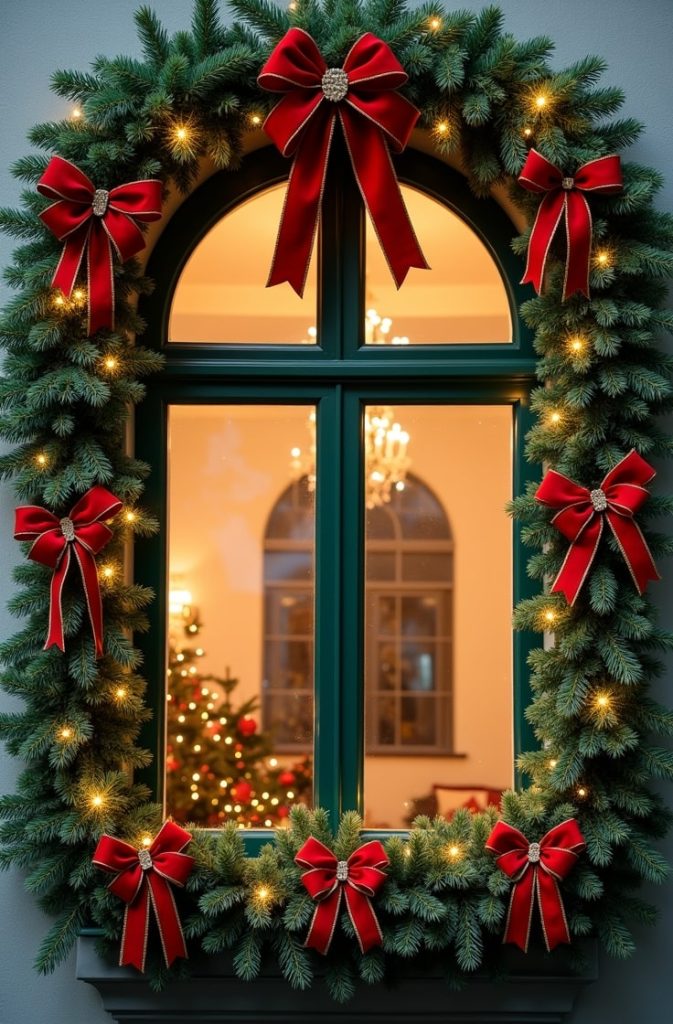
Description: Swags of garland draped across your window’s top add lush, festive texture. They’re versatile and easy to customize.
Materials: Faux garland (6–10 feet), command hooks, ribbon or bows.
Step-by-Step:
- Measure your window’s width to cut the garland to size.
- Attach command hooks at both ends and the center of the top frame.
- Drape the garland across, letting it swag naturally.
- Fluff branches and add bows for color.
Variations: Choose pine with pinecones for a natural look or beaded garland for elegance. Mix in tinsel for extra sparkle.
Tips: Layer with fairy lights for a glowing effect. Secure ends tightly to prevent sagging. Use wire cutters for precise trimming.
Challenges: Garlands can collect dust. Shake them out before hanging or choose washable materials. If hooks fail, double up for extra hold.
5. Festive Window Clings and Decals
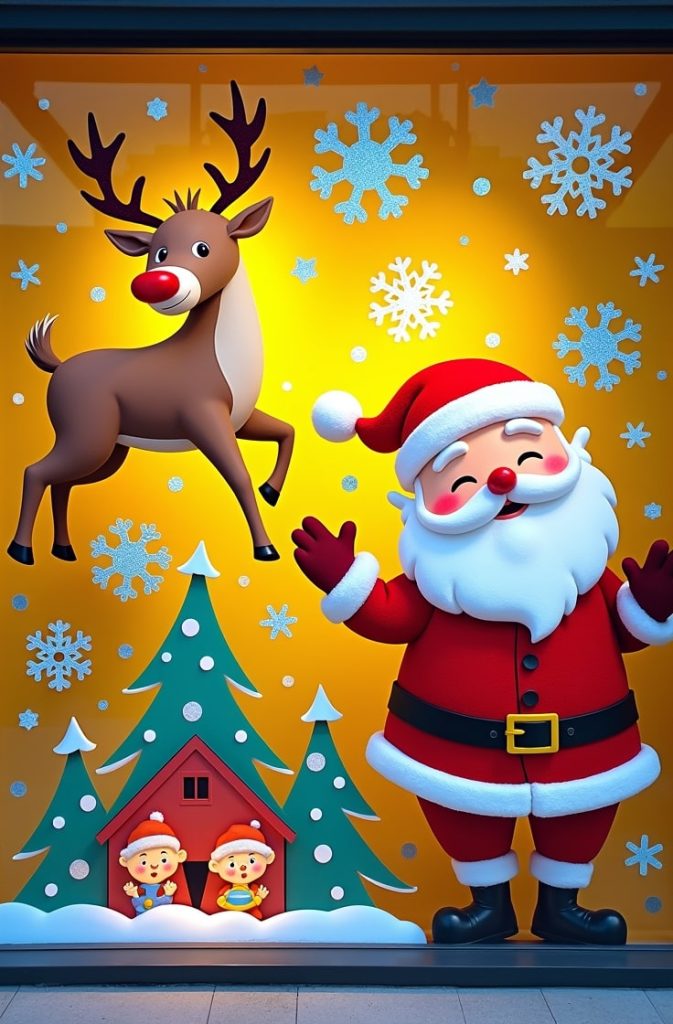
Description: Reusable clings or decals with holiday scenes stick right to your glass. They’re quick, colorful, and kid-friendly.
Materials: Store-bought clings or DIY vinyl sheets, scissors.
Step-by-Step:
- Clean your window with glass cleaner for a smooth surface.
- Peel clings from their backing.
- Press onto the glass, smoothing out bubbles.
- Arrange to create a scene, like Santa’s sleigh or snowflakes.
Variations: Pick Santa and reindeer for fun or abstract snow patterns for simplicity. Create custom decals with a vinyl cutter if you’re crafty.
Tips: Mix large and small clings for a storytelling effect. Remove slowly to avoid tearing. Store flat for reuse next year.
Challenges: Bubbles can form under clings. Smooth them out with a credit card. If clings won’t stick, ensure the glass is dry and clean.
6. LED Candle Displays on Sills
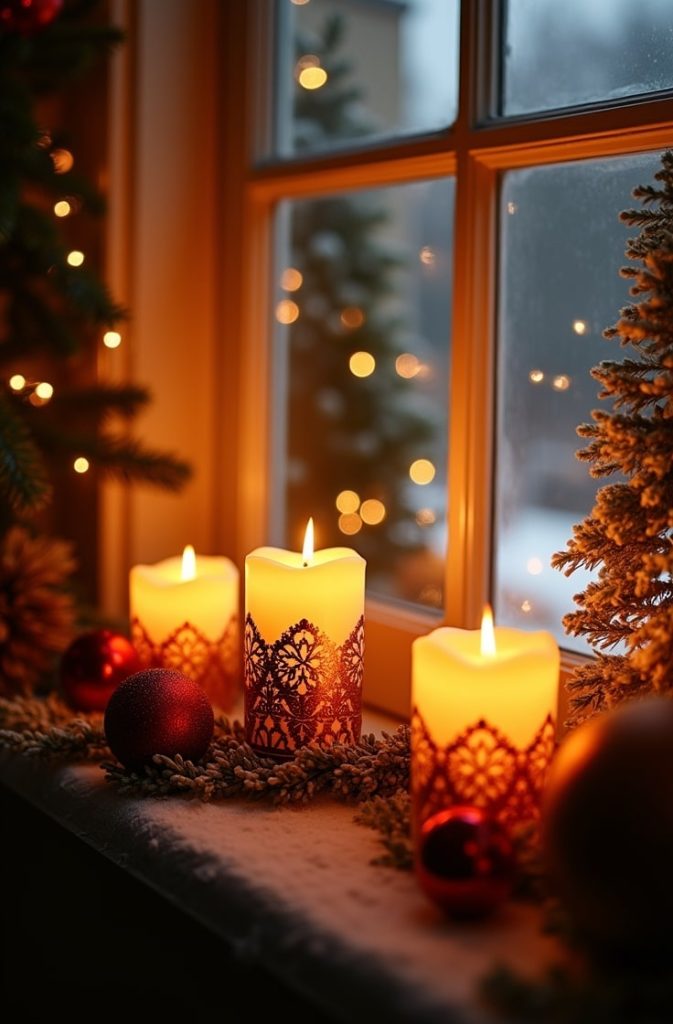
Description: Flameless candles on your window sill create a cozy, welcoming glow. They’re safe and elegant for any home.
Materials: Battery-operated LED candles, holders (optional), timer.
Step-by-Step:
- Choose candles (3–5 for most sills).
- Place in holders or directly on the sill.
- Arrange in odd numbers for visual appeal.
- Set timers to light up at dusk.
Variations: Use scented pillar candles for ambiance or tapered ones for a vintage look. Vary heights for interest.
Tips: Add a small mirror behind candles to reflect light. Use remote-controlled candles for convenience. Group tightly for impact.
Challenges: Batteries can die quickly. Keep extras on hand or use rechargeable ones. If candles tip, secure with museum putty.
7. Hanging Ornaments

Description: Colorful ornaments suspended at different heights add a playful, festive touch. They sway gently for a dynamic look.
Materials: Shatterproof ornaments, ribbon, tension rod.
Step-by-Step:
- Fit a tension rod across the top of your window frame.
- Tie ribbons of varying lengths to ornaments.
- Hang ornaments from the rod, spacing them evenly.
- Adjust heights for a cascading effect.
Variations: Use plastic ornaments for safety or glass for elegance. Match colors to your theme or mix for eclectic charm.
Tips: Use fishing line for an “invisible” hang. Add small bells for a jingling sound. Test the rod’s strength before loading.
Challenges: Ornaments can swing in drafts. Add small weights to ribbons or secure the rod tightly to prevent movement.
8. Christmas Tree Silhouettes
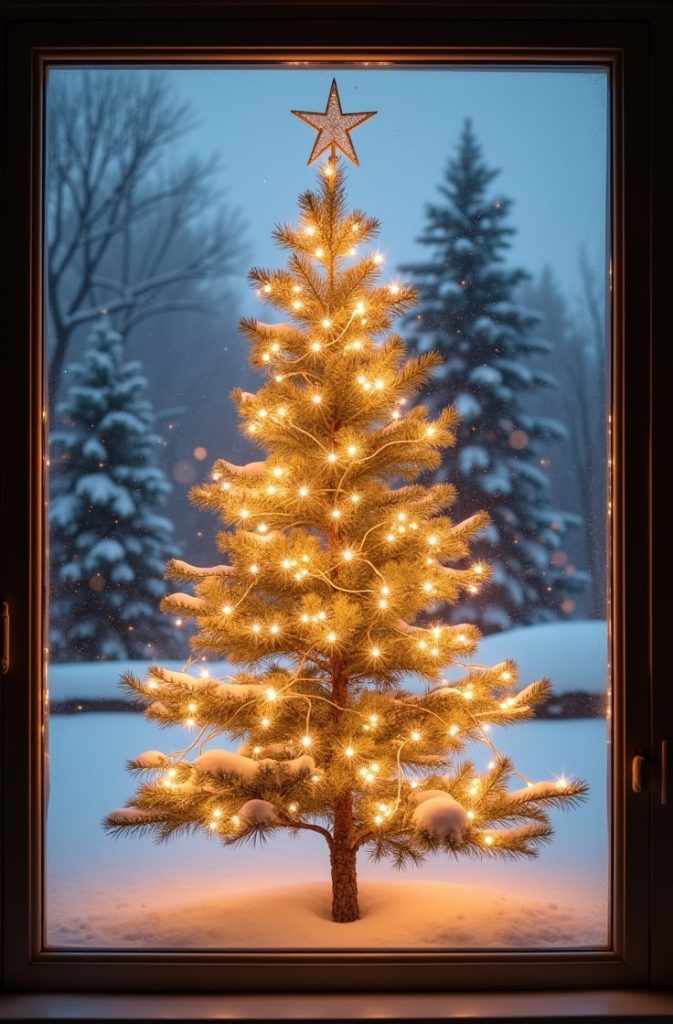
Description: A glowing tree outline on your window is a bold, iconic statement. It’s simple but striking.
Materials: String lights or cardboard, green paint, tape.
Step-by-Step:
- Sketch a tree shape on cardboard or plan light placement.
- For lights, tape or hook them into a triangle shape on the glass.
- For cardboard, cut out the tree, paint it green, and tape to the window.
- Add a star topper (light or cutout).
Variations: Use wire for a minimalist outline or add “ornaments” with colored lights. Create a full foliage look with layered cardboard.
Tips: Trace a tree template for accuracy. Backlight cardboard for a glowing effect. Use removable tape for easy cleanup.
Challenges: Scaling can be tricky. Measure your window to ensure the tree fits. If lights slip, use extra tape or hooks.
9. Character Cutouts (e.g., Santa, Elves)

Description: Whimsical figures like Santa or elves bring joy and storytelling to your windows. Kids love them!
Materials: Cardstock, markers, double-sided tape, scissors.
Step-by-Step:
- Draw or print character shapes (Santa, elves, reindeer).
- Color with markers or paint for vibrancy.
- Cut out carefully along the edges.
- Attach to the window with double-sided tape.
Variations: Go cartoon-style for fun or realistic for tradition. Add props like gift sacks or candy canes.
Tips: Position for street view to delight passersby. Laminate for reuse. Use bold colors for visibility.
Challenges: Colors can fade in sunlight. Use UV-resistant markers or place on indoor-facing glass. If tape fails, try stronger adhesive strips.
10. Faux Frosted Glass
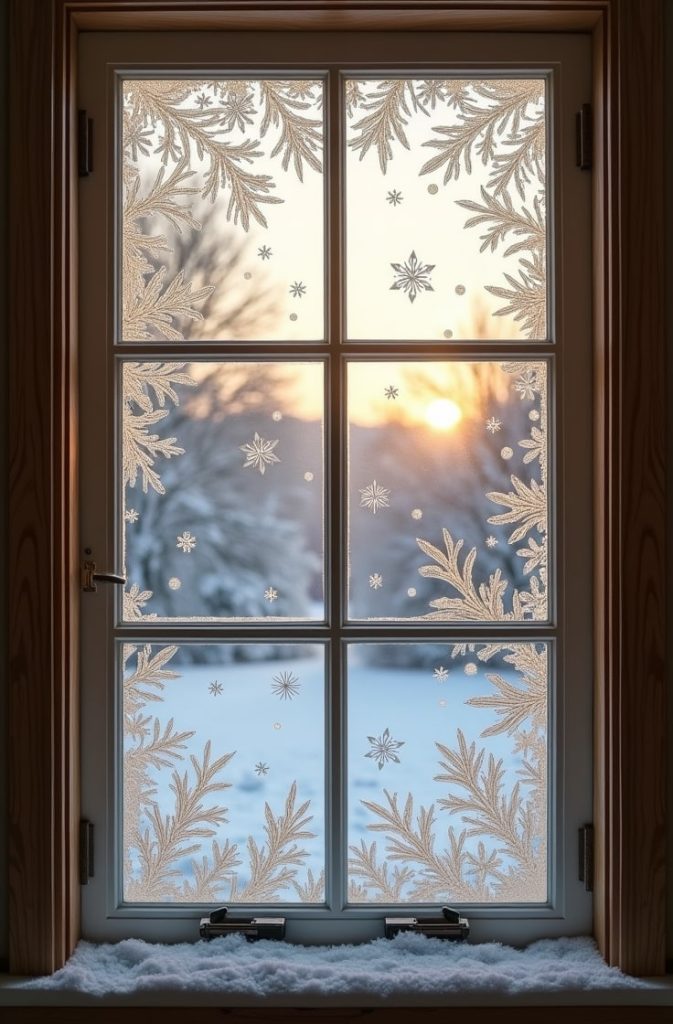
Description: A snowy, frosted effect on your glass creates a winter wonderland vibe. It’s easy and removable.
Materials: Frosting spray (e.g., Rust-Oleum), stencils (optional).
Step-by-Step:
- Clean your window thoroughly.
- Mask off areas you don’t want sprayed with painter’s tape.
- Apply frosting spray in thin, even coats.
- Use stencils for patterns like stars or snowflakes if desired.
- Let dry and remove tape.
Variations: Frost the entire window for privacy or use stencils for delicate designs. Add glitter spray for sparkle.
Tips: Test spray on a small area first. Work in a well-ventilated space. Wipe off with soap and water when done.
Challenges: Overspray can happen. Cover nearby surfaces and apply lightly. If spray clumps, smooth with a damp cloth before it dries.
11. Ribbon and Bow Accents

Description: Big, bold bows add a touch of elegance to your windows. They’re quick and versatile.
Materials: Wide ribbon (2–3 inches), wire for shaping, suction hooks.
Step-by-Step:
- Cut ribbon to desired length (2–3 feet per bow).
- Form a bow, using wire to hold its shape.
- Attach to window corners or sills with suction hooks.
- Fluff loops for fullness.
Variations: Use velvet ribbon for luxury or burlap for a rustic feel. Add small bells for a festive touch.
Tips: Coordinate ribbon colors with your curtains. Pre-made bows save time. Secure tightly to avoid slipping.
Challenges: Bows can untie. Use wire-edged ribbon or hot glue for stability. If hooks fail, switch to command strips.
12. Nativity Scene Silhouettes
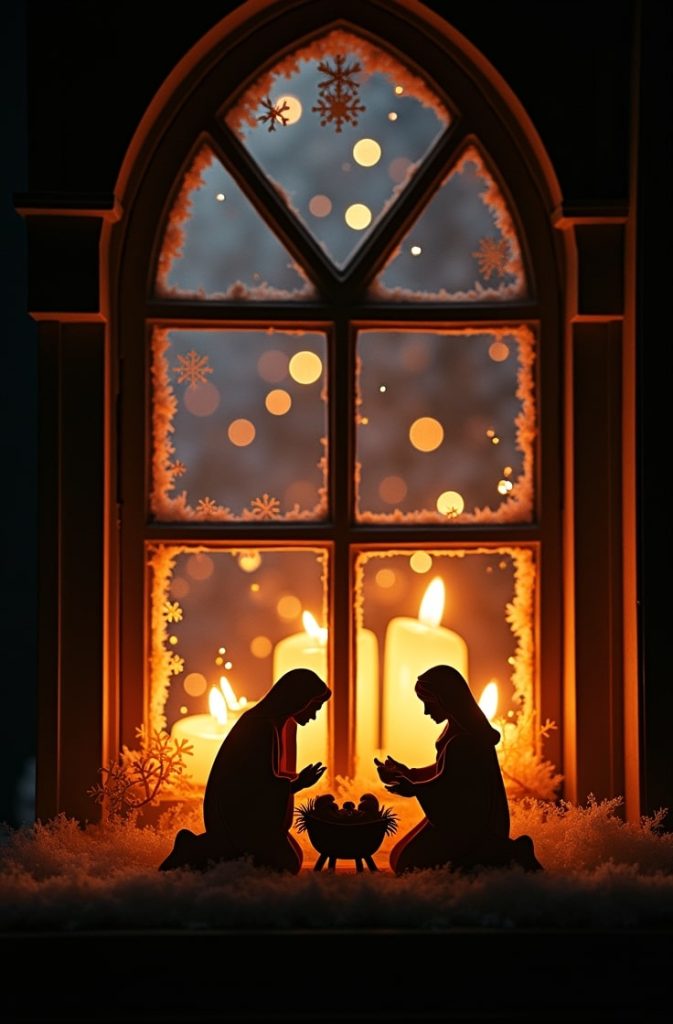
Description: A serene nativity scene in black silhouettes honors the season’s meaning. It’s perfect for traditional homes.
Materials: Black cardstock, scissors, LED strip or candles for backlighting.
Step-by-Step:
- Draw or print nativity figures (Mary, Joseph, baby Jesus).
- Cut out shapes carefully.
- Tape to the window or place on the sill.
- Add LED strips or candles behind for a glowing silhouette.
Variations: Keep it simple with a manger or add animals and stars for detail. Use white cardstock for a modern twist.
Tips: Use LED strips for even lighting. Position for shadow play at night. Reinforce thin cuts with tape.
Challenges: Delicate cuts can tear. Use sharp scissors and work slowly. If backlighting is dim, add more LEDs.
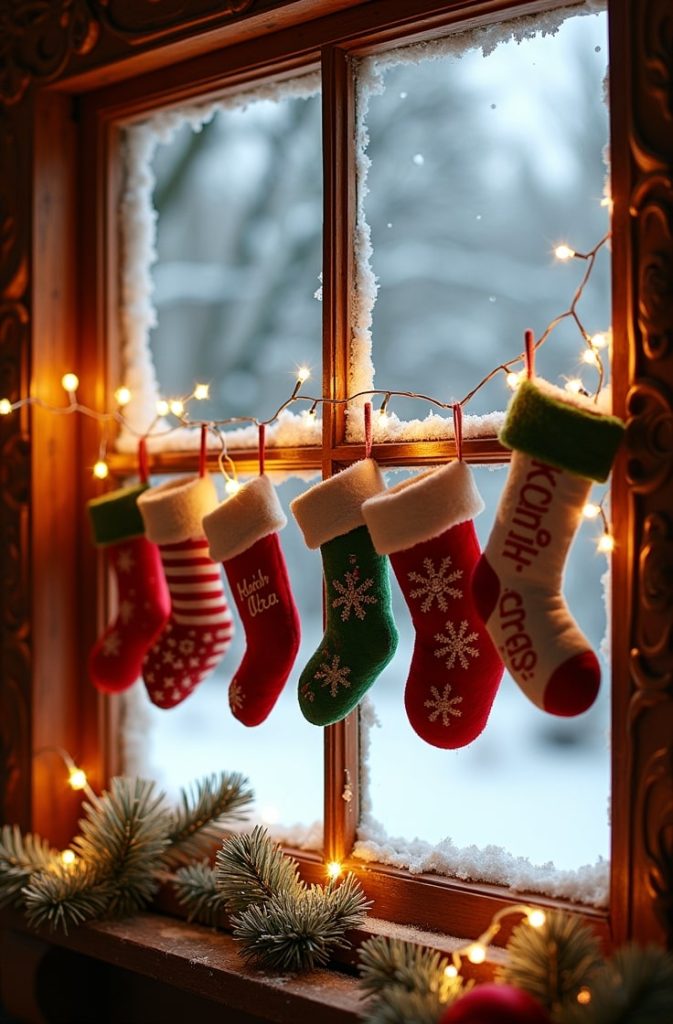
13. Hanging Stockings
Description: Mini stockings hung along your window frame mimic a mantel display. They’re cute and festive.
Materials: Small fabric stockings, suction hooks, thread.
Step-by-Step:
- Buy or sew small stockings (6–8 inches long).
- Attach suction hooks along the bottom window frame.
- Hang stockings with loops or thread.
- Fill with lightweight items like tissue or lights.
Variations: Personalize with names or use patterned fabrics. Mix sizes for variety.
Tips: Fill with battery lights for a glowing effect. Space evenly for balance. Use sturdy hooks for weight.
Challenges: Limited space can crowd windows. Use slim stockings. If they fall, reinforce hooks or use lighter fillings.
14. Pine Cone and Branch Clusters
Description: Bundles of pine cones and branches bring rustic charm to your windows. They’re natural and budget-friendly.
Materials: Pine cones, small branches, twine, suction hooks.
Step-by-Step:
- Gather pine cones and branches (forage or buy).
- Bundle 3–5 items together with twine.
- Tie a loop for hanging.
- Attach to suction hooks at the window’s top or sides.
Variations: Dust with fake snow for a wintery look or spray gold for glamour. Add berries for color.
Tips: Add a drop of pine essential oil for scent. Forage ethically or buy from craft stores. Secure tightly to avoid falling.
Challenges: Pine cones can shed. Contain in mesh bags or spray with sealant. If bundles are heavy, use stronger hooks.
15. DIY Advent Calendar Windows
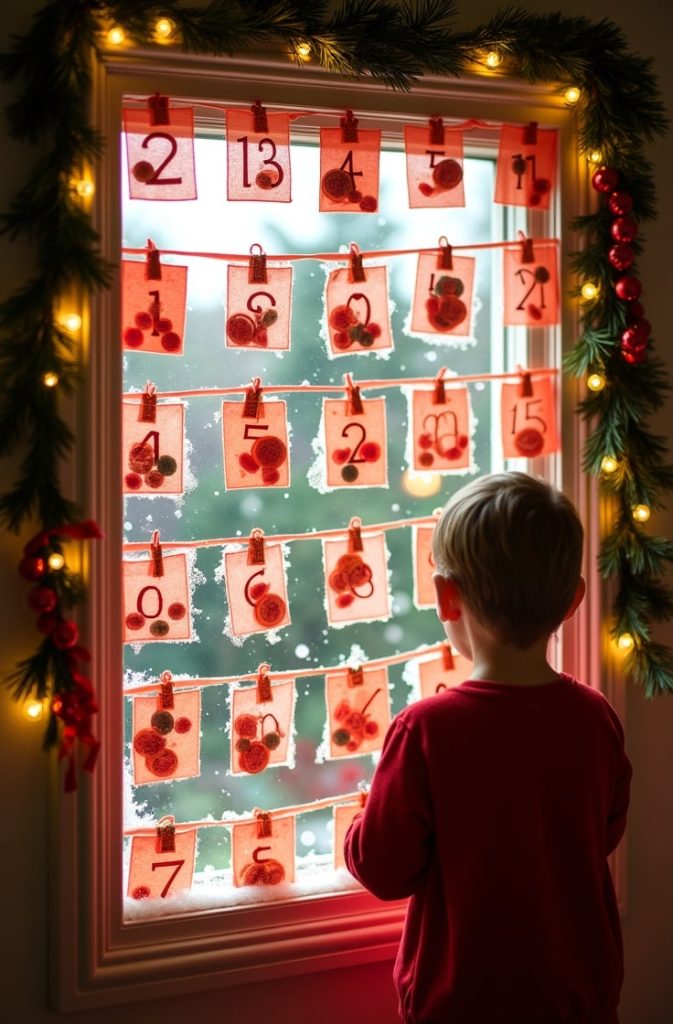
Description: Turn your window into an advent calendar with numbered pockets for daily surprises. It’s interactive and fun for kids.
Materials: Felt, number stickers, small hooks, treats.
Step-by-Step:
- Cut felt into small pockets (2×2 inches).
- Add number stickers (1–24) to each pocket.
- Fill with small treats or notes.
- Attach pockets to the window frame with hooks or tape.
- Open one pocket daily until Christmas.
Variations: Use fabric for durability or paper for simplicity. Theme pockets with colors or patterns.
Tips: Make pockets sturdy for daily use. Involve kids in filling them. Reuse pockets each year.
Challenges: Pockets can tear with frequent handling. Reinforce with stitching or glue. If treats are heavy, use stronger hooks.
Advanced Customization and Combinations
Feeling adventurous? Mix and match these ideas for a standout look. Pair fairy light curtains with paper snowflakes for a glowing, snowy scene. Combine a wreath with ribbon accents for a polished touch.
For a bold statement, layer a tree silhouette with hanging ornaments. Tailor each window to its room—go bold with garlands in the living room, but keep it subtle with candles in the bedroom. For eco-friendly flair, use recycled paper for cutouts or energy-efficient LEDs.
If something goes wrong—like fading clings or slipping hooks—check my challenge fixes above. Personalize with family traditions, like adding a star for each kid or using heirloom ornaments.
Conclusion
Your windows are now ready to shine with holiday magic! These 15 ideas—from twinkling lights to rustic pine cones—offer something for every style and budget.
Start with one or two projects, then mix and match as you gain confidence. Snap some photos and share your creations with friends or on social media to inspire others.
For more ideas, check out Pinterest for holiday boards or browse craft books like The Christmas Craft Book by Thomas Berger.
After Christmas, tweak your decorations for New Year’s by swapping red ribbons for silver or adding star decals. Have fun, and let your windows tell your holiday story!

Jenny is a passionate writer specializing in home decor, design, and styling. With years of experience in transforming spaces, she shares expert tips on creating beautiful, functional homes. From interior design trends to DIY decor ideas, Jenny’s work helps homeowners craft spaces that reflect their unique style. Whether it’s a cozy living room, a modern kitchen, or a serene bedroom, her articles offer practical advice and inspiration to elevate any home.