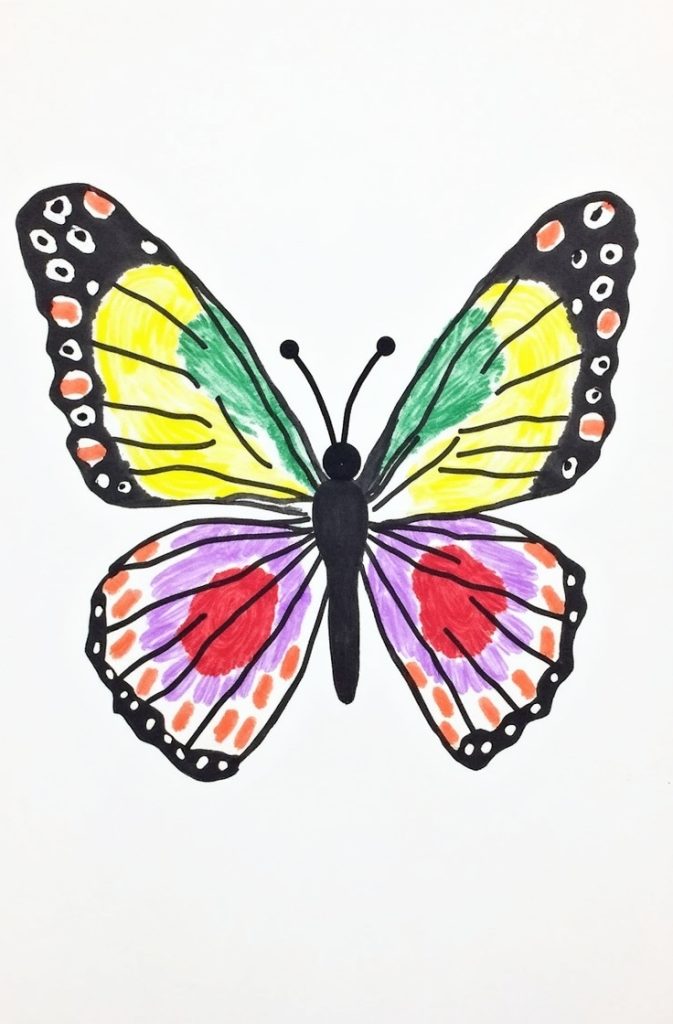
I love watching preschoolers light up when they create something with their own hands. Butterfly crafts are perfect for sparking that joy.
They’re colorful, fun, and a great way to teach kids about nature. In this guide, I’m sharing 13 butterfly crafts designed for preschoolers aged 3 to 5.

These activities are simple, use everyday materials, and are packed with learning opportunities. As a parent or teacher, I know you want crafts that are engaging and educational.
These projects help kids develop fine motor skills, recognize colors, and explore the magic of butterflies.
Plus, they’re a blast to make! Whether you’re a caregiver looking for a rainy-day activity or a teacher planning a nature-themed lesson, this guide has you covered.
Let’s dive into the world of butterfly crafts and watch those little wings soar!
Table of Contents
- Materials Overview
- The 13 Butterfly Crafts for Preschool
- 1. Paper Plate Butterfly
- 2. Coffee Filter Butterfly
- 3. Tissue Paper Butterfly
- 4. Egg Carton Butterfly
- 5. Handprint Butterfly
- 6. Popsicle Stick Butterfly
- 7. Fingerprint Butterfly
- 8. Clothespin Butterfly
- 9. Butterfly Suncatcher
- 10. Pom-Pom Butterfly
- 11. Beaded Butterfly
- 12. Butterfly Mobile
- 13. Butterfly Mask
- Educational Extensions
- Tips for Success
- FAQs
- Conclusion
Materials Overview
I’m all about keeping things budget-friendly. Most of these butterfly crafts use supplies you probably already have.
Think construction paper, pipe cleaners, tissue paper, and googly eyes. Washable paints and glue sticks are staples, too. I also love incorporating recyclable items. Paper plates, coffee filters, and egg cartons make great craft bases.
You can find affordable supplies at dollar stores or craft shops. For recyclables, check your kitchen or recycling bin. Most crafts need minimal prep. I might pre-cut shapes for younger kids to make things easier. This way, you spend less time setting up and more time creating. Stock up on these basics, and you’re ready for all 13 crafts!
The 13 Butterfly Crafts for Preschool
Here’s the heart of the guide: 13 butterfly crafts that preschoolers will love. Each one includes a description, materials, steps, age suitability, and educational benefits. I’ve made sure they’re easy to follow and fun to make. Let’s get crafting!
1. Paper Plate Butterfly
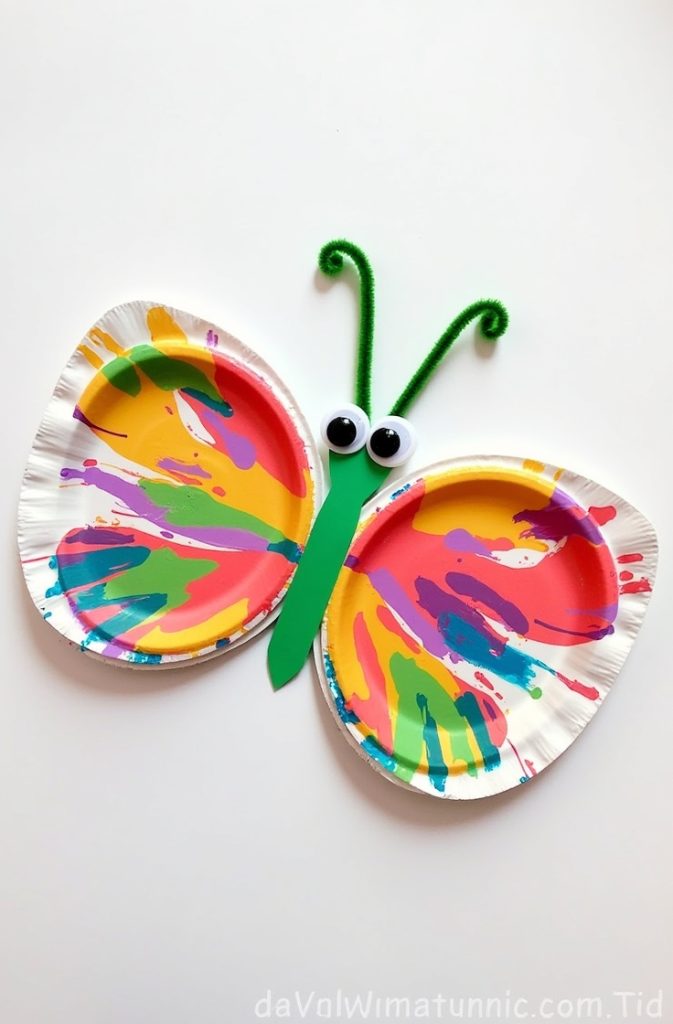
I adore how simple and vibrant this craft is. You turn a paper plate into a butterfly’s wings. It’s perfect for little hands.
- Materials: Paper plates, washable paint, pipe cleaners, googly eyes, glue stick.
- Steps:
- Give each child a paper plate. Let them paint it with their favorite colors.
- Once dry, fold the plate in half to form wings.
- Twist a pipe cleaner into antennae. Glue it to the top.
- Add googly eyes with a glue stick.
- Let kids decorate the wings with more paint or stickers.
- Age: 3-5.
- Benefits: Kids explore colors while painting. Gluing and folding boost fine motor skills. They also love seeing their plate transform into a butterfly.
2. Coffee Filter Butterfly

This craft is like magic. Kids color coffee filters, and the colors blend beautifully when misted with water.
- Materials: Coffee filters, washable markers, spray bottle with water, pipe cleaners, clothespins.
- Steps:
- Hand out coffee filters. Let kids color them with markers.
- Lightly spray the filters with water. Watch the colors spread!
- Let them dry (about 10 minutes).
- Pinch the filter in the middle. Clip it with a clothespin.
- Add a pipe cleaner for antennae. Twist it around the clothespin.
- Age: 3-5.
- Benefits: Kids learn about color blending. The spray bottle adds sensory fun. Pinching and clipping help with coordination.
3. Tissue Paper Butterfly
I love the delicate look of this craft. Tissue paper creates soft, layered wings.
- Materials: Tissue paper, construction paper, glue stick, kid-safe scissors.
- Steps:
- Draw a butterfly shape on construction paper. Cut it out (adults can help).
- Cut tissue paper into small squares.
- Let kids glue tissue paper onto the wings, layering for effect.
- Add details with markers or googly eyes.
- Age: 4-5 (younger kids may need pre-cut shapes).
- Benefits: Kids practice shape recognition. Layering tissue paper builds patience and creativity.
4. Egg Carton Butterfly
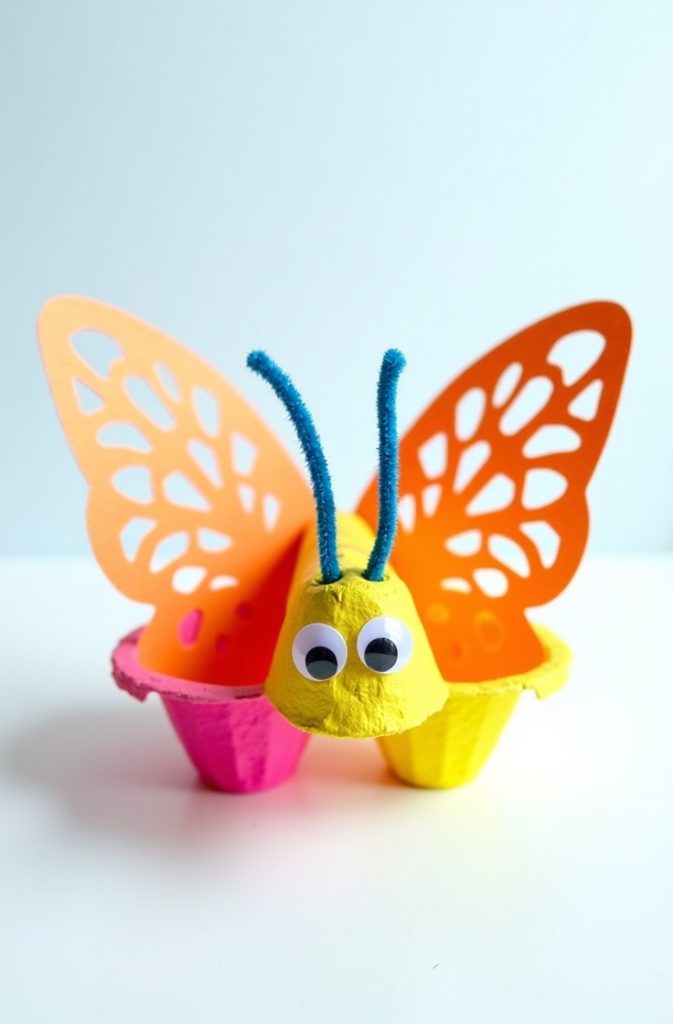
This craft is a favorite for its 3D effect. Egg cartons make a sturdy butterfly body.
- Materials: Egg carton, washable paint, construction paper, glue stick.
- Steps:
- Cut two cups from an egg carton (adult task).
- Let kids paint the cups any color.
- Cut wing shapes from construction paper.
- Glue wings to the carton body.
- Add googly eyes and pipe cleaner antennae.
- Age: 4-5.
- Benefits: Kids learn about recycling. Building a 3D model sparks spatial thinking.
5. Handprint Butterfly

This one’s a keepsake. Kids use their handprints to make butterfly wings.
- Materials: Construction paper, washable paint, googly eyes, glue stick.
- Steps:
- Paint each child’s hands with washable paint.
- Press their hands onto paper to make two wing prints.
- Draw or cut a butterfly body from paper. Glue it between the wings.
- Add googly eyes to the body.
- Age: 3-4.
- Benefits: The paint feels fun and sensory. Kids personalize their craft, boosting confidence.
6. Popsicle Stick Butterfly
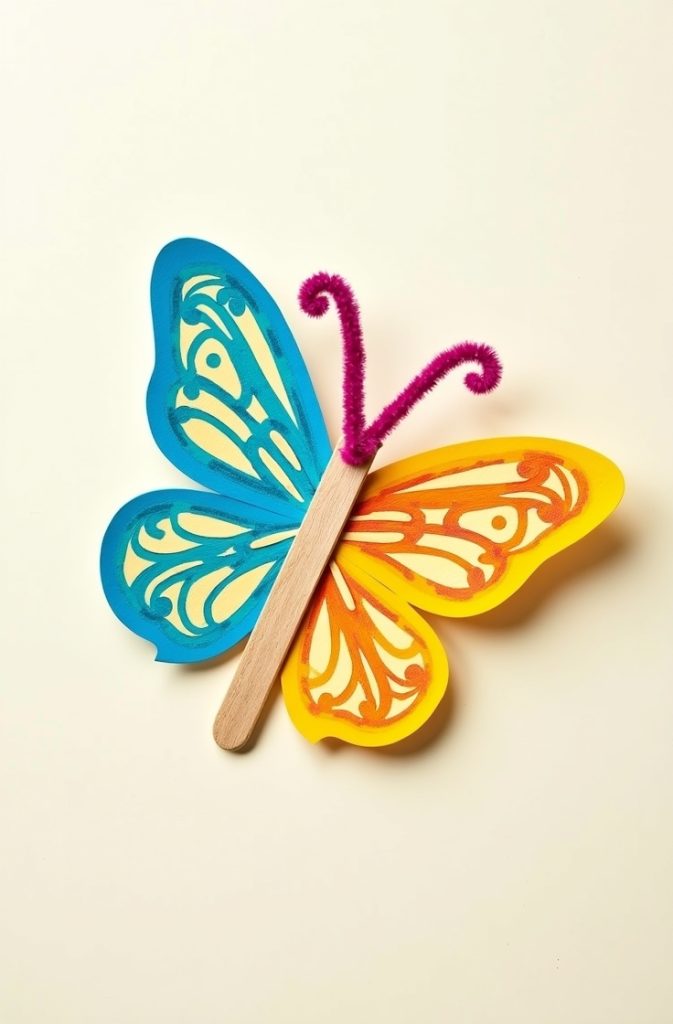
I love how sturdy this craft is. Popsicle sticks form a solid butterfly body.
- Materials: Popsicle sticks, washable paint, construction paper, glue stick.
- Steps:
- Let kids paint popsicle sticks.
- Glue two sticks together to form a body.
- Cut wing shapes from construction paper.
- Glue wings to the sticks.
- Add pipe cleaner antennae and googly eyes.
- Age: 3-5.
- Benefits: Gluing and painting improve motor skills. Kids learn about structure by building the body.
7. Fingerprint Butterfly
This craft is so cute. Kids use fingerprints to decorate wings.
- Materials: Construction paper, washable ink pads, markers.
- Steps:
- Draw a butterfly outline on paper.
- Let kids dip their fingers in ink pads.
- Press fingerprints onto the wings to make patterns.
- Use markers to add details like a body or antennae.
- Age: 3-4.
- Benefits: Kids explore patterns. The ink feels sensory and fun.
8. Clothespin Butterfly

This craft is functional and adorable. The clothespin lets the butterfly “fly.”
- Materials: Clothespins, construction paper, markers, glue sticks.
- Steps:
- Let kids decorate a clothespin with markers.
- Cut wing shapes from construction paper.
- Glue wings to the clothespin.
- Add googly eyes or draw a face.
- Age: 4-5.
- Benefits: Kids create something they can play with. Clipping and gluing build coordination.
9. Butterfly Suncatcher
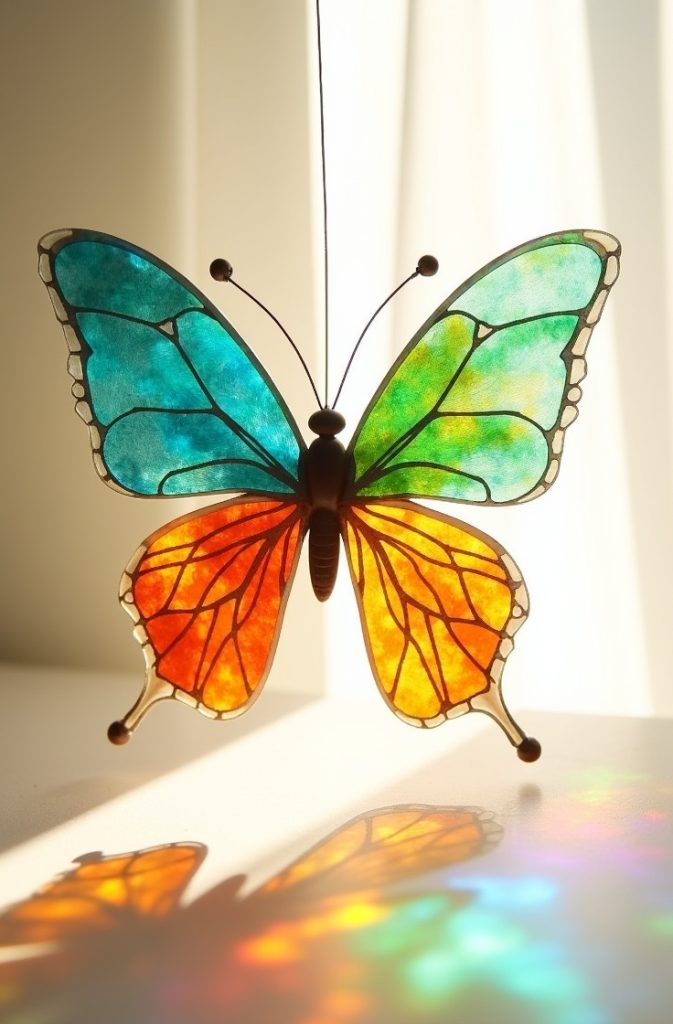
I love how these suncatchers glow in windows. They’re a beautiful preschool project.
- Materials: Clear plastic lids (e.g., from yogurt containers), tissue paper, glue stick, string.
- Steps:
- Cut tissue paper into small pieces.
- Let kids glue tissue paper onto a plastic lid.
- Cut the lid into a butterfly shape (adult task).
- Punch a hole and tie string for hanging.
- Age: 4-5.
- Benefits: Kids explore light and color. Hanging the craft teaches about display.
10. Pom-Pom Butterfly
This craft is so fluffy and fun. Pom-poms make a cuddly butterfly body.
- Materials: Pom-poms, pipe cleaners, construction paper, glue stick.
- Steps:
- Let kids pick pom-poms for the body.
- Glue pom-poms together.
- Cut wing shapes from paper. Glue them to the pom-poms.
- Add pipe cleaner antennae.
- Age: 3-5.
- Benefits: Kids explore textures. Gluing small pieces improves precision.
11. Beaded Butterfly
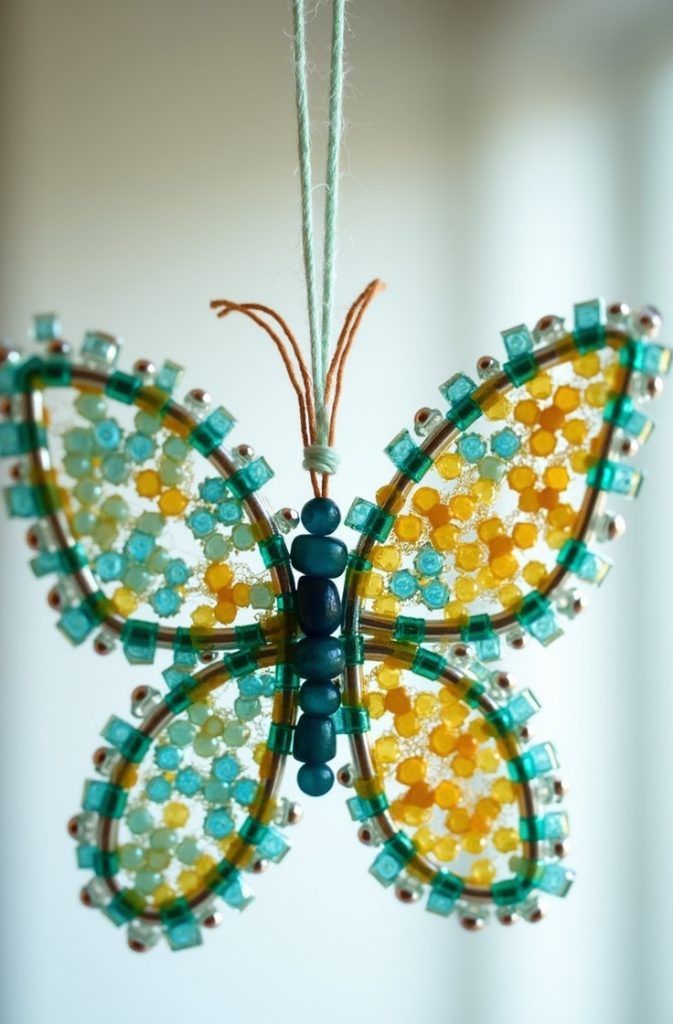
This craft is great for older preschoolers. Beads create a sparkly butterfly.
- Materials: Beads, pipe cleaners, yarn.
- Steps:
- Let kids thread beads onto a pipe cleaner for the body.
- Bend the pipe cleaner to form wings.
- Add more beads to the wings.
- Tie yarn for hanging, if desired.
- Age: 4-5.
- Benefits: Beading teaches counting. Threading boosts fine motor skills.
12. Butterfly Mobile
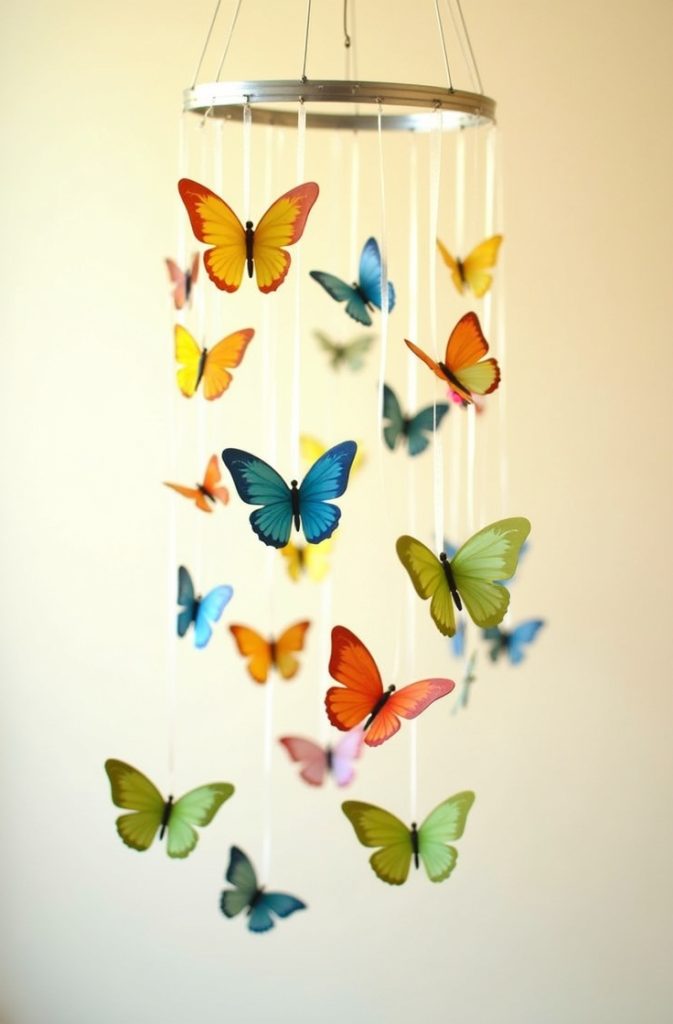
I love how this craft fills a room with butterflies. It’s perfect for groups.
- Materials: Construction paper, string, hangers, washable paint.
- Steps:
- Cut butterfly shapes from paper.
- Let kids paint the butterflies.
- Tie string to each butterfly.
- Attach strings to a hanger to create a mobile.
- Age: 4-5.
- Benefits: Kids learn about balance and space. It’s great for teamwork.
13. Butterfly Mask
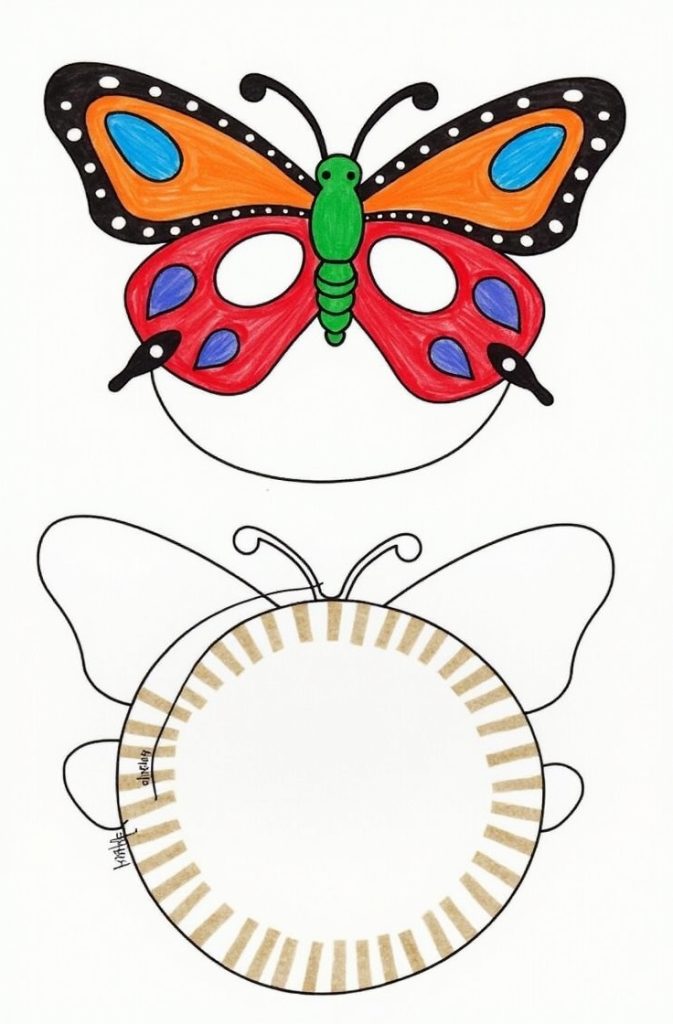
This craft is a hit for pretend play. Kids love wearing their butterfly masks.
- Materials: Paper plates, washable paint, elastic string, kid-safe scissors.
- Steps:
- Cut a paper plate into a mask shape (adult task).
- Let kids paint the mask.
- Punch holes for eyes and string.
- Attach an elastic string to fit the child’s head.
- Age: 3-5.
- Benefits: Cutting shapes boosts skills. Wearing the mask sparks imaginative play.
Educational Extensions
I always try to sneak in extra learning. These crafts are a great way to teach about butterflies. One idea is a paper plate life cycle wheel. Kids paint sections for egg, caterpillar, chrysalis, and butterfly. It’s a hands-on way to learn the stages.
I also love pairing crafts with stories. Reading The Very Hungry Caterpillar by Eric Carle before crafting ties everything together. For a nature connection, I encourage kids to watch butterflies in the backyard.
Visiting a butterfly garden is even better! You can also use crafts to teach math and science. Counting wings or spotting symmetry in the crafts introduces early concepts. These extensions make the crafts even more meaningful.
Tips for Success
Crafting with preschoolers can be messy, but I’ve got tips to make it smooth. Always supervise closely, especially for cutting or gluing. For group activities, set up material stations.
This keeps things organized in a classroom. I love displaying the finished crafts. Bulletin boards or stringing butterflies into a garland work great. Cleanup is easier with washable materials.
Lay down newspaper and have wipes handy. If a craft feels too hard, simplify it.
For example, use stickers instead of glue for younger kids. These tips help everyone have fun without stress.
FAQs
I know you might have questions, so here are some common ones:
- What if my child struggles with cutting? No worries! Pre-cut shapes for them. You can also use tearable materials like tissue paper.
- Are these crafts safe for 3-year-olds? Absolutely. With adult supervision and non-toxic materials, they’re perfect.
- How long do crafts take? Most take 15-30 minutes. It depends on the child’s pace and focus.
- Can I use these for a butterfly-themed party? Yes! Masks and suncatchers are great party activities. Kids can take them home as favors.
Conclusion
I hope you’re as excited about these 13 butterfly crafts as I am. They’re fun, easy, and packed with learning.
From paper plate butterflies to sparkly beaded ones, there’s something for every preschooler. These projects spark creativity and teach kids about nature. I encourage you to try them at home or in the classroom.
Share your creations with me—I’d love to see those colorful wings! If you’re hungry for more, explore other nature-themed crafts. Let’s keep the creativity flying!

Jenny is a passionate writer specializing in home decor, design, and styling. With years of experience in transforming spaces, she shares expert tips on creating beautiful, functional homes. From interior design trends to DIY decor ideas, Jenny’s work helps homeowners craft spaces that reflect their unique style. Whether it’s a cozy living room, a modern kitchen, or a serene bedroom, her articles offer practical advice and inspiration to elevate any home.


