The holiday season is knocking, and there’s no better way to get into the festive spirit than by rolling up your sleeves and creating something special.

I love how crafting brings warmth, joy, and a touch of personal magic to Christmas. Whether you’re decorating your home, making heartfelt gifts, or keeping the kids entertained, I’ve got you covered with 15 Christmas craft ideas that are fun, affordable, and perfect for all skill levels.
These projects use simple materials, spark creativity, and make your holiday season feel extra cozy. Let’s dive in and make some holiday memories!
Table of Contents
- Craft Idea Categories
- 15 Christmas Craft Ideas
- 1. Pinecone Christmas Trees (Beginner, Kid-Friendly, Eco-Friendly)
- 2. Mason Jar Snow Globes (Beginner, Gift)
- 3. Felt Christmas Ornaments (Beginner, Kid-Friendly)
- 4. Wooden Reindeer Ornaments (Intermediate, Gift)
- 5. Paper Snowflake Garlands (Beginner, Kid-Friendly)
- 6. Upcycled Tin Can Lanterns (Intermediate, Eco-Friendly)
- 7. Cinnamon Stick Ornaments (Beginner, Gift)
- 8. Hand-Painted Christmas Baubles (Intermediate, Gift)
- 9. Popsicle Stick Sleds (Beginner, Kid-Friendly)
- 10. Knitted Mini Stockings (Advanced, Gift)
- 11. Salt Dough Ornaments (Beginner, Kid-Friendly)
- 12. Wine Cork Wreath (Intermediate, Eco-Friendly)
- 13. Beaded Snowflake Ornaments (Intermediate, Gift)
- 14. Quilted Tree Skirt (Advanced, Decoration)
- 15. Glittery Candle Holders (Beginner, Decoration)
- Additional Tips for a Crafty Christmas
- Wrapping It Up
Craft Idea Categories
I’ve organized these 15 crafts into five categories to make it easy for you to find the perfect project. Each category serves a different purpose, so you can mix and match based on your needs.
Decorations for the Home
These crafts add festive cheer to your living space. They work indoors or outdoors and make your home feel like a winter wonderland.
Handmade Gifts
Nothing says “I care” like a handmade gift. These projects are thoughtful, customizable, and perfect for friends and family.
Kid-Friendly Crafts
Safe and simple, these crafts keep kids entertained while helping them build creativity and motor skills.
Eco-Friendly/Upcycled Crafts
If you love sustainability, these projects use recycled or natural materials to create beautiful holiday pieces.
Advanced Crafts for Experienced Crafters
For those who love a challenge, these crafts use more intricate techniques to create show-stopping results.
15 Christmas Craft Ideas
Now, let’s get to the fun part—the crafts! Each project comes with a clear list of materials, step-by-step instructions, and an estimated time to complete. I’ve also noted the skill level and why each craft is special. Let’s make your holiday season sparkle!
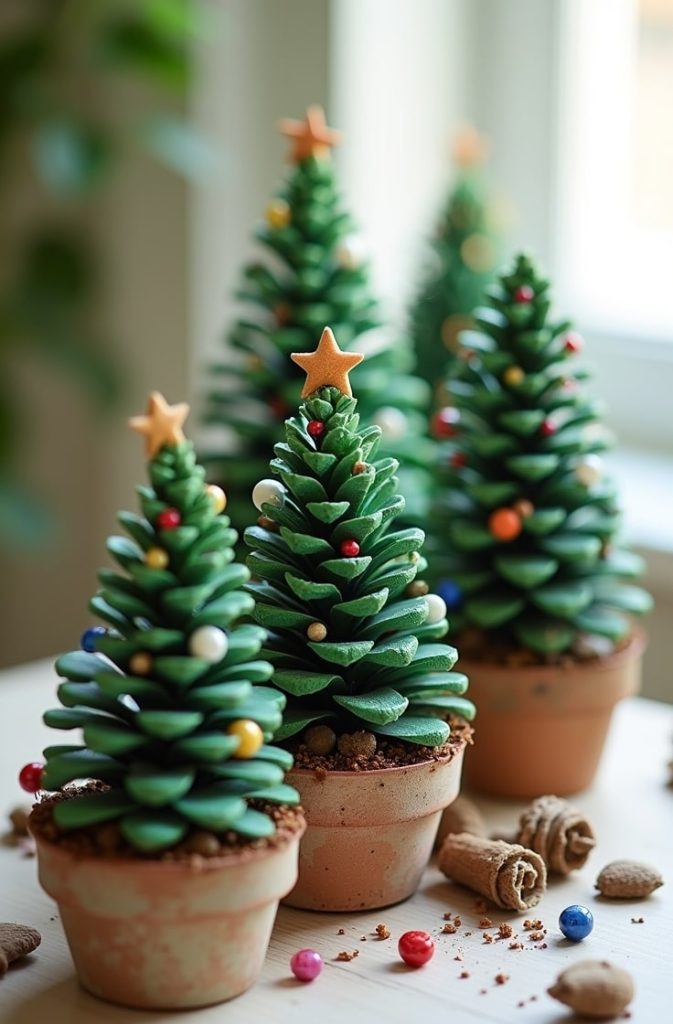
1. Pinecone Christmas Trees (Beginner, Kid-Friendly, Eco-Friendly)
Time: 30 minutes
Materials: Pinecones, green acrylic paint, small beads, hot glue, small pots or bottle caps, paintbrush, ribbon (optional).
I love how nature inspires creativity, and these pinecone Christmas trees are proof! They’re simple, adorable, and perfect for kids. You can gather pinecones from your backyard, making this a budget-friendly and eco-friendly project.
Steps:
- Gather pinecones from outside or buy them at a craft store. Clean off any dirt.
- Paint the pinecones green with a paintbrush. Let them dry for 10 minutes.
- Glue small beads onto the pinecone “branches” as ornaments. Use bright colors for a festive look.
- Place the pinecone in a small pot or bottle cap to stand upright. Secure with glue.
- Optional: Tie a ribbon around the pot for extra charm.
Why It’s Great: These mini trees are quick to make and look adorable on a table or windowsill. Kids love decorating them, and they’re a sustainable way to bring nature indoors.
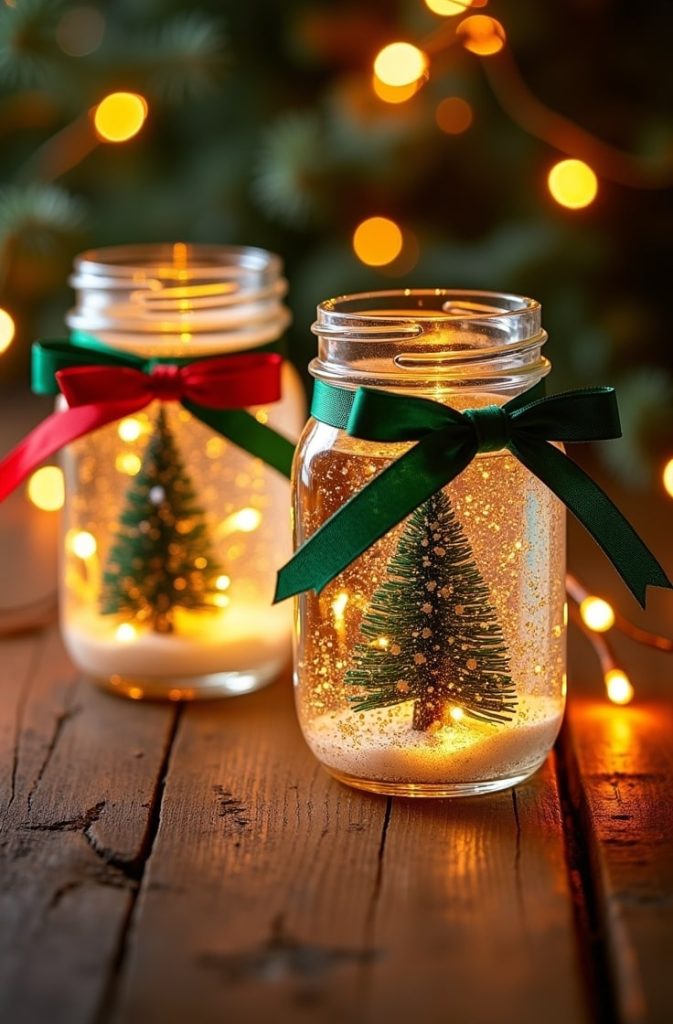
2. Mason Jar Snow Globes (Beginner, Gift)
Time: 45 minutes
Materials: Mason jar, small figurine (tree, Santa, etc.), glitter, glycerin, water, hot glue, ribbon.
Snow globes bring back childhood memories, don’t they? These mason jar versions are easy to make and make heartfelt gifts or charming decor.
Steps:
- Choose a small figurine that fits inside the mason jar lid.
- Glue the figurine to the inside of the lid using hot glue. Let it set for 5 minutes.
- Fill the jar with water, leaving a little space at the top.
- Add a teaspoon of glycerin and a tablespoon of glitter. Stir gently.
- Screw the lid onto the jar tightly. Turn it upside down so the figurine is inside the globe.
- Tie a ribbon around the jar for a festive touch.
Why It’s Great: You can personalize these with different figurines or glitter colors. They’re a thoughtful gift that looks magical on a shelf.
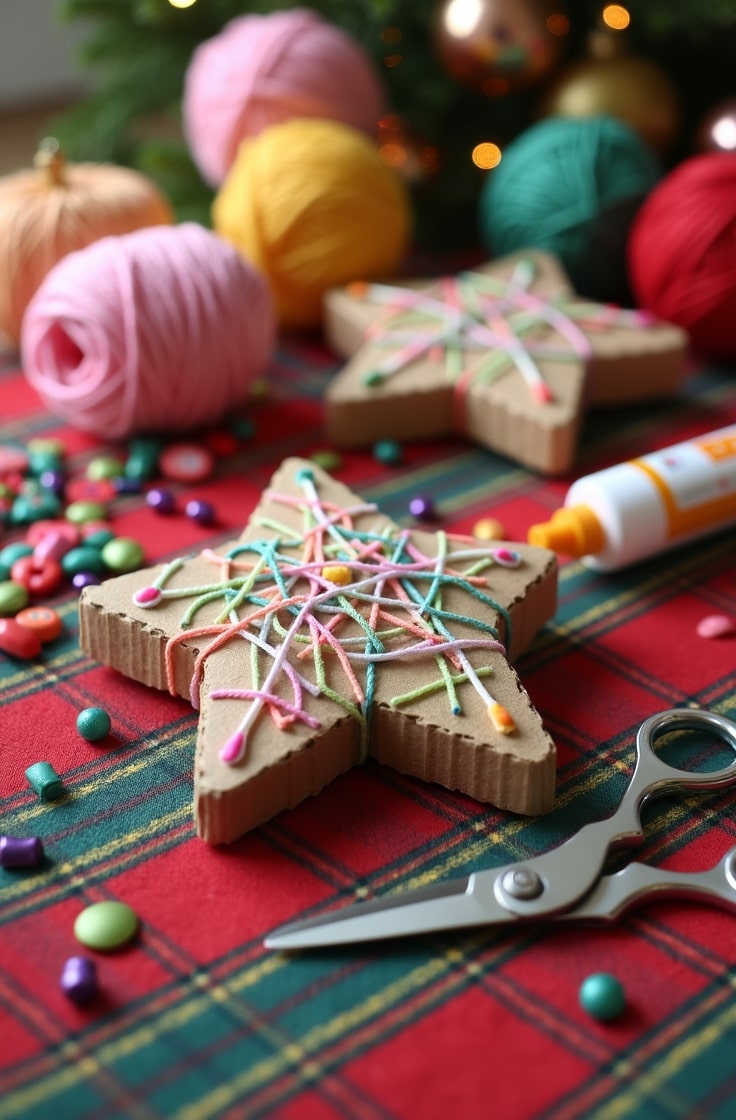
3. Felt Christmas Ornaments (Beginner, Kid-Friendly)

Time: 1 hour
Materials: Felt sheets (various colors), embroidery thread, needle, stuffing, ribbon, scissors.
Felt ornaments are soft, durable, and perfect for kids to help with. I love how they add a cozy vibe to any Christmas tree.
Steps:
- Cut two identical shapes (stars, trees, or hearts) from felt using scissors.
- Sew the edges together with a simple running stitch, leaving a small opening.
- Stuff the shape with a bit of stuffing for a plump look.
- Sew the opening closed.
- Attach a ribbon loop to hang the ornament on the tree.
Why It’s Great: These ornaments are safe for kids and easy to customize with different shapes or colors. They’re also durable enough to use year after year.
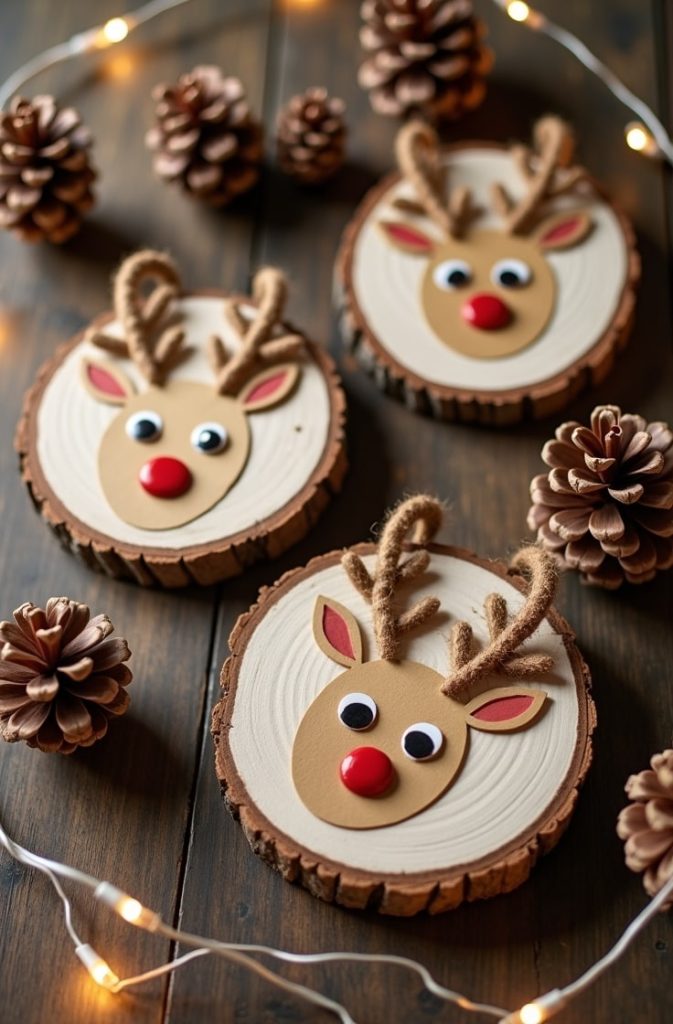
4. Wooden Reindeer Ornaments (Intermediate, Gift)
Time: 1 hour
Materials: Wood slices, acrylic paint, paintbrush, twine, googly eyes, hot glue.
These rustic reindeer ornaments are so charming! They’re a bit more involved but worth the effort for a unique tree decoration or gift.
Steps:
- Buy or cut wood slices (about 3 inches in diameter). Sand them smooth.
- Paint a reindeer face on the wood slice. Use brown for the face and red for the nose.
- Glue googly eyes onto the face. Let the paint and glue dry for 15 minutes.
- Tie a twine loop through a small hole in the wood or glue it to the back for hanging.
- Optional: Add details like antlers with paint or small twigs.
Why It’s Great: These ornaments have a rustic charm that’s perfect for a cozy Christmas. They make great gifts for neighbors or coworkers.
5. Paper Snowflake Garlands (Beginner, Kid-Friendly)

Time: 30 minutes
Materials: White paper, scissors, string, tape or glue.
Paper snowflakes are a classic holiday craft. I remember making these as a kid, and they still bring so much joy!
Steps:
- Fold a square piece of white paper into a triangle, then fold it again.
- Cut small shapes (triangles, circles) along the edges to create a snowflake pattern.
- Unfold the paper to reveal your snowflake. Make several snowflakes.
- Tape or glue the snowflakes to a long piece of string to create a garland.
- Hang the garland on your tree, mantel, or window.
Why It’s Great: This craft is super affordable and fun for all ages. The garlands add a delicate, wintry touch to any space.
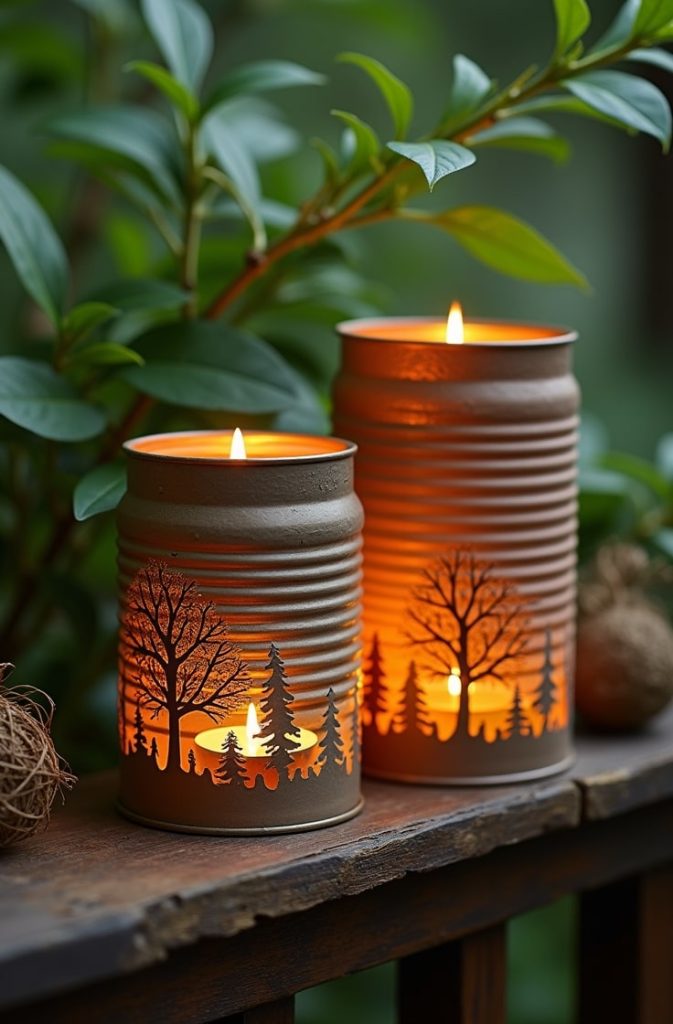
6. Upcycled Tin Can Lanterns (Intermediate, Eco-Friendly)
Time: 1.5 hours
Materials: Clean tin cans, hammer, nail, spray paint, tea light candles, wire (optional).
These lanterns are a fantastic way to upcycle old tin cans into something beautiful. They create a warm glow for your holiday evenings.
Steps:
- Remove labels from clean tin cans and fill them with water. Freeze overnight.
- Use a hammer and nail to punch a pattern (stars, trees) into the can. The ice keeps the can from denting.
- Let the ice melt and dry the can completely.
- Spray paint the can in a festive color like silver or gold. Let it dry for 30 minutes.
- Place a tea light candle inside. Optional: Add a wire handle for hanging.
Why It’s Great: These lanterns are eco-friendly and add a magical glow to your porch or dining table. They’re a conversation starter!
7. Cinnamon Stick Ornaments (Beginner, Gift)
Time: 30 minutes
Materials: Cinnamon sticks, ribbon, hot glue, beads, twine.
These ornaments smell amazing and look so rustic. They’re a quick project that makes a thoughtful gift.
Steps:
- Arrange 3–5 cinnamon sticks into a star or tree shape.
- Glue the sticks together at the joints using hot glue.
- Add small beads as “ornaments” with glue.
- Tie a twine loop for hanging.
- Wrap a ribbon around the ornament for extra flair.
Why It’s Great: The cinnamon scent adds a cozy vibe to your tree. These make sweet, budget-friendly gifts or gift tags.
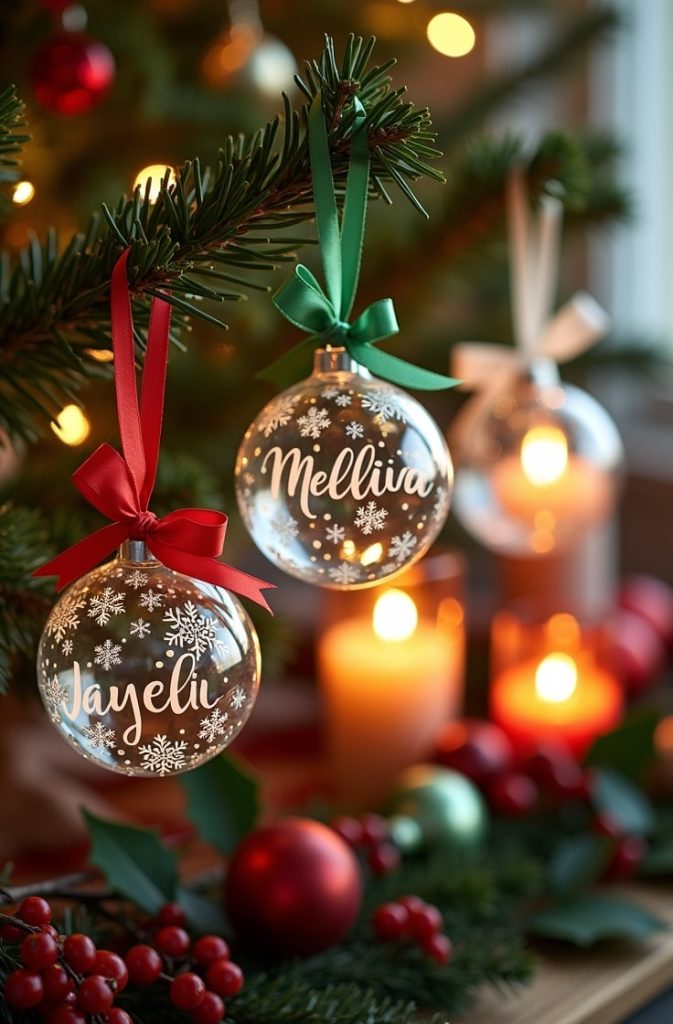
8. Hand-Painted Christmas Baubles (Intermediate, Gift)
Time: 1 hour
Materials: Clear glass ornaments, acrylic paint, paintbrush, ribbon.
Painting your own baubles is so satisfying! These make elegant decorations or personalized gifts.
Steps:
- Remove the top from a clear glass ornament.
- Pour a small amount of acrylic paint inside and swirl it around to coat the interior.
- Let the paint dry for 30 minutes.
- Paint designs (snowflakes, names) on the outside with a fine brush.
- Reattach the top and tie a ribbon for hanging.
Why It’s Great: These baubles are fully customizable and look stunning on a tree. They’re a special keepsake for loved ones.
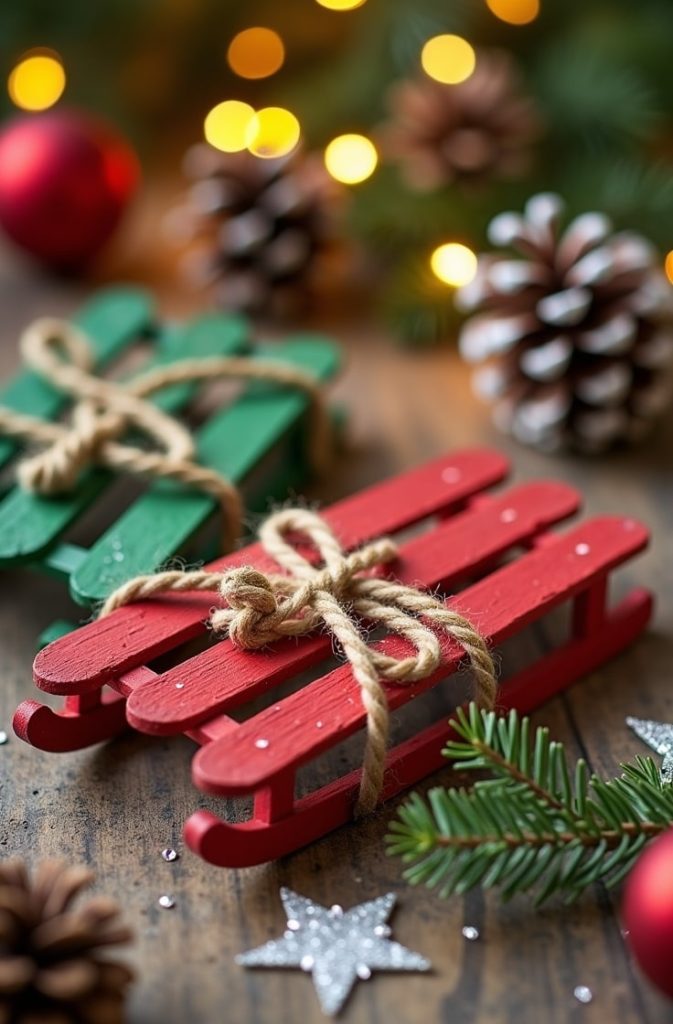
9. Popsicle Stick Sleds (Beginner, Kid-Friendly)
Time: 45 minutes
Materials: Popsicle sticks, hot glue, acrylic paint, twine, scissors.
These mini sleds are adorable and so easy to make. Kids love them, and they’re perfect for ornaments or gift tags.
Steps:
- Lay two popsicle sticks parallel to each other.
- Glue two shorter sticks across them to form a sled base.
- Paint the sled in a festive color like red or green. Let it dry for 15 minutes.
- Glue a small piece of twine to the front to mimic a rope.
- Attach a twine loop for hanging.
Why It’s Great: This craft is simple, fun, and versatile. Use the sleds as ornaments or tie them to gifts for extra charm.
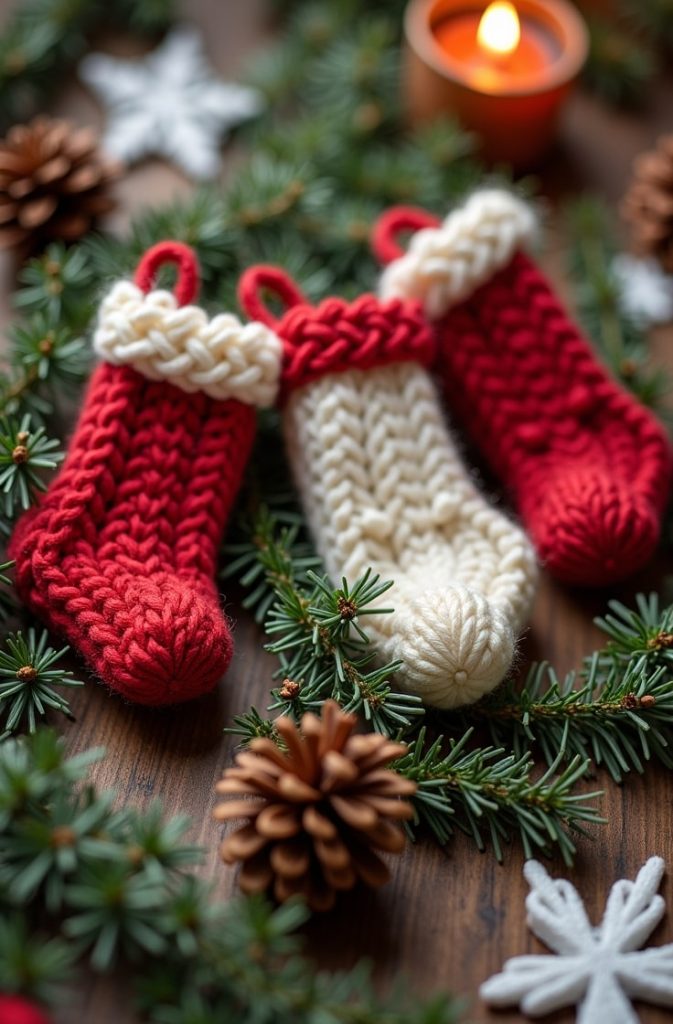
10. Knitted Mini Stockings (Advanced, Gift)
Time: 3 hours
Materials: Yarn (red, green, white), knitting needles, ribbon, scissors.
If you love knitting, these mini stockings are a delightful challenge. They’re perfect for gift cards or small treats.
Steps:
- Cast on 20 stitches with size 4 knitting needles.
- Knit in the round to create a small stocking shape (about 4 inches long).
- Decrease stitches at the toe and bind off.
- Fold the top edge down to create a cuff. Sew it in place.
- Attach a ribbon loop for hanging.
Why It’s Great: These stockings are cozy and reusable. They make charming gift holders or tree decorations.
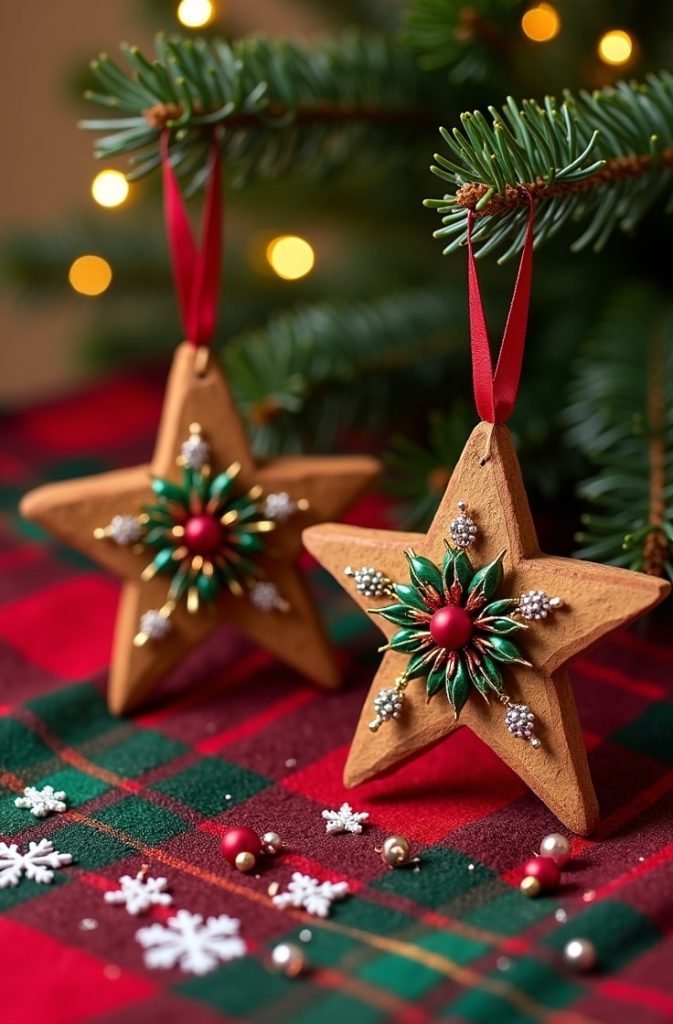
11. Salt Dough Ornaments (Beginner, Kid-Friendly)

Time: 2 hours (including baking)
Materials: Flour, salt, water, cookie cutters, acrylic paint, ribbon.
Salt dough ornaments are a classic for a reason. They’re easy, affordable, and so much fun to make with kids.
Steps:
- Mix 1 cup flour, 1/2 cup water, and 1/2 cup salt to form a dough.
- Roll out the dough and cut shapes with cookie cutters (stars, trees, etc.).
- Poke a hole in each shape for hanging.
- Bake at 250°F for 1 hour until hard.
- Paint the cooled ornaments and thread ribbon through the holes.
Why It’s Great: These ornaments are customizable and durable. Kids love painting them, and they make great keepsakes.
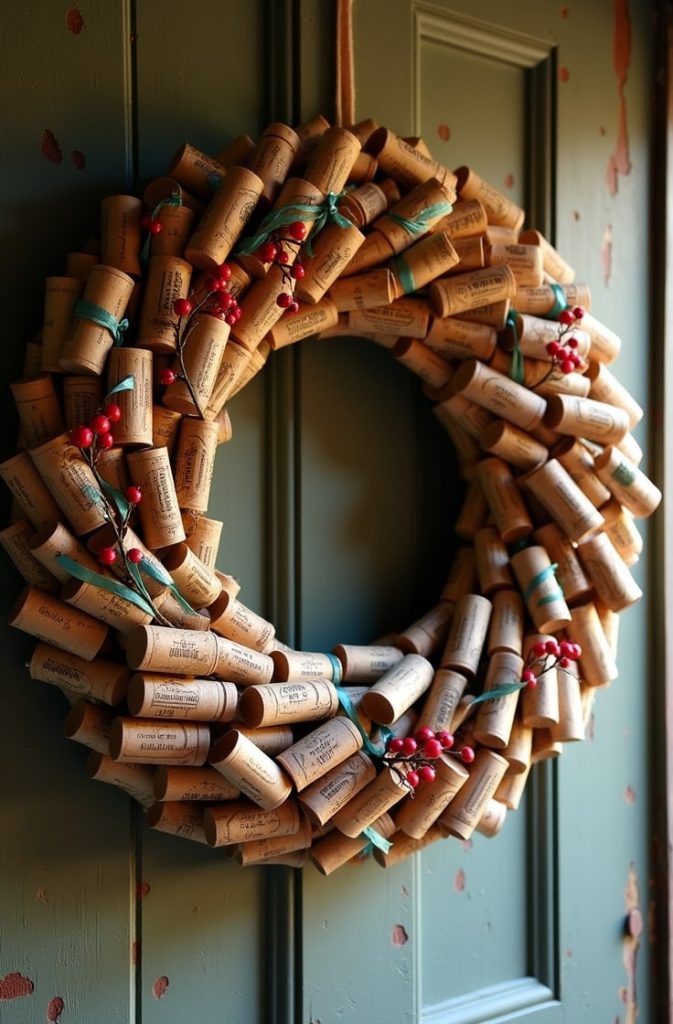
12. Wine Cork Wreath (Intermediate, Eco-Friendly)
Time: 2 hours
Materials: Wine corks, hot glue, wreath form, ribbon, decorations (optional).
This upcycled wreath is perfect for wine lovers! It’s a fun way to turn corks into a festive decoration.
Steps:
- Collect 50–60 wine corks (ask friends or restaurants if needed).
- Glue corks onto a wreath form in a circular pattern. Alternate angles for texture.
- Let the glue dry for 30 minutes.
- Tie a ribbon around the wreath for hanging.
- Optional: Add small decorations like berries or bells.
Why It’s Great: This wreath is eco-friendly and has a rustic charm. It’s perfect for your front door or above the fireplace.
13. Beaded Snowflake Ornaments (Intermediate, Gift)
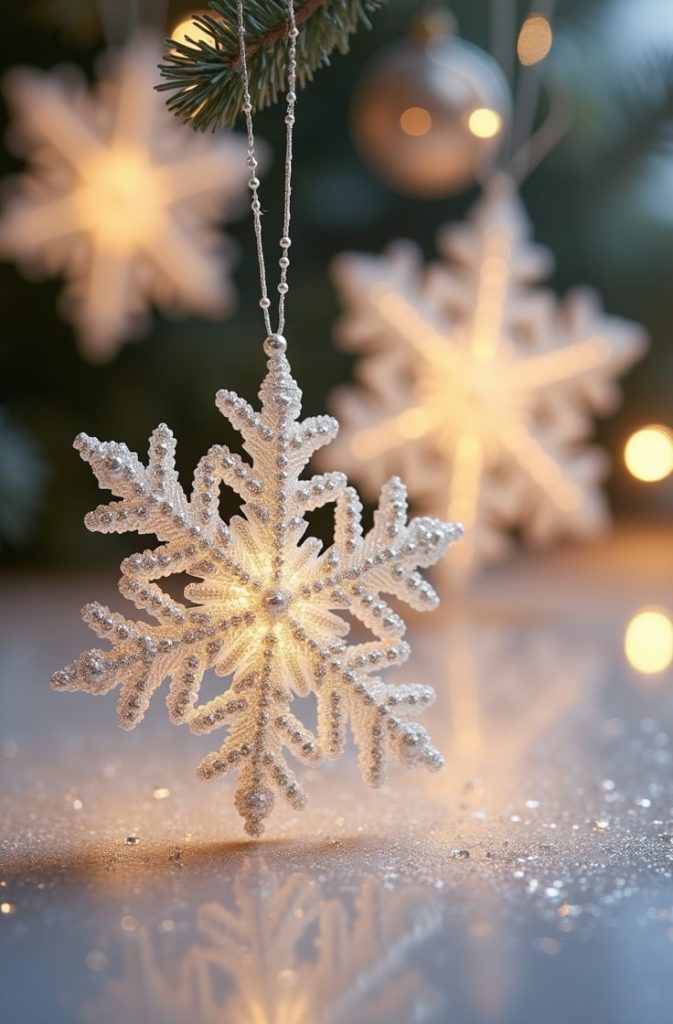
Time: 1.5 hours
Materials: Beads (white, silver), wire, pliers, ribbon.
These sparkly snowflakes are a bit fiddly but so worth it. They add a touch of elegance to your tree.
Steps:
- Cut six equal lengths of wire (about 6 inches each).
- Twist the wires together at the center to form a snowflake shape.
- Thread beads onto each wire arm, mixing colors and sizes.
- Bend the wire ends to secure the beads.
- Attach a ribbon loop for hanging.
Why It’s Great: These snowflakes are dazzling and make lovely gifts. They’re a great way to use up leftover beads.
14. Quilted Tree Skirt (Advanced, Decoration)
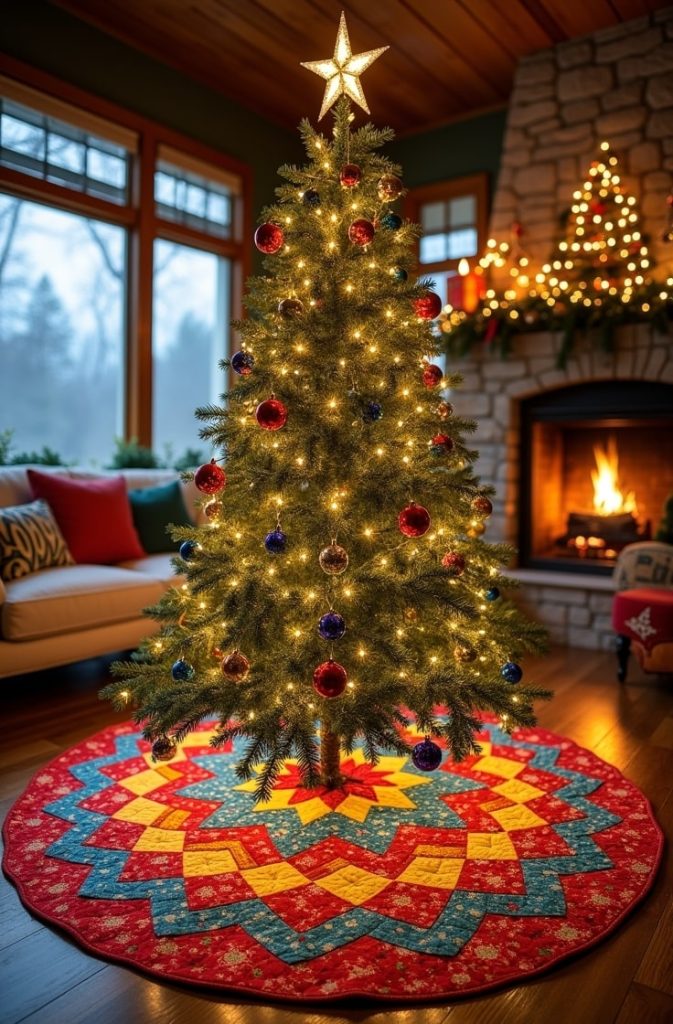
Time: 4 hours
Materials: Fabric scraps, batting, thread, sewing machine, scissors.
This tree skirt is a labor of love, but it’s a showpiece that you’ll use for years. It’s perfect for experienced crafters.
Steps:
- Cut fabric scraps into squares or triangles.
- Sew the pieces together to form a circular skirt (about 40 inches in diameter).
- Layer batting between two layers of fabric and quilt with a sewing machine.
- Cut a slit and a small circle in the center to fit around the tree base.
- Sew a border to finish the edges.
Why It’s Great: This tree skirt is heirloom-quality and adds a cozy touch to your tree. It’s a project to be proud of!
15. Glittery Candle Holders (Beginner, Decoration)
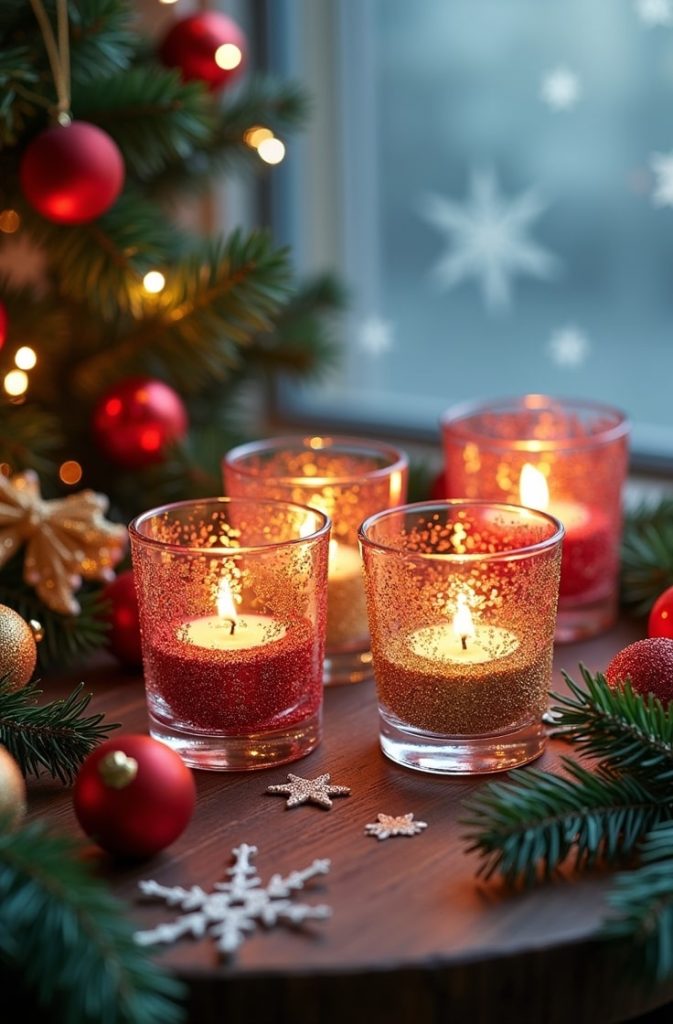
Time: 30 minutes
Materials: Glass votive holders, glitter, glue, paintbrush, tea light candles.
These candle holders are quick, glamorous, and perfect for adding sparkle to your holiday table.
Steps:
- Brush glue onto the outside of a glass votive holder.
- Sprinkle glitter over the glue, covering the surface.
- Shake off excess glitter and let the glue dry for 20 minutes.
- Place a tea light candle inside.
- Optional: Add a ribbon around the base for extra flair.
Why It’s Great: These holders are fast to make and create a warm, festive glow. They’re perfect for dinner parties or cozy nights.
Additional Tips for a Crafty Christmas
Now that you’ve got 15 craft ideas to try, here are some extra tips to make your crafting experience even better.
Sourcing Materials
You don’t need to spend a fortune to craft! Check thrift stores for yarn, fabric, or glassware. Dollar stores are great for beads, ribbon, and paint. For eco-friendly projects, gather pinecones, twigs, or corks from your home or community. Local craft stores often have sales during the holiday season, so keep an eye out.
Safety Tips
If you’re crafting with kids, use non-toxic glue and paints. Supervise them with scissors or hot glue guns. For younger kids, stick to projects like paper snowflakes or salt dough ornaments. Always work in a well-ventilated area when using spray paint or glitter.
Customization Ideas
Make your crafts extra special by personalizing them. Add names to ornaments with paint or embroidery. Use your family’s favorite colors for a cohesive look. For gifts, include a small handwritten note to add a personal touch.
Storage and Reusability
To keep your crafts looking great year after year, store them carefully. Use tissue paper to wrap delicate items like glass baubles or beaded snowflakes. Keep ornaments in a sturdy box to prevent crushing. For fabric crafts, store them in a dry place to avoid mildew.
Eco-Friendly Crafting
Reduce waste by using natural materials like pinecones or twigs. Upcycle items like tin cans or wine corks. Choose biodegradable glitter for projects like the candle holders. These small choices make a big difference for the planet.
Wrapping It Up
There you have it—15 Christmas craft ideas to fill your holiday season with creativity and joy! From pinecone trees to quilted tree skirts, these projects offer something for everyone.
Whether you’re decorating your home, making gifts, or keeping the kids busy, these crafts are sure to make your Christmas special. I love how each project adds a personal touch to the holidays, and I hope you feel inspired to try a few.
So, grab your supplies, put on some holiday music, and start crafting! Share your creations with friends or family, and let the festive spirit shine. If you want more inspiration, check out craft blogs or YouTube channels for video tutorials.
Happy crafting, and here’s to a merry, handmade Christmas!

Jenny is a passionate writer specializing in home decor, design, and styling. With years of experience in transforming spaces, she shares expert tips on creating beautiful, functional homes. From interior design trends to DIY decor ideas, Jenny’s work helps homeowners craft spaces that reflect their unique style. Whether it’s a cozy living room, a modern kitchen, or a serene bedroom, her articles offer practical advice and inspiration to elevate any home.