Christmas is a wonderful time to bring out your creative side. As an adult, making crafts can be relaxing and fun. It lets you enjoy the festive season in a meaningful way.
In this guide, I’ll share 15 Christmas crafts that are perfect for adults. I will also walk you through what you need, step-by-step ideas, and how to enjoy the process.
Whether you want to decorate your home, create gifts, or try something green and upcycled, there is something here for you.
Table of Contents
- 15 Christmas Crafts to Spark Your Holiday Spirit
- 1. Hand-Painted Glass Ornaments
- 2. Evergreen Wreath with Pinecones
- 3. Knitted Christmas Stockings
- 4. Scented Soy Candles in Festive Jars
- 5. Hand-Stamped Holiday Cards
- 6. Upcycled Gift Wrap with Fabric Scraps
- 7. Mason Jar Snow Globes
- 8. Beaded Christmas Garland
- 9. Wooden Reindeer Signs
- 10. Felt Advent Calendar
- 11. Pressed Flower Ornaments
- 12. Crocheted Snowflakes
- 13. Etched Glassware for Mulled Wine
- 14. Herbal Sachets for Drawers
- 15. Paper Quilled Christmas Trees
- Wrapping It Up
15 Christmas Crafts to Spark Your Holiday Spirit
Ready to get crafting? Here are 15 projects to fill your home with festive cheer. Each one includes everything you need to know to create something beautiful.
1. Hand-Painted Glass Ornaments
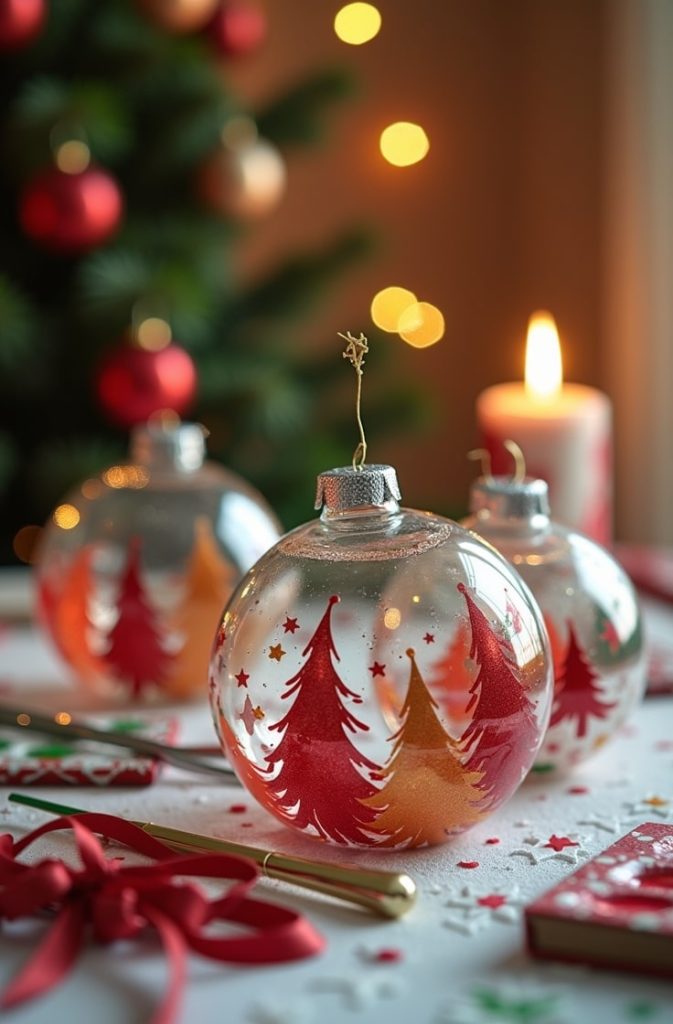
Overview: Let’s start with a beginner-friendly project that’s pure fun. Painting glass ornaments lets you create dazzling tree decorations or thoughtful gifts. You’ll feel like an artist, even if you’ve never painted before!
Materials:
- Clear glass ornaments (available at craft stores or online)
- Acrylic paints in holiday colors
- Paintbrushes (small for details)
- Ribbon for hanging
Instructions:
- Remove the top of each ornament and clean it with rubbing alcohol.
- Pour a little paint inside or brush designs on the outside. Swirl for a marbled effect!
- Let dry for a few hours, then reattach the top and tie a ribbon loop.
Time/Cost: About 30 minutes per ornament; under $10 for a set of six.
Customization: Paint names for personalized gifts or try glow-in-the-dark paint for a magical effect. Mix patterns like stripes or polka dots for variety.
Tips/Troubleshooting: Use painter’s tape to create clean lines or shapes. If paint smudges, wipe it off with alcohol before it dries. Keep a damp cloth nearby for quick fixes.
2. Evergreen Wreath with Pinecones
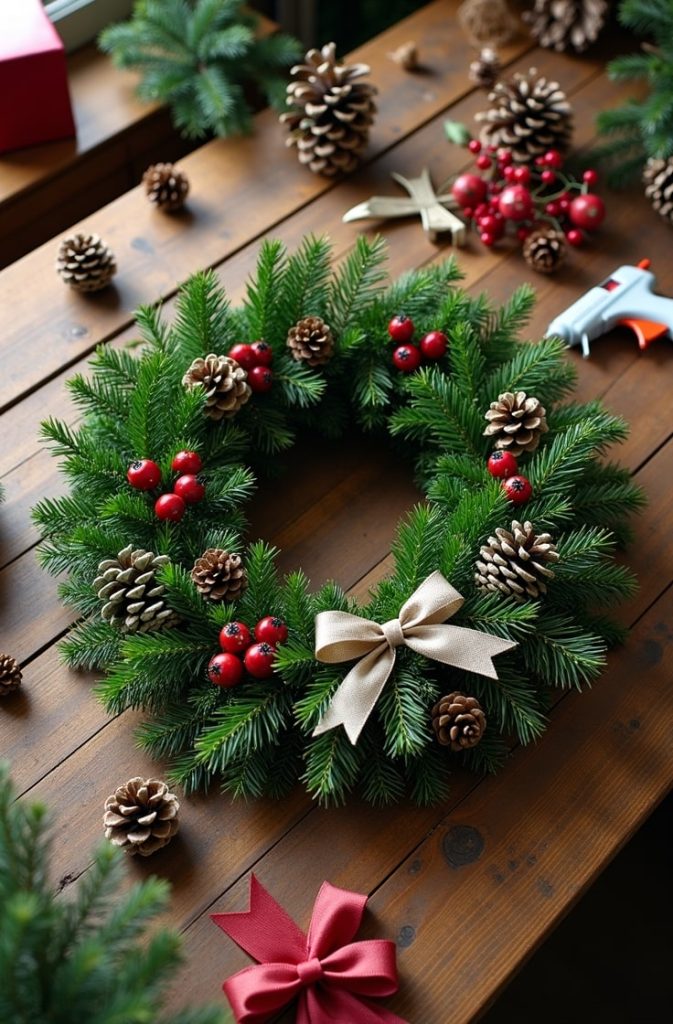
Overview: Nothing says Christmas like a wreath on your door. This intermediate project uses natural elements for a rustic, welcoming vibe. It’s perfect for your front porch or above the fireplace.
Materials:
- Wire wreath frame
- Faux evergreen branches (or real ones from your yard)
- Pinecones (collect them or buy them)
- Hot glue gun
- Faux berries or ribbon for accents
Instructions:
- Attach evergreen branches to the frame with floral wire, overlapping for fullness.
- Glue pinecones and berries in clusters for a balanced look.
- Add a ribbon bow and hang with a sturdy hook.
Time/Cost: About 45 minutes; $15–20.
Customization: Add fairy lights for a warm glow or dried orange slices for a citrusy scent. Swap berries for bells if you love a jingle.
Tips/Troubleshooting: Secure heavy pinecones with extra wire to prevent falling. If using outdoors, spray with a weatherproof sealant to protect against rain.
3. Knitted Christmas Stockings
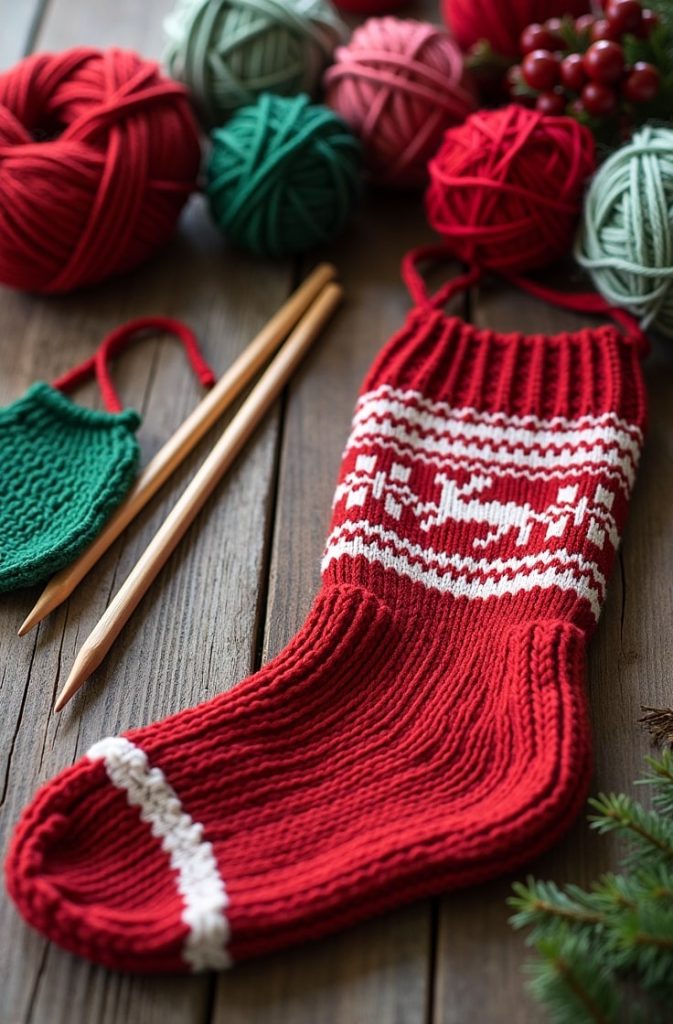
Overview: Knitting a Christmas stocking is a cozy, advanced project that creates heirloom-quality pieces. Don’t worry if you’re new—I’ll share a beginner pattern option too!
Materials:
- Yarn in festive colors (wool or acrylic)
- Knitting needles (size 8 for beginners)
- Stocking pattern (free ones online or simple rectangular design)
- Yarn needle for sewing
Instructions:
- Cast on stitches per your pattern (try 50 for a beginner size).
- Knit the body and heel, following the pattern’s shaping guide.
- Sew the cuff, add a loop, and embroider a name if desired.
Time/Cost: 4–6 hours; $10–15 per stocking.
Customization: Make each stocking unique with color blocks or patterns like snowflakes. Add pom-poms for a playful touch.
Tips/Troubleshooting: Use stitch markers to track rows. Dropped a stitch? Pick it up with a crochet hook. Practice on a small swatch if you’re new to knitting.
4. Scented Soy Candles in Festive Jars
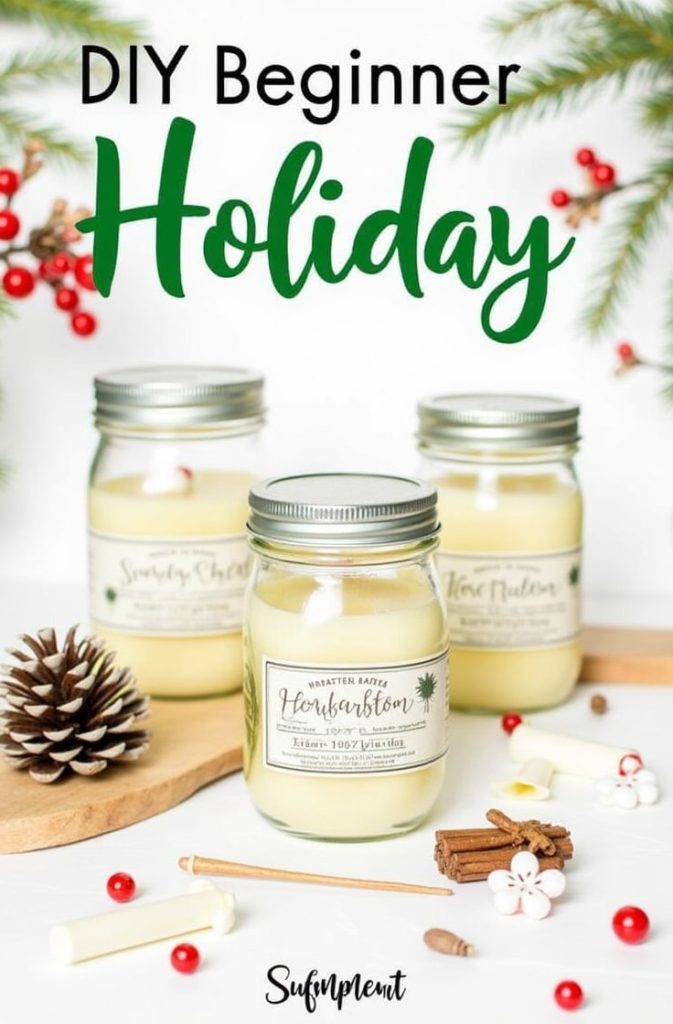
Overview: Fill your home with holiday scents like cinnamon or pine. This beginner project is relaxing and makes great gifts. I’ll keep safety first so you can craft with confidence.
Materials:
- Soy wax flakes
- Essential oils (pine, peppermint, or cinnamon)
- Wicks with metal bases
- Glass jars (mason or thrift store finds)
Instructions:
- Melt wax in a double boiler (or a heat-safe bowl over a pot of water).
- Add 10–20 drops of essential oil and stir. Pour into jars with centered wicks.
- Let cool for 4 hours, then trim the wick to ¼ inch.
Time/Cost: 1 hour (plus cooling); about $20 for 3–4 candles.
Customization: Embed dried herbs like rosemary for a natural look or use red/green wax dye. Try layering scents for a unique blend.
Tips/Troubleshooting: Use a double boiler to avoid burning wax. Handle hot jars with care—oven mitts are your friend! If the wick shifts, hold it in place with a clothespin while cooling.
5. Hand-Stamped Holiday Cards

Overview: Sending handmade cards feels so special. This quick, beginner project lets you create heartfelt greetings in minutes. Perfect for spreading holiday cheer!
Materials:
- Cardstock in white or holiday colors
- Rubber stamps (trees, stars, or messages)
- Ink pads in festive shades
- Embellishments like stickers or glitter
Instructions:
- Fold cardstock in half to make cards.
- Press stamps into ink and stamp designs onto the front.
- Write messages inside and add stickers or glitter for flair.
Time/Cost: 15 minutes per card; $5–10 for a set of 10.
Customization: Include a family photo inside or make pop-up elements for fun. Try watercolor stamps for an artsy vibe.
Tips/Troubleshooting: Practice stamping on scrap paper to get the pressure right. Clean stamps with baby wipes to switch colors easily.
6. Upcycled Gift Wrap with Fabric Scraps

Overview: Ditch disposable wrapping paper for this eco-friendly, beginner project. Use fabric scraps to create reusable gift wrap that’s as pretty as the gift itself.
Materials:
- Fabric scraps (old shirts, curtains, or remnant bins)
- Ribbon or twine
- Gift tags (make from cardstock)
Instructions:
- Cut fabric to fit your gift (about twice the size).
- Wrap the gift like a present, folding edges neatly.
- Tie with ribbon and attach a tag.
Time/Cost: 10 minutes per gift; nearly free if using scraps.
Customization: Embroider a snowflake or use holiday-themed fabric. Try furoshiki knots for a polished look.
Tips/Troubleshooting: Iron fabric for a crisp finish. For odd-shaped gifts, use stretchy fabric or double-wrap. Check YouTube for furoshiki tutorials.
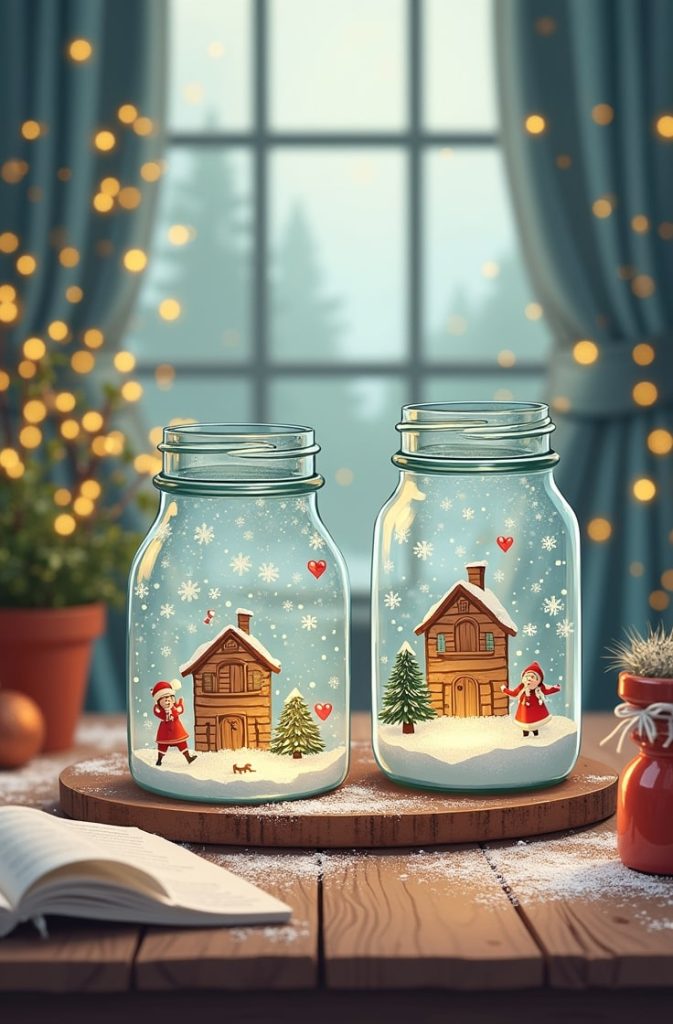
7. Mason Jar Snow Globes

Overview: These whimsical snow globes are perfect for your desk or as gifts. This intermediate project lets you create tiny winter scenes that sparkle.
Materials:
- Mason jars with lids
- Mini figurines (trees, reindeer)
- Glycerin, glitter, distilled water
- Waterproof glue
Instructions:
- Glue figurines to the inside of the lid.
- Fill the jar with water, a teaspoon of glycerin, and a pinch of glitter.
- Seal tightly, flip, and shake to test.
Time/Cost: 30 minutes; about $10 per globe.
Customization: Build a village scene or use mementos like tiny charms. Add colored glitter for a festive twist.
Tips/Troubleshooting: Use silicone sealant to prevent leaks. Test glue on figurines first—some plastics don’t stick well. Shake gently to avoid clouding.
8. Beaded Christmas Garland
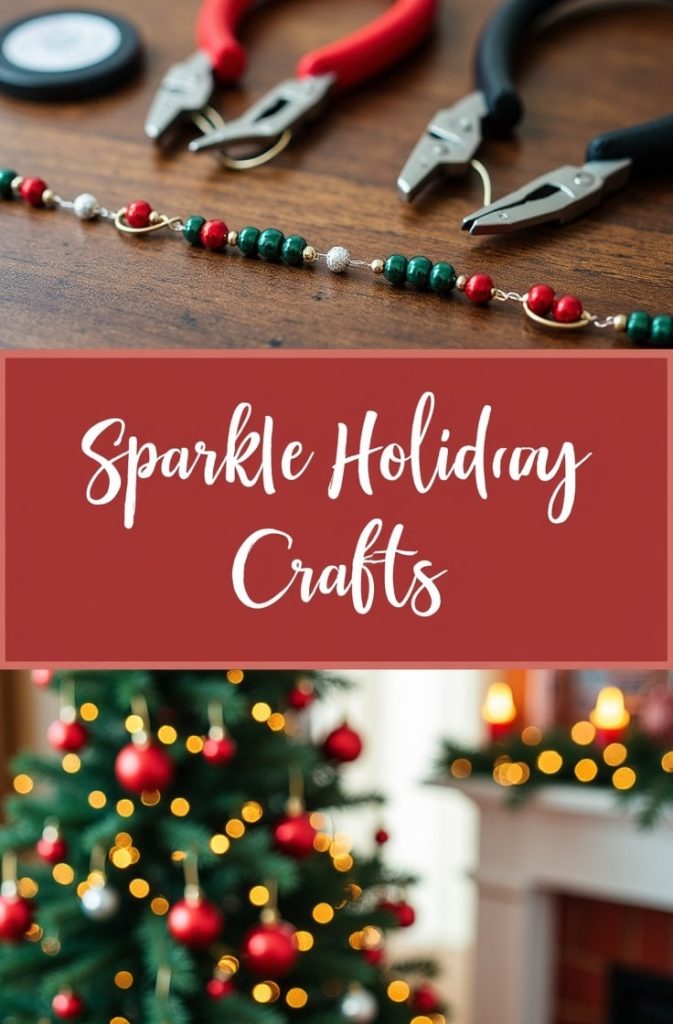
Overview: This beginner project creates a sparkling alternative to string lights. Drape it on your tree or along a mantel for instant holiday charm.
Materials:
- Beads (wood, glass, or metallic)
- Craft wire
- Crimp beads and pliers
Instructions:
- String beads onto wire in your desired pattern.
- Secure ends with crimp beads using pliers.
- Shape into loops or swags for hanging.
Time/Cost: 1 hour; about $15.
Customization: Mix bead sizes or colors for texture. Add charms like stars for extra flair.
Tips/Troubleshooting: Measure your space before cutting wire. Use pliers for tight crimps to keep beads secure. Store flat to avoid tangles.
9. Wooden Reindeer Signs
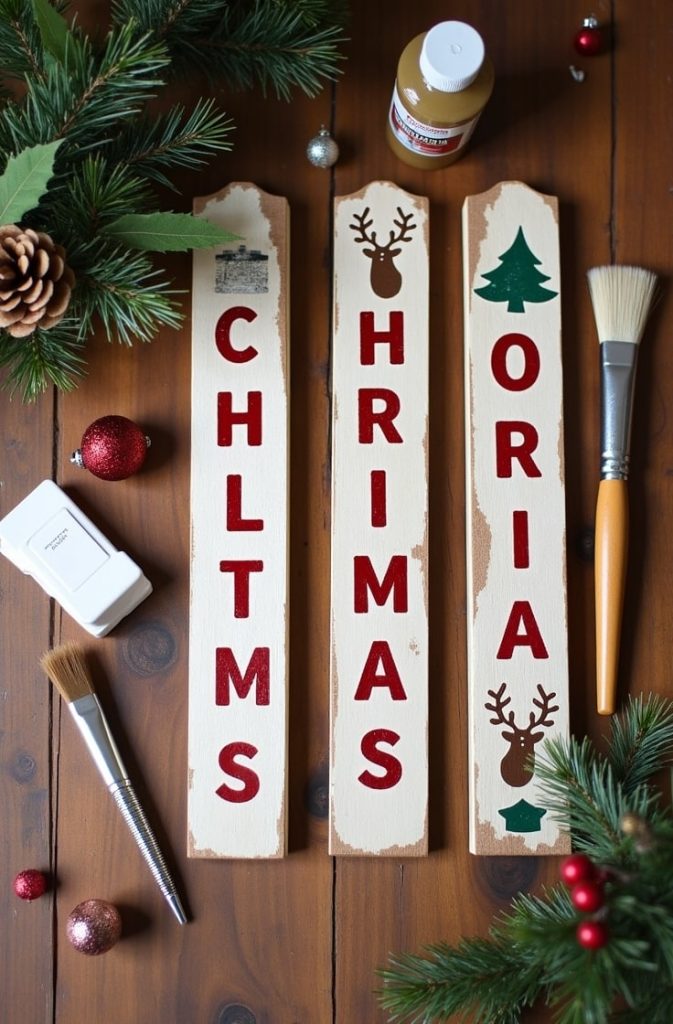
Overview: Add rustic charm with these intermediate wooden signs. Perfect for your yard or indoors, they bring holiday messages to life.
Materials:
- Wood planks (from hardware stores or pallets)
- Acrylic paint and brushes
- Stencils (letters or reindeer shapes)
- Hooks or stakes for display
Instructions:
- Sand planks for a smooth surface.
- Apply stencils and paint your design or message (e.g., “Joy”).
- Attach hooks or stakes for hanging.
Time/Cost: 2 hours; about $20.
Customization: Carve a reindeer silhouette or add fairy lights. Paint in metallics for a modern twist.
Tips/Troubleshooting: Seal with polyurethane for outdoor use. Wear gloves to avoid paint stains. Sand rough edges for safety.
10. Felt Advent Calendar
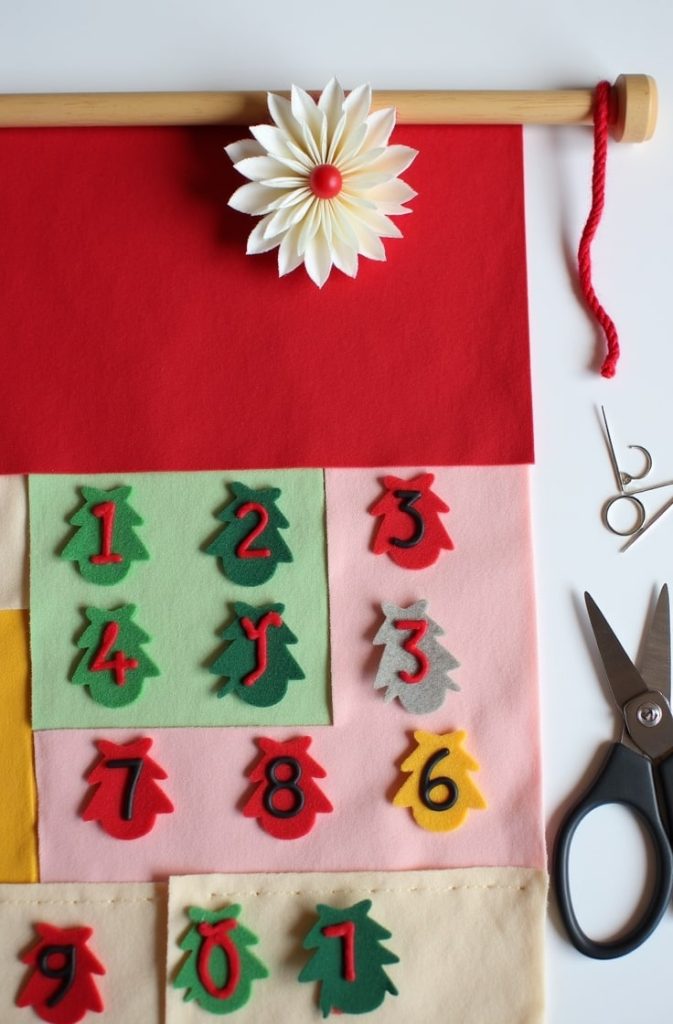
Overview: Count down to Christmas with this intermediate sewing project. Fill pockets with treats or notes for a fun holiday tradition.
Materials:
- Felt sheets (green, red, white)
- Thread and needle (or fabric glue)
- Number stickers or embroidery
- Dowel for hanging
Instructions:
- Cut a large felt rectangle for the base and 24 small pockets.
- Sew or glue pockets onto the base in rows.
- Add numbers and hang with a dowel and string.
Time/Cost: 3 hours; about $15.
Customization: Fill pockets with candy, quotes, or tiny gifts. Add a tree shape to the base for flair.
Tips/Troubleshooting: Reinforce seams for heavy items. No sewing machine? Use fabric glue for a quick fix. Plan pocket sizes to fit your treats.
11. Pressed Flower Ornaments
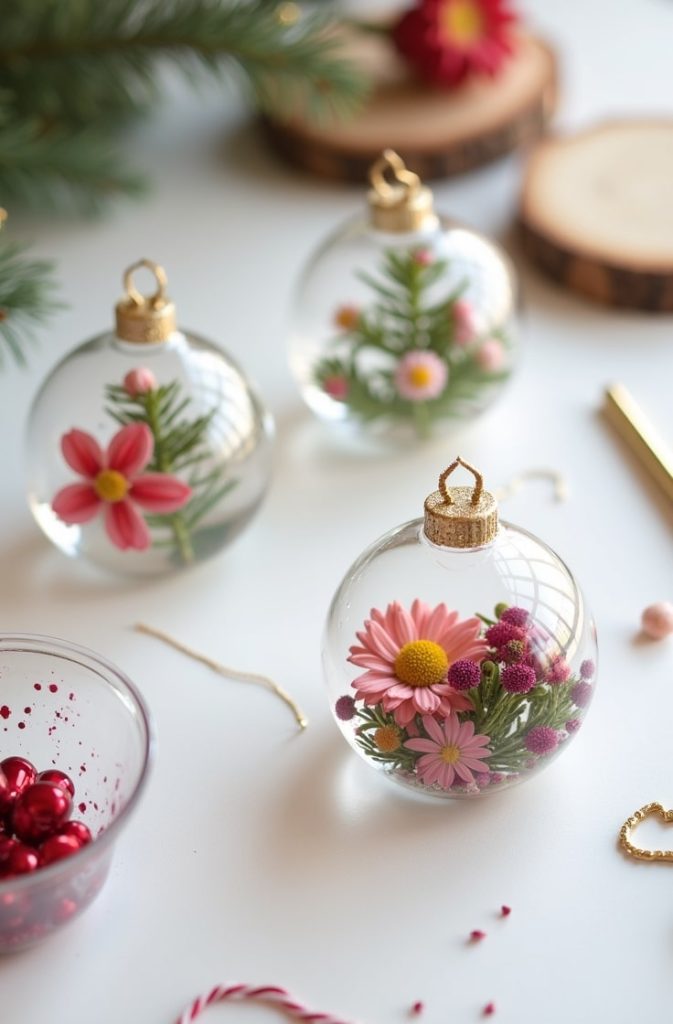
Overview: These delicate, beginner ornaments use dried flowers for a natural look. They’re perfect for gifting or decorating, though they need drying time.
Materials:
- Clear resin and molds
- Dried flowers (press your own or buy)
- String for hanging
- Drill or pin for holes
Instructions:
- Arrange dried flowers in a silicone mold.
- Mix and pour resin over flowers, filling the mold.
- Let cure for 24 hours, then drill a hole and add string.
Time/Cost: 1 hour active (24-hour cure); about $20.
Customization: Use holiday-colored flowers or add glitter. Shape into stars or hearts for variety.
Tips/Troubleshooting: Work in a well-ventilated area—resin smells strong. Stir slowly to avoid bubbles. Press flowers at least a week ahead.
12. Crocheted Snowflakes
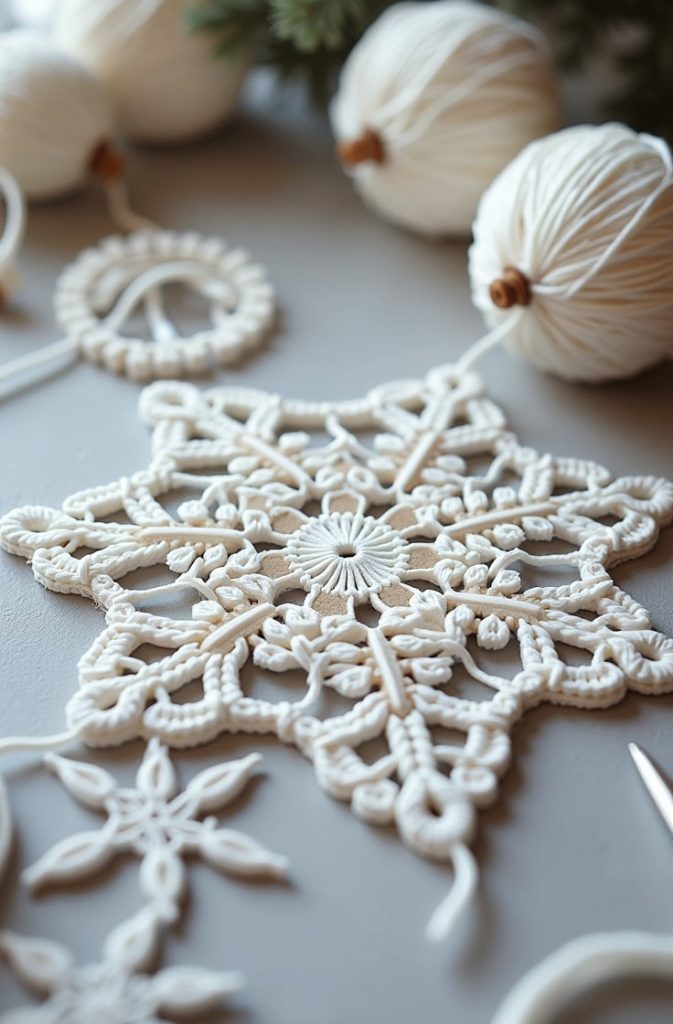
Overview: These intricate snowflakes are an advanced crochet project that dazzles on windows or trees. They’re small but stunning!
Materials:
- White cotton thread
- Small crochet hook (size 1.5mm)
- Liquid starch for stiffening
Instructions:
- Follow a snowflake pattern (find free ones online).
- Crochet tightly, then pin to shape on a board.
- Brush with starch and let dry overnight.
Time/Cost: 30 minutes each; about $5 for a set.
Customization: Vary sizes or use metallic thread. Hang in clusters for a blizzard effect.
Tips/Troubleshooting: Use blocking pins to hold shape while drying. Practice basic crochet chains first if you’re rusty.
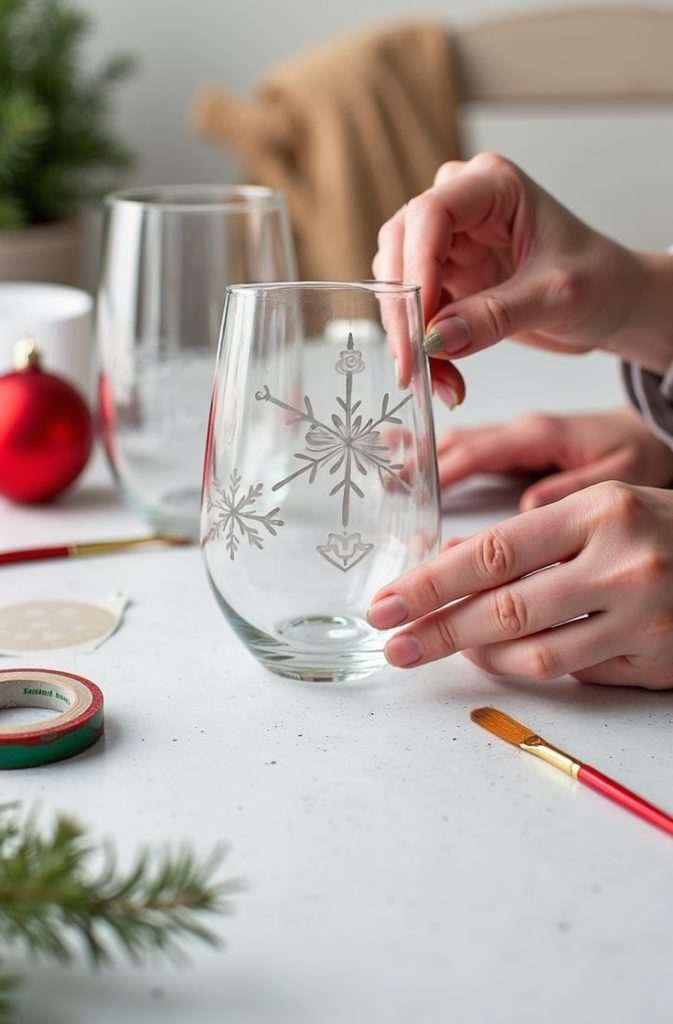
13. Etched Glassware for Mulled Wine

Overview: Personalize mugs or glasses with this intermediate etching project. They’re perfect for sipping mulled wine at holiday gatherings.
Materials:
- Glassware (mugs or wine glasses)
- Etching cream
- Stencils (snowflakes or initials)
- Painter’s tape
Instructions:
- Apply stencil to clean glass and secure with tape.
- Brush on etching cream, following package instructions.
- Wait 5–10 minutes, rinse thoroughly, and remove stencil.
Time/Cost: 45 minutes; about $15.
Customization: Etch holiday motifs or names. Pair with a mulled wine recipe card for gifting.
Tips/Troubleshooting: Wear gloves—etching cream is strong! Test on a cheap glass first to practice timing.
14. Herbal Sachets for Drawers
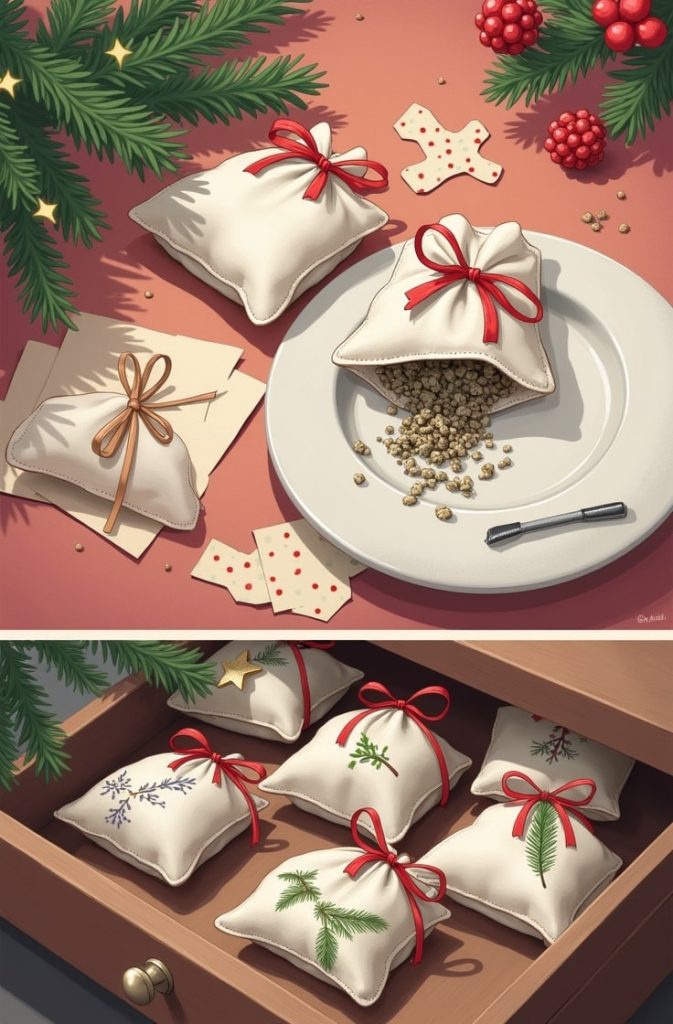
Overview: These beginner sachets add holiday scents to drawers or gifts. Sew them or go no-sew for a quick project.
Materials:
- Fabric squares (cotton or muslin)
- Dried herbs (lavender, pine needles)
- Ribbon or twine
Instructions:
- Cut two fabric squares (4×4 inches).
- Sew or glue three sides, fill with herbs, then close.
- Tie with ribbon for a cute finish.
Time/Cost: 20 minutes; about $10 for 5–6 sachets.
Customization: Mix scents like lavender-pine or add a charm. Use as tree ornaments for extra flair.
Tips/Troubleshooting: Use breathable fabric so scents release. Refresh herbs yearly to keep them potent.
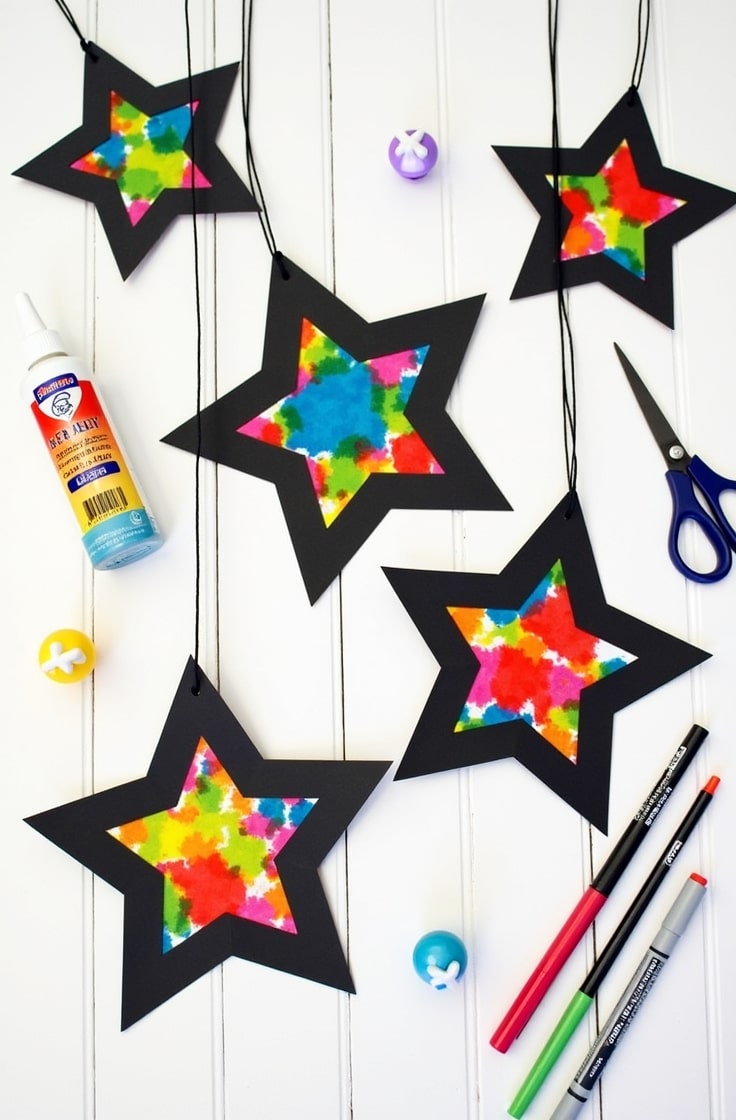
15. Paper Quilled Christmas Trees
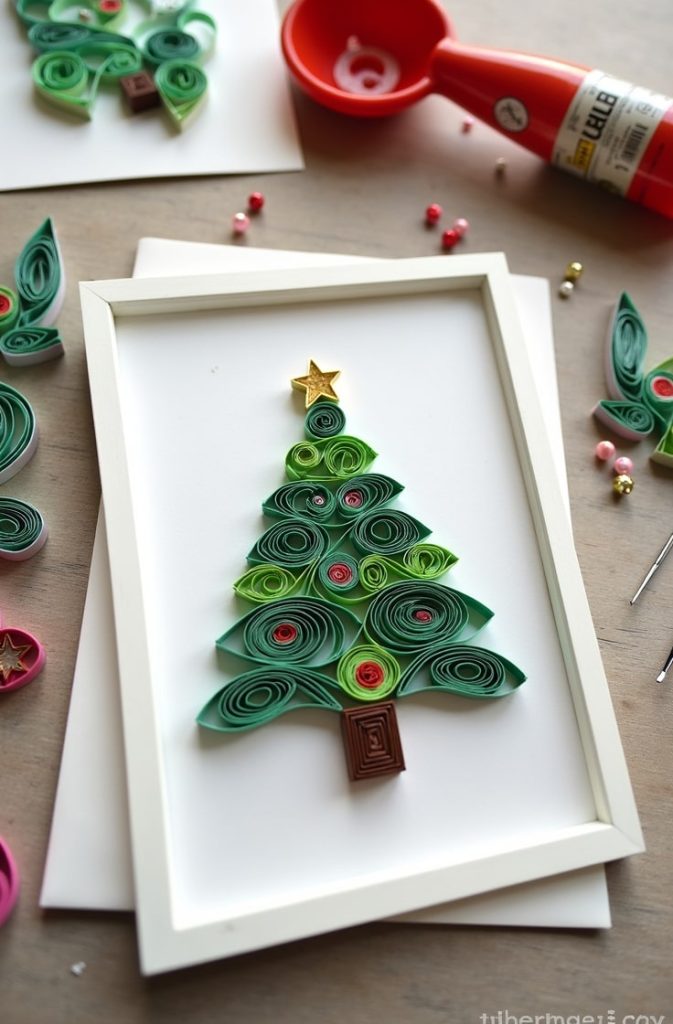
Overview: Create 3D tree art for cards or frames with this intermediate quilling project. It’s a unique way to show off your skills.
Materials:
- Quilling paper strips
- Quilling tool
- Glue and tweezers
- Cardstock or frame for display
Instructions:
- Roll paper strips into tight coils or shapes using the quilling tool.
- Arrange into a tree shape, gluing each piece.
- Attach to cardstock or frame for display.
Time/Cost: 1 hour; about $10.
Customization: Add tiny bead “ornaments” or use metallic paper. Frame for a polished gift.
Tips/Troubleshooting: Keep strips slightly damp for flexibility. Use tweezers for precise placement.
Wrapping It Up
Crafting for Christmas is all about joy, creativity, and making memories. Whether you’re painting ornaments or knitting stockings, each project adds a personal touch to your holiday.
I hope these 15 ideas inspire you to grab your supplies and start creating. Don’t be afraid to experiment—your unique spin is what makes these crafts special.
Share your creations with loved ones or keep them as keepsakes for years to come. Happy crafting, and here’s to a festive, handmade holiday!

Jenny is a passionate writer specializing in home decor, design, and styling. With years of experience in transforming spaces, she shares expert tips on creating beautiful, functional homes. From interior design trends to DIY decor ideas, Jenny’s work helps homeowners craft spaces that reflect their unique style. Whether it’s a cozy living room, a modern kitchen, or a serene bedroom, her articles offer practical advice and inspiration to elevate any home.