I’m thrilled to share some spine-chilling and fun ways to transform your outdoor space this Halloween.
There’s something magical about turning your front yard into a spooky wonderland or a family-friendly haunt. Whether you’re aiming to scare the socks off trick-or-treaters or create a welcoming vibe for kids, I’ve got you covered with 15 outdoor decoration ideas.

These ideas come straight from the heart of Halloween creativity, with practical tips, budget-friendly hacks, and safety advice to make your setup a hit.
Let’s dive in and make your yard the talk of the neighborhood!
Table of Contents
- Why Decorate Outdoors for Halloween?
- 15 Halloween Outdoor Decoration Ideas
- Practical Tips for Implementation
- Conclusion
Why Decorate Outdoors for Halloween?
Picture this: it’s Halloween night, and your street is buzzing with excited kids in costumes, parents snapping photos, and neighbors admiring each other’s setups. Outdoor decorations set the stage for all that magic.
They’re your chance to show off your Halloween spirit and make your home a destination for trick-or-treaters. A well-decorated yard doesn’t just look cool—it brings your community together. It creates memories for kids and adults alike. Plus, it’s a fun way to express yourself!
But outdoor decorating isn’t just about aesthetics. It’s about creating a safe, inviting space. I’ll share ideas that work for all skill levels, from DIY beginners to seasoned crafters.
We’ll also talk about using weather-resistant materials and secure setups to keep your decorations looking great, no matter the October weather.
Ready to get started? Let’s explore 15 ideas that’ll make your yard scream Halloween!
15 Halloween Outdoor Decoration Ideas
I’ve broken these ideas into categories to suit every vibe—classic spooky, family-friendly, eerie effects, dramatic lighting, and interactive displays. Each idea includes what you need, how to pull it off, and tips to make it shine. Let’s get decorating!
Classic Spooky Themes
These timeless ideas bring the creepy, crawly essence of Halloween to life. They’re perfect for setting a haunting mood without going over the top.
1. Jack-o’-Lantern Pathway

Nothing says Halloween like glowing jack-o’-lanterns! I love lining my walkway with these carved pumpkins to guide trick-or-treaters to my door. You can go classic with triangle eyes and toothy grins or get fancy with intricate designs like bats, witches, or skulls.
What You’ll Need: Fresh pumpkins, carving tools, LED candles (safer than real flames), and a scoop for cleaning out the guts.
How to Do It: Pick pumpkins in various sizes for visual interest. Sketch your design with a marker before carving. Scoop out the insides, carve your pattern, and pop an LED candle inside. Arrange them along your walkway or steps. Want to mix it up? Try stacking smaller pumpkins on larger ones for a totem-pole effect.
Tips: Use battery-powered LED candles to avoid fire risks and keep them glowing all night. For extra flair, brush glow-in-the-dark paint on the edges of your carvings. It’ll make them pop under moonlight! If you want them to last longer, coat the cut edges with petroleum jelly to slow decay.
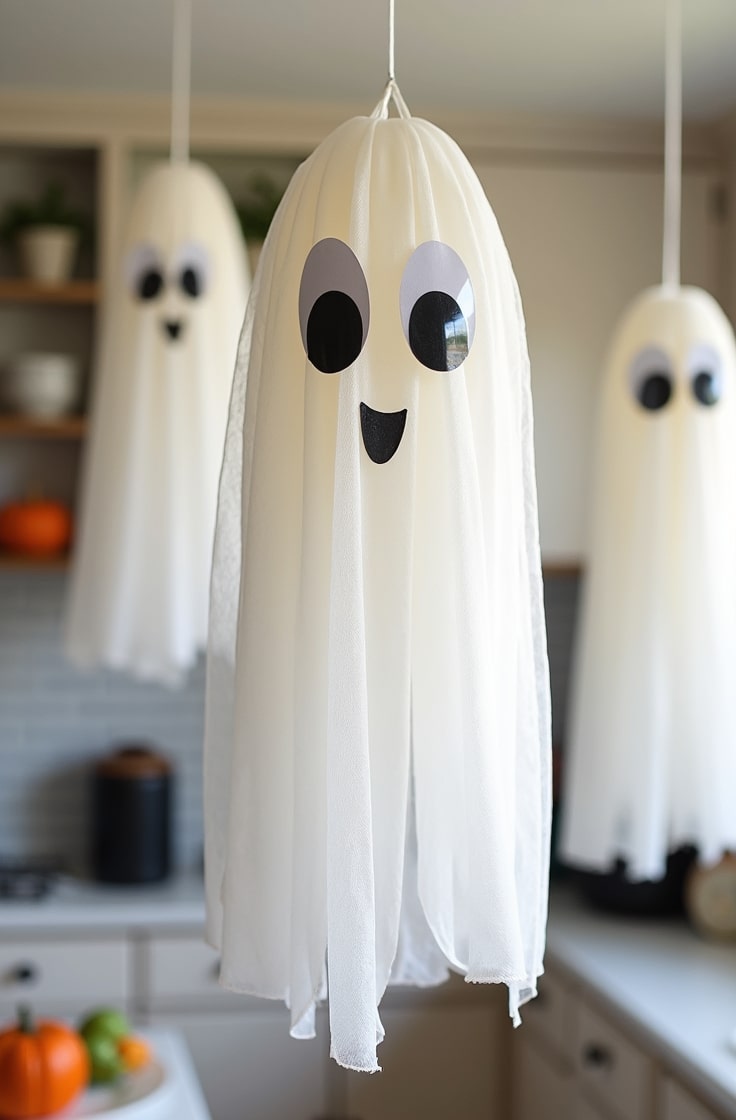
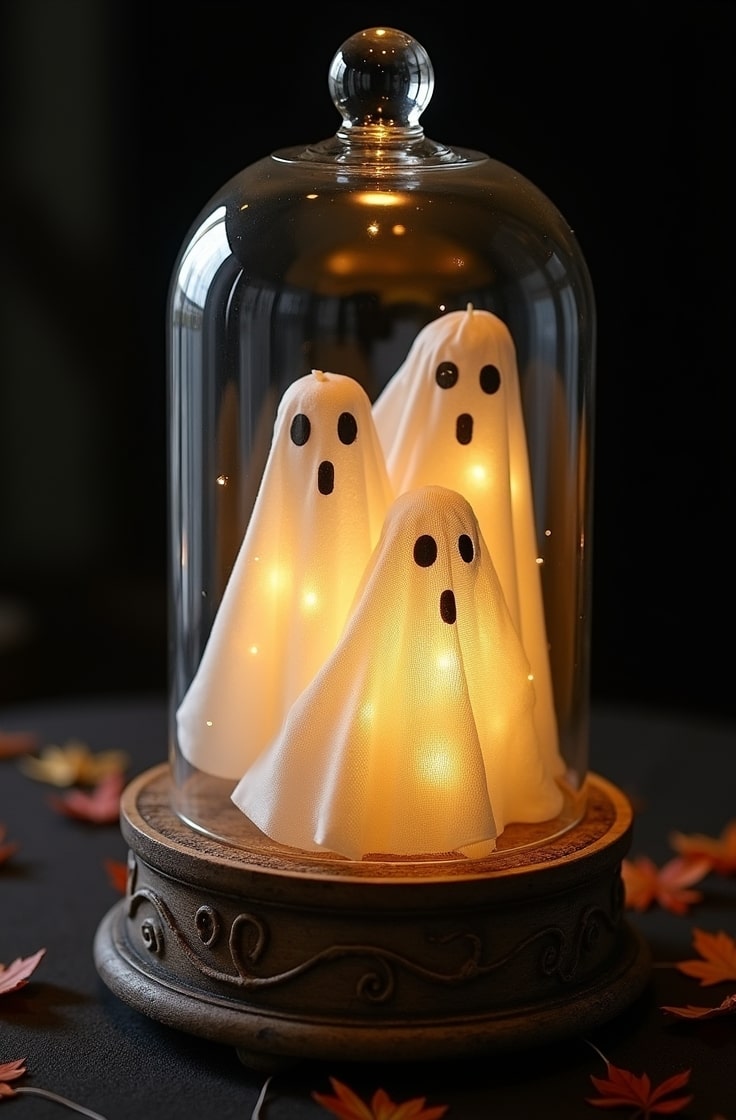
2. Ghostly Figures

Floating ghosts are my go-to for a spooky yet whimsical vibe. They’re easy to make and look amazing swaying in the breeze. I hang mine from trees or my personally to create a ghostly gathering.
What You’ll Need: Cheesecloth, balloons, glow sticks, fishing line, and some wire or stakes for stability.
How to Do It: Inflate a balloon to form the ghost’s head. Drape cheesecloth over it, letting it hang unevenly for a tattered look. Secure the cloth with a small piece of fishing line around the “neck.” Pop a glow stick inside for an eerie glow, then hang the ghost with fishing line from a tree or porch. You can also use wire frames for more structured shapes.
Tips: Add LED lights or glow-in-the-dark paint for glowing eyes to make your ghosts extra creepy. Space them out to create a floating effect, and avoid placing them where they might tangle in strong winds. If you’re feeling crafty, add tattered fabric scraps for a more weathered look.
3. Tombstone Graveyard

I can’t resist a creepy graveyard scene! Setting up tombstones in your yard is a classic way to give your space an abandoned, haunted feel. It’s surprisingly easy and super effective.
What You’ll Need: Foam boards (from craft stores), gray paint, black markers for epitaphs, and stakes for securing them.
How to Do It: Cut foam boards into tombstone shapes—rectangles with rounded tops work great. Paint them gray to mimic stone, then use a black marker to write funny or spooky epitaphs like “Here Lies My Wi-Fi” or “R.I.P. Barry D. Alive.” Push stakes into the bottom to anchor them in the ground. Scatter them across your lawn for a graveyard vibe.
Tips: Add fake cobwebs and plastic skeleton hands reaching out of the ground for extra creepiness. You can find cobweb material at most Halloween stores. To make your tombstones sturdy, double up the foam layers or use wooden stakes. If it’s windy where you live, weigh them down with rocks or sandbags.
Family-Friendly and Fun Decorations
These ideas are perfect for homes with young kids or if you want a lighter, less scary Halloween vibe. They’re colorful, cute, and sure to make everyone smile.
4. Friendly Pumpkin Characters

Carving pumpkins can be messy, so I love painting them instead to create adorable characters. Think pumpkins dressed up as cats, superheroes, or even minions! They’re kid-friendly and add a playful touch to your yard.
What You’ll Need: Pumpkins (real or foam), acrylic paint, paintbrushes, and clear spray paint for sealing.
How to Do It: Choose smooth pumpkins for easier painting. Sketch your design lightly with a pencil—maybe a panda face or a superhero mask. Paint with bright acrylic colors, letting each layer dry. Once done, spray with clear sealant to protect against rain. Group them on your porch or lawn for a cheerful display.
Tips: Use foam pumpkins for a reusable option—they last year after year. Cluster them in groups of three or five for a balanced look. If you’re not artsy, use stencils for clean designs. Kids can join in with washable paints for a fun family project.
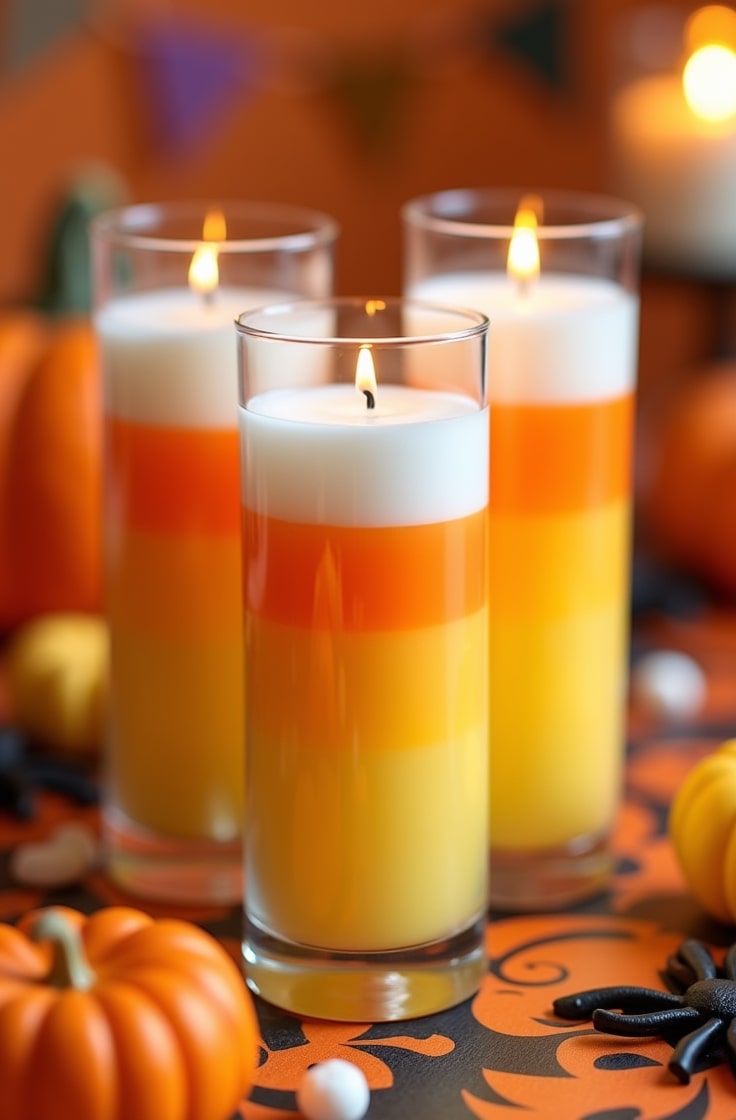
5. Candy Corn Lawn Stakes

Candy corn is a Halloween staple, and oversized versions make adorable lawn decorations. I love how these add a pop of color to my yard without being too spooky.
What You’ll Need: Wood or foam boards, paint (white, orange, yellow), and ground stakes.
How to Do It: Cut your material into large candy corn shapes—wide at the bottom, tapering to a point. Paint the bottom third white, the middle third orange, and the top third yellow. Attach stakes to the back and push them into the lawn. Space them evenly along your walkway or garden edge.
Tips: Add reflective tape to make them visible at night, especially for trick-or-treaters. If you’re on a budget, check dollar stores for foam boards. Secure stakes firmly to prevent tipping in windy weather. You can also scale down the size for smaller yards.
6. Witch’s Cauldron Display

A bubbling cauldron is a showstopper! I set one up on my porch last year, and kids couldn’t stop talking about the spooky mist. It’s easier than it looks and adds a magical touch.
What You’ll Need: A cauldron prop (plastic or metal), dry ice, LED lights, and a small amount of water.
How to Do It: Place your cauldron in a prominent spot, like your porch or near the door. Add a small amount of water and a chunk of dry ice for that bubbling, foggy effect. Drop in a waterproof LED light (green or purple works great) for a glowing potion vibe. Keep it running during peak trick-or-treating hours.
Tips: Handle dry ice with gloves to avoid burns, and keep it out of reach of kids. Only use it in well-ventilated areas. If dry ice isn’t available, a small fog machine inside the cauldron works too. Refresh the water and dry ice every hour for continuous fog.
Eerie and Dramatic Effects
Want to dial up the creep factor? These ideas add a chilling atmosphere that’ll have your neighbors doing double takes.
7. Fog Machine Ambiance

A fog machine is my secret weapon for creating a haunted vibe. It transforms your yard into a misty, otherworldly scene that’s perfect for Halloween night.
What You’ll Need: A fog machine, fog juice, and outdoor extension cords.
How to Do It: Set up your fog machine in a sheltered spot, like under a porch or in a garage corner. Fill it with fog juice and plug it in. Let the fog roll across your yard, creating a spooky haze. Pair it with other decorations like tombstones or ghosts for maximum impact.
Tips: Add colored LED lights (purple or green) to tint the fog for a supernatural effect. Check that your machine is weatherproof or keep it covered. Use a timer to control bursts of fog and save juice. Always test it beforehand to ensure it’s working.
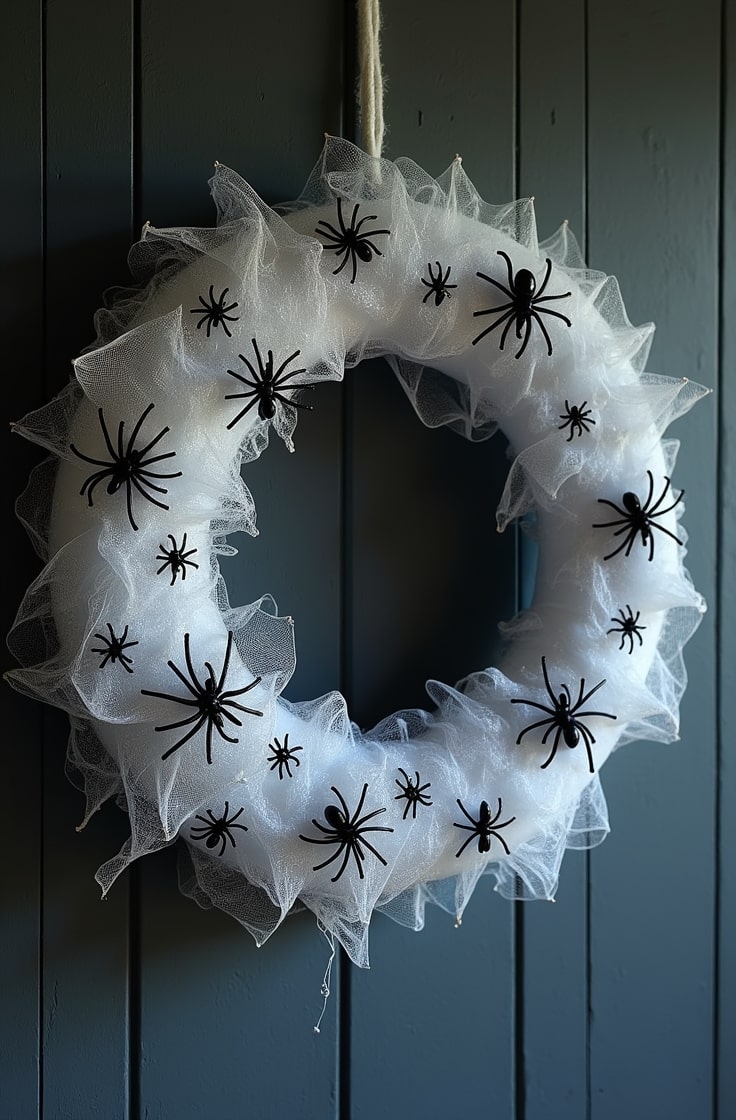
8. Spider Web Canopy

Giant spider webs are a must for a creepy-crawly vibe. I drape them over my bushes and porch to make it look like giant spiders have taken over!
What You’ll Need: Stretchable spider webbing (available at Halloween stores) and plastic spiders.
How to Do It: Stretch the webbing across bushes, fences, or your porch railing. Pull it thin for a realistic, wispy look. Scatter plastic spiders of various sizes across the webs—bigger ones make a bolder statement. You can also wrap webbing around tree trunks for extra effect.
Tips: Avoid stretching webs across walkways to prevent tripping. Add a few oversized spiders for drama, but don’t overdo it—one or two big ones are enough. If it’s rainy, check that your webbing is water-resistant, or bring it in during storms.
9. Skeleton Scene

Skeletons are so versatile! I love setting them up in funny or creepy poses to add personality to my yard. Last year, I had one “climbing” my fence, and it was a hit.
What You’ll Need: Plastic skeletons, zip ties, and props like hats, shovels, or chairs.
How to Do It: Get creative with your skeletons! Pose one sitting on a porch chair with a book, another climbing a tree, or a group digging a “grave.” Use zip ties to secure them to fences, trees, or stakes. Add props to tell a story—a skeleton with a pirate hat or holding a lantern is always fun.
Tips: Paint skeletons with glow-in-the-dark paint for a spooky nighttime effect. Secure them tightly to withstand wind—zip ties are your friend. If you have multiple skeletons, create a scene, like a skeleton picnic or a “bone” fire.
Lighting and Projections
Lighting can make or break your Halloween setup. These ideas use light and projections to create a magical or terrifying effect.
10. Spooky Silhouette Window Projections

Window projections are my favorite way to add movement to my decor. Ghostly silhouettes dancing across your windows will stop passersby in their tracks.
What You’ll Need: A projector, silhouette templates (available online), and sheer curtains or white sheets.
How to Do It: Hang a sheer curtain or sheet in a window facing the street. Set up a small projector inside, aimed at the curtain. Download or create silhouette templates—think ghosts, witches, or bats. Loop a video or slideshow of the silhouettes for a continuous effect.
Tips: Free templates are easy to find online, or you can draw your own with software like Canva. Test the projector’s brightness to ensure it’s visible at night. If you want sound, add a small speaker with creepy noises, but keep it low to avoid disturbing neighbors.
11. Colored Floodlights

Colored floodlights are a simple way to transform your yard’s mood. I use purple and orange to bathe my house in a spooky glow that screams Halloween.
What You’ll Need: LED floodlights (purple, orange, or green), outdoor extension cords, and stakes or mounts.
How to Do It: Position floodlights to highlight key areas, like your front door, trees, or decorations. Plug them into outdoor-rated extension cords. Angle the lights to create dramatic shadows—pointing them at tombstones or skeletons works great. Turn them on at dusk for maximum impact.
Tips: Use timers to save energy and ensure lights turn on automatically. LED bulbs are bright and energy-efficient, plus they come in fun Halloween colors. Test the angles during the day to avoid blinding neighbors or creating glare.
12. Glowing Eyes in Bushes

This is one of my favorite low-effort, high-impact tricks! Glowing eyes peeking from bushes make your yard feel alive with hidden creatures.
What You’ll Need: LED lights, ping pong balls or toilet paper rolls, and a marker.
How to Do It: For ping pong balls, cut small slits for eyes and draw pupils with a marker. Insert an LED light inside each ball. For toilet paper rolls, cut out eye shapes and tape a light inside. Scatter them in bushes or low shrubs, securing with tape or wire. Turn on the lights at night for a creepy effect.
Tips: Use red or yellow LEDs for a menacing look. Space the eyes unevenly for a natural, scattered feel. Make sure they’re weatherproof—seal ping pong balls with waterproof tape if needed. Check them nightly to replace batteries.
Interactive and Unique Displays
These ideas add a touch of interactivity or uniqueness to surprise and delight your visitors. They’re perfect for making your yard memorable.
13. Witch Crash Scene

A witch “crashing” into your yard is hilarious and eye-catching! I set one up last year, and kids loved taking selfies with it.
What You’ll Need: A witch hat, broom, striped stockings, and a wire frame or mannequin legs.
How to Do It: Create the illusion of a witch crashing into a tree, wall, or hay bale. Stuff striped stockings with fabric or foam and attach them to a broom. Add a witch hat and some tattered fabric for a cape. Secure the setup with wire or stakes so it looks like she’s stuck mid-crash.
Tips: Add a sign like “Witch Parking Only” for extra laughs. Make sure the setup is secure to avoid falling in wind or rain. If you have a tree, wrap the broom around it for a realistic crash effect. Kids will love this one!
14. Haunted Archway

An archway at your walkway’s entrance sets the tone for your Halloween setup. I built one last year with skulls and vines, and it was a showstopper.
What You’ll Need: PVC pipes or wood for the frame, faux vines, Halloween ornaments (skulls, lanterns), and zip ties.
How to Do It: Build a simple arch using PVC pipes or wood—hardware stores have affordable options. Wrap it with faux vines and hang decorations like plastic skulls, lanterns, or bats. Add motion-sensor lights or sound effects (like cackling) for interactivity. Place it at your walkway’s start to welcome guests.
Tips: Secure the base with heavy weights or stakes to keep it upright. Motion-sensor lights or sounds add a fun surprise—test them to ensure they’re not too loud. If you’re crafty, paint the PVC black for a creepier look.
15. Zombie Hands Emerging from Ground

Zombie hands reaching out of the ground are a creepy, interactive touch. I love how they make my lawn look like a zombie apocalypse is starting!
What You’ll Need: Plastic zombie hands, stakes, and dirt or mulch for effect.
How to Do It: Push plastic hands into the ground at an angle, so they look like they’re clawing their way out. Add a layer of dirt or mulch around the base to make it look realistic. Cluster them in one area, like near a tombstone, for a dramatic scene.
Tips: Use subtle LED lights to highlight the hands at night—green or white works well. Secure them with stakes to prevent tipping. If you want extra creepiness, add a few hands near your porch steps (but keep them out of the way for safety).
Practical Tips for Implementation
Now that you’ve got a ton of ideas, let’s talk about making them work. Halloween decorating can be fun and affordable if you plan ahead. Here are some tips to bring your vision to life.
Budget Considerations
You don’t need to break the bank to create a spooky yard. I’ve found great deals at dollar stores, thrift shops, and post-Halloween sales. Foam boards for tombstones or paint for pumpkins are super affordable.
Reuse old sheets for ghosts or repurpose Christmas lights for Halloween colors. If you’re buying props like skeletons, check online marketplaces for secondhand deals. DIY projects like painted pumpkins or zombie hands save money while letting you customize.
Safety Guidelines
Safety is key, especially with kids running around. Use flame-resistant materials for anything near lights or electronics—most Halloween stores label these clearly. Secure heavy items like tombstones or arches with stakes or weights to prevent tipping.
Keep walkways clear of webs, cords, or decorations to avoid tripping hazards. If you’re using dry ice or fog machines, follow instructions carefully and keep them out of reach of kids. Check all electrical items for outdoor ratings to avoid shocks or fires.
Weatherproofing
October weather can be unpredictable, so protect your decorations. Use waterproof spray paint or sealants on painted pumpkins and tombstones. Store delicate items like cheesecloth ghosts indoors during rain or high winds.
For electronics like fog machines or floodlights, use outdoor-rated extension cords and cover plugs with waterproof tape. If you’re in a rainy area, opt for foam pumpkins or plastic props over real ones—they hold up better.
Storage Tips
After Halloween, you’ll want to keep your decorations in good shape for next year. Clean off dirt or pumpkin guts before storing. Wrap fragile items like skeletons or lanterns in bubble wrap or old blankets.
Store everything in labeled bins to make next year’s setup a breeze. Keep foam tombstones flat to avoid warping, and store lights untangled to save time. If you used real pumpkins, compost them or use them for fall recipes—waste not, want not!
Conclusion
There you have it—15 Halloween outdoor decoration ideas to make your yard the spookiest (or cutest) on the block! From classic jack-o’-lanterns to interactive zombie hands, there’s something for every style and skill level.
I love how these ideas let you mix creepy, fun, and dramatic elements to create a unique setup. Whether you’re crafting with your kids or going all-out for a haunted vibe, you’re sure to make memories.
So, grab your pumpkins, fog machine, or skeleton crew, and get decorating! Involve your family, have fun, and share your creations online—platforms like Pinterest or X are great for showing off your spooky style.
If you’re looking for inspiration, check out local Halloween displays or search X for trending ideas. Let’s make this Halloween one to remember!

Jenny is a passionate writer specializing in home decor, design, and styling. With years of experience in transforming spaces, she shares expert tips on creating beautiful, functional homes. From interior design trends to DIY decor ideas, Jenny’s work helps homeowners craft spaces that reflect their unique style. Whether it’s a cozy living room, a modern kitchen, or a serene bedroom, her articles offer practical advice and inspiration to elevate any home.