You’re not here to scroll through pretty pictures and wonder how they were made — you’re here for the actual pattern. The real row-by-row, knot-by-knot breakdown you can follow with floss between your fingers.
And that’s exactly what you’re going to get! These 5 red, white, and blue bracelet patterns are designed for the 4th of July, but honestly, you’ll want to wear them all summer long.
From a classic chevron to a seed bead stripe layout and even a beginner-friendly alpha pattern, there’s something here for every skill level. Grab your supplies and let’s get into it.
Table of Contents
- 🛒 What You'll Need: Top 5 Supplies on Amazon
- 1. Red, White & Blue Chevron Pattern 🎆
- 2. Patriotic Stripe Alpha Pattern
- 3. Seed Bead Stripe Layout ❤️
- 4. Stars & Stripes Macramé Square Knot Pattern 🎆
- 5. Diagonal Stripe Braid Pattern
- Save These & Stack Them All!
🛒 What You’ll Need: Top 5 Supplies on Amazon
DMC Embroidery Floss Mega Set (100 Colors) — A large floss set ensures you have the exact shades of red, white, and blue needed to execute any pattern in this article without color-matching stress.
Knotty Boy Bracelet Making Board with Clips — A dedicated pattern board holds your anchor knot securely so both hands stay free to knot, keeping your tension consistent row by row.
11/0 Glass Seed Bead Kit (Patriotic Color Pack) — Uniform seed beads in red, white, and blue are essential for the bead pattern sections of this guide, where consistent bead size affects the layout directly.
0.8mm Elastic Stretch Cord (Clear, 50m Spool) — A long spool of clear elastic cord gives you enough length to experiment with bead pattern layouts before committing to your final design.
Bead Mat (Flocked, 12×8 inch) — A flocked beading mat keeps your beads from rolling off the table and lets you lay out your full pattern before stringing, which saves a lot of frustration.
1. Red, White & Blue Chevron Pattern 🎆
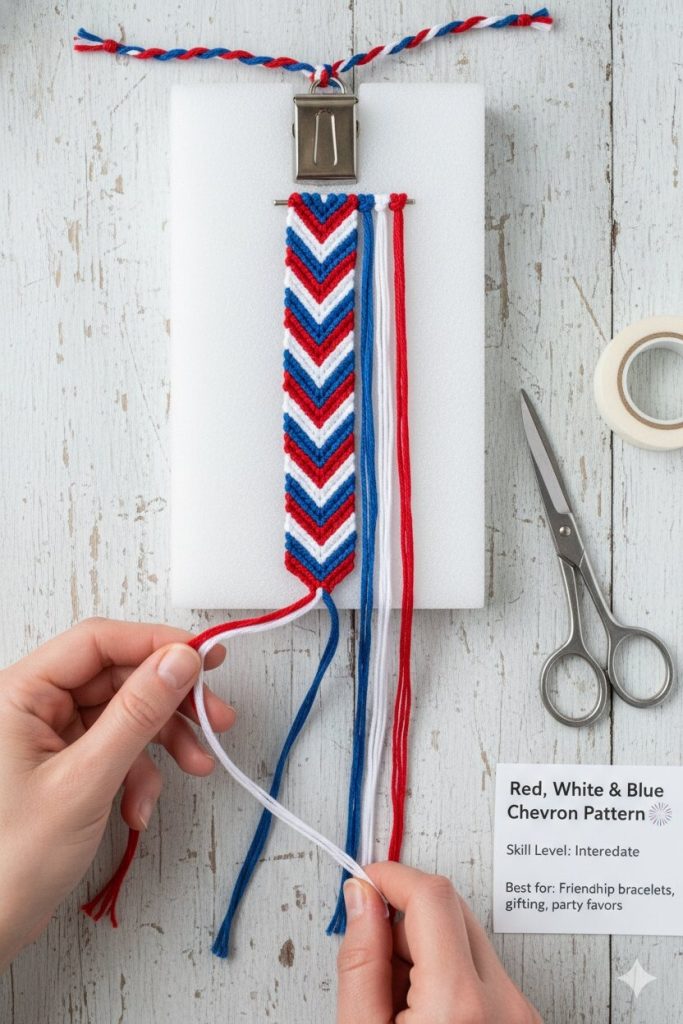
Skill Level: Intermediate Best for: Friendship bracelets, gifting, party favors
You’ll need:
- Red, white, and blue embroidery floss (2 strands of each, 30 inches long)
- Tape or bracelet board
- Scissors
The Pattern:
Arrange your 6 strands in this order, left to right: R — W — B — B — W — R
This mirror arrangement is what creates the V-shape (chevron) automatically as you knot.
Each row: Left outer cord ties FORWARD knots across to center. Right outer cord ties BACKWARD knots across to center. Center two cords tie one FORWARD-BACKWARD knot together to close the V.
Row 1: Red cords meet in the middle → closes with red V Row 2: White cords are now outermost → white V Row 3: Blue cords are now outermost → blue V Repeat from Row 1.
Step-by-Step Instructions:
- Cut 2 strands each of red, white, and blue floss at 30 inches. Knot all 6 together at one end, leaving a 3-inch tail, and clip to your board.
- Arrange strands in mirror order: R-W-B-B-W-R from left to right.
- Take the far-left red strand and tie a forward knot (loop over, pull through, tighten — twice) onto each strand moving right until you reach the center.
- Take the far-right red strand and tie a backward knot (loop under, pull through, tighten — twice) onto each strand moving left until you reach the center.
- Tie the two red strands together in the middle with one forward-backward knot to close the V. That’s your first chevron row.
- White is now your outermost color on both sides. Repeat steps 3–5 with white, then again with blue.
- Keep repeating the R-W-B sequence until your bracelet measures 6.5–7 inches, then knot off and leave tying tails.
Pro Tip: Always knot twice on each strand — one knot creates a loose, uneven row. Two knots lock it in and keep your chevrons sharp and uniform.
2. Patriotic Stripe Alpha Pattern
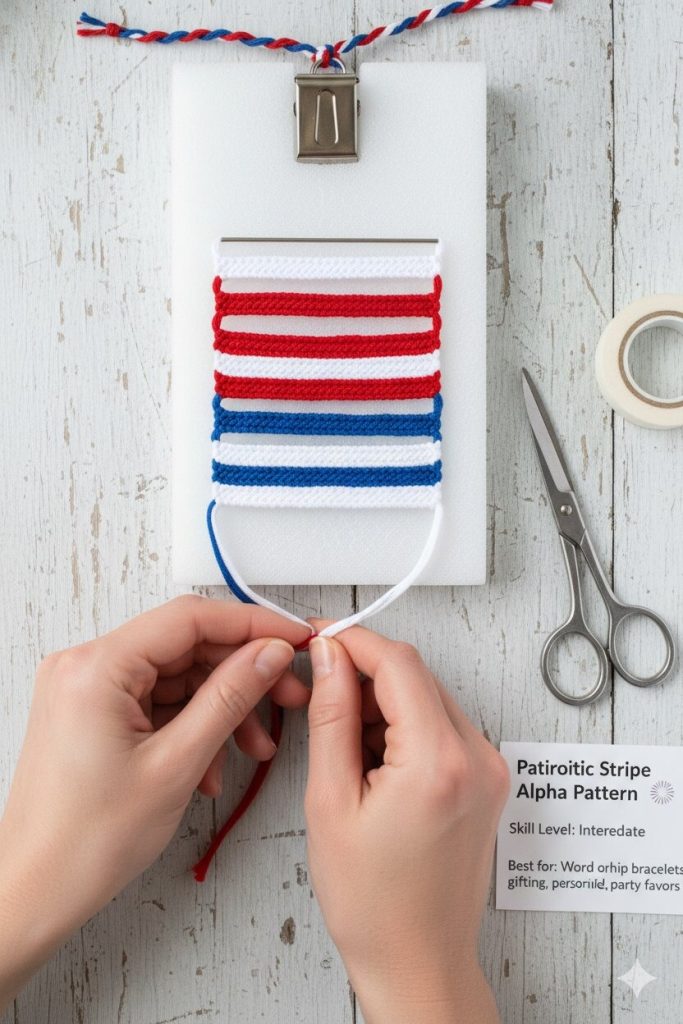
Skill Level: Intermediate Best for: Word or initial bracelets, personalized gifts
You’ll need:
- White embroidery floss (base color, 6 strands, 30 inches)
- Red and blue embroidery floss (pattern color, 2 strands each, 30 inches)
- Bracelet board with clips
- Scissors
The Pattern:
Alpha patterns work differently from chevrons — your base strands stay mostly stationary and your pattern strand weaves across each row to form shapes.
Layout (8-strand base, read left to right): W — W — W — W — W — W — W — W
Pattern strand starts on the left and travels right across each row.
Row 1 (Red stripe): Pattern strand = Red. Tie BACKWARD knot on every white strand from left to right. Row 2 (White stripe): No pattern strand needed — all white base strands, skip row or let base show. Row 3 (Blue stripe): Pattern strand = Blue. Tie BACKWARD knot on every white strand from left to right. Repeat: Red stripe → White gap → Blue stripe → White gap.
Step-by-Step Instructions:
- Cut 8 white strands at 30 inches each. Knot together at one end and clip to your board spread evenly.
- Cut one red strand and one blue strand at 30 inches. These are your traveling pattern strands.
- Start with your red pattern strand on the far left. Tie a backward knot onto each white strand moving right across the full row.
- When the red strand reaches the far right, loop it back to the left — this is the start of your next row. Let the white base show for one full row (this is your white stripe).
- Bring your blue pattern strand in from the left and tie backward knots across all white strands for one full row.
- Let the white base show again for one row, then repeat from step 3.
- Continue the R-W-B-W stripe sequence until your bracelet is 6.5 inches long, tie off, and leave tails.
Pro Tip: Keep your pattern strand at a slight diagonal angle as you knot across — pulling it straight creates puckering and uneven rows.
3. Seed Bead Stripe Layout ❤️
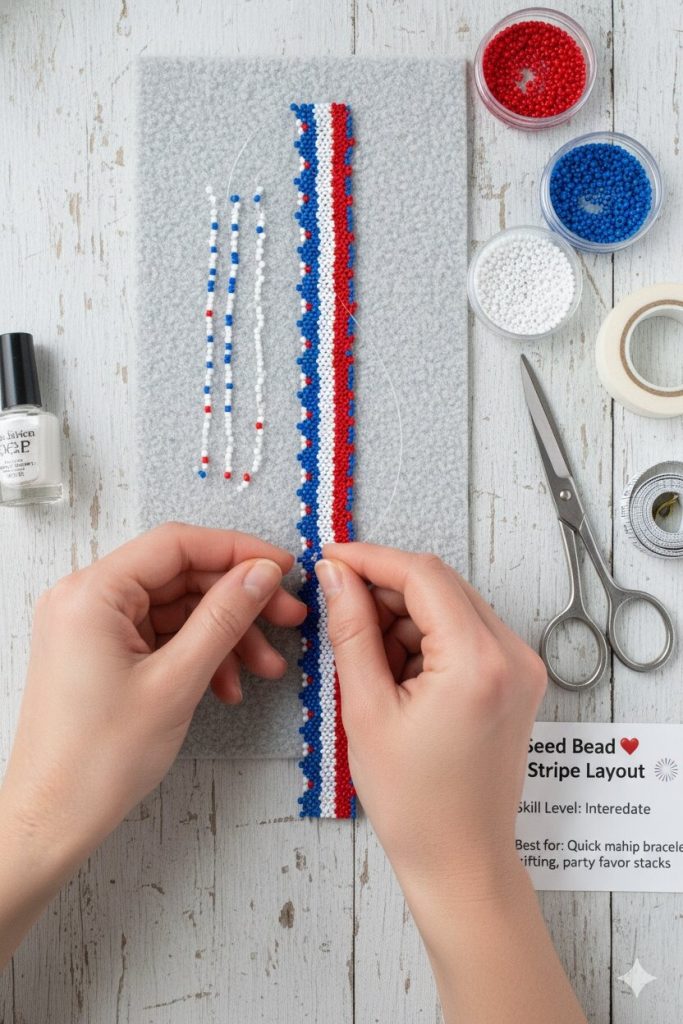
Skill Level: Beginner Best for: Quick makes, kids’ crafts, party favor stacks
You’ll need:
- Red, white, and blue size 11/0 seed beads
- Clear elastic cord (0.8mm)
- Beading mat
- Scissors
The Pattern:
Lay out your bead sequence on your mat before stringing. This is your repeating unit:
Unit: B-B-B — W — R-R-R — W — B-B-B (Blue x3, White x1, Red x3, White x1, Blue x3 = 11 beads per unit)
Repeat this unit until your strand measures 6.5–7 inches. A standard wrist typically needs 5–6 full units.
Step-by-Step Instructions:
- Lay out 5–6 full units of the bead sequence on your mat to confirm the layout looks right before you commit.
- Cut 12 inches of elastic cord and tie a loose temporary knot at one end so beads don’t fall off while you work.
- Thread beads onto the cord following your laid-out sequence exactly — don’t pick beads from the pile directly, follow your mat layout.
- Continue stringing until the beaded section measures 6.5 inches, or test it around your wrist with the ends held together.
- Untie your temporary knot and bring both ends of the cord together.
- Tie a surgeon’s knot: cross right over left and pull through twice, then cross left over right and pull through once. Pull both ends firmly.
- Dab the knot with clear nail polish, let it dry 60 seconds, then trim the tails close.
Pro Tip: String in good lighting — red and blue seed beads look nearly identical in dim light and a wrong bead in the middle of your pattern is extremely frustrating to fix after the fact.
4. Stars & Stripes Macramé Square Knot Pattern 🎆
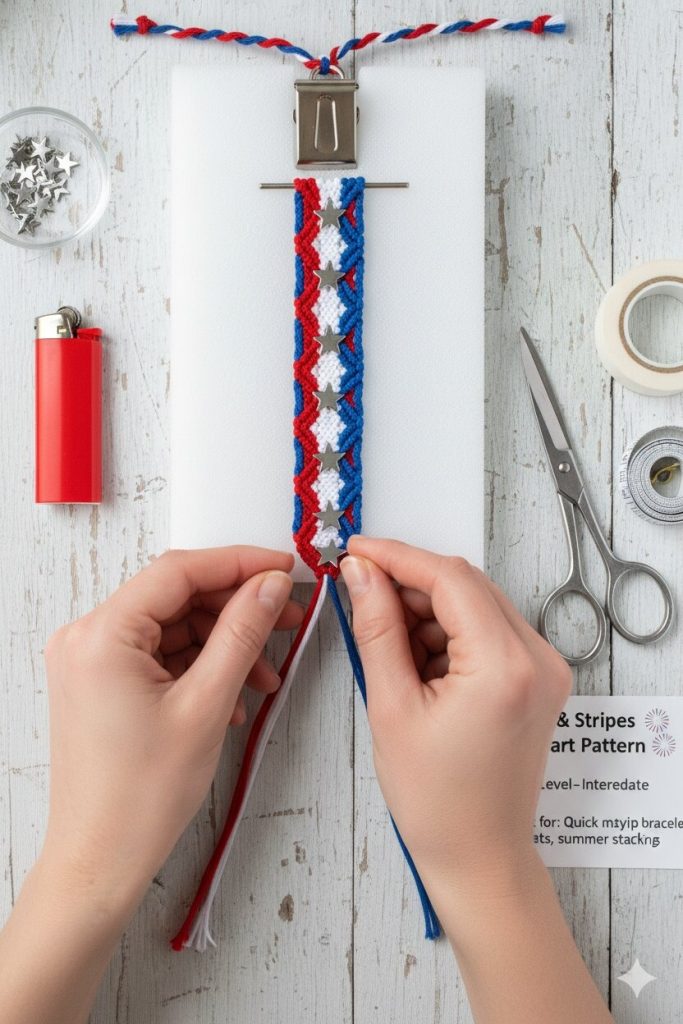
Skill Level: Beginner–Intermediate Best for: Chunky boho-style bracelets, summer stacking
You’ll need:
- Red, white, and blue 1mm waxed cotton cord (30 inches per strand)
- Small silver star charms (3–5)
- Scissors
- Lighter to seal ends
The Pattern:
4-cord setup: 2 outer knotting cords (red) + 2 inner anchor cords (white)
Square Knot sequence: Knot 1: Left red OVER white anchors → right red UNDER white → pull right red UP through left loop → tighten (this is the left half) Knot 2: Right red OVER white anchors → left red UNDER white → pull left red UP through right loop → tighten (this is the right half) Knots 1 + 2 together = 1 complete square knot.
Pattern: 3 square knots in red → slide on star charm over anchor cords → 3 square knots in blue → slide on star charm → repeat.
Step-by-Step Instructions:
- Cut 2 red cords at 30 inches (knotting cords) and 2 white cords at 12 inches (anchor cords). Fold all cords at the midpoint and knot together, leaving a 3-inch loop for tying on.
- Pin or tape the top knot to your board so both hands are free to knot.
- Tie 3 complete square knots in red following the pattern notation above.
- Slide one star charm onto both white anchor cords so it sits flush against your last knot.
- Switch to blue knotting cords (tuck the red cords behind) and tie 3 square knots in blue below the charm.
- Add another star charm and continue alternating: 3 red square knots, charm, 3 blue square knots, charm — until the knotted section is 5.5–6 inches long.
- Finish with an overhand knot using all cords together, trim to 2-inch tails, and seal with a lighter flame.
Pro Tip: Pull your square knots with equal tension on both sides — if one side is tighter, the bracelet will twist and spiral instead of lying flat.
5. Diagonal Stripe Braid Pattern
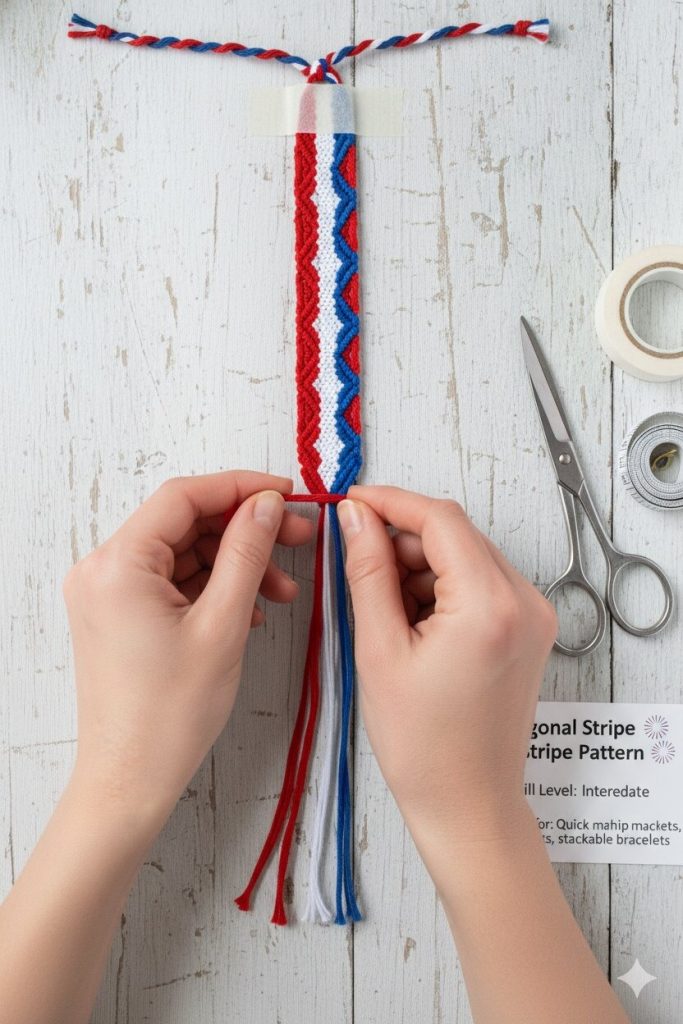
Skill Level: Beginner Best for: First-time pattern makers, quick gifts, stackable bracelets
You’ll need:
- Red, white, and blue embroidery floss (3 strands each, 24 inches)
- Tape or clipboard
- Scissors
The Pattern:
9-strand setup, arranged left to right: R — R — R — W — W — W — B — B — B
Forward knot only — every strand knots onto the strand to its right.
Row 1: R1 ties forward knots onto R2, R3, W1, W2, W3, B1, B2, B3 → R1 is now on the far right. Row 2: R2 (now leftmost red) repeats the same across all strands to the right. Row 3: R3 does the same → all reds have traveled right, stripe shifts diagonally. Row 4: W1 is now leftmost → white stripe begins traveling right.
The diagonal stripe appears naturally — you just keep sending the leftmost strand across the row with forward knots.
Step-by-Step Instructions:
- Cut 3 strands each of red, white, and blue at 24 inches. Knot all 9 at one end and tape down, spreading strands in R-R-R-W-W-W-B-B-B order.
- Take the far-left strand (red) and tie two forward knots onto every strand to its right, working across all 8 remaining strands.
- That first strand is now on the far right. Your new far-left strand is the next red.
- Repeat step 2 with this strand — forward knots across all strands to its right.
- Repeat with the third red strand. You’ll now see a clear red diagonal stripe.
- Continue with white strands (rows 4, 5, 6), then blue strands (rows 7, 8, 9). The R-W-B diagonal stripe pattern repeats automatically.
- Keep going until the bracelet reaches 6.5–7 inches. Knot off and leave 3-inch tying tails.
Pro Tip: Don’t rush the forward knot — always make sure to knot twice on each strand or your stripe will look uneven and loose.
Save These & Stack Them All!
Pin your favorite pattern to your craft board right now so you don’t lose it — trust me, you’ll want to come back to these. Better yet, challenge yourself to make all 5 and wear them as a full patriotic stack on the 4th of July.
There’s nothing better than showing up to the fireworks with a wrist full of bracelets you made yourself. Happy knotting, happy stringing, and happy Independence Day from one crafter to another!

Jenny is a passionate writer specializing in home decor, design, and styling. With years of experience in transforming spaces, she shares expert tips on creating beautiful, functional homes. From interior design trends to DIY decor ideas, Jenny’s work helps homeowners craft spaces that reflect their unique style. Whether it’s a cozy living room, a modern kitchen, or a serene bedroom, her articles offer practical advice and inspiration to elevate any home.