I remember standing in my laundry closet with a tape measure in one hand and a sad cup of coffee in the other. Five feet by six feet. That was it.
I wanted a sink in there so badly. Everyone told me it wouldn’t fit. I didn’t believe them, and I was right not to. I spent the next few weekends testing layouts, measuring drain lines, and returning sinks that were an inch too wide.
I found seven setups that actually work in tight spaces. Here’s what I found, starting with the products that made it possible.
Table of Contents
- Top 5 Products for a Small Laundry Sink Setup
- Why Small Laundry Sinks Need Different Planning
- 1. The 24-Inch Closet Sink Squeeze
- 2. The Stacked Washer-Dryer Sink Combo
- 3. The Under-Stairs Laundry Nook With Sink
- 4. The Mudroom-Laundry Sink Combo
- 5. The Fold-Down Sink for Ultra-Tight Spaces
- 6. The DIY Corner Sink With Slim Cabinet
- 7. The Semi-Custom Cabinet Sink for a Finished Look
- Which Idea Is Right for Your Space?
- FAQs
Top 5 Products for a Small Laundry Sink Setup
- Mustee 15-Inch Utility Sink – A compact, molded sink built specifically for tight laundry closets where a standard 24-inch basin won’t fit.
- VINGLI 20-Gallon Freestanding Utility Sink with Faucet – A budget-friendly, all-in-one unit with a pull-out faucet that skips separate plumbing fixture shopping.
- UTILITYSINKS 18×24″ Portable Utility Sink – A lightweight, quick-connect option that works well for renters or DIYers who don’t want to cut into existing plumbing.
- Oatey 42721 Floor-Mounted Utility Sink – A low-profile, floor-standing sink designed for narrow footprints next to a washer.
- Kraus Compact Stainless Steel Laundry Faucet with Pull-Down Sprayer – A slim, wall-mount faucet that frees up counter space instead of eating into it.
Why Small Laundry Sinks Need Different Planning
A small space doesn’t just need a smaller sink. It needs a different plan. You’re working around a drain line, a washer’s water supply, and usually a doorway. Every inch matters. That’s why I’m giving you full layouts, not just pretty pictures.
1. The 24-Inch Closet Sink Squeeze
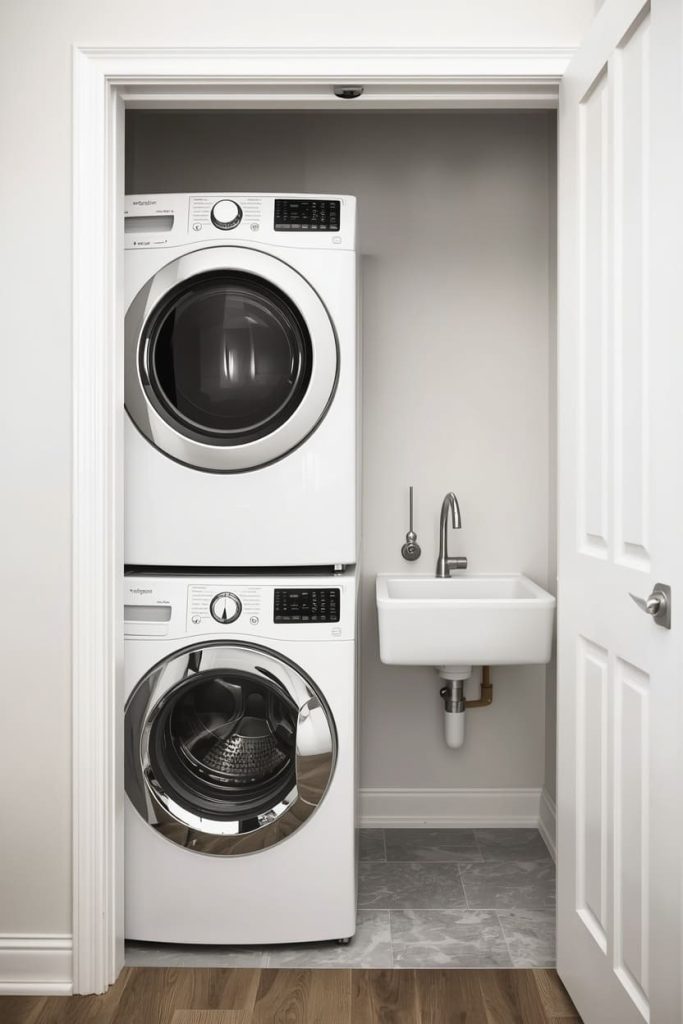
This works if your laundry closet is between 24 and 30 inches wide, with the washer and dryer stacked rather than side by side.
Sink type: Wall-mounted, 15-inch compact basin (like the Mustee above).
Layout: Mount the sink on the wall opposite the stacked unit, at 34 inches off the floor. This keeps floor space open for the door swing.
Steps:
- Confirm your drain stub-out location. You’ll likely need to extend it a few inches with PVC.
- Install a wall-mounted faucet instead of a deck-mounted one. This avoids needing counter depth.
- Mount the sink bracket into studs, not just drywall anchors. A full sink of water is heavy.
- Add a P-trap under the sink, angled to clear the wall.
Tip: Don’t skip the shutoff valves. In a tight space, you’ll want to isolate the sink without touching the washer’s water lines.
2. The Stacked Washer-Dryer Sink Combo
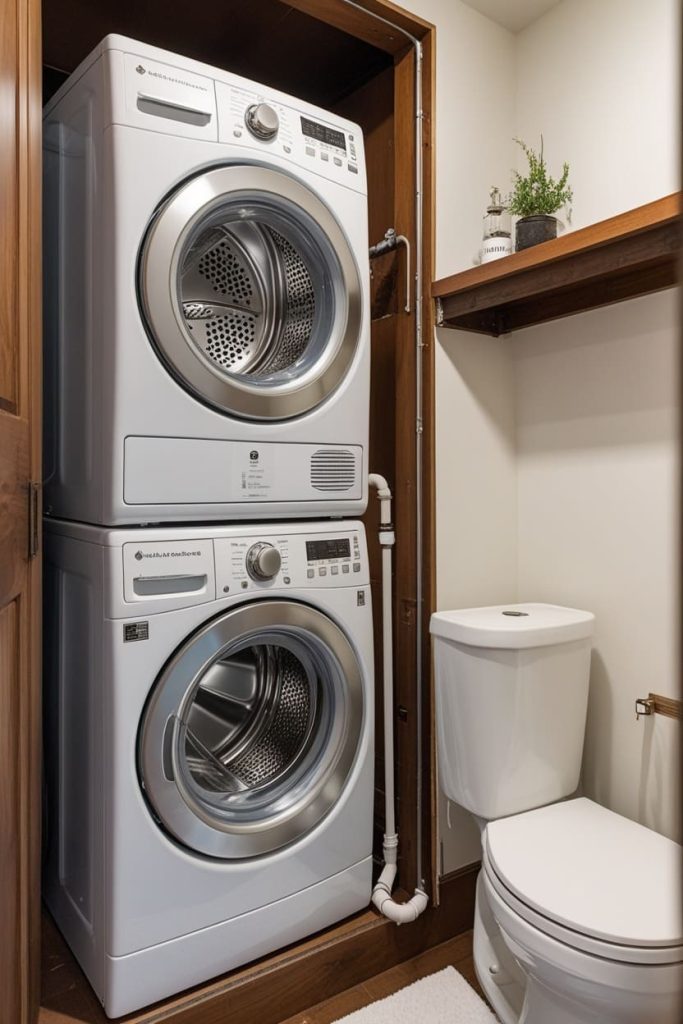
This works for hallway or closet setups where the washer and dryer are already stacked and you have one open wall left.
Sink type: Freestanding 20-gallon unit (like the VINGLI sink).
Layout: Place the sink directly beside the stacked unit, using the same wall for both.
Steps:
- Measure the depth of your stacked unit. Most are 27–33 inches deep. Your sink should sit flush or slightly recessed.
- Run a shared drain line if code allows, tying the sink drain into the washer’s standpipe downstream.
- Use a single shutoff manifold for both the washer and sink to simplify future repairs.
- Add a slim shelf above the sink for detergent, since you’re losing counter space.
Common mistake: People tie the sink drain in upstream of the washer trap, which causes backflow during the spin cycle. Always go downstream.
3. The Under-Stairs Laundry Nook With Sink
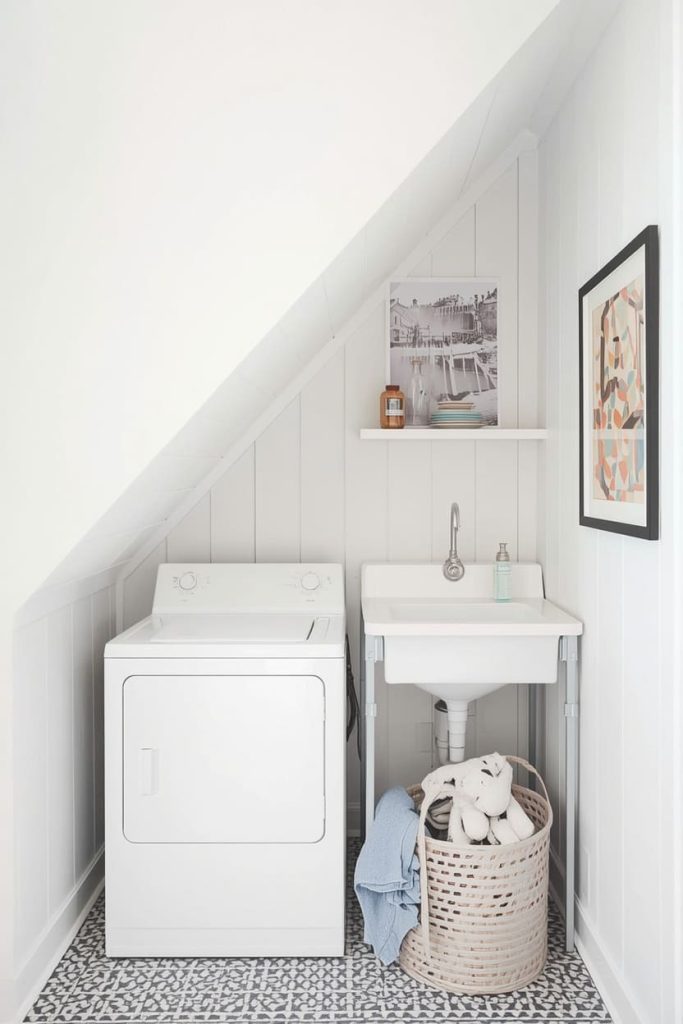
This works for homes with a closet under the stairs, typically an irregular, sloped-ceiling space.
Sink type: Portable, quick-connect sink (like the UTILITYSINKS 18×24).
Layout: Place the sink at the tallest end of the slope, where you have full standing height.
Steps:
- Sketch the ceiling slope first. You need at least 60 inches of height where the sink sits.
- Use a quick-connect drain kit instead of hard plumbing if you’re renting or unsure about permanent changes.
- Install a fold-down shelf above the sink instead of a fixed cabinet, since headroom shrinks fast under stairs.
- Add battery-powered puck lights, since under-stairs spaces are usually short on wiring.
Tip: Don’t put the washer under the lowest point of the slope. You’ll hit your head every time you load it.
4. The Mudroom-Laundry Sink Combo
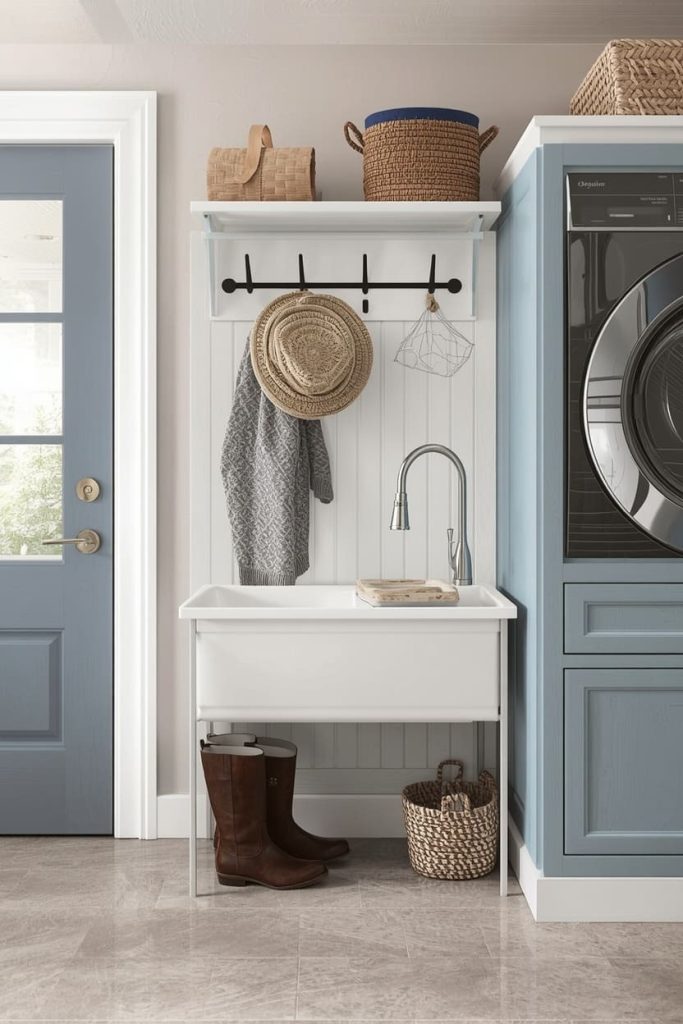
This works if your laundry area doubles as a mudroom, with boots, coats, and a sink for muddy hands or paws.
Sink type: Deep basin, floor-mounted (like the Oatey 42721).
Layout: Position the sink near the entry door, with the washer and dryer along the back wall.
Steps:
- Choose a deep-basin sink, at least 12 inches deep, since mudroom use means bigger messes than laundry alone.
- Add a pull-down sprayer faucet for rinsing boots or bathing pets.
- Install a floor drain nearby if your budget allows. It saves your sink from overflow damage.
- Use water-resistant flooring, like porcelain tile, since this zone gets wetter than a standard laundry room.
Common mistake: Skipping a splash guard behind the sink. Mudroom sinks get more aggressive use than laundry sinks, and drywall behind them stains fast.
5. The Fold-Down Sink for Ultra-Tight Spaces
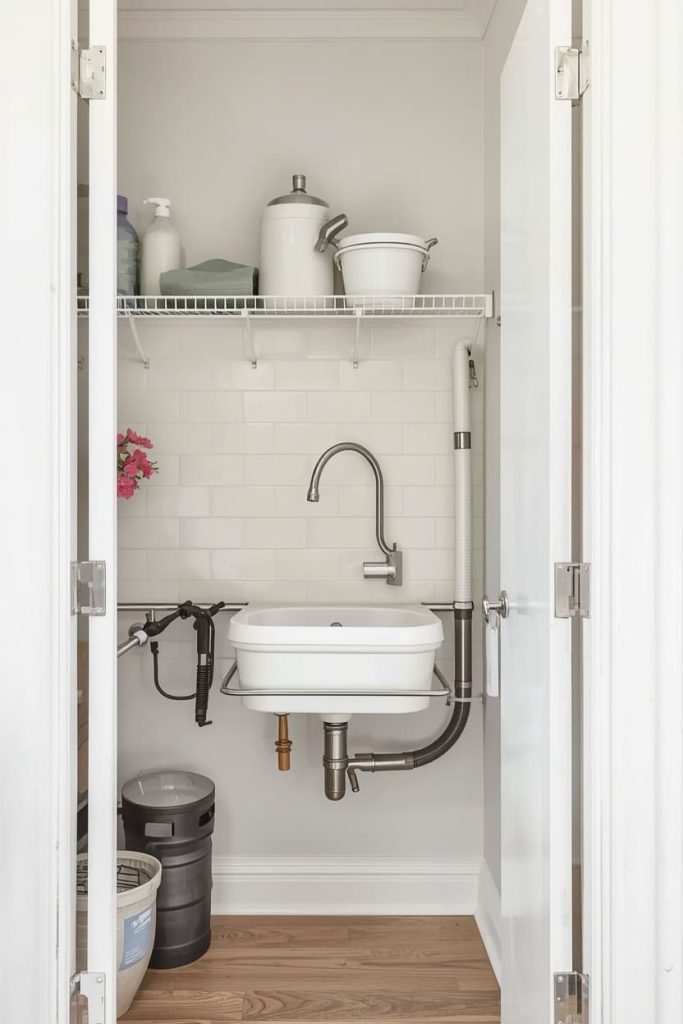
This works for closets under 24 inches wide, where even a compact sink won’t fit permanently.
Sink type: Fold-down or collapsible basin, wall-mounted.
Layout: Mount the sink so it folds flat against the wall when not in use.
Steps:
- Choose a fold-down sink rated for at least 15 pounds of standing water weight.
- Install a flexible braided supply line so the faucet can pivot with the fold.
- Mount a small drain trap that also folds or disconnects easily for cleaning.
- Keep a small stool or step nearby if the sink height needs to shift for accessibility.
Tip: This setup is not ideal for daily heavy use. It’s best for handwashing and quick pet cleanups, not full loads of dishes or laundry pretreatment.
6. The DIY Corner Sink With Slim Cabinet
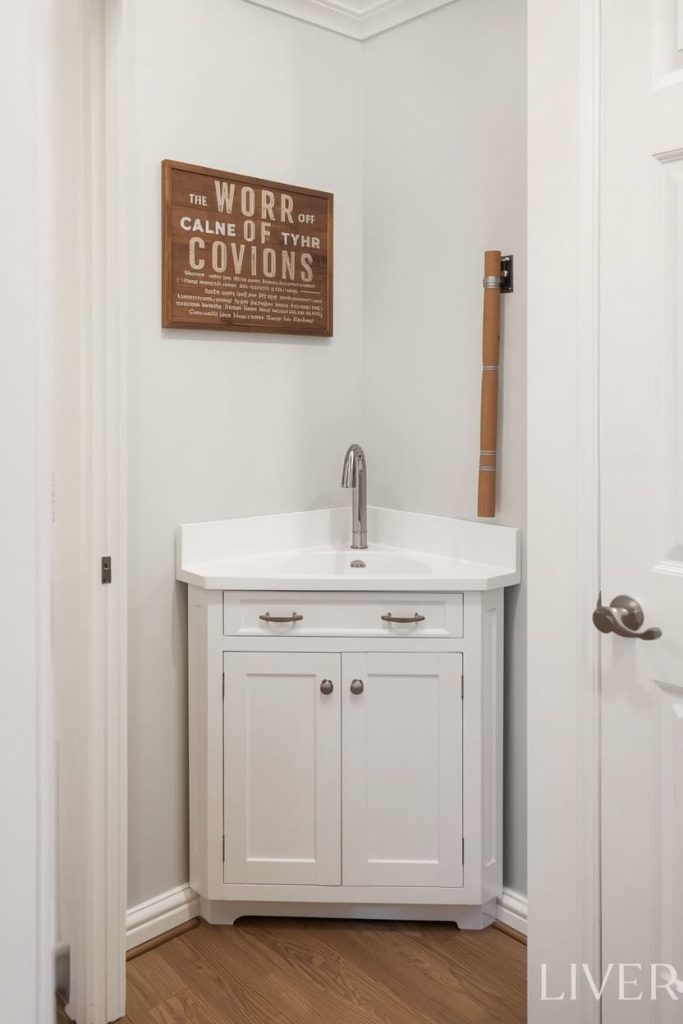
This works for L-shaped laundry closets with one unused corner.
Sink type: Corner-fit basin with a slim cabinet base.
Layout: Use the corner itself as the sink’s footprint, angling it at 45 degrees to the walls.
Steps:
- Build or buy a triangular cabinet base sized to your corner’s exact dimensions.
- Choose a corner sink insert, common in bathroom fixtures, adapted here for laundry use.
- Run the drain line along the shorter wall to minimize pipe runs.
- Add a slim faucet with a swiveling spout so it can reach both sides of the angled basin.
Common mistake: Forgetting to check the cabinet door swing against the washer door. In tight corners, they often collide.
7. The Semi-Custom Cabinet Sink for a Finished Look
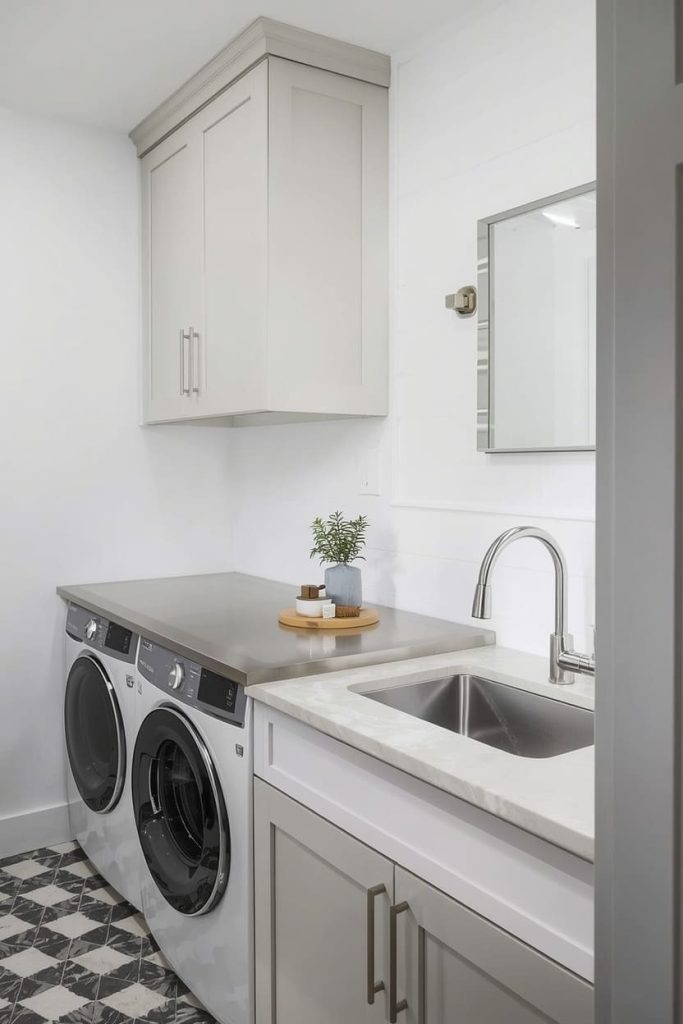
This works for anyone with $2,000–$4,000 to spend and a small space they want to look intentional, not improvised.
Sink type: Drop-in stainless steel sink with a custom-sized cabinet.
Layout: Full wall run with washer, dryer, and sink built into one continuous cabinet line.
Steps:
- Hire a cabinet maker or use a semi-custom line sized to your exact wall width, often available in 3-inch increments.
- Choose a drop-in sink so the surrounding counter stays continuous and easy to wipe down.
- Route plumbing through the cabinet’s back panel, not exposed pipe, for a finished look.
- Add under-cabinet lighting, since built-in cabinets often block your closet’s main light source.
Tip: Get your cabinet maker to confirm plumbing rough-in locations before building. Custom cabinets are hard to modify once assembled.
Which Idea Is Right for Your Space?
If you’re under 24 inches wide, look at the fold-down or under-stairs option. If you already have a stacked unit, the sink combo layout is your easiest win. If budget isn’t tight, the semi-custom cabinet gives you the most finished result. Measure first. Every one of these ideas depends on getting your actual dimensions right before you buy anything.
FAQs
How much space do I need for a laundry sink?
You can fit a compact sink in as little as 15 inches of wall width. For comfortable use, aim for at least 24 inches, which gives you room to move without hitting the washer or door.
Do I need a permit to add a sink to my laundry room?
In most areas, yes, if you’re adding new plumbing lines or a floor drain. Check with your local building department before starting, since requirements vary by city and county.
What’s the average cost to add a sink to a small laundry space?
Budget setups with a portable or quick-connect sink can run $150–$400. Semi-custom cabinet builds with drop-in sinks often run $2,000–$4,000 depending on plumbing complexity.
Does a laundry sink need its own vent?
Usually yes, unless it ties into an existing vented drain line close by. An unvented sink can gurgle or drain slowly, so ask your plumber about tying into your washer’s existing vent stack.
What’s the best sink material for a small space?
Stainless steel resists stains and handles heavy use well. Polypropylene and acrylic sinks are lighter and cheaper, which helps if you’re mounting on drywall instead of into studs.
Can I add a sink without hiring a plumber?
If you’re using a quick-connect or portable unit, yes. If you’re tying into permanent plumbing or moving a drain line, hire a licensed plumber. Mistakes here can cause leaks inside walls, which cost far more to fix than the plumber’s visit would have.

Jenny is a passionate writer specializing in home decor, design, and styling. With years of experience in transforming spaces, she shares expert tips on creating beautiful, functional homes. From interior design trends to DIY decor ideas, Jenny’s work helps homeowners craft spaces that reflect their unique style. Whether it’s a cozy living room, a modern kitchen, or a serene bedroom, her articles offer practical advice and inspiration to elevate any home.