The first time I handed my six-year-old a real carving knife, I lasted about ten seconds before I snatched it back and hid it on top of the fridge.
He cried, I felt terrible, and our “family pumpkin night” ended with me carving alone while he watched from a safe distance. That was the moment I realized pumpkin decorating with kids doesn’t have to involve blades at all.
Since then, I’ve tested dozens of Halloween pumpkin ideas for kids that let them do the actual decorating — safely, independently, and without me hovering with a first-aid kit nearby.
Here are the five that worked best, start to finish.
The Only Supplies You’ll Actually Need
Before diving into the ideas below, here are three kid-safe tools that make every project on this list easier and genuinely fun for little hands:
- Pumpkin Punchers Kids’ Pumpkin Carving Kit (24 Safe Tools & Stencils) — dull-edged, rounded plastic and stainless tools designed specifically for kids, so there’s no risk of cutting skin even with direct contact.
- Acrylic Paint Pens for Pumpkins (Dual-Tip, Multicolor Set) — waterproof, mess-controlled markers that let kids draw fine details or bold designs without spilled paint or sticky brushes.
- Halloween Pumpkin Decorating Sticker & Face Kit — peel-and-stick foam pieces (eyes, teeth, noses) that let even toddlers “carve” a jack-o’-lantern face with zero sharp tools involved.
Now let’s get into the projects.
Sticker Face Jack-o’-Lantern (Best for Toddlers and Preschoolers)
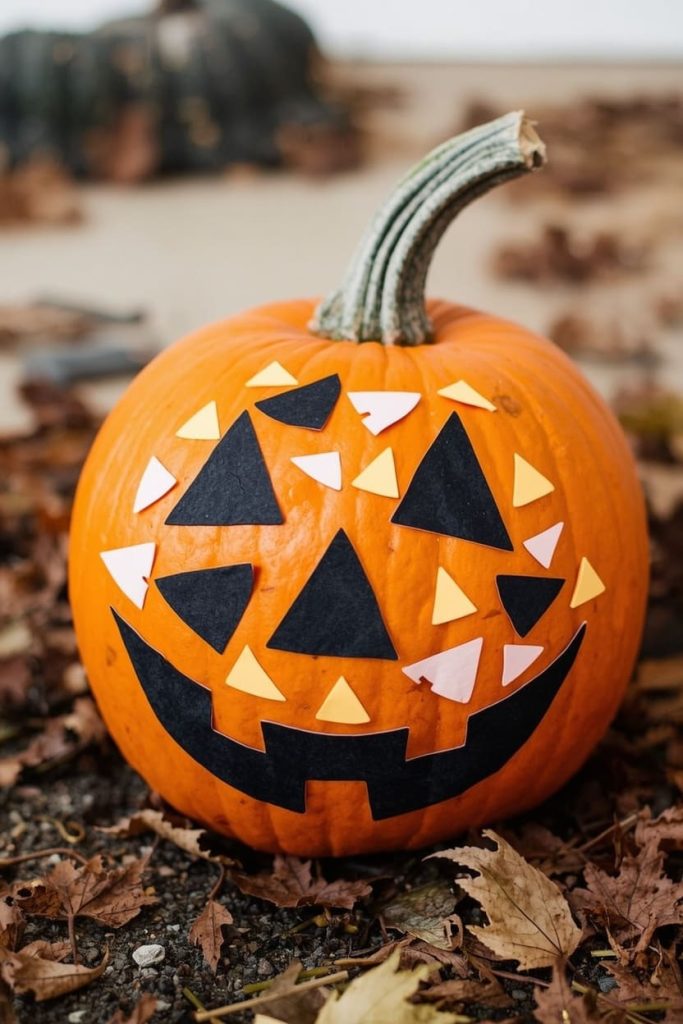
This is where I always start with younger kids, because there’s genuinely nothing that can go wrong — no glue, no paint, no tools, just peel and press.
What you’ll need:
- A pumpkin (real or artificial foam)
- A foam or felt sticker face kit (eyes, mouth, nose, eyebrows)
- Optional: a small table or tray to keep pieces contained
How to do it:
- Lay out all the sticker pieces in front of your child so they can see their options.
- Let them choose which pieces they want and where to place them — resist the urge to “correct” a crooked eye or upside-down nose.
- Press each piece firmly onto the pumpkin’s surface.
- Repeat with a second pumpkin for a different expression if they want to make a “family” of faces.
I love this one because it puts 100% of the creative control in your child’s hands while keeping your hands completely clean.
Tip: if pieces won’t stick well to a bumpy or ridged pumpkin, choose the smoothest one in the bunch — it makes a big difference in how well the stickers hold.
Paint Pen Doodle Pumpkin (Great for Ages 4–8)

This idea is perfect for kids who are past the toddler stage and want to actually draw something, but aren’t quite ready for scissors, knives, or wet paint everywhere.
What you’ll need:
- A smooth, light-colored pumpkin
- A set of acrylic paint pens or paint markers
- Newspaper or a plastic tablecloth to protect your table
How to do it:
- Set the pumpkin on a protected surface at a comfortable height for your child.
- Let them sketch a simple design first — a face, a pattern, or even their name — directly onto the pumpkin skin.
- Have them trace and fill in their design using the paint pens, working in small sections.
- Let it dry for about 20–30 minutes before moving or displaying it.
Here’s how my kids did theirs: we set out five pumpkins on the porch table and let each kid claim one — the different personalities that came through in their designs still make me smile.
Tip: paint pens dry much faster and with far less mess than brush-and-bottle paint, so they’re ideal if you’re doing this activity indoors or don’t want to manage a water cup with little hands.
Yarn-Wrapped Spiderweb Pumpkin (Fine Motor Practice, Ages 5+)
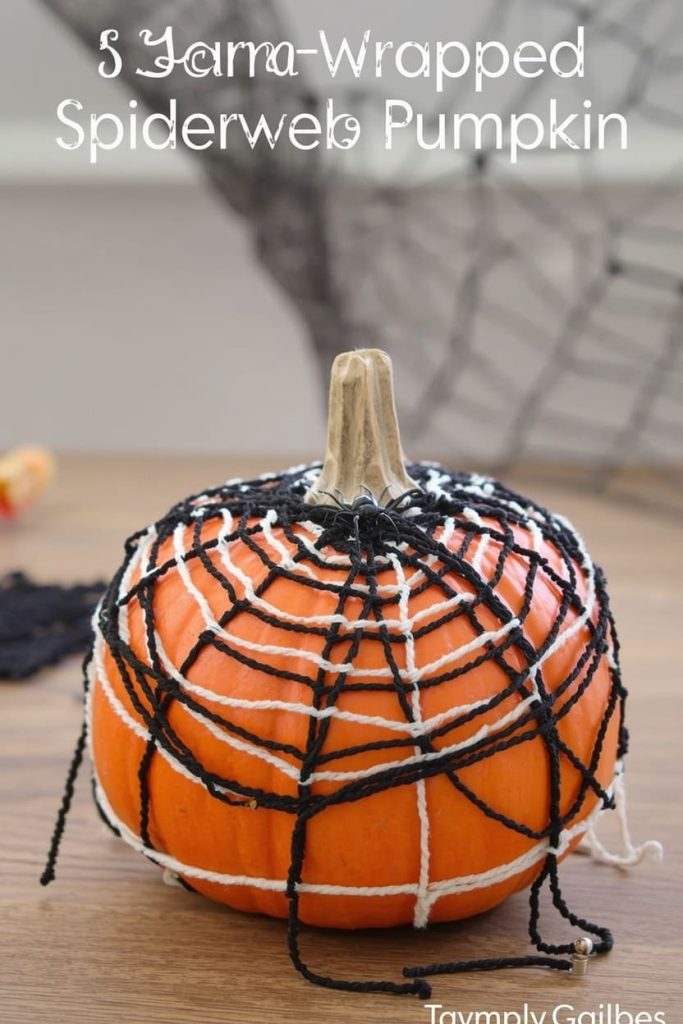
This one doubles as a quiet, screen-free activity that keeps kids focused for a solid 20–30 minutes — genuinely useful on a rainy Halloween-week afternoon.
What you’ll need:
- A pumpkin (real or foam)
- Black and white yarn or string
- Push pins or small dabs of removable tape
- Scissors (adult-handled for cutting yarn lengths)
How to do it:
- Pre-cut several arm’s-length pieces of yarn so your child doesn’t need scissors during the activity.
- Secure one end of a piece of yarn near the pumpkin’s stem with tape or a push pin.
- Have your child wrap the yarn around the pumpkin in a random or spiral pattern, securing the other end when they’re done.
- Layer a few more strands in different directions to build a “web” effect, then add a small plastic spider on top if you have one.
This is the idea you’ll want when you need 20 minutes of calm, focused activity rather than a big messy production.
Tip: use two colors of yarn — kids tend to enjoy watching the pattern build as they alternate strands, and it makes the finished web look more intentional.
Handprint Ghost Pumpkin (Best for a Keepsake Project)
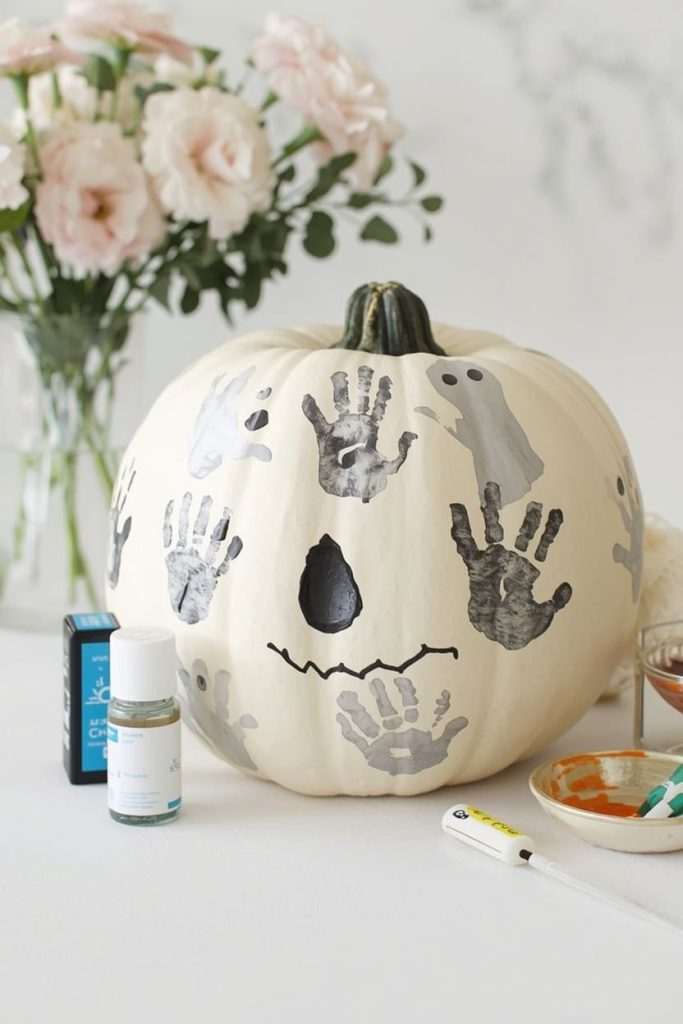
If you want something that doubles as a sentimental keepsake — especially good for classrooms or grandparents — this is the idea to pick. Every year the handprint changes size, which makes it fun to compare later.
What you’ll need:
- A white or light-colored pumpkin
- White or black acrylic paint (or a washable kids’ paint)
- A paper plate for the paint
- Baby wipes for quick cleanup
How to do it:
- Pour a small amount of paint onto the paper plate and use a sponge or brush to coat your child’s palm.
- Press their hand firmly onto the pumpkin, then lift straight up to avoid smudging.
- Once dry, use a paint pen or thin brush to add two small dot eyes to each handprint, turning it into a little ghost.
- Repeat with multiple handprints around the pumpkin for a “ghost family” effect.
I always come back to this one because it’s less about the pumpkin and more about capturing a moment — it’s the project people end up keeping on a shelf all year.
Tip: keep baby wipes within arm’s reach before you start; washable paint dries fast, and little hands wander toward faces and clothes quicker than you’d expect.
Kid-Safe Carving with Cookie Cutters (Best for Ages 7 and Up, With Supervision)
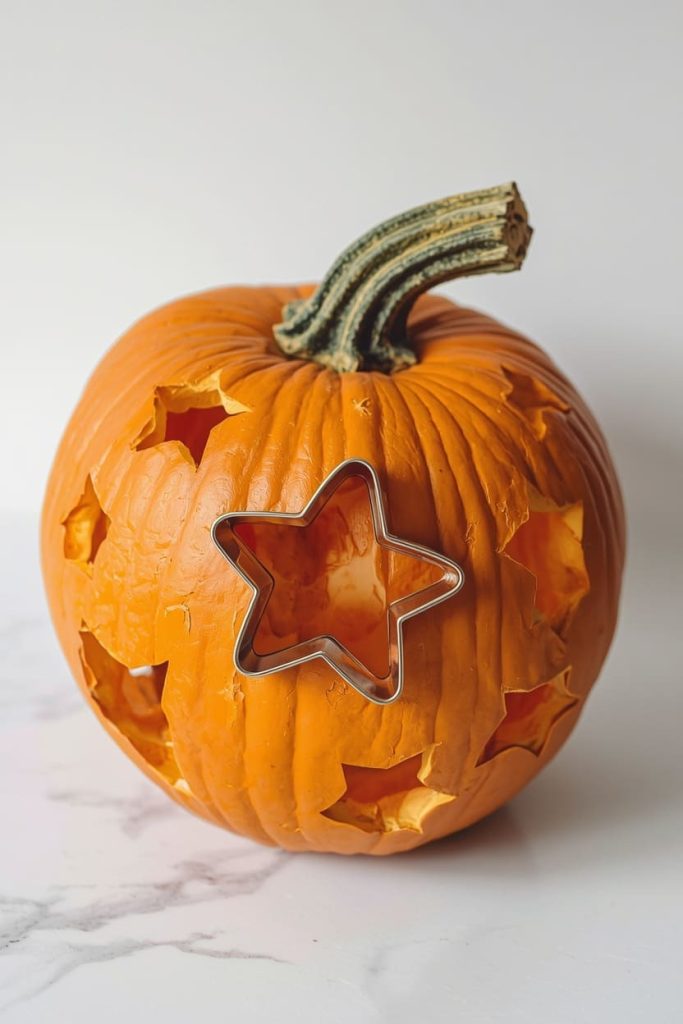
This is the one lightly carving-adjacent idea on the list, and it’s the closest kids get to a “real” jack-o’-lantern without ever touching a sharp blade.
What you’ll need:
- A soft-skinned pumpkin
- Small cookie cutters (stars, moons, simple shapes)
- A kid-safe carving kit with a rounded mallet or pusher tool
- Adult supervision throughout
How to do it:
- Choose a cookie cutter shape and help your child press it firmly into the pumpkin’s skin, using gentle rocking pressure rather than force.
- Use the mallet or pusher tool (included in most kid-safe kits) to help push the shape all the way through if the skin is thick.
- Pop the cut piece out from the inside, and repeat with different shapes around the pumpkin.
- Once finished, insert a battery-operated light so the shapes glow from within.
Kids genuinely love this one because it feels like “real” carving, but the dull cookie-cutter edges mean there’s no risk even if their hand slips.
Tip: choose a pumpkin that’s been sitting out for a day or two — slightly softer skin makes it much easier for smaller hands to push shapes through without adult muscle doing all the work.
Age-Appropriate Adaptations: What Works for Which Kids
Not every idea above fits every age, so here’s a quick guide for matching the activity to your child:
- Toddlers (2–3): Stick to the sticker face pumpkin — no tools, no ingestion risk, and full sensory engagement without frustration.
- Preschoolers (4–5): Paint pens and handprint ghosts work well since they involve simple motor skills and immediate visual payoff.
- Early elementary (6–8): Yarn-wrapping and paint pens hold their attention longer and build fine motor control.
- Older kids (7+): The cookie-cutter carving idea gives them the “real carving” experience they’re often asking for, with training-wheels-level safety.
If you’re running this for a mixed-age group (a classroom or a family gathering with cousins of different ages), set up two or three stations so each child can choose the one that matches their skill level — it also cuts down on wait times and squabbling over shared tools.
Keeping It Mess-Free and Easy to Clean Up
A few small setup choices save a lot of cleanup time later:
- Cover your table with a plastic tablecloth or newspaper before starting any paint-based activity — cleanup becomes a two-minute job instead of twenty.
- Pre-portion paint onto paper plates rather than letting kids dip directly into shared containers; it prevents color mixing and spills.
- Keep baby wipes and a small trash bowl within reach at all times, especially for handprint and paint pen projects.
- Do sticker and yarn activities on a hard floor or tray so stray pieces are easy to spot and gather afterward.
- Have kids wear an old shirt or smock, since even “washable” paint can stain favorite outfits if it sits too long.
Frequently Asked Questions
What age can kids start carving pumpkins? Most experts suggest kids around age 7–8 can begin lightly supervised carving using kid-safe tools like rounded saws or cookie-cutter kits, never adult knives. Younger children can absolutely participate in the pumpkin decorating process through painting, stickers, or yarn-wrapping instead.
How do I keep pumpkin painting mess-free? Use paint pens instead of brush-and-bottle paint whenever possible, since they eliminate spills and dry much faster. Covering your workspace with a plastic tablecloth and pre-portioning any wet paint onto plates also keeps things contained.
Can toddlers help decorate pumpkins? Yes — toddlers do great with sticker face kits or simple handprint projects, both of which involve no tools and minimal choking or safety risk. Just supervise closely if paint is involved, since young toddlers may try to taste it.
Are kid-safe carving kits actually safe? Kid-safe carving kits use dulled, rounded, or plastic tools specifically designed so they can’t break skin even with direct pressure, making them significantly safer than kitchen knives. That said, adult supervision is still recommended any time tools are involved, regardless of how safe they’re marketed to be.
How do I keep a pumpkin looking good if my kids decorate it early in the month? No-carve options like stickers, paint pens, and yarn last much longer than carved designs since the pumpkin’s skin stays intact. If you’re using a real pumpkin, keep it out of direct sun and bring it indoors on unusually warm days to help it last through the whole season.
Whichever of these you choose, the real win isn’t a picture-perfect pumpkin — it’s watching your kids get genuinely excited about something they made themselves, safely, from start to finish. Pick the idea that fits your child’s age and your afternoon’s patience level, and you’ll have a Halloween pumpkin worth the mess (however small it ends up being).

Jenny is a passionate writer specializing in home decor, design, and styling. With years of experience in transforming spaces, she shares expert tips on creating beautiful, functional homes. From interior design trends to DIY decor ideas, Jenny’s work helps homeowners craft spaces that reflect their unique style. Whether it’s a cozy living room, a modern kitchen, or a serene bedroom, her articles offer practical advice and inspiration to elevate any home.