Three years ago, I stood in my kitchen at 11 p.m. the night before Halloween, staring at a lopsided jack-o’-lantern with a caved-in eye and pumpkin guts on my ceiling (don’t ask).
I’d pinned a dozen “gorgeous” pumpkin ideas that week and attempted the most complicated one first, with zero plan. It was a mess.
Since then, I’ve learned that the best pumpkin projects aren’t the fanciest ones — they’re the ones you can actually finish.
So if you’ve been scrolling for creative Halloween pumpkin ideas that won’t leave you frustrated on October 30th, you’re in the right place.
Below are five real, doable projects, plus everything you need to bring them to life.
The Only Supplies You’ll Actually Need
Before you start any of the projects below, a few good tools make the difference between “fun afternoon” and “why did I do this.” Here are the three I keep coming back to:
- Pumpkin Masters Pumpkin Pro 20-Piece Family Carving Kit — a full set of safe, sturdy carving tools plus stencils, so you’re not white-knuckling a kitchen knife through thick pumpkin skin.
- Crayola Pumpkin Paint Set (Acrylic, 6-Color) — non-toxic, multi-surface acrylic paint that goes on smooth and dries fast, perfect for no-carve painted designs with kids or solo.
- Battery-Operated Flameless LED Tea Lights — flicker-effect bulbs that light up any carved or drilled pumpkin safely, with no wax mess or fire risk near curtains, kids, or pets.
Grab whichever fits your project, and let’s get into the ideas.
The Drilled Constellation Pumpkin (No Carving Knife Required)
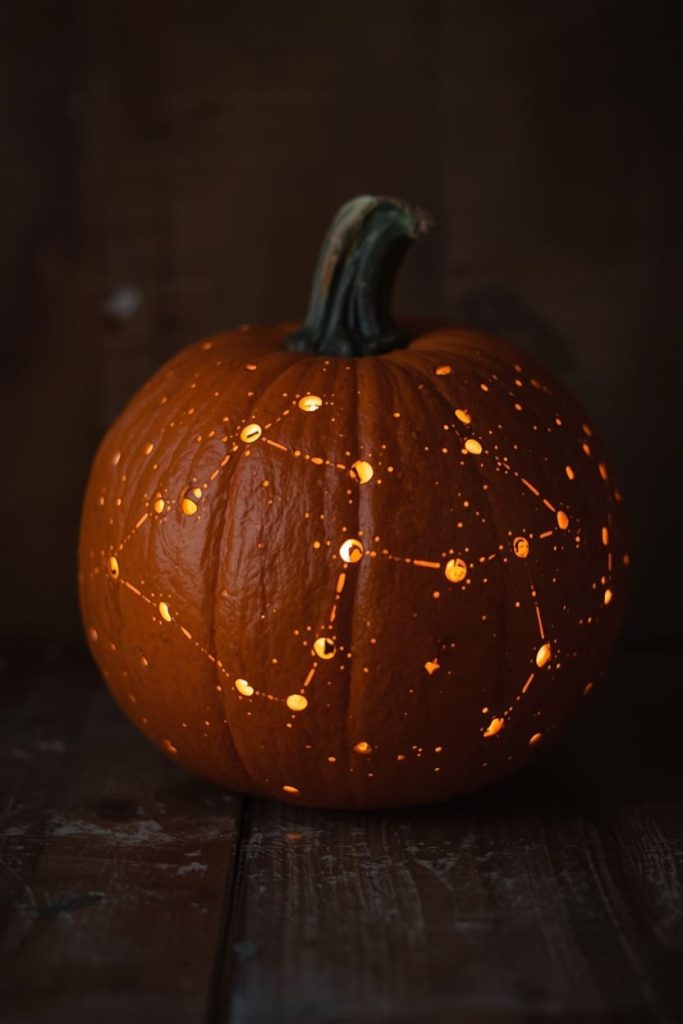
This is the one I recommend if carving intimidates you or if a kitchen knife anywhere near a pumpkin makes you nervous. Instead of cutting shapes, you drill small holes that let light shine through in a pattern — like stars in the night sky.
What you’ll need:
- A round, smooth pumpkin (real or foam)
- A power drill with a few different bit sizes (⅛” to ½”)
- A printed constellation image or star map for reference
- A pushpin or marker
- An LED light or battery tea light
How to do it:
- Print or sketch a simple constellation pattern (Orion and the Big Dipper are easiest to start with).
- Tape the pattern to the pumpkin or freehand the dots with a marker.
- Using the smallest drill bit first, drill through the pumpkin skin at each marked point, following the shape of the constellation.
- Go back over a few “brighter” stars with a slightly larger bit for visual depth.
- Hollow out the top and insert your light source.
I love this one because it looks like you spent hours on intricate carving, but drilling is honestly faster and far more forgiving than cutting — if a hole is slightly off, it just blends into the “sky.”
Tip: drill in short bursts and let the bit cool between holes; pumpkin flesh gums up the bit fast and can cause it to slip.
Watercolor-Effect Painted Pumpkin (Perfect for Beginners and Kids)
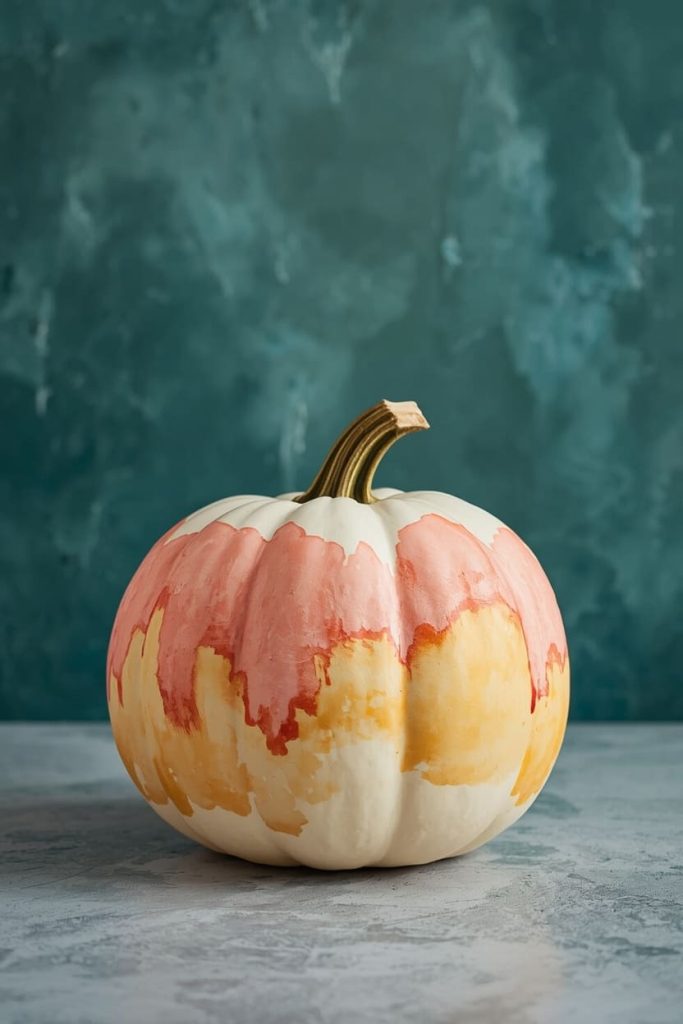
If you want something colorful, mess-tolerant, and genuinely relaxing to make, this is it. You don’t need artistic skill — the blending technique does the work for you.
What you’ll need:
- A smooth, light-colored pumpkin
- Crayola or similar acrylic paint set (fall tones work beautifully: orange, deep red, mustard yellow, burnt umber)
- A wide, soft-bristle brush
- A cup of water and a paper towel
How to do it:
- Wet your brush and lightly dampen a section of the pumpkin’s surface.
- Dab a small amount of one paint color onto the damp area and blend outward in circular motions.
- While that’s still wet, add a second color right next to it and let the colors bleed together naturally.
- Continue around the pumpkin in sections, always keeping the surface slightly damp for that soft, watercolor blend.
- Let it dry fully (about an hour) before displaying.
Here’s how I did mine: I skipped any design entirely and just let the colors flow into each other — it turned into this gorgeous sunset gradient without any planning.
Tip: work in small sections rather than covering the whole pumpkin in wet paint at once, or the colors will muddy together instead of blending cleanly.
Layered Stencil Silhouette Pumpkin
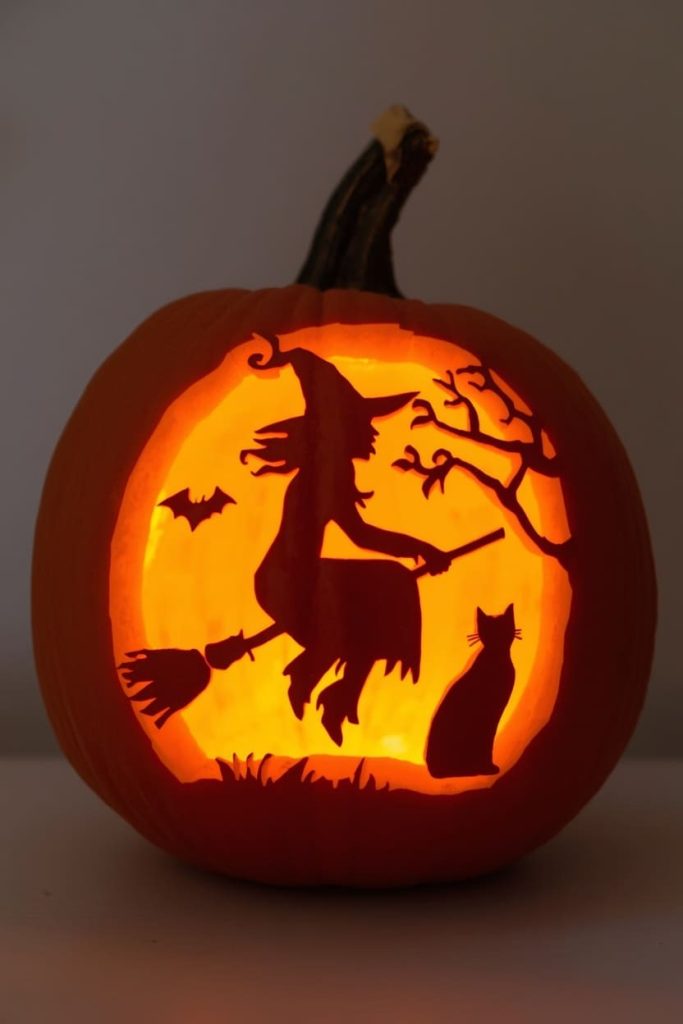
This is my go-to when I want something that looks genuinely striking in photos — a witch on a broomstick, a black cat, a spooky tree — all cut in clean silhouette against a glowing interior.
What you’ll need:
- A medium-to-large pumpkin with a flat carving surface
- A carving kit with a fine detail saw and a poking tool
- A printable stencil (search “free Halloween pumpkin stencils” or use ones included in most carving kits)
- Tape and a marker
- An LED light for the finished piece
How to do it:
- Hollow out your pumpkin, scraping the inner walls down to about 1 inch thick for easier cutting.
- Tape your printed stencil onto the flattest side of the pumpkin.
- Use the poking tool to trace small dots along every line of the design.
- Remove the paper and connect the dots using your fine detail saw, cutting slowly along the perforated lines.
- Push out each cut section gently from the inside.
This one takes patience, but you don’t need to be an artist — the stencil does all the creative work for you.
Tip: cut the smallest, most detailed pieces first while your saw is sharpest and the pumpkin walls are freshest; they get harder to cut cleanly as the flesh softens over time.
No-Carve Gem and Sequin Pumpkin (Mess-Free and Kid-Friendly)
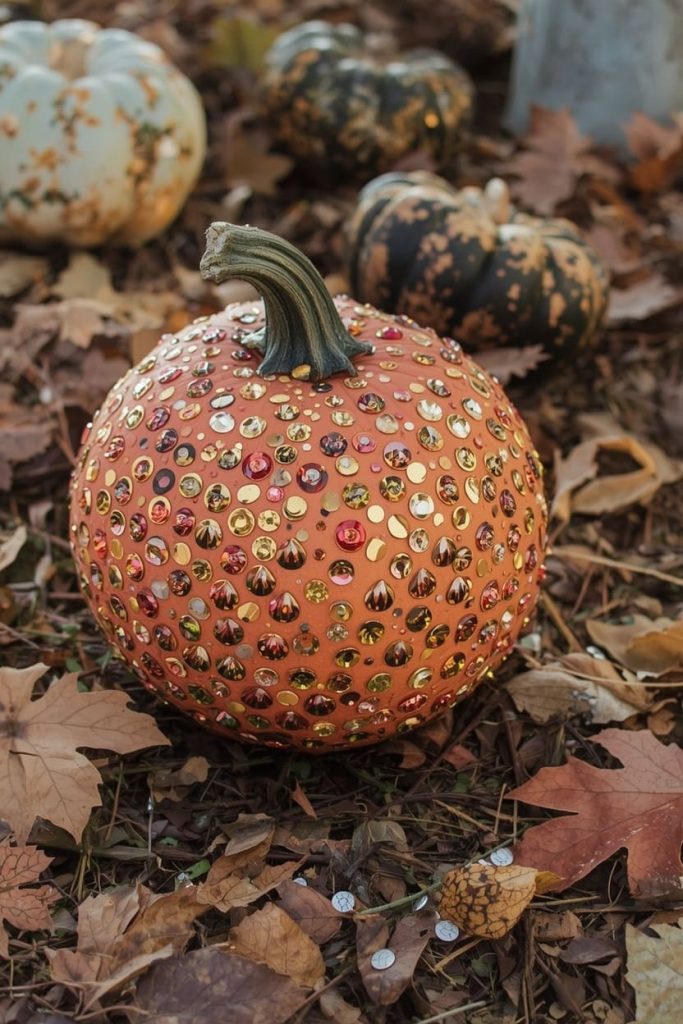
If carving and paint both sound like too much cleanup, this idea solves that completely — and it’s one of the few Halloween projects that can double as elegant fall décor.
What you’ll need:
- A real or artificial pumpkin
- Craft glue or a hot glue gun
- Sequins, gems, or decorative pins in gold, black, or jewel tones
- Ribbon (optional, for the stem)
How to do it:
- Plan a simple pattern first — a spiral, ombré color gradient, or geometric shape works best for beginners.
- Starting at the base or center of your pattern, apply small dots of glue and press on your gems or sequins one at a time.
- Work outward in your chosen pattern, keeping spacing even.
- Wrap a ribbon around the stem for a finished, polished look.
This is the idea you’ll want if you have young kids helping out, since there’s no sharp tools, no paint stains, and no drying time to manage.
Tip: if you’re using a real pumpkin, this design will last through the whole season since there’s no cut surface to rot — just don’t leave it outside in rain.
Classic Carved Jack-o’-Lantern, Leveled Up
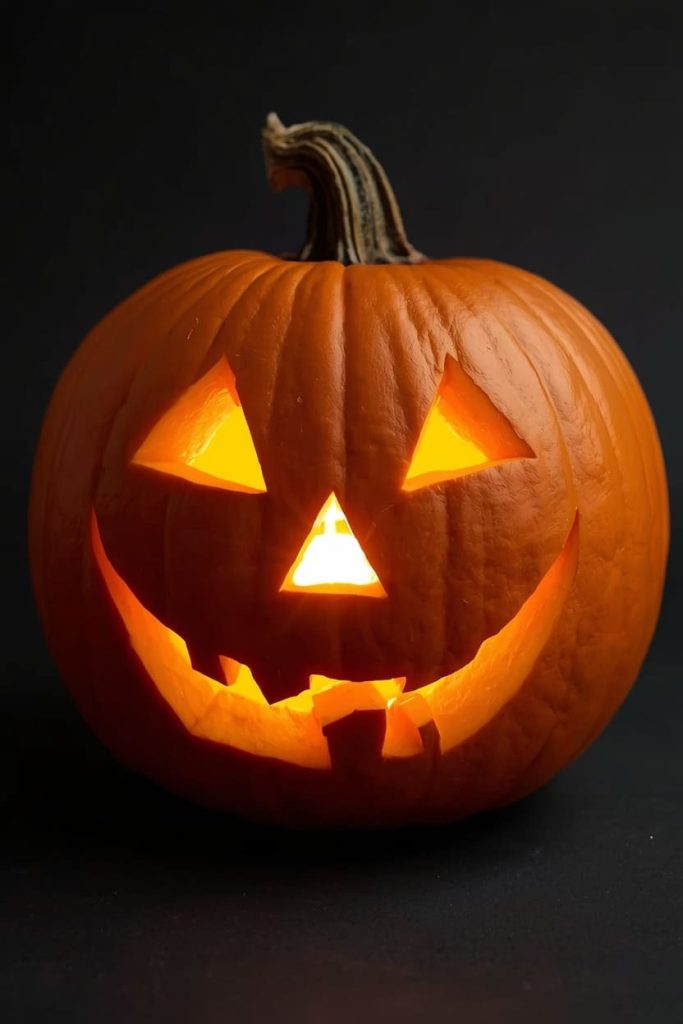
Sometimes you just want the traditional jack-o’-lantern — but a few small upgrades take it from basic to genuinely creative without adding much extra work.
What you’ll need:
- A pumpkin with a flat bottom (so it won’t wobble once hollowed)
- A carving kit with a large saw for the lid and a small saw for detail
- A spoon or scooper for cleaning
- Cinnamon or pumpkin spice (yes, really)
- An LED light
How to do it:
- Cut the lid at an angle instead of straight down — this keeps it from falling into the pumpkin as it shrinks.
- Scoop out the inside completely, scraping the walls thin near where you’ll carve details.
- Draw your face or design freehand or with a stencil, then carve slowly with your detail saw.
- Before lighting it, sprinkle a pinch of cinnamon or pumpkin spice inside the lid — the heat from the light will release a warm, cozy scent.
- Insert your light source and set the lid back on top.
I always come back to this one because it’s the pumpkin everyone expects at Halloween, but the cinnamon trick genuinely surprises people.
Tip: rub a thin layer of petroleum jelly on all cut edges after carving — it slows moisture loss and can keep your jack-o’-lantern looking fresh for several extra days.
How to Keep Your Pumpkins Fresh Longer
Nothing’s more disappointing than a pumpkin that collapses on Halloween night itself. A few small habits go a long way:
- Keep carved pumpkins out of direct sunlight and bring them inside overnight if temperatures are warm — heat speeds up rot dramatically.
- Spray the inside and cut edges with a diluted bleach solution (1 tablespoon bleach per quart of water) to kill mold spores before they start.
- Rehydrate a wilting pumpkin by submerging it in a tub of cold water for a few hours; it can actually plump the skin back up.
- Use LED lights instead of candles whenever possible — the lower heat means less internal cooking, which is a major cause of early collapse.
Choosing the Right Pumpkin for Each Project
Not every pumpkin is built for every idea, and picking the right one from the start will save you a lot of frustration:
- For carving: choose a pumpkin with a flat bottom, thin-to-medium flesh, and a stem that’s still firmly attached.
- For painting: go for a smooth, uniformly shaped pumpkin without heavy ridges — texture makes it harder to get clean color blends.
- For drilling: pick a firmer, denser pumpkin, since softer ones can crack or crumble under pressure from a drill bit.
- For no-carve/glued designs: almost any pumpkin works, including small decorative ones or even artificial foam pumpkins if you want the design to last well beyond Halloween.
Frequently Asked Questions
How long do painted pumpkins last? A painted, uncarved pumpkin can typically last 2–3 months since the skin stays sealed and the flesh isn’t exposed to air. Keep it out of direct sun and rain, and it’ll hold its color and shape well past Halloween.
Can I carve a pumpkin the day before Halloween? Yes, and it’s actually the safest timing — a freshly carved pumpkin usually looks its best for 3–5 days before it starts to soften or shrink. If you carve much earlier, use the bleach spray and petroleum jelly trick above to extend its life.
Do I need real pumpkins, or can I use artificial ones? Either works depending on the project. Real pumpkins are ideal for carving and drilling since you get that genuine glow, while artificial foam pumpkins are better for painting or gem designs you want to reuse year after year.
What’s the easiest idea for young kids to help with? The no-carve gem and sequin pumpkin is by far the safest and most kid-friendly, since there are no blades or drying time involved — just glue and decorations they can place themselves.
How do I stop my carved pumpkin from molding so fast? Beyond the bleach spray mentioned earlier, make sure you scrape the inner walls completely clean of stringy pulp, since leftover pulp is where mold grows fastest. Keeping the pumpkin cool and dry between display times also slows mold significantly.
Whichever of these you try first, the goal isn’t perfection — it’s making something you’re genuinely proud to set on your porch. Pick the one that matches your time, your patience level, and how much cleanup you’re up for tonight, and you’ll have a pumpkin worth showing off by the time trick-or-treaters arrive.

Jenny is a passionate writer specializing in home decor, design, and styling. With years of experience in transforming spaces, she shares expert tips on creating beautiful, functional homes. From interior design trends to DIY decor ideas, Jenny’s work helps homeowners craft spaces that reflect their unique style. Whether it’s a cozy living room, a modern kitchen, or a serene bedroom, her articles offer practical advice and inspiration to elevate any home.