My cat has never once helped me carve a pumpkin, but she absolutely supervises. Every October she plants herself on the kitchen table, tail flicking, watching me scoop pumpkin guts like it’s the most important task I’ll do all year.
Last Halloween I finally carved a pumpkin that actually looked like her — pointed ears, narrowed eyes, that unimpressed little smirk she gives me daily — and she still didn’t seem to notice the resemblance.
If you’re a cat person hunting for cat pumpkin carving ideas that actually turn out looking like a cat (and not a lopsided triangle with whiskers), you’re in the right place.
Below are five designs ranging from true-beginner to detail-lover, so there’s one here for wherever your carving skills currently sit.
Table of Contents
- The Only Supplies You'll Actually Need
- The Classic Black Cat Silhouette (Easiest, Beginner-Friendly)
- The Peeking Cat Face (Simple, One Level Up)
- The Sitting Cat Scene (Moderate Difficulty)
- The Realistic Cat Face (Advanced, Detail-Focused)
- The Two-Cat Duo Pumpkin (Fun for Multi-Cat Households)
- How to Find or Make a Cat Stencil for Carving
- Tips for Getting Clean, Precise Carving Lines
- Frequently Asked Questions
The Only Supplies You’ll Actually Need
A few good tools make cat pumpkin carving ideas go from frustrating to genuinely fun. Here’s what I reach for every year:
- Pumpkin Masters Pumpkin Pro 20-Piece Family Carving Kit — sturdy, comfortable-grip tools with both large and fine saws, giving you the range to handle simple silhouettes and detailed faces alike.
- Antner 10-Piece Professional Pumpkin Carving Tool Set — includes fine detail tools ideal for adding realistic fur texture, whisker lines, and shading to more advanced cat designs.
- Battery-Operated Flameless LED Pumpkin Lights — safe, flicker-effect lighting that makes silhouette-style cat designs glow clearly without any fire risk.
Now let’s get into the designs.
The Classic Black Cat Silhouette (Easiest, Beginner-Friendly)
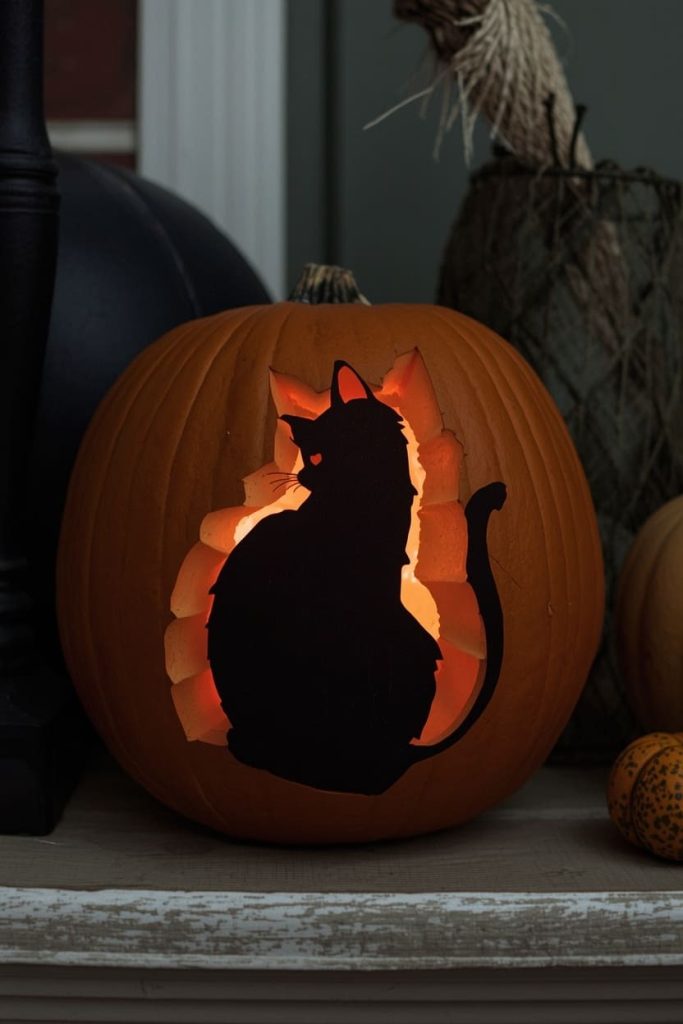
This is the design most people picture when they think “cat pumpkin,” and it’s the perfect starting point if you’ve never carved anything more complicated than a triangle-eyed jack-o’-lantern before.
What you’ll need:
- A round, medium pumpkin
- A basic carving kit with a small saw
- A printed cat silhouette (arched back, pointed ears, upright tail)
- Tape and a marker
How to do it:
- Tape your printed silhouette onto the flattest side of your pumpkin.
- Trace over the outline firmly with a marker or poke through it with a pin tool, leaving small dots along the shape.
- Remove the paper and connect the dots with your saw, cutting slowly along the outline.
- Push the cut piece gently from the inside once the full shape is cut through.
I love this one because it’s genuinely hard to mess up — the silhouette shape is forgiving, and even a slightly wobbly line still reads clearly as “cat” once it’s lit up.
Tip: keep the tail and ears slightly thicker than you think you need; thin points are the most likely spot to break off while you’re carving or cleaning out the pumpkin.
The Peeking Cat Face (Simple, One Level Up)
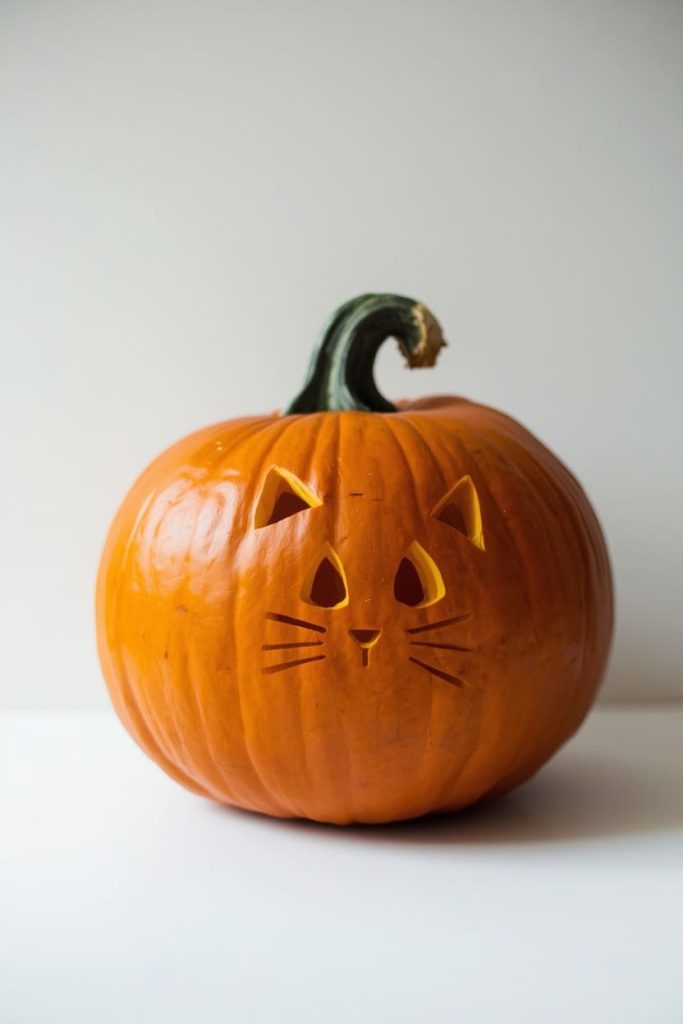
This design is just a step above the silhouette in difficulty, but it adds a lot of personality — instead of a full-body shape, you’re carving just a cat face peeking over the pumpkin’s rim, as if your pumpkin has a stowaway.
What you’ll need:
- A pumpkin with a wide, flat top edge once hollowed
- Basic carving kit
- A pencil for freehand sketching (no stencil needed)
How to do it:
- Hollow out your pumpkin as usual, keeping the top rim as even as possible.
- Along the rim, freehand sketch two triangle ears and a rounded head shape peeking up from the opening, with the “face” positioned right at the cut edge.
- Carve out two small oval eyes and a simple triangle nose within the face shape.
- Leave the mouth uncarved or add two small curved whisker dots on either side for extra charm.
Here’s how mine turned out: I made the eyes slightly too wide the first time and it looked startled rather than curious, so I’d recommend keeping them narrow and close-set for a calmer, “peeking” expression.
Tip: this design works especially well with a smaller pumpkin, since the peeking effect reads more clearly when the face takes up a larger portion of the visible opening.
The Sitting Cat Scene (Moderate Difficulty)
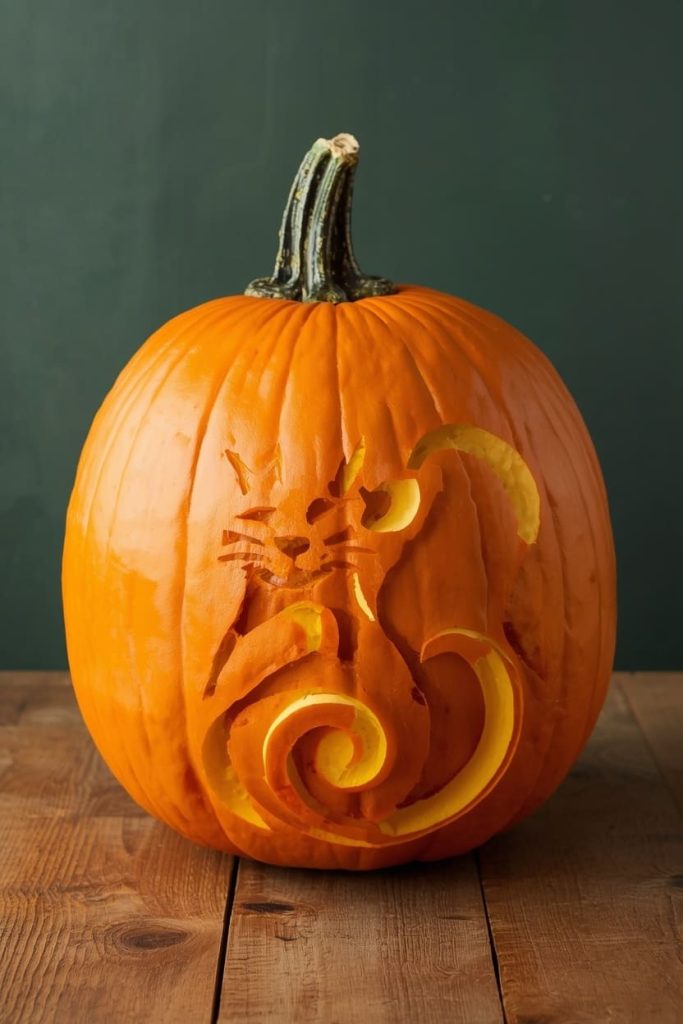
This design carves a full sitting cat — body, tail curled around its paws, and a simple background like a moon or fence — turning your pumpkin into more of a scene than a single silhouette.
What you’ll need:
- A medium-to-large pumpkin with a flat carving surface
- Carving kit with a fine detail saw
- A printed or hand-drawn template of a sitting cat with a curled tail
- A poking tool
How to do it:
- Tape your template to the pumpkin and poke dots along every outline, including the curled tail and any background elements.
- Start carving from the largest, simplest shapes first (the body) before moving to smaller details (the tail curl, ears).
- For the moon or background element, carve it as a separate simple shape positioned above or beside the cat.
- Clean up any rough edges by gently trimming with your detail saw once the main shapes are cut.
This is the idea you’ll want if you want something that looks more like a finished illustration than a basic shape, without jumping all the way to a fully realistic face.
Tip: carve the tail curl in one continuous cut rather than several short ones — it keeps the line smoother and prevents the thin curved section from breaking.
The Realistic Cat Face (Advanced, Detail-Focused)
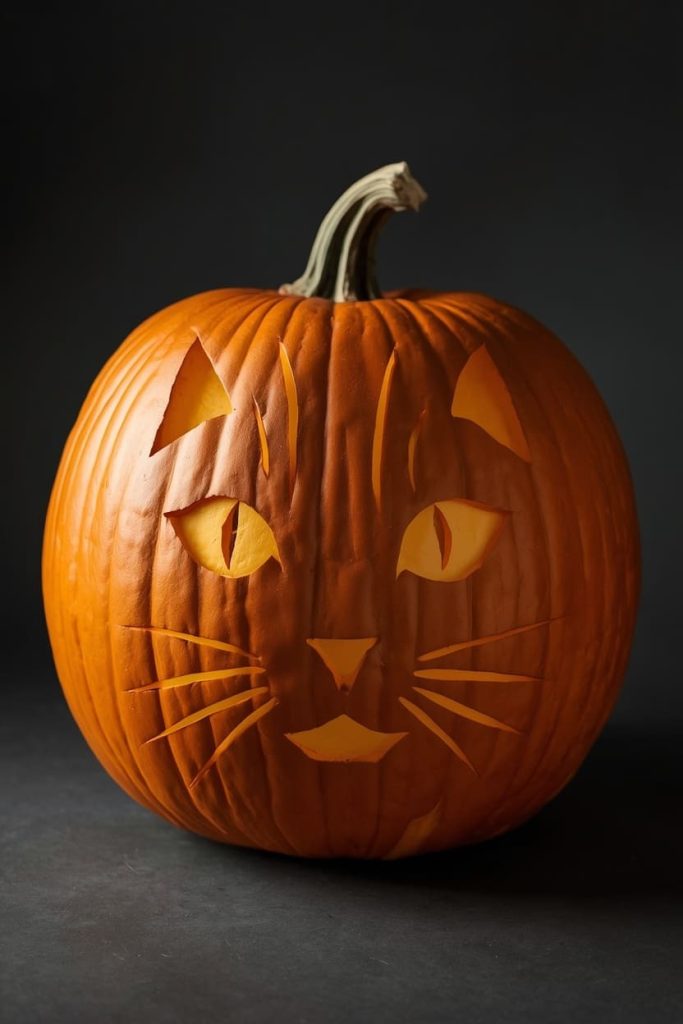
If you’ve carved a few pumpkins before and want something that actually looks like a specific cat’s face rather than a cartoon shape, this is where shading and depth carving come in.
What you’ll need:
- A pumpkin with a smooth, wide front surface
- Carving kit with fine detail tools
- A reference photo of a cat face (yours, if you’re recreating your own pet)
- A pencil for sketching directly onto the pumpkin
How to do it:
- Sketch the basic face shape directly onto the pumpkin in pencil, using your reference photo for proportions — eye spacing, ear angle, and nose shape especially.
- Fully cut through the pumpkin skin for the eyes, nose, and any dark markings, but only shave away the outer skin layer (not cutting all the way through) for lighter fur areas — this creates a shading effect once lit from within.
- Use your fine detail tool to add short, textured lines radiating outward from the face for a fur texture effect.
- Carve whisker lines as thin, shallow etched marks rather than full cuts, so they read as fine details rather than bold shapes.
I love this one because it’s the closest you’ll get to actually recreating your cat’s expression in pumpkin form — the shading trick genuinely changes how three-dimensional the final result looks.
Tip: practice the shallow “shaving” technique on the back of the pumpkin first, since it takes a bit of pressure control to remove just the outer skin without cutting all the way through.
The Two-Cat Duo Pumpkin (Fun for Multi-Cat Households)
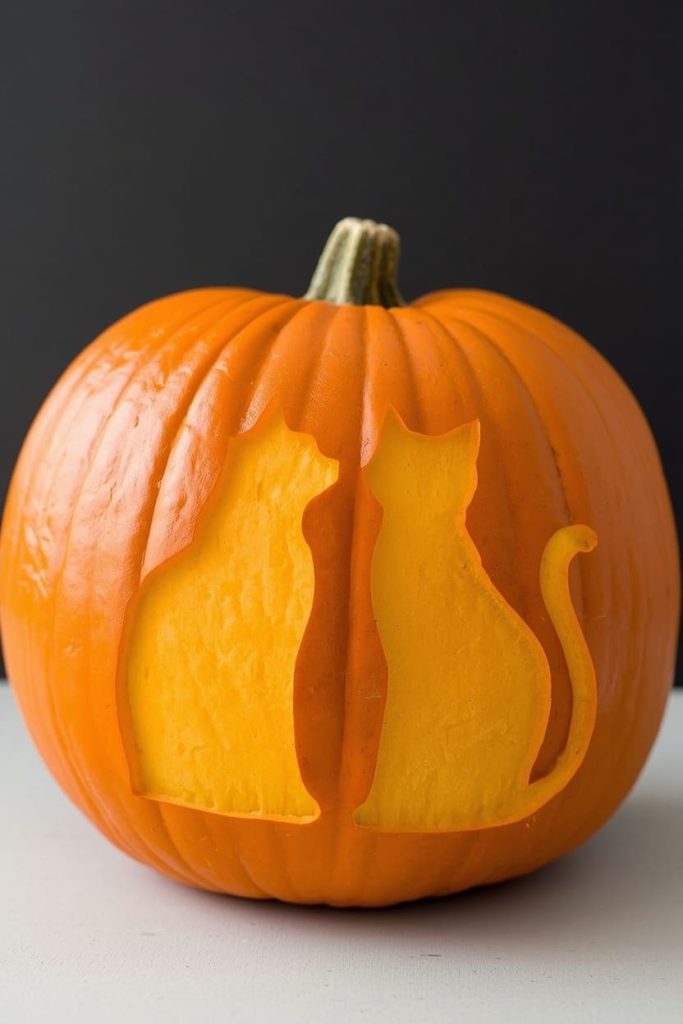
If you’ve got more than one cat — or just love the idea of a pair — this design carves two cat silhouettes side by side, sitting or facing each other, for a design with a bit more storytelling built in.
What you’ll need:
- A wide pumpkin with enough flat surface for two shapes
- Carving kit
- Two printed or hand-drawn cat silhouettes, sized slightly differently
- Tape and a poking tool
How to do it:
- Position your two cat templates side by side on the pumpkin, angling them slightly toward each other so they appear to be interacting.
- Poke dots along both outlines, then remove the templates.
- Carve the larger cat first, then the smaller one, keeping consistent spacing between the two shapes.
- If you want extra detail, add a small carved heart or curved tail overlap between the two cats to reinforce the “pair” feeling.
I love this one because it instantly tells a small story rather than just showing a single shape — it’s an easy way to represent a multi-cat household without carving two separate pumpkins.
Tip: vary the sizes noticeably (one clearly bigger than the other) so the two shapes read as distinct individuals rather than one blurry combined silhouette.
How to Find or Make a Cat Stencil for Carving
If freehand sketching isn’t your thing, a stencil takes almost all the guesswork out of these designs:
- Search “free printable cat pumpkin stencil” online — there are dozens of free templates ranging from simple silhouettes to detailed face designs, sized to print on standard paper.
- Trace a photo of your own cat using tracing paper over a printed picture, simplifying the outline into clean shapes as you go rather than tracing every small detail.
- Use stencils included in most carving kits — many kits come with generic Halloween shapes, including cats, that you can trace directly.
- Resize on a printer or photocopier if your stencil doesn’t match your pumpkin’s size — scaling up or down before taping it on saves you from an awkward, cramped, or oversized design.
Tips for Getting Clean, Precise Carving Lines
A few small habits make a noticeable difference in how polished your finished cat pumpkin looks:
- Cut slowly and let the saw do the work — pushing too hard tends to tear the pumpkin flesh rather than cut it cleanly.
- Carve the smallest, most detailed shapes first, while your tools are sharpest and the pumpkin walls are freshest and firmest.
- Wipe the surface clean between cuts so you can actually see your pencil or poked-dot lines clearly as you go.
- Support thin sections from behind with your free hand as you cut, especially on thin points like ears or tails, to prevent them from snapping off mid-cut.
Frequently Asked Questions
What’s the easiest cat pumpkin design for beginners? The classic black cat silhouette is the most beginner-friendly option, since it’s a single bold shape with no fine internal detail required. Even a slightly imperfect outline still reads clearly as a cat once the pumpkin is lit from inside.
How do I carve a realistic cat face? Realistic cat faces rely on a shading technique where you shave away only the outer pumpkin skin (rather than cutting all the way through) to create lighter, textured areas alongside fully cut dark features like the eyes and nose. Using a reference photo for proportions and taking your time with fine detail tools makes the biggest difference in realism.
Can I carve a pumpkin to look like my own cat? Yes, and it’s one of the most rewarding cat pumpkin carving ideas to try if you’re up for a bit more detail work. Start with a clear reference photo of your cat’s face, sketch the basic proportions in pencil first, and use the shading technique from the realistic face idea above to capture their specific markings or expression.
Do I need a stencil, or can I freehand a cat design? Either works, but a stencil is strongly recommended for detailed designs like the realistic face or sitting cat scene, since it keeps proportions accurate. Simpler designs like the classic silhouette or peeking cat face are easy to freehand once you’re comfortable with basic carving.
How do I keep thin details like ears and whiskers from breaking? Keep thin sections slightly thicker than you think they need to be, and support them gently from behind with your free hand while cutting. Carving whisker lines as shallow etched marks instead of full cuts also helps, since thin fully-cut lines are the most fragile part of most cat designs.
Whichever design matches your current skill level, the goal isn’t a perfect pumpkin — it’s one that makes you smile every time you walk past it, the same way your actual cat probably does (when they’re not ignoring you, anyway). Pick the idea that fits your time and patience tonight, and you’ll have a cat pumpkin worth showing off all season.

Jenny is a passionate writer specializing in home decor, design, and styling. With years of experience in transforming spaces, she shares expert tips on creating beautiful, functional homes. From interior design trends to DIY decor ideas, Jenny’s work helps homeowners craft spaces that reflect their unique style. Whether it’s a cozy living room, a modern kitchen, or a serene bedroom, her articles offer practical advice and inspiration to elevate any home.