The year I finally swapped my usual orange pumpkins for a few white ones, my porch stopped looking like a Halloween store display and started looking like something out of a magazine.
I hadn’t even done anything fancy — just a couple of creamy white pumpkins mixed in with dried grasses and a cream pumpkin — but three neighbors stopped to ask where I got them.
That’s when I realized you don’t need spooky or gory to make a statement at Halloween; you just need soft, elegant, and a little whimsical.
If you’re after ghost pumpkin ideas that feel more “cozy farmhouse” than “haunted house,” here are five you can create at home, real or DIY.
The Only Supplies You’ll Actually Need
Whether you’re working with a real white pumpkin or turning an orange one into a ghost, these three basics cover nearly everything below:
- White Acrylic Craft Paint (Multi-Surface, 8 oz) — a smooth, opaque white that covers orange pumpkin skin fully in one or two coats for a clean ghost-white base.
- Cheesecloth (Unbleached, Large Roll) — lightweight, drapable fabric that creates that soft, ethereal “ghost” silhouette without any sewing or cutting.
- Black Acrylic Paint Pen (Fine Tip) — precise enough to add simple ghost faces or delicate detailing without the mess of a brush.
Now let’s get into the ideas.
The Classic Painted Ghost Pumpkin (No Carving Required)
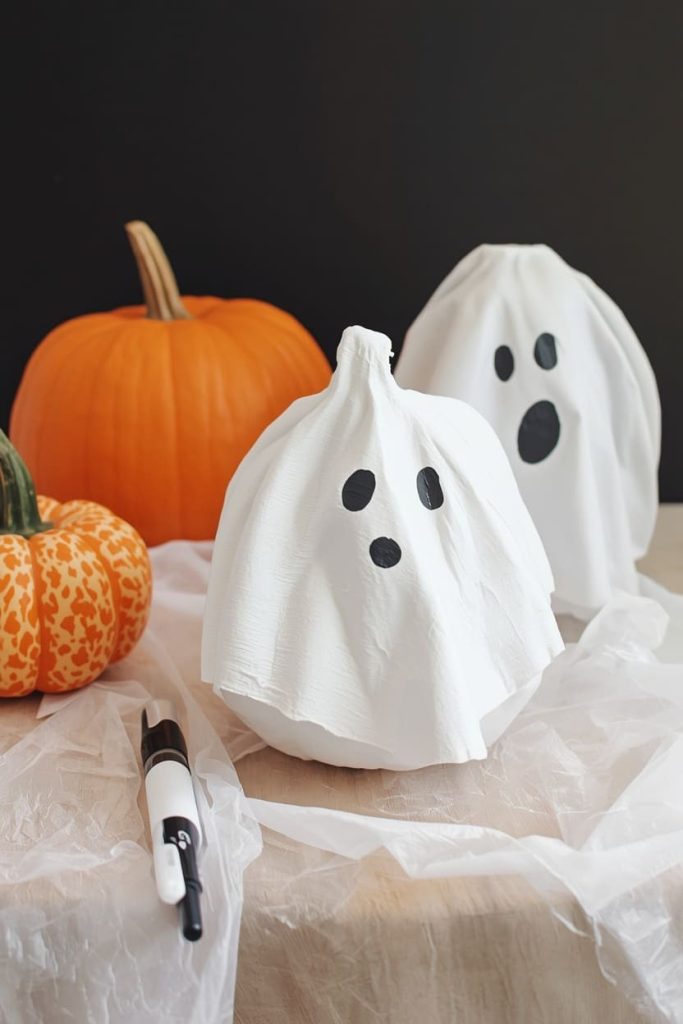
This is the easiest entry point into ghost pumpkin ideas, and it’s the one I recommend if you’re starting with regular orange pumpkins you already have on hand.
What you’ll need:
- Any orange or light-colored pumpkin
- White acrylic craft paint
- A foam brush or sponge for smooth coverage
- Black paint pen (optional, for a simple face)
How to do it:
- Wipe your pumpkin clean and let it dry completely before painting.
- Apply your first coat of white paint in smooth, even strokes, working from the stem downward.
- Let it dry for about 30 minutes, then apply a second coat to fully cover any orange showing through.
- Once fully dry, add two small dot eyes and an oval mouth with the paint pen for a soft, friendly ghost expression — or leave it blank for a more minimalist look.
I love this one because it takes an afternoon and instantly transforms a basic pumpkin into something that looks intentional and styled.
Tip: two thin coats always look smoother and more even than one thick coat, which tends to show brush strokes and drips.
The Draped Cheesecloth Ghost Pumpkin
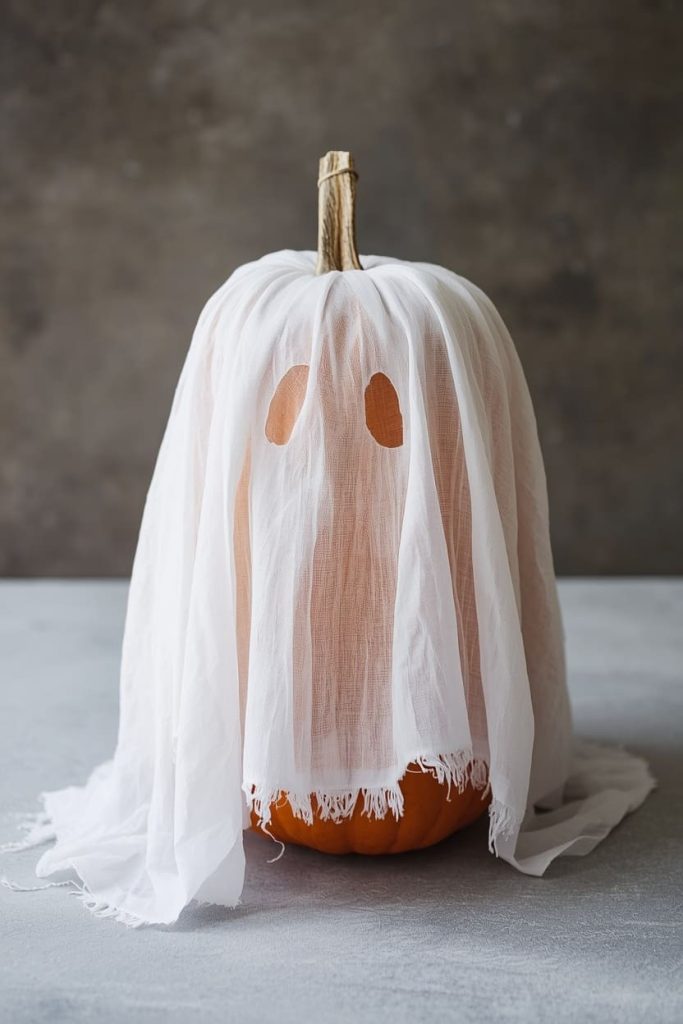
This idea gives you that soft, floating, “ghostly” texture without any paint at all — it’s become one of my favorite ghost pumpkin ideas for anyone who wants something a little more ethereal than a solid painted surface.
What you’ll need:
- A pumpkin of any color (white or orange both work, since the fabric covers it)
- Cheesecloth, cut into a large square
- Scissors
- A rubber band or twine
How to do it:
- Drape the cheesecloth loosely over the top of the pumpkin, letting it fall naturally down the sides.
- Gather the excess fabric at the base of the stem and secure it with a rubber band or twine.
- Cut two small holes for eyes where you want the “face” to show through, and trim any excess fabric hanging too low.
- Fluff and adjust the folds so the fabric drapes softly rather than sitting flat.
Here’s how I did mine: I left the bottom edge slightly uneven and torn rather than trimmed perfectly straight, and it gave the whole thing a much more natural, floaty look.
Tip: lightly mist the cheesecloth with water before draping — damp fabric molds to the pumpkin’s shape more naturally and holds its folds better than dry fabric.
Styling Real White Pumpkins in a Cluster
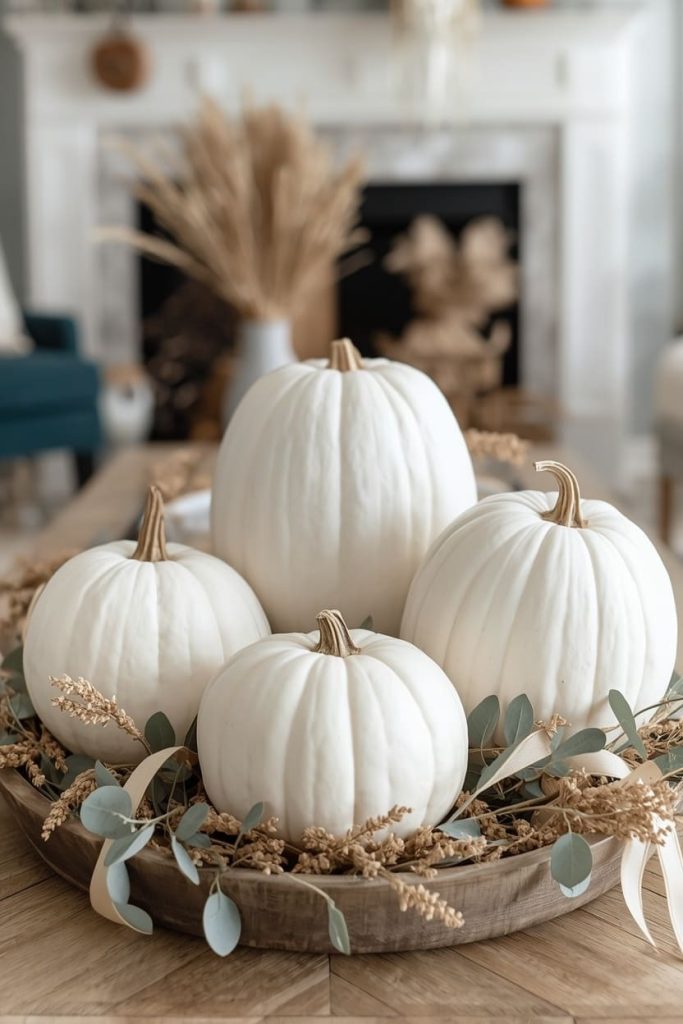
If you’d rather skip DIY entirely, this idea is all about sourcing real white pumpkins and letting their natural beauty do the work. Grouping is the secret — a single white pumpkin looks nice, but a cluster looks like a designed display.
What you’ll need:
- 3–5 real white pumpkins in varying sizes (Casper, Lumina, or Baby Boo varieties all work beautifully)
- A tray, wooden crate, or the top of a console table
- Dried grasses, eucalyptus, or cream-colored ribbon for filler
How to do it:
- Choose pumpkins of different sizes and slightly different shapes for visual interest — perfectly matching pumpkins tend to look flatter together.
- Arrange your largest pumpkin first as the anchor, then layer smaller ones around it at different angles.
- Tuck dried grasses or greenery into the gaps between pumpkins to soften the arrangement.
- Step back and rotate pieces as needed so the most attractive side of each pumpkin faces outward.
This is the idea you’ll want if you love the ghost pumpkin look but don’t want to paint or craft anything — the pumpkins themselves are already doing all the visual work.
Tip: look for these at farmers markets or specialty grocery stores in early-to-mid fall, since white pumpkin varieties tend to sell out faster than orange ones as Halloween approaches.
The Lace-Wrapped Elegant Ghost Pumpkin
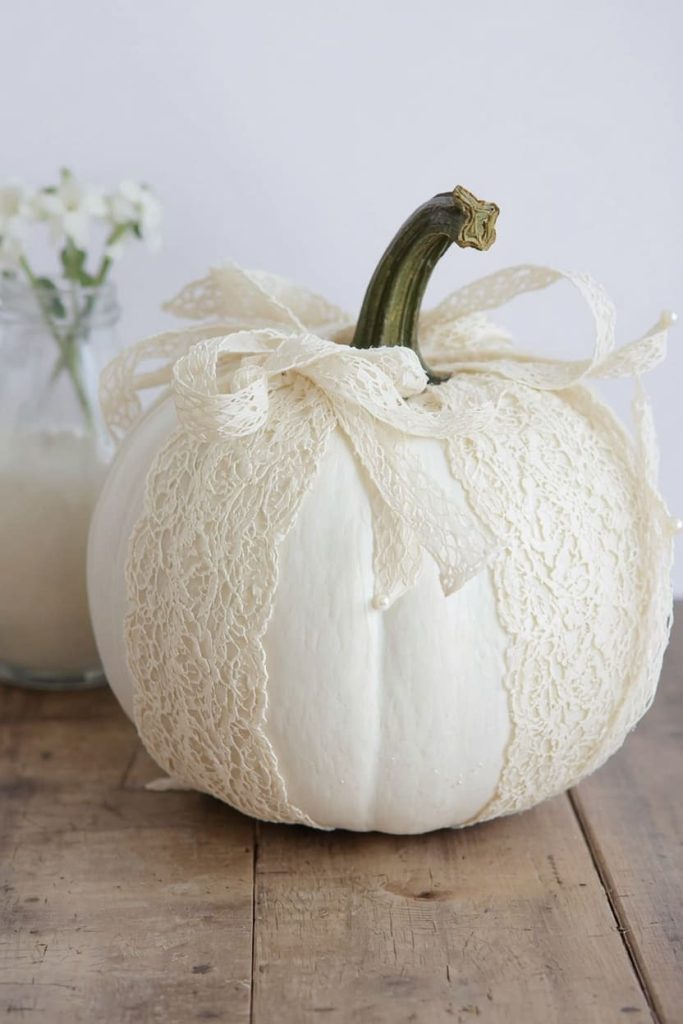
For a slightly more refined, almost bridal-inspired take on ghost pumpkin ideas, wrapping a white pumpkin in lace creates a look that works just as well for a fall wedding or dinner party as it does for Halloween.
What you’ll need:
- A real or painted white pumpkin
- A length of white or cream lace fabric or ribbon
- Hot glue gun or craft pins
- Small pearl or cream beads (optional)
How to do it:
- Wrap the lace loosely around the pumpkin, crisscrossing it like ribbon on a gift.
- Secure the ends underneath near the base or tuck them under the stem where they won’t show.
- Add small dabs of hot glue at a few points to keep the lace from slipping out of place.
- If using beads, glue a few along the lace lines for subtle sparkle without looking overdone.
I love this one because it elevates a simple white pumpkin into something that looks intentional enough for a formal tablescape, not just a porch decoration.
Tip: choose a lace pattern with larger, more open detailing rather than tightly woven lace — it drapes more naturally around the pumpkin’s curves and shows more contrast against the white.
The Minimalist Dot-Face Ghost Pumpkin Trio
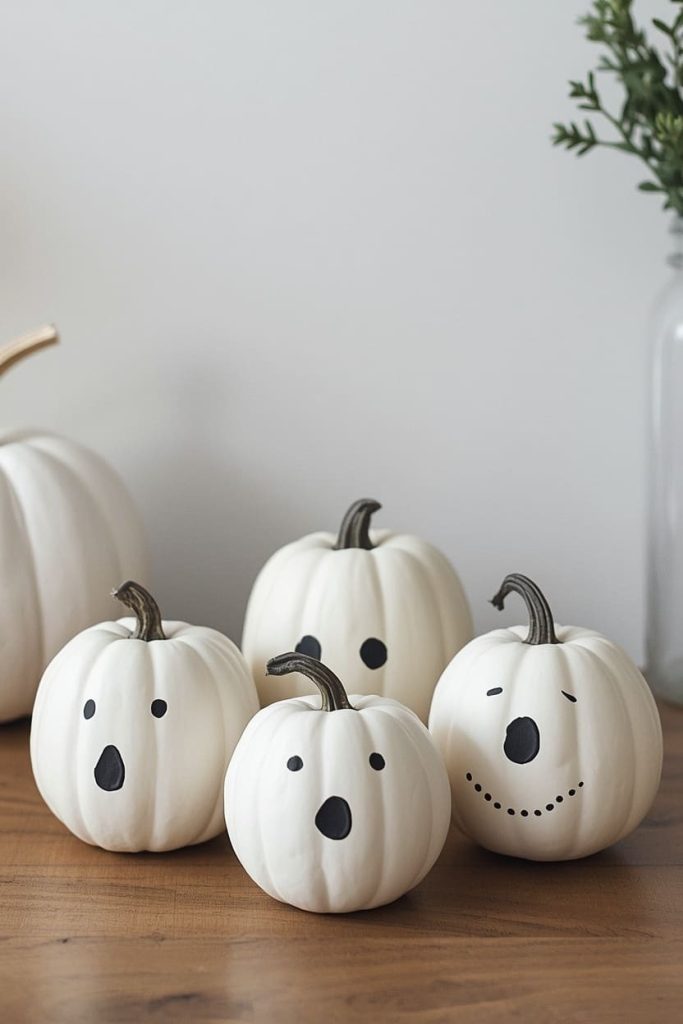
This idea is the simplest of the five, and it’s the one I come back to when I want something quick that still reads as clearly “ghost” without looking cartoonish or overly Halloween-specific.
What you’ll need:
- 3 small white pumpkins (or painted mini pumpkins)
- Black paint pen
- A steady hand and a few minutes
How to do it:
- Lightly mark where you want two dot eyes and a small “o” mouth using pencil first, so you can adjust placement before committing to paint.
- Trace over your pencil marks with the black paint pen, keeping the dots small and evenly spaced for a soft, sweet expression.
- Repeat with slightly different expressions on each pumpkin — one surprised, one sleepy, one smiling — to give the trio some personality.
- Group them together on a shelf, mantel, or entryway table.
I love this one because it’s the fastest project on the list, but the trio effect makes it feel like a fully styled display rather than a single afterthought pumpkin.
Tip: keep the dots small and centered rather than large or exaggerated — the smaller and more minimal the face, the more elegant and less “cartoon Halloween” the final look reads.
Where to Find Real Ghost Pumpkins vs. How to DIY the Look
If you’re hoping to source the real thing, a few white pumpkin varieties are worth knowing:
- Casper — a classic, brilliant white variety with a smooth, rounded shape, widely considered one of the prettiest for decorating and baking alike.
- Lumina — smooth-skinned with a shiny finish and vibrant orange flesh inside, popular for both carving and styling.
- Baby Boo — a miniature white pumpkin, perfect for the dot-face trio idea or scattering across a tablescape.
These varieties typically show up at farmers markets, pumpkin patches, and some grocery stores from early September through mid-October, and they tend to sell out faster than orange pumpkins since supply is more limited.
If you can’t find real ones nearby, painting regular orange pumpkins white is a completely seamless substitute — most people won’t be able to tell the difference once it’s styled into a display.
Styling Ghost Pumpkins Into a Full Fall Display
A single ghost pumpkin looks nice on its own, but here’s how to build it into a full seasonal moment:
- Mix textures, not just colors — pair smooth white pumpkins with rougher elements like dried wheat, pampas grass, or woven baskets for visual contrast.
- Stick to a neutral palette — creams, whites, soft browns, and muted greens keep the look cohesive and elegant rather than busy.
- Vary your heights — use a stack of books, a wooden crate, or a plant stand to elevate some pumpkins above others for a more dynamic arrangement.
- Add warm lighting — a few flameless candles or string lights nearby give the white pumpkins a soft glow in the evening, which enhances the whimsical effect.
Frequently Asked Questions
What are ghost pumpkins called? The most common white pumpkin varieties are Casper, Lumina, Baby Boo, and Full Moon, all of which are sometimes casually referred to as “ghost pumpkins” because of their pale, ethereal color. They’re technically not a different species from orange pumpkins — just varieties bred specifically for their white skin.
Can I paint a regular pumpkin white? Yes, and it’s one of the easiest ways to get the ghost pumpkin look if real white varieties aren’t available near you. A couple of coats of white acrylic craft paint fully covers the orange skin and holds up well through the fall season if kept out of heavy rain.
Do ghost pumpkins taste different from orange pumpkins? Not really — most white pumpkin varieties like Lumina and Casper have similar or even slightly sweeter flesh than traditional orange pumpkins, and both work well in pies, soups, and roasting. The white color is only skin-deep; the inside flesh is typically a familiar orange or pale yellow.
How long do real white pumpkins last as decorations? Uncarved white pumpkins typically last 2–3 months when kept dry and out of direct sun, similar to orange pumpkins. If you carve or cut into one, though, expect it to hold up for only about a week before it starts to soften.
Do ghost pumpkins need to be carved to look good? Not at all — most of the ideas that make ghost pumpkins so popular right now involve no carving whatsoever, relying instead on color, draping, or simple painted details. This actually makes them a great option if you want a polished look without carving tools or mess.
However you choose to bring the ghost pumpkin look into your space, the goal is that soft, elegant contrast against all the orange and black of a typical Halloween display. Pick whichever idea matches the time you have and the aesthetic you’re going for, and you’ll have a display that feels a little more “styled porch” and a little less “trick-or-treat store run.”

Jenny is a passionate writer specializing in home decor, design, and styling. With years of experience in transforming spaces, she shares expert tips on creating beautiful, functional homes. From interior design trends to DIY decor ideas, Jenny’s work helps homeowners craft spaces that reflect their unique style. Whether it’s a cozy living room, a modern kitchen, or a serene bedroom, her articles offer practical advice and inspiration to elevate any home.