There’s something special about decorating your tree with ornaments you’ve made yourself. DIY Christmas tree ornaments don’t just add beauty—they tell a story and create lasting memories.
From simple crafts you can make with the kids to elegant designs that elevate your holiday style, handmade ornaments bring a personal touch no store-bought piece can match.

In this list, you’ll discover 11 DIY Christmas tree ornament ideas that are creative, budget-friendly, and easy to try, making your tree stand out with charm and meaning.
Table of Contents
- Materials and Tools Overview
- 11 DIY Christmas Tree Ornament Ideas
- Tips for Success
- Inspiration and Themes
- Troubleshooting Common Issues
- Conclusion
- FAQs
Materials and Tools Overview
Before we start crafting, let’s talk about what you’ll need. Most of these projects use everyday items you probably already have at home. Here’s a quick rundown of common supplies:
- Glue: Hot glue guns work great, but school glue is perfect for kids.
- Scissors: Sharp ones for adults, safety scissors for little hands.
- Paint: Acrylic paint is versatile and sticks to most surfaces.
- String or Twine: For hanging your ornaments.
- Glitter: Because who doesn’t love a little sparkle?
Some projects call for specific items, like clear plastic baubles or wood slices. Don’t worry if you don’t have these on hand. You can find affordable materials at craft stores, dollar stores, or even around your house.
For example, old fabric scraps or pinecones from your backyard can work wonders. If you’re crafting with kids, keep safety in mind. Use non-toxic paints and avoid sharp tools. For hot glue, always supervise closely or stick to glue sticks for younger crafters.
11 DIY Christmas Tree Ornament Ideas
Ready to get started? Here are 11 fun, creative ornament ideas. I’ve included step-by-step instructions, customization tips, and skill levels for each one. Let’s make your tree one-of-a-kind!
1. Salt Dough Ornaments

Salt dough ornaments are a holiday classic. They’re easy to make, kid-friendly, and super customizable. I remember making these as a child, and the joy of seeing them on the tree never gets old.
Materials:
- 1 cup flour
- 1/2 cup water
- 1/2 cup salt
- Acrylic paint
- Clear sealant (like Mod Podge)
- Cookie cutters, twine
Instructions:
- Mix flour, salt, and water in a bowl until a dough forms.
- Roll out the dough to about 1/4-inch thickness.
- Use cookie cutters to create shapes like stars, trees, or hearts.
- Poke a small hole at the top for hanging.
- Bake at 250°F for 2-3 hours until hard.
- Let cool, then paint with acrylics. Add glitter for extra sparkle.
- Seal with Mod Podge and thread twine through the hole.
Customization: Paint festive designs like snowflakes or write family names for a personal touch. You can even press handprints for a keepsake.
Skill Level: Beginner. Perfect for families or first-time crafters.
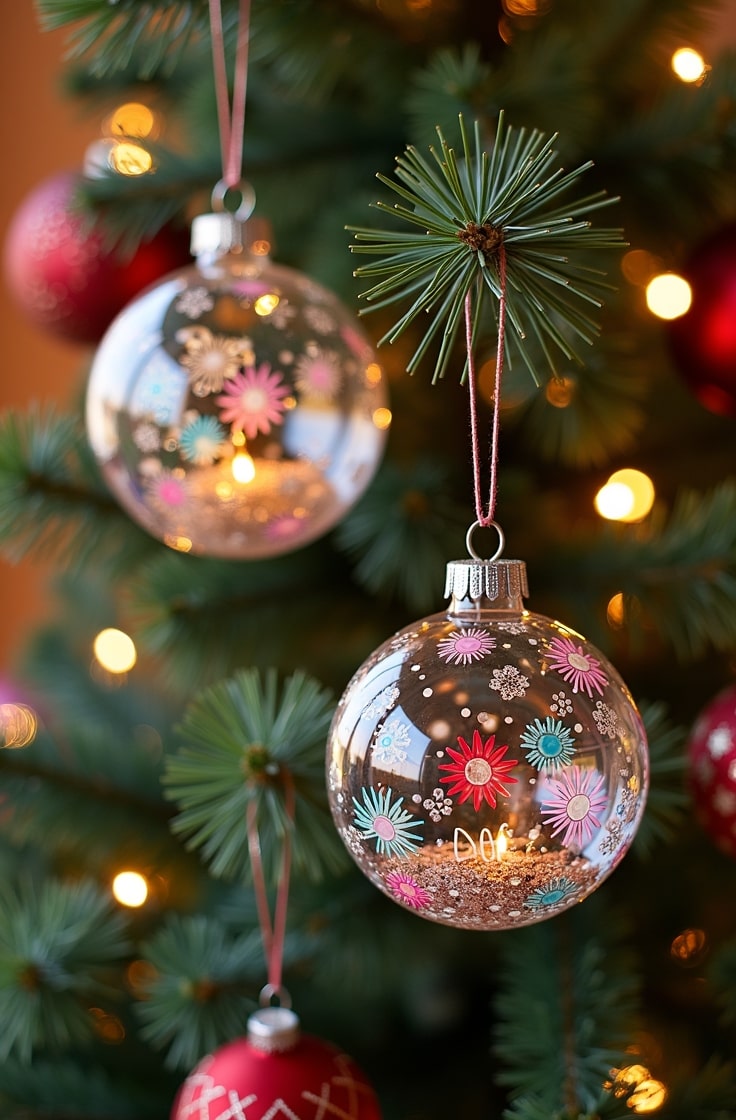
2. Clear Plastic Ornament Baubles
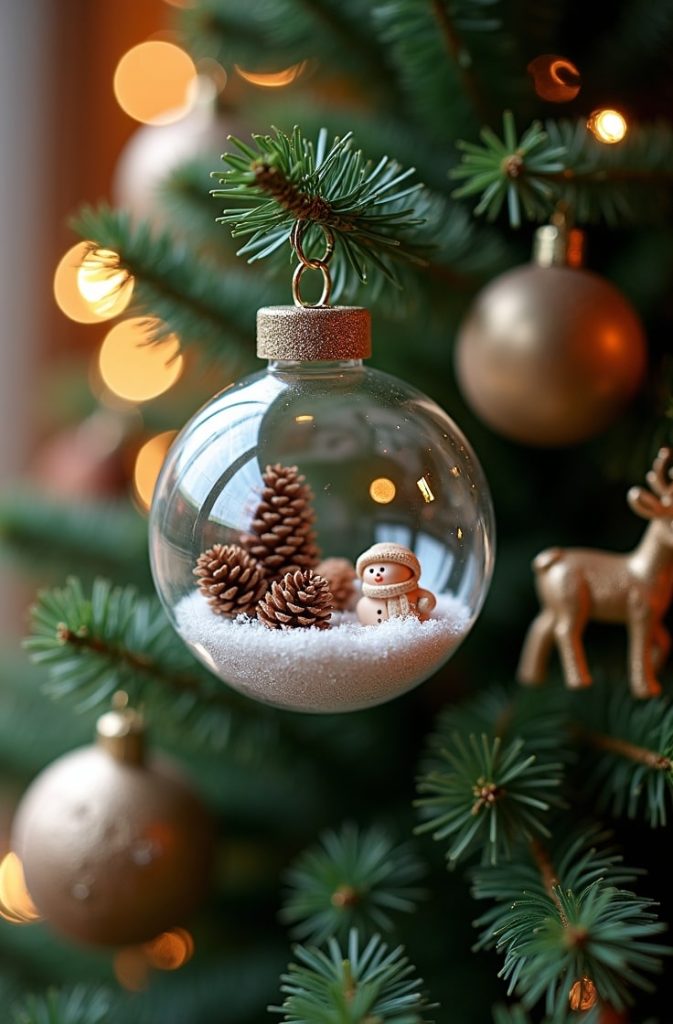
Clear plastic baubles are like blank canvases for your creativity. Fill them with glitter, tiny trinkets, or even photos for a stunning effect.
Materials:
- Clear plastic baubles (available at craft stores)
- Glitter, faux snow, or small figurines
- Ribbon or twine
- Hot glue (optional)
Instructions:
- Open the bauble by removing the top cap.
- Pour in glitter, faux snow, or small items like mini pinecones.
- Replace the cap and shake gently to distribute.
- Tie a ribbon around the top for hanging.
- Optional: Use hot glue to add exterior decorations like bows.
Customization: Create a winter scene with faux snow and tiny trees. Or add a small photo inside for a personal keepsake. Write messages on the outside with metallic markers.
Skill Level: Beginner to intermediate. Easy to fill, but decorating the exterior might take a bit more skill.
3. Wooden Slice Ornaments
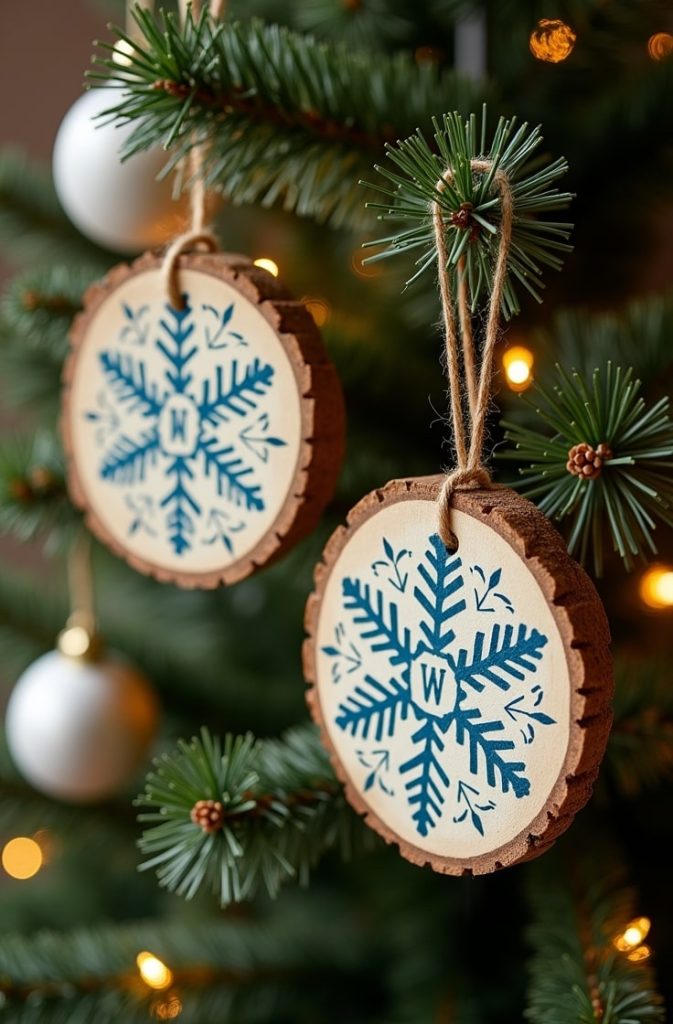
Wooden slice ornaments bring a rustic charm to your tree. They’re perfect if you love natural, cozy vibes.
Materials:
- Wood slices (pre-cut from craft stores or sliced from branches)
- Acrylic paint or wood-burning tool
- Twine
- Paintbrushes
Instructions:
- Sand the wood slices lightly for a smooth surface.
- Paint a design like a snowflake, tree, or monogram.
- Alternatively, use a wood-burning tool for a permanent etched look.
- Drill a small hole at the top or hot glue twine for hanging.
- Seal with clear varnish for durability.
Customization: Paint nature-inspired designs or burn family initials. Add a touch of glitter for sparkle.
Skill Level: Intermediate. Painting is easy, but wood-burning requires care.
4. Paper Snowflakes

Paper snowflakes are a budget-friendly way to add elegance to your tree. They’re surprisingly simple and look stunning in 3D.
Materials:
- White or colored paper
- Scissors
- Glue
- String or ribbon
Instructions:
- Cut six 4×4-inch squares from paper.
- Fold each square diagonally into a triangle, then fold again.
- Cut small shapes along the edges (triangles, curves, or slits).
- Unfold carefully to reveal the snowflake pattern.
- Glue the six pieces together at the center to form a 3D snowflake.
- Attach a string loop for hanging.
Customization: Use colored paper or add glitter for extra flair. Vary sizes for a layered look.
Skill Level: Beginner. Kid-friendly with safety scissors.
5. Felt Animal Ornaments
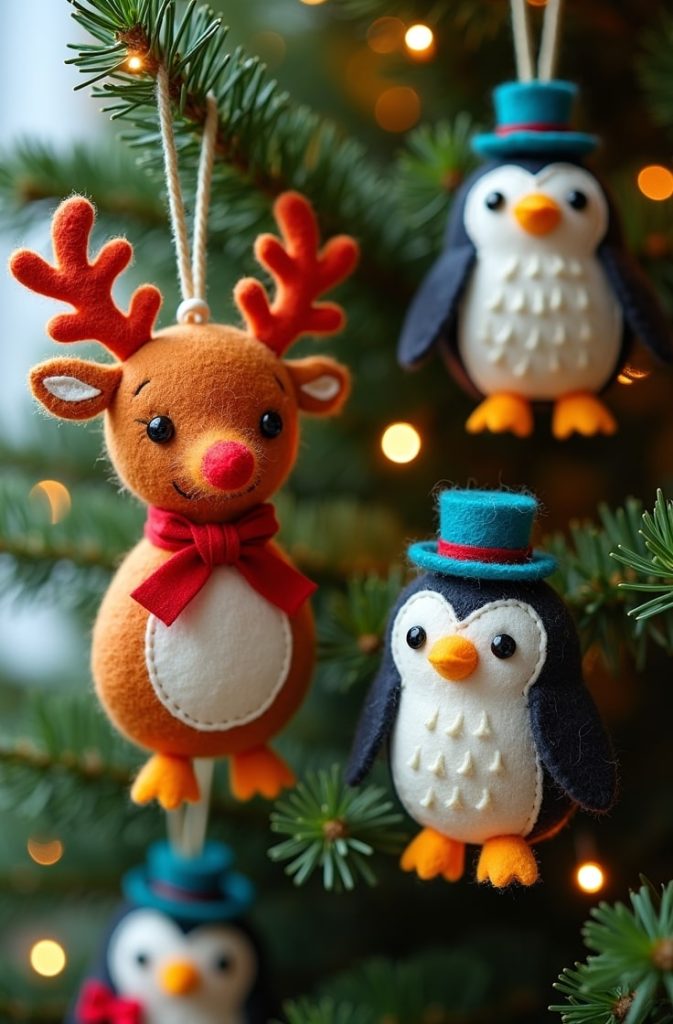
Felt animal ornaments are adorable and perfect for a whimsical tree. Think reindeer, penguins, or owls!
Materials:
- Felt sheets in various colors
- Embroidery thread or glue
- Stuffing (like cotton balls)
- Beads for eyes
- Needle, scissors
Instructions:
- Draw an animal shape (like a reindeer) on paper and cut it out as a template.
- Trace the template onto felt and cut two identical shapes.
- Sew or glue the edges together, leaving a small opening.
- Stuff lightly with cotton, then seal the opening.
- Add bead eyes or other details with glue.
- Attach a twine loop for hanging.
Customization: Choose different animals or add accessories like scarves or hats. Use contrasting thread for a decorative stitch.
Skill Level: Intermediate. Sewing is optional but adds charm.
6. Cinnamon Stick Stars
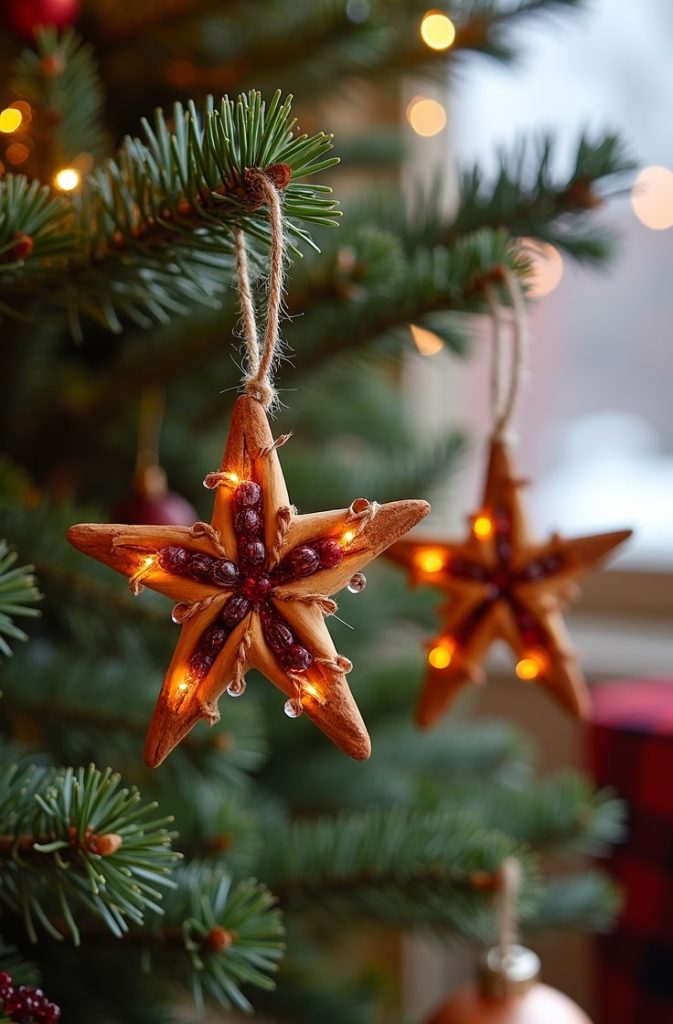
Cinnamon stick stars smell amazing and look rustic. They’re a quick project with a big impact.
Materials:
- Cinnamon sticks (5 per star)
- Hot glue
- Twine
- Small beads or berries
Instructions:
- Arrange five cinnamon sticks into a star shape.
- Use hot glue to secure where the sticks overlap.
- Tie twine around one point for hanging.
- Glue on small beads or berries for decoration.
Customization: Add mini pinecones or glitter for extra texture. Spray with clear sealant to preserve the scent.
Skill Level: Beginner. Quick and easy.
7. Beaded Snowflake Ornaments
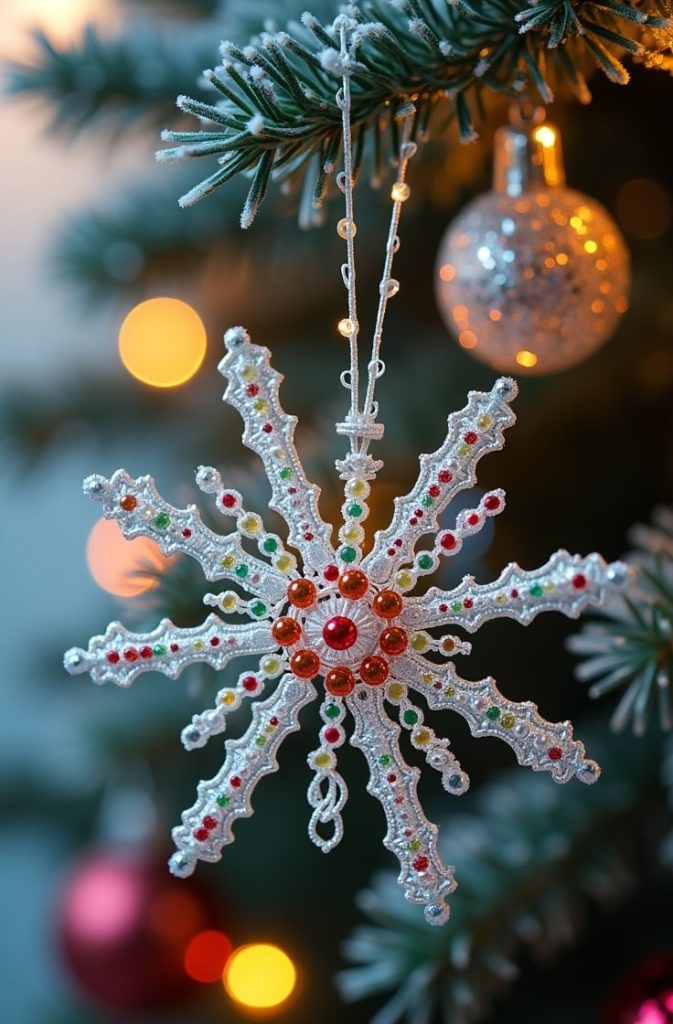
Beaded snowflakes sparkle beautifully on the tree. They’re a bit fiddly but worth the effort.
Materials:
- Craft wire (18-20 gauge)
- Assorted beads (glass or plastic)
- Pliers
- Ribbon
Instructions:
- Cut six equal lengths of wire (about 6 inches each).
- Twist the wires together at the center to form a snowflake base.
- Thread beads onto each wire arm, mixing sizes and colors.
- Bend the wire ends with pliers to secure beads.
- Tie a ribbon loop at one arm for hanging.
Customization: Use crystal beads for elegance or bright colors for a playful look. Vary arm lengths for unique shapes.
Skill Level: Intermediate. Requires some dexterity.
8. Photo Frame Ornaments
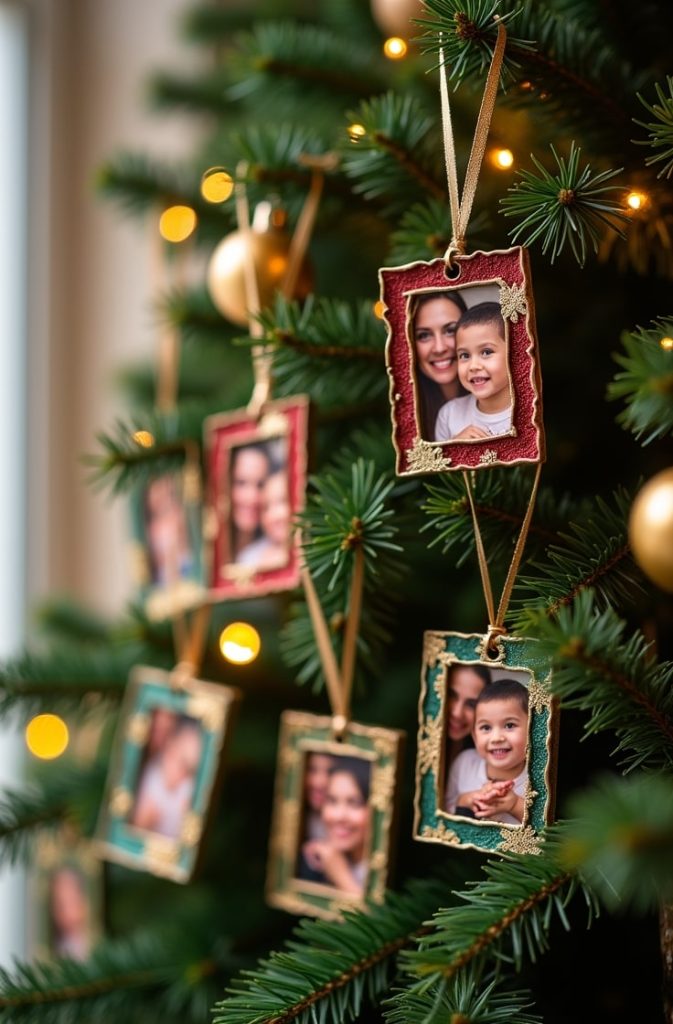
Photo frame ornaments are a heartfelt way to display memories on your tree. They’re simple but meaningful.
Materials:
- Small photo frames (wood or plastic)
- Printed photos (sized to fit frames)
- Acrylic paint
- Ribbon
Instructions:
- Paint the frame in a festive color like red or gold.
- Cut your photo to fit the frame.
- Insert the photo and secure the back.
- Tie a ribbon loop through the frame’s top for hanging.
- Add small stickers or paint details for flair.
Customization: Use family photos, pet pictures, or holiday snapshots. Decorate with holiday motifs like holly or stars.
Skill Level: Beginner. Easy and sentimental.
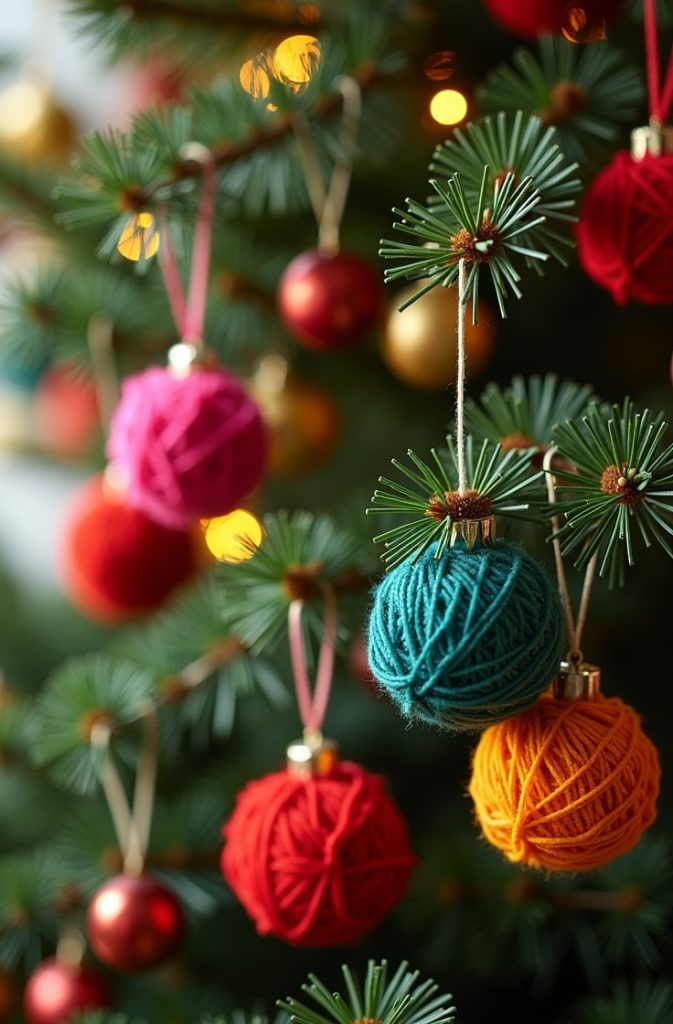
9. Pom-Pom Ornaments
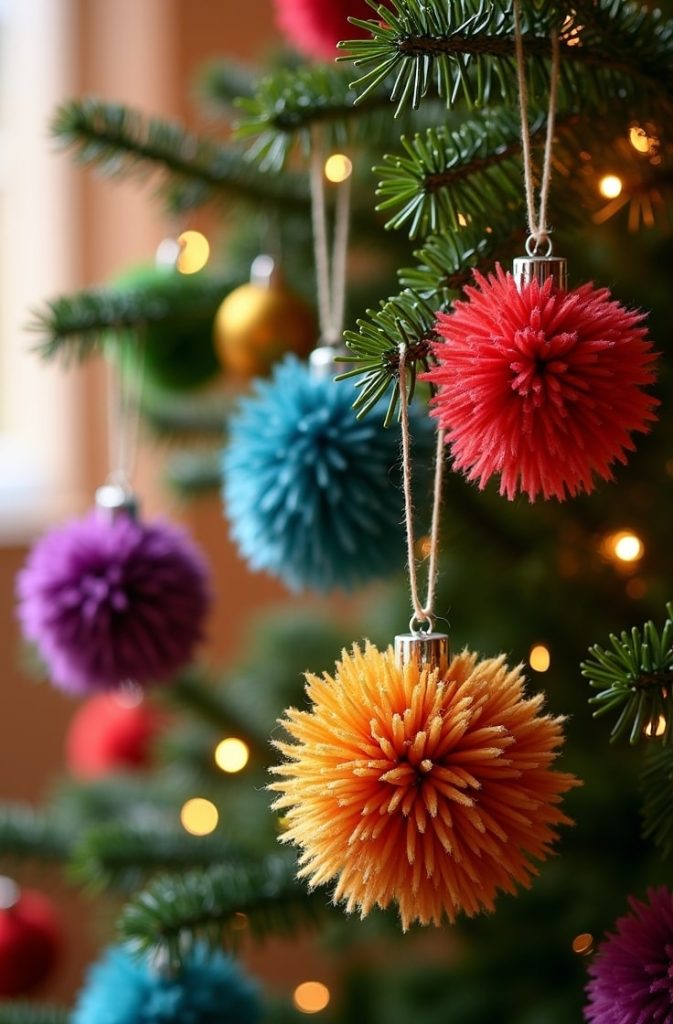
Pom-pom ornaments are fluffy, colorful, and so much fun to make. Kids love this one!
Materials:
- Yarn in various colors
- Pom-pom maker or cardboard
- Glue
- Ribbon
Instructions:
- Wrap yarn around a pom-pom maker or cardboard cutout.
- Tie tightly in the center and cut the loops to form a pom-pom.
- Trim to make it round and fluffy.
- Glue multiple pom-poms together to form a wreath or ball.
- Attach a ribbon loop for hanging.
Customization: Mix colors or add beads for texture. Create mini wreaths or single pom-poms.
Skill Level: Beginner. Kid-friendly and forgiving.
10. Glitter Pinecone Ornaments
Pinecones are nature’s gift to crafters. Add glitter, and they’re pure holiday magic.
Materials:
- Pinecones (collected or store-bought)
- Glitter
- Spray paint
- Twine
Instructions:
- Clean pinecones by brushing off dirt and baking at 200°F for 30 minutes.
- Spray paint the pinecones in a festive color (gold, silver, or white).
- Sprinkle glitter while the paint is wet.
- Let dry completely, then tie twine around the top for hanging.
Customization: Use metallic or pastel colors. Dust only the tips with glitter for a subtle look.
Skill Level: Beginner. Quick and forgiving.
11. Fabric Scrap Ornaments
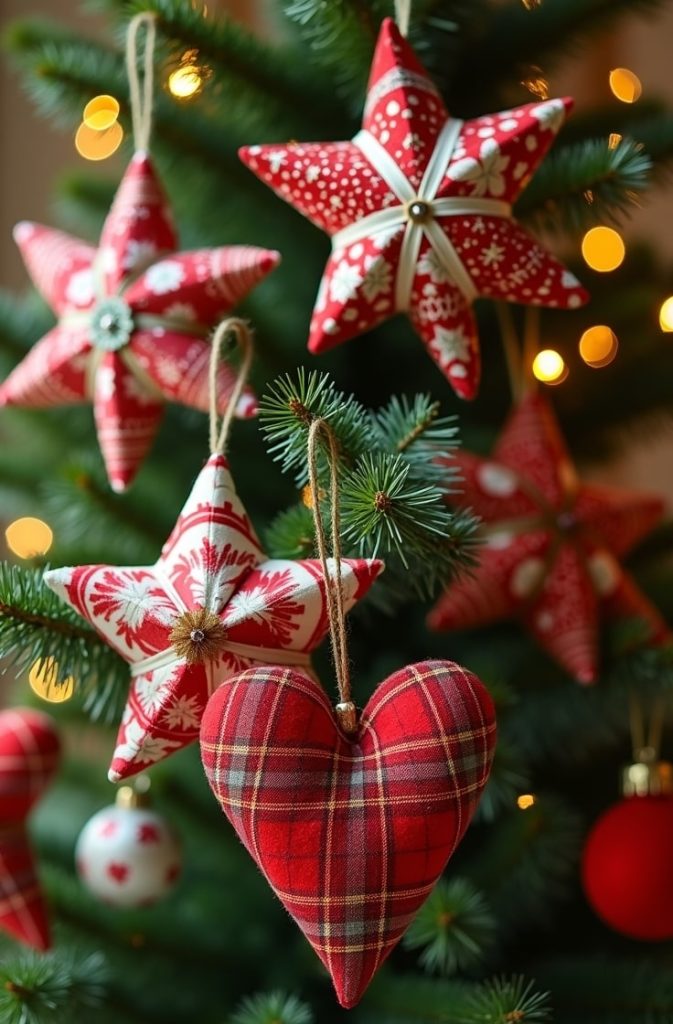
Fabric scrap ornaments add a cozy, quilted feel to your tree. They’re great for using up leftover material.
Materials:
- Fabric scraps
- Foam balls or cardboard shapes
- Pins or glue
- Ribbon
Instructions:
- Cut fabric into small strips or patches.
- Wrap or pin the fabric around a foam ball or cardboard shape.
- Secure with glue or pins, overlapping for a quilted look.
- Add a ribbon loop for hanging.
- Decorate with buttons or embroidery for extra detail.
Customization: Use holiday-themed fabrics or mix patterns for a eclectic vibe. Create shapes like stars or hearts.
Skill Level: Intermediate. Requires some patience for pinning.
Tips for Success
Crafting is all about having fun, but a few tips can make the process smoother:
- Time Management: Most of these projects take 30 minutes to an hour. Batch similar tasks (like painting all ornaments at once) to save time.
- Kid-Friendly Tips: Use washable paints and blunt scissors for younger kids. Let them add glitter or stickers to keep it fun.
- Storage and Durability: Store ornaments in a cool, dry place. Use sealants like Mod Podge to protect delicate projects. Wrap fragile ones in tissue paper.
- Budget Hacks: Check your recycling bin for materials like cardboard or fabric scraps. Buy supplies in bulk at dollar stores to save money.
Inspiration and Themes
Want your tree to tell a story? Try a theme! A rustic theme with wooden slices, pinecones, and cinnamon sticks creates a cozy vibe. For a modern look, go for glittery baubles and beaded snowflakes. If kids are involved, let them lead with colorful pom-poms and paper snowflakes.
Personalize your ornaments with names, dates, or special messages. For example, write “2025” on a salt dough ornament to mark the year. For eco-friendly options, use natural materials like pinecones or recycled fabric. You can also reflect cultural traditions—try adding symbols or colors that hold meaning for your family’s heritage.
Troubleshooting Common Issues
Mistakes happen, but they’re easy to fix:
- Glue Mishaps: If hot glue strings appear, snip them off with scissors. For excess glue, peel it off once dry.
- Uneven Paint: Apply thin layers and let each dry fully. Sand lightly to smooth out mistakes.
- Material Substitutions: No wood slices? Use cardboard circles. No glitter? Try colorful sand or crushed foil.
- Safety Fixes: If glitter is loose, seal with clear spray varnish. Reinforce fragile ornaments with extra glue.
Conclusion
There you have it—11 DIY Christmas tree ornaments to make your holiday sparkle!
From simple salt dough shapes to intricate beaded snowflakes, these projects offer something for every skill level.
Crafting your own decorations is a wonderful way to create memories, save money, and add a personal touch to your tree. I hope you’re inspired to grab some supplies and start creating.
Share your masterpieces with friends or on social media—I’d love to see what you come up with! For more ideas, check out craft blogs or YouTube tutorials. Happy crafting!
FAQs
How long do salt dough ornaments last?
With a sealant like Mod Podge, they can last for years if stored properly.
Can I make these with kids?
Yes! Paper snowflakes, pom-poms, and glitter pinecones are great for kids. Use safety scissors and non-toxic materials.
What if I don’t have a hot glue gun?
School glue or craft glue works for most projects, though it may take longer to dry.
How do I store fragile ornaments?
Wrap them in tissue paper and store in a sturdy box to prevent breakage.
Can I use outdoor pinecones?
Yes, but clean them first by baking at 200°F for 30 minutes to remove bugs and sap.

Jenny is a passionate writer specializing in home decor, design, and styling. With years of experience in transforming spaces, she shares expert tips on creating beautiful, functional homes. From interior design trends to DIY decor ideas, Jenny’s work helps homeowners craft spaces that reflect their unique style. Whether it’s a cozy living room, a modern kitchen, or a serene bedroom, her articles offer practical advice and inspiration to elevate any home.