Three years ago, I got tired of pulling the same plastic skeleton out of a bin every October. It looked cheap. It looked tired.
So I pulled dried florals, black candles, and a glue gun onto my kitchen table instead. Two hours later, my mantel looked like something out of a design magazine, not a dollar store. That one afternoon changed how I decorate every fall.
If you want Halloween decor that actually looks good in your home, you’re in the right place.
Below are five projects built for adults. No googly eyes. No glitter glue. Just moody, elevated pieces you’ll want to keep out past October.
Materials Worth Buying for Elevated Halloween Decor
A few solid supplies make these projects look polished instead of homemade. Here are three I’d actually buy.
- NESCCI Dried Pressed Flowers Bulk Kit — A big mixed batch of real dried botanicals gives you natural texture and muted color without needing to press your own flowers.
- TooGet Natural Dried Lavender Bundles — Long dried lavender stems add height, movement, and a soft purple-grey tone that reads elegant rather than “seasonal aisle.”
- Surebonder Cordless Hot Glue Gun — A cordless option lets you glue florals and ribbon at odd angles on a wreath form without fighting a cord the whole time.
Now let’s get into the projects.
Dried Floral Halloween Wreath for a Gothic Front Door
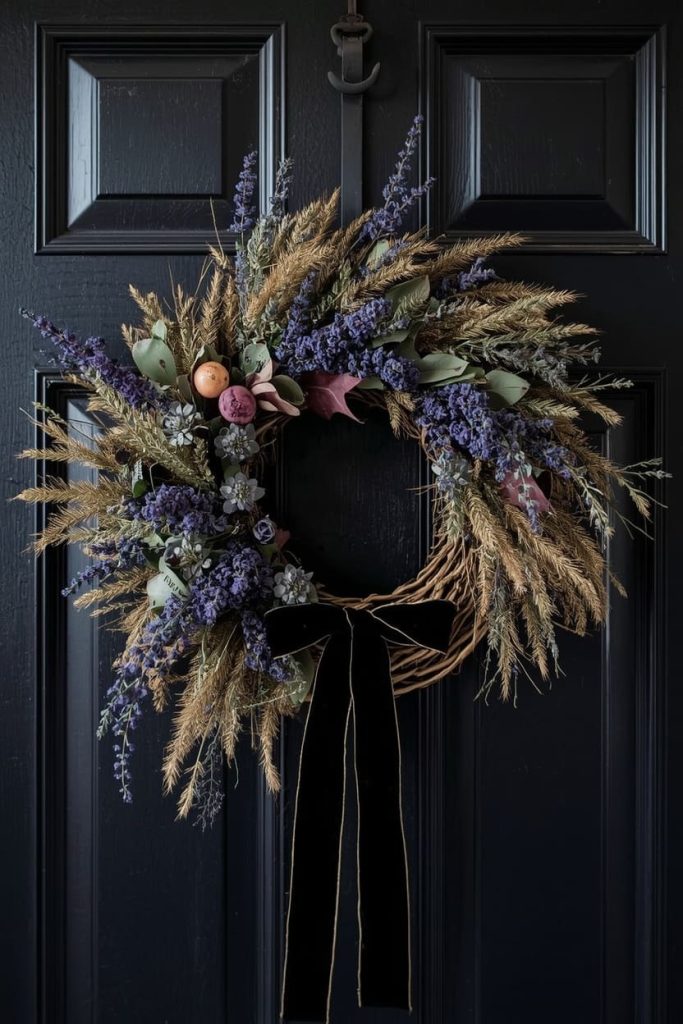
This wreath is the first thing I make every fall. It’s moody, it’s textural, and it looks nothing like the orange-and-black wreaths at big box stores.
Materials:
- 12-inch grapevine or straw wreath form
- Dried lavender bundles
- Dried pampas grass or wheat stems
- Black or burgundy velvet ribbon
- Floral wire
- Hot glue gun and glue sticks
- Wire cutters
Steps:
- Lay your wreath form flat on the table and decide which side will hang facing out.
- Cut your dried stems into 6 to 8 inch pieces using wire cutters.
- Starting at one point on the wreath, wire small bundles of 3 to 4 stems together, then attach each bundle to the form with floral wire, overlapping in one direction.
- Continue around two-thirds of the wreath, layering bundles so the previous one hides the stems of the next.
- Once you’re happy with the coverage, hot glue any loose stems that won’t stay put.
- Tie the velvet ribbon into a loose bow and wire or glue it to the top or side of the wreath, letting the tails hang down.
- Hang with a wreath hook and let it settle for a day before final touch-ups.
Tip: For a more budget-friendly version, use one type of dried grass instead of mixing three. For a more elevated look, add a few dried black roses or preserved eucalyptus in with the lavender.
Black Taper Candle Centerpiece with Wax Drip Detail
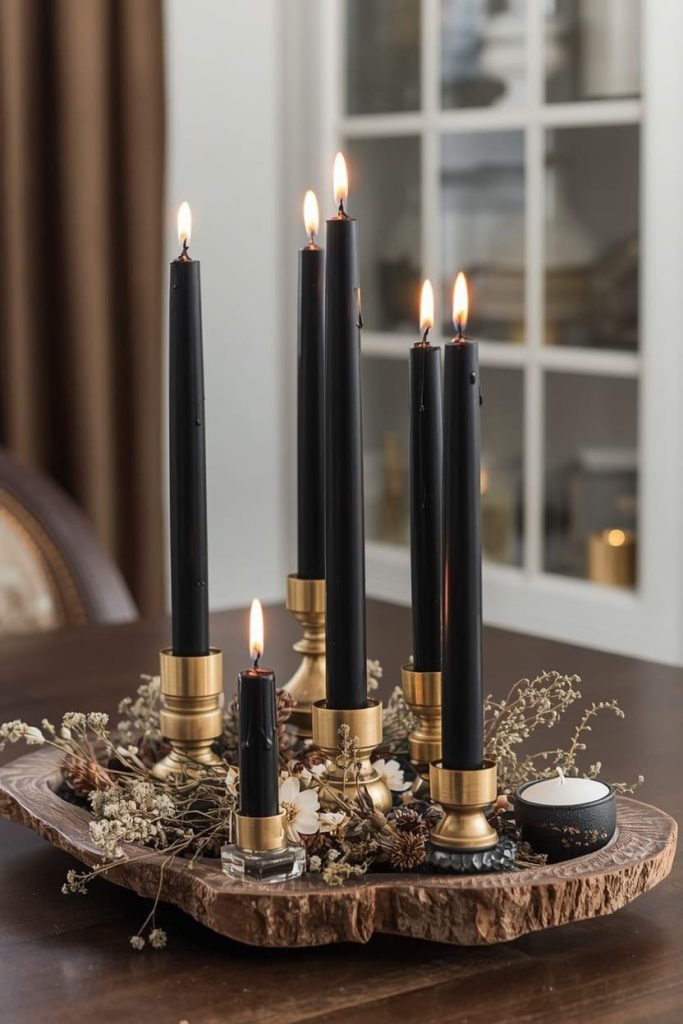
This one takes ten minutes and instantly makes your dinner table or console look intentional. It’s simple, but it reads expensive.
Materials:
- 3 to 5 black taper candles, varying heights
- Wooden or ceramic candlestick holders
- A tray or wood slab as a base
- Small dried florals or greenery for filler
- Lighter or matches
Steps:
- Arrange your candlestick holders on the tray, mixing heights so they’re not all even.
- Place one taper candle in each holder.
- Light each candle and let it burn for about 10 to 15 minutes, then blow it out. This lets the wax drip naturally down the sides.
- Relight and repeat two or three times over a few days to build up layered drips.
- Once you like the wax buildup, tuck a few sprigs of dried florals around the base of the holders to soften the look.
Tip: If you want a faster version, skip the drip-building and just buy taper candles that already have a matte, textured finish. For a more elevated centerpiece, use candlesticks in mixed metals like brass and matte black.
Dried Orange Slice and Botanical Garland
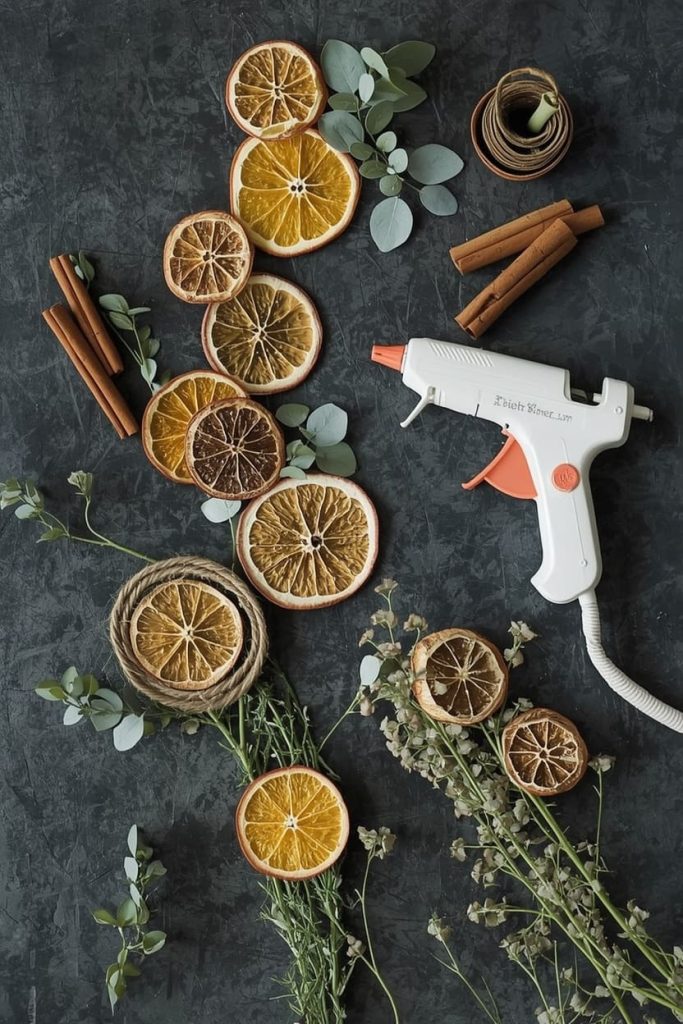
This garland brings warmth into a moody palette. It’s rustic, it smells incredible while it dries, and it works draped over a mirror, mantel, or staircase.
Materials:
- 4 to 5 oranges, thinly sliced
- Baking sheet lined with parchment paper
- Cinnamon sticks
- Dried bay leaves or eucalyptus stems
- Twine or thin jute rope
- Hot glue gun
Steps:
- Preheat your oven to 200°F. Lay orange slices flat on the parchment-lined baking sheet, patting them dry first.
- Bake for 3 to 4 hours, flipping halfway, until the slices are dry and slightly leathery, not wet in the center.
- Let the orange slices cool completely on a wire rack.
- Lay your twine out to the length you want the garland to be.
- Glue orange slices, cinnamon sticks, and small clusters of dried leaves along the twine, alternating so no two identical elements sit next to each other.
- Let the glue set for 15 minutes before hanging.
Tip: For a faster version, skip the oven-drying and buy pre-dried orange slices online. For a moodier palette, swap the orange slices for dried apple rings, which turn a deeper brown color.
Painted Black and Gold Pumpkin Display
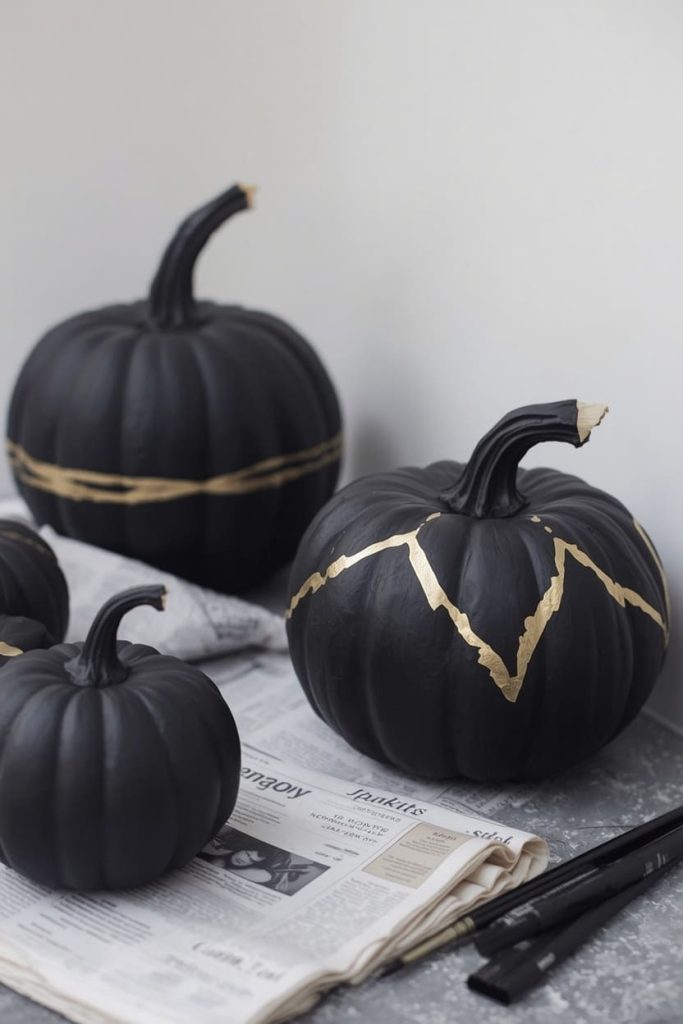
Skip carving. This project uses paint to turn plain pumpkins into a display-worthy set that fits a modern, moody home.
Materials:
- 3 to 5 real or faux pumpkins in varying sizes
- Matte black spray paint
- Gold leaf sheets or gold leafing pen
- Small paintbrush
- Painter’s tape
- Newspaper or drop cloth
Steps:
- Set up your pumpkins on a covered surface outdoors or in a well-ventilated space.
- Spray each pumpkin with one to two even coats of matte black paint, letting each coat dry for 20 minutes before adding the next.
- Once fully dry, use painter’s tape to mark a simple line or geometric shape on one or two pumpkins, like a ring around the middle or a jagged crack pattern.
- Apply gold leaf adhesive inside the taped area, wait a few minutes until tacky, then press gold leaf sheets on top. Smooth gently with your fingers or a soft brush.
- Remove the tape carefully once the gold leaf is set, and brush away any excess flakes.
- Group the pumpkins together on a console table, staircase, or porch step, mixing painted and plain pumpkins for contrast.
Tip: For a budget-friendly version, use a gold paint pen instead of gold leaf sheets. For extra texture, add a matte black stem or wrap the stem in raffia before displaying.
Vintage Apothecary Jar Display with Dried Specimens
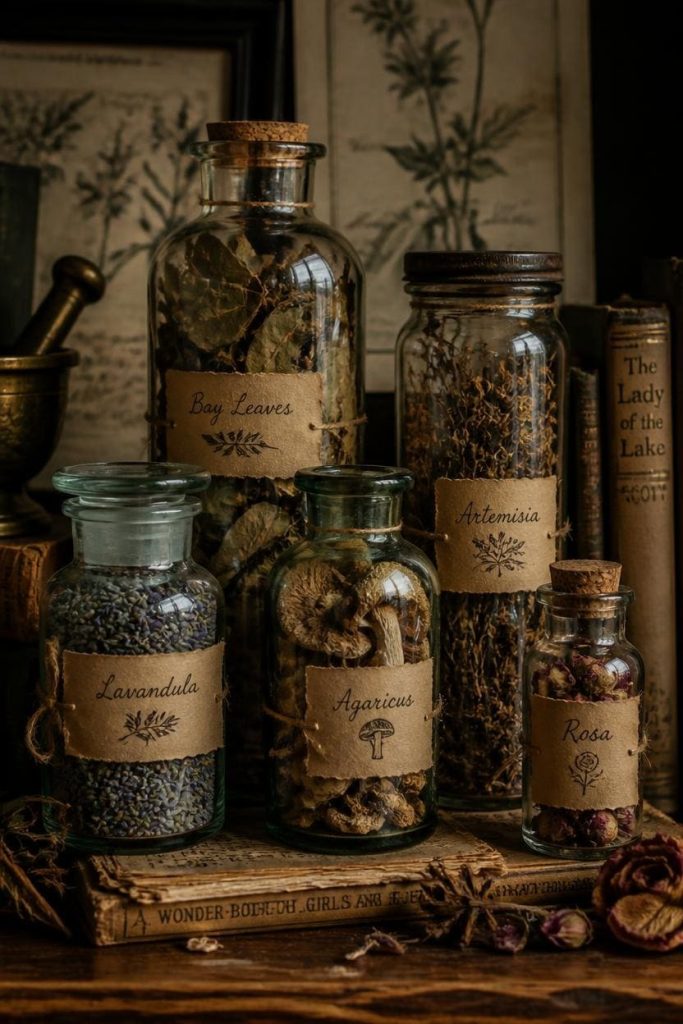
This one is less a single craft and more a styled vignette, and it’s one of my favorite ways to bring a witchy, collected-over-time feel into a room without much effort.
Materials:
- 3 to 5 glass apothecary jars or vintage bottles, various sizes
- Dried florals, pressed leaves, or dried mushrooms
- Kraft paper or old book pages
- Twine or thin ribbon
- Small handwritten or printed labels
Steps:
- Clean and dry your jars completely before filling them.
- Fill each jar with a different dried element: one with lavender, one with dried leaves, one with small dried branches or mushrooms.
- Wrap a strip of kraft paper or a torn book page around the neck of each jar and secure it with twine.
- Write a simple label on each wrap using a fine-tip pen, something like a plant name or a small illustration, to give it that collected, old-apothecary feel.
- Arrange the jars together on a shelf, bookcase, or mantel, mixing heights so it doesn’t look too matched.
Tip: For a faster version, skip the labels and just group the jars by color instead of theme. For a more elevated version, use antique or thrifted glass bottles instead of new jars from a craft store.
FAQs About Halloween Crafts for Adults
Where can I source materials that don’t look like cheap Halloween decorations? Look outside the seasonal aisle. Craft stores’ floral and home decor sections, thrift stores, and even hardware stores for raw materials like wood, twine, and wire will usually have better options than the pre-packaged Halloween displays.
How do I keep Halloween decor tasteful instead of tacky? Stick to a limited color palette, usually two or three tones like black, cream, and gold or black, burgundy, and sage. Natural materials like dried florals and wood also read more elevated than plastic or neon accents.
How long do these projects usually take? Most take between 30 minutes and 2 hours, not counting drying time for painted pumpkins or oven-dried oranges. The apothecary jars and candle centerpiece are the fastest at under 30 minutes of hands-on time.
Can I reuse this decor for next year, or does it need to be remade? Dried florals, wreaths, and painted pumpkins (if using faux pumpkins) all store well. Wrap wreaths in tissue paper and keep them in a box away from moisture, and store faux pumpkins in a bin with the other florals to protect them from crushing.
What’s a budget-friendly way to still get this look? Focus your budget on one or two statement pieces, like the wreath or the pumpkin display, and keep the rest simple. Dried florals from your own backyard or a farmer’s market are often cheaper than store-bought bundles and look just as good.
Wrapping Up
That’s five projects that’ll actually make your home look good this October, not just “decorated.” Pick the one that fits your space, grab your supplies, and give yourself an afternoon to make it. I’d love to see how yours turns out.

Jenny is a passionate writer specializing in home decor, design, and styling. With years of experience in transforming spaces, she shares expert tips on creating beautiful, functional homes. From interior design trends to DIY decor ideas, Jenny’s work helps homeowners craft spaces that reflect their unique style. Whether it’s a cozy living room, a modern kitchen, or a serene bedroom, her articles offer practical advice and inspiration to elevate any home.

