Three years ago, I planned a Halloween craft that needed glitter glue, three colors of tissue paper, and forty-five minutes.
I had twenty-two second graders and twenty-eight minutes before lunch. It was chaos. Glitter ended up in places glitter should never end up. I learned my lesson fast.
Since then, I’ve tested dozens of crafts in real classrooms with real time limits and real budgets. The five below survived that test.
They’re simple, cheap, and kids finish them without you standing over every desk. Let’s get into it.
Table of Contents
- Top 3 Amazon Picks for Classroom Halloween Crafts
- Paper Plate Spider Webs: A 10-Minute No-Mess Classroom Favorite
- Toilet Paper Roll Bats: The Cheapest Craft You'll Ever Run
- Handprint Ghost Cards: The Craft That Doubles as a Keepsake
- Paper Bag Pumpkins: A Stand-Up Craft With Zero Drying Time
- Torn Paper Owls: A Fine-Motor Craft That Doesn't Need Scissors
- FAQs
Top 3 Amazon Picks for Classroom Halloween Crafts
- ZIRSENG 24-Piece Halloween Bookmark Craft Kit — Individually packaged self-adhesive foam bookmarks in six designs, so you can hand one to each student without any prep or cutting.
- 4E’s Novelty Silly Monsters Foam Magnet Craft Kit — A complete 12-pack with foam pieces, pom poms, wiggle eyes, and magnets, ideal when you want kids building something from scratch instead of just decorating.
- Winlyn 36-Set Halloween Foam Sticker Craft Kits — Thirty-six pre-portioned kits with pumpkin, bat, and monster designs, which makes it the easiest option for a full class without any leftover supplies to divide up.
Paper Plate Spider Webs: A 10-Minute No-Mess Classroom Favorite
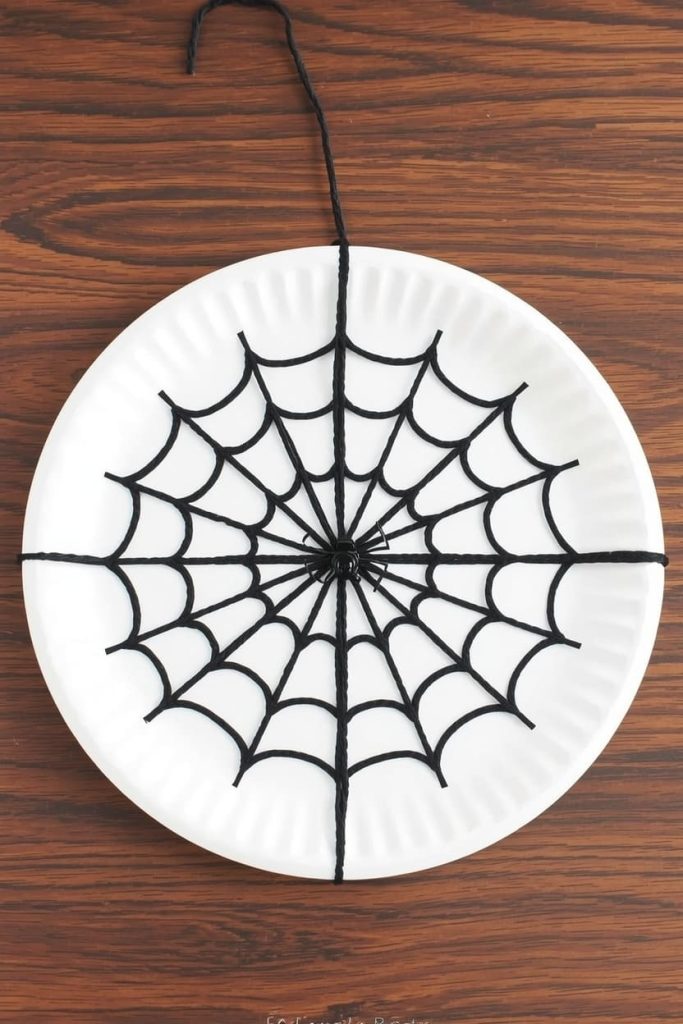
This craft turns a plain paper plate into a spider web using string and a hole punch. No glue, no paint, no drying time.
Why it works: I’ve run this with kids as young as kindergarten and as old as fourth grade. It takes about 10 minutes once supplies are handed out, there’s zero mess to clean, and it costs less than a dollar per student if you buy paper plates in bulk.
What you’ll need:
- Paper plates (one per student)
- A hole punch
- Black or white yarn or string
- Small plastic spiders (optional, from any dollar store)
- Scissors
How to make it:
- Punch 8 to 10 holes evenly around the edge of the plate.
- Punch one hole in the center of the plate.
- Tie one end of the yarn to any outer hole.
- Thread the yarn from that hole to the center hole, then back out to a different outer hole. Repeat this in-and-out pattern until the plate looks like a web.
- Tie off the yarn on the back of the plate and trim the excess.
- Glue a small plastic spider in the middle, or draw one with a marker.
Tip for scaling: For younger kids, pre-punch the holes before class so they only have to thread the string. For older kids, let them punch their own holes and add extra details like ripped-edge “torn web” effects with scissors.
Toilet Paper Roll Bats: The Cheapest Craft You’ll Ever Run
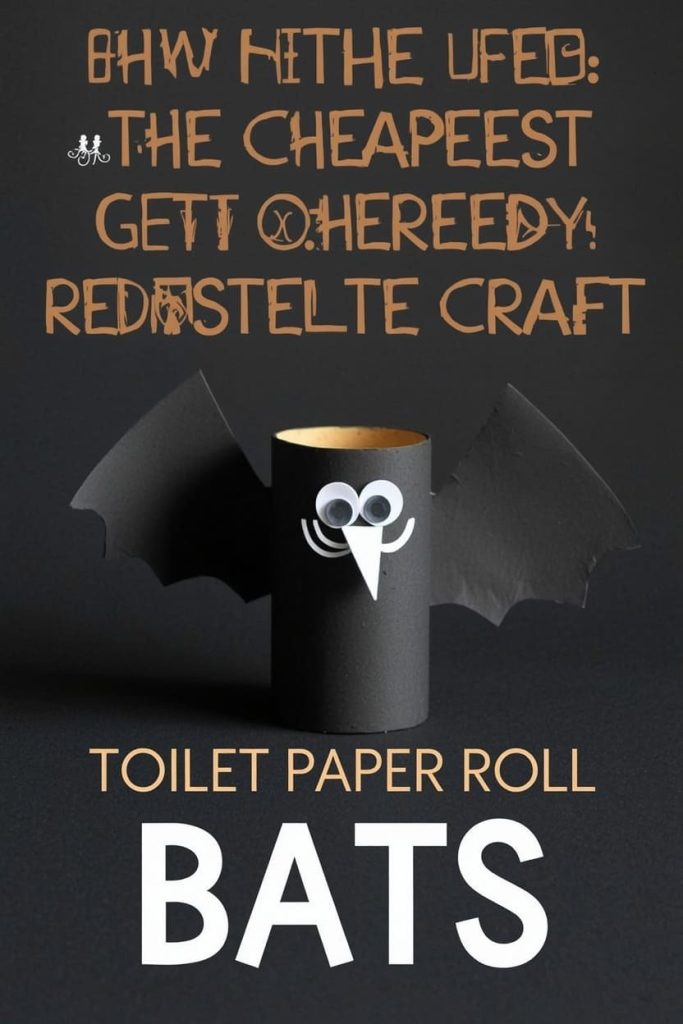
You’re just cutting and gluing black construction paper wings onto toilet paper rolls. That’s it.
Why it works: This one costs almost nothing because you’re using recycled materials most schools already have. I’ve never had a kid struggle to finish this in under 15 minutes, and the mess is limited to a few paper scraps.
What you’ll need:
- Empty toilet paper rolls (ask parents to save these for two weeks before Halloween)
- Black construction paper
- White paper for eyes
- Glue sticks
- Scissors
How to make it:
- Paint or wrap each toilet paper roll in black construction paper if it isn’t already dark.
- Cut two bat-wing shapes out of black paper.
- Glue the wings to the sides of the roll.
- Cut small white circles for eyes and glue them near the top of the roll.
- Add a marker dot for pupils, and optionally cut small triangle ears or fangs from white paper.
Tip for scaling: Give younger students pre-cut wing shapes to glue on. Older students can trace and cut their own wings, and you can challenge them to make the wings symmetrical.
Handprint Ghost Cards: The Craft That Doubles as a Keepsake
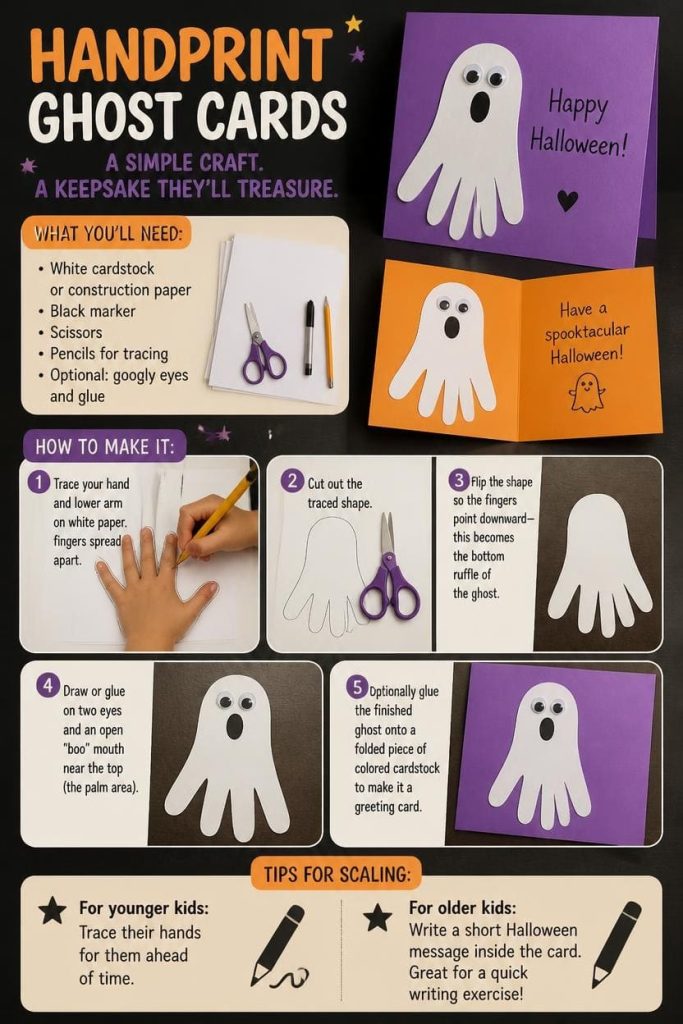
Kids trace their hand on white paper, cut it out, and turn it into a ghost card parents actually keep.
Why it works: Parents love this one because it becomes a memory piece, not just something that gets thrown away after Halloween. It works well for a 20-minute window and needs almost no supervision once kids know how to trace their own hand.
What you’ll need:
- White cardstock or construction paper
- Black marker
- Scissors
- Pencils for tracing
- Optional: googly eyes and glue
How to make it:
- Have each student trace their hand and lower arm onto white paper, fingers spread apart.
- Cut out the traced shape.
- Flip the shape so the fingers point downward — this becomes the bottom ruffle of the ghost.
- Draw or glue on two eyes and an open “boo” mouth near the top (the palm area).
- Optionally glue the finished ghost onto a folded piece of colored cardstock to make it a greeting card.
Tip for scaling: For younger kids, trace their hands for them ahead of time. Older kids can write a short Halloween message inside the card, which also works as a quick writing exercise.
Paper Bag Pumpkins: A Stand-Up Craft With Zero Drying Time
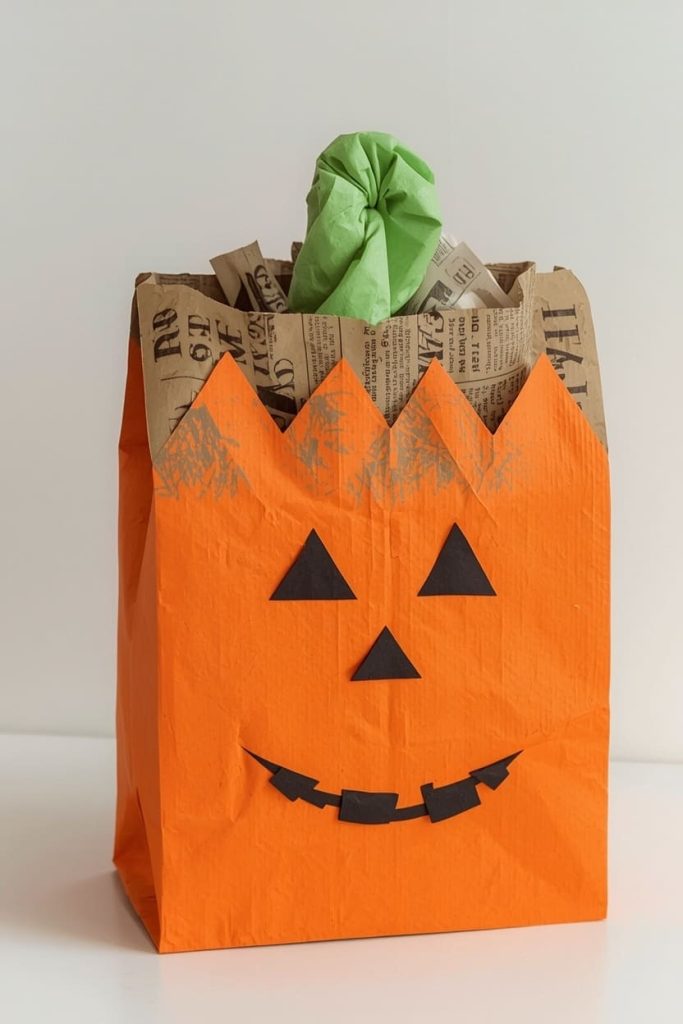
You stuff a brown paper lunch bag with crumpled newspaper, twist the top, and turn it into a 3D pumpkin that stands on a desk.
Why it works: This is the craft I reach for when I need something that looks impressive but takes almost no skill. There’s no paint, so there’s no drying time and no mess. It also gives kids something they can actually display, which they love.
What you’ll need:
- Brown paper lunch bags
- Old newspaper or scrap paper for stuffing
- Orange construction paper (if your bags aren’t already orange)
- Green construction paper for the stem
- Black construction paper for a face
- Glue sticks
How to make it:
- If using plain brown bags, have students cover them in orange construction paper first, or use pre-colored orange bags.
- Crumple newspaper into balls and stuff the bag about three-quarters full.
- Gather the open top of the bag and twist it closed, like tying off a balloon.
- Roll a strip of green paper into a tube and glue it into the twisted top as a stem.
- Cut simple triangle eyes, a nose, and a jagged mouth from black paper and glue them onto the front.
Tip for scaling: For younger students, pre-stuff the bags so they only handle the twisting and decorating. Older students can cut their own face shapes freehand instead of using templates, which adds a nice range of pumpkin personalities across the room.
Torn Paper Owls: A Fine-Motor Craft That Doesn’t Need Scissors
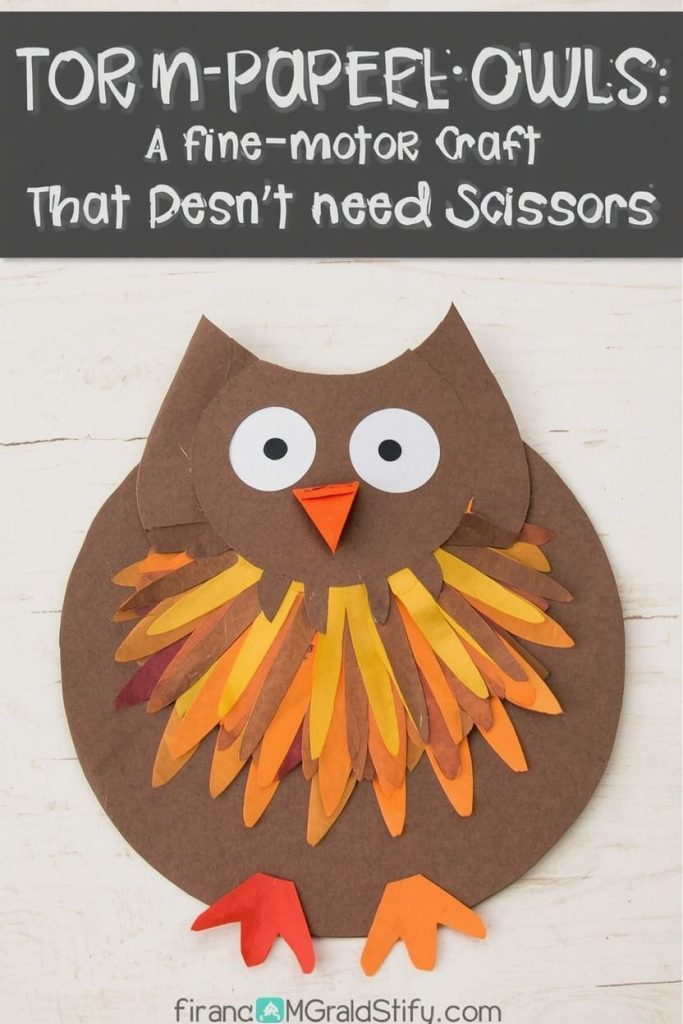
Kids tear (not cut) strips of colored paper and layer them onto a circle to build feathers. No scissors required, which makes this one of the safest options for younger grades.
Why it works: I use this one specifically for classes where scissor skills are still developing, or when I want a quieter activity. Tearing paper is naturally slower and calmer than cutting, and it builds fine motor control without anyone needing supervision with sharp tools.
What you’ll need:
- Brown, orange, and yellow construction paper
- A large brown paper circle as the owl’s body base
- Glue sticks
- White paper for eyes
- Black marker
How to make it:
- Give each student a large paper circle as the base of the owl’s body.
- Have them tear small strips of brown, orange, and yellow paper into rough feather shapes.
- Starting from the bottom of the circle, glue the torn strips in overlapping rows, working upward like shingles on a roof.
- Cut or tear two white circles for eyes and glue them near the top.
- Add a small orange triangle for a beak and a marker dot for pupils.
Tip for scaling: For younger kids, pre-cut the paper circle base so they only need to tear and layer feathers. Older kids can add torn paper wings and talons for a more detailed owl.
FAQs
What Halloween crafts work best for a 30-minute class period? Paper plate spider webs and toilet paper roll bats are your safest bets under 30 minutes. Both use materials that need no drying time, and most kids finish in 10 to 15 minutes, which leaves buffer time for cleanup or an early finisher activity.
How do I keep Halloween crafts low-mess in a classroom? Stick to glue sticks instead of liquid glue, and skip paint entirely unless you have extra time for drying and cleanup. Every craft in this article avoids liquid glue and paint for that reason.
What’s the cheapest Halloween craft for a full classroom? Toilet paper roll bats cost almost nothing if you collect empty rolls from families over a couple of weeks. Paper bag pumpkins are a close second since brown lunch bags and newspaper are already sitting in most supply closets.
Can these crafts work for mixed-age classrooms or homeschool co-ops? Yes. Every craft above includes a tip for scaling difficulty up or down, so you can hand younger kids pre-cut or pre-punched pieces while older kids do more of the cutting, tracing, and detail work themselves.
Do I need to buy a craft kit, or can I use classroom supplies? You can run all five crafts with basic classroom supplies you likely already have. A kit like the ones listed above just saves prep time, since the pieces come pre-cut and pre-portioned per student.
How far in advance should I prep these crafts? Paper plate webs and paper bags can be prepped the same morning. If you’re collecting toilet paper rolls or want pre-cut shapes for younger grades, start gathering supplies and cutting templates about two weeks out.

Jenny is a passionate writer specializing in home decor, design, and styling. With years of experience in transforming spaces, she shares expert tips on creating beautiful, functional homes. From interior design trends to DIY decor ideas, Jenny’s work helps homeowners craft spaces that reflect their unique style. Whether it’s a cozy living room, a modern kitchen, or a serene bedroom, her articles offer practical advice and inspiration to elevate any home.


