The first Hello Kitty pumpkin I made sat on my desk for weeks. It was tiny. It was pink. It had a huge satin bow glued right on top. My roommate walked in and gasped. She asked where I bought it. I told her I made it in twenty minutes.
That was the moment I got hooked on Hello Kitty pumpkin decor. If you love Hello Kitty, pastel pink, and all things soft and cute, this trend is basically made for you.
I want to be upfront about something first. This article will not use official Hello Kitty artwork. I am not licensed to reproduce it, and neither are most bloggers.
Instead, every idea here is inspired by that same Hello Kitty look using simple shapes I can legally show you. Think pink. Think bows.
Think simple dot eyes and little whiskers. It gives you that same sweet vibe without stepping on anyone’s copyright.
Top 3 Products You Will Want for These Projects
- Pink acrylic craft paint gives you full control for small details like whiskers and dots, which spray paint just cannot match on a mini pumpkin.
- Satin bow appliques in bulk save you from tying dozens of bows by hand, and they come pre-shaped and ready to glue.
- A rhinestone gem pack for crafts adds instant sparkle to any pumpkin surface and works with just a dab of craft glue.
The Giant Pink Bow Hello Kitty Pumpkin
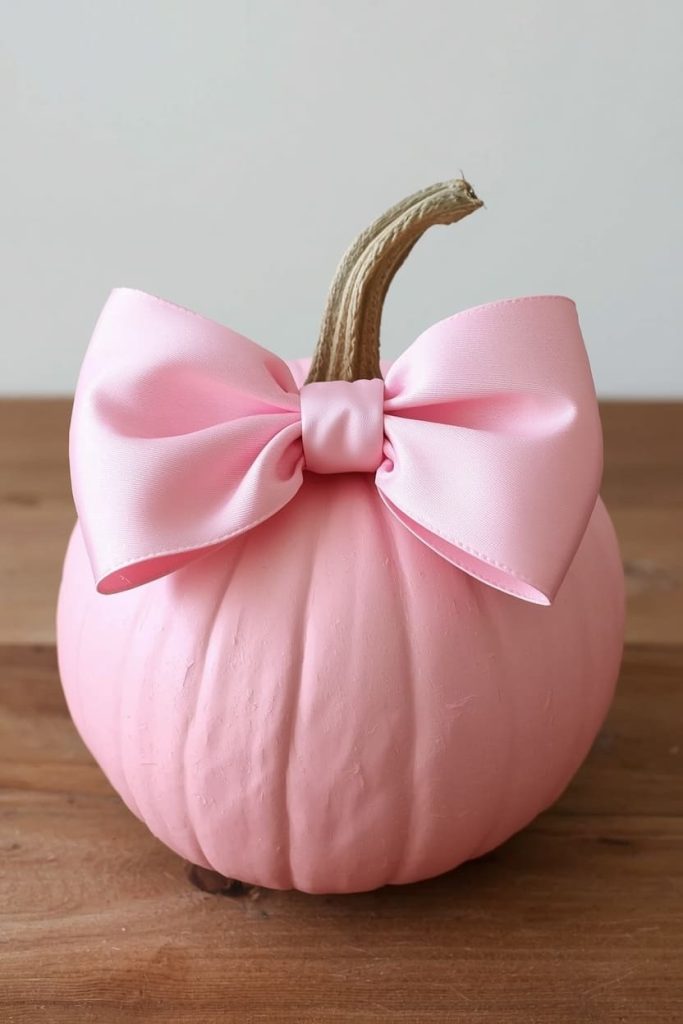
This is the easiest project on the list. It is also the one that gets the most compliments.
What you need:
- 1 medium pumpkin, real or faux
- Pink spray paint or acrylic paint
- 1 large satin bow, store bought or handmade
- Hot glue gun
Steps:
- Paint your pumpkin a soft pink. Let it dry fully.
- Apply a second coat if the color looks patchy.
- Once dry, add a small line of hot glue to the back of your bow.
- Press the bow onto the front of the stem or the top of the pumpkin.
Styling tip: Use a bow that is bigger than you think you need. Oversized bows read as cuter and more eye catching in photos.
This project also scales up easily. If you want a bigger statement piece, grab a larger pumpkin and a bigger bow to match. It still only takes about twenty minutes from start to finish, even at a larger size.
The Hello Kitty Face Mini Pumpkin Set
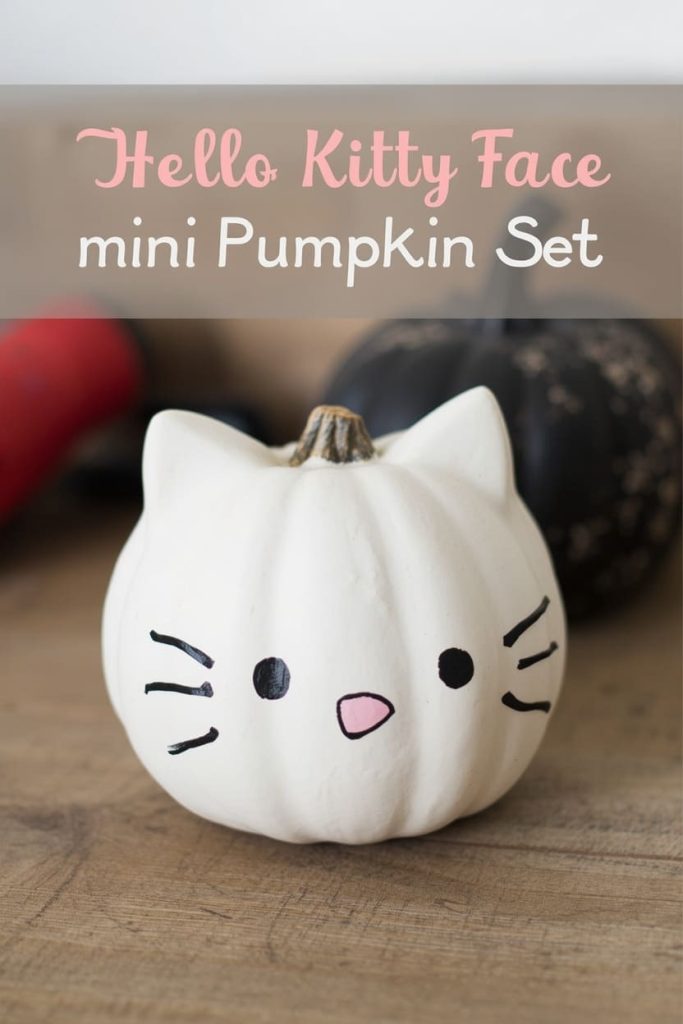
This idea uses simple shapes only. No fancy artwork needed.
What you need:
- 3 to 5 mini pumpkins, white or pale pink if possible
- Black acrylic paint
- A fine detail paintbrush
- Pink acrylic paint for a nose
Steps:
- Paint each mini pumpkin a soft white or pale pink base.
- Let the base coat dry completely.
- Add two small black dots for eyes using your fine brush.
- Add three short whisker lines on each side, plus a tiny pink triangle for a nose.
Styling tip: Keep every face simple. Two dots and a few lines is all you need. Simple is what makes this design feel cute instead of busy.
This is one of my favorite projects to do with kids. It requires no sharp tools. It also comes together fast, so little ones stay interested from start to finish without losing patience halfway through.
The Pastel Ombre Pumpkin
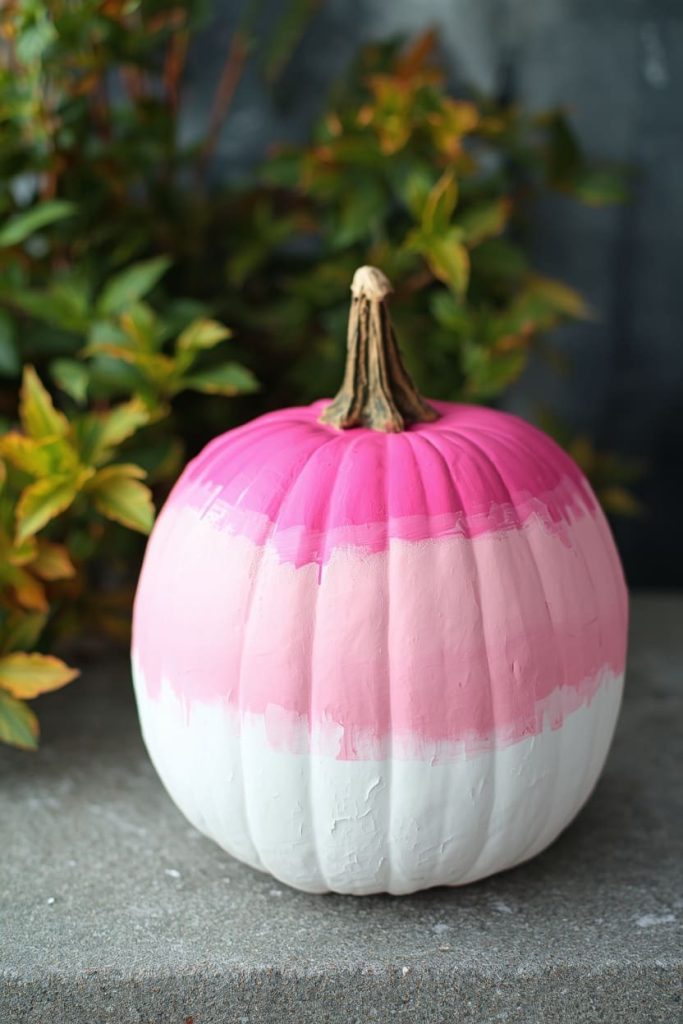
This project is a little more advanced, but it looks amazing once finished.
What you need:
- 1 medium pumpkin
- Acrylic paint in white, light pink, and hot pink
- A sponge or blending brush
- A cup of water for blending
Steps:
- Paint the bottom third of the pumpkin white.
- Blend in light pink through the middle section using your sponge.
- Add hot pink near the top, blending where the colors meet.
- Let each layer dry slightly before blending the next to avoid muddy colors.
Styling tip: Work in small sections. Ombre painting is all about patience, not speed.
Do not worry if your first attempt looks a little uneven. Ombre painting always looks better from a few feet away than it does up close. Once it is dry and sitting on display, small blending imperfections tend to disappear completely.
The Rhinestone Bedazzled Mini Pumpkin
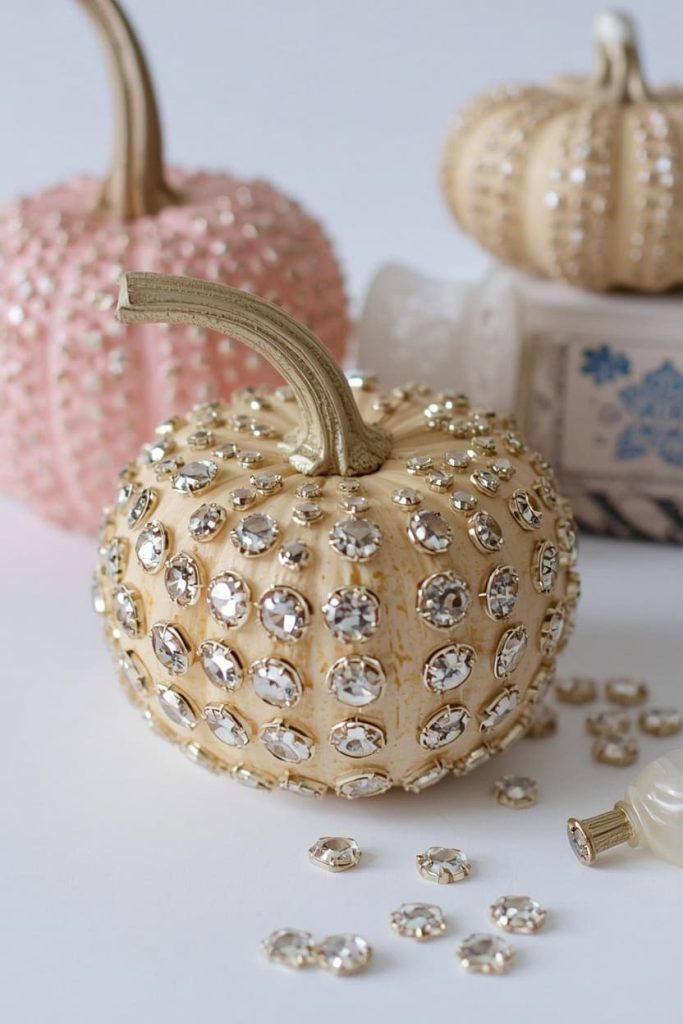
If you love sparkle, this idea is for you. It is also incredibly simple.
What you need:
- 1 to 3 mini pumpkins, painted pink or left natural
- A pack of rhinestone gems in assorted sizes
- Craft glue or a hot glue gun
- Tweezers for placement
Steps:
- Plan your gem pattern before gluing anything down.
- Add a small dot of glue to the back of each gem using your tweezers.
- Press each gem firmly onto the pumpkin surface.
- Let the glue set fully before moving or displaying your pumpkin.
Styling tip: Cluster your gems instead of spacing them evenly. Clusters catch more light and look more intentional.
You can also mix gem sizes for extra dimension. A few tiny gems scattered around one larger centerpiece gem tends to look more polished than gems that are all the same size.
The No-Carve Hello Kitty Bow Trio for Your Shelf
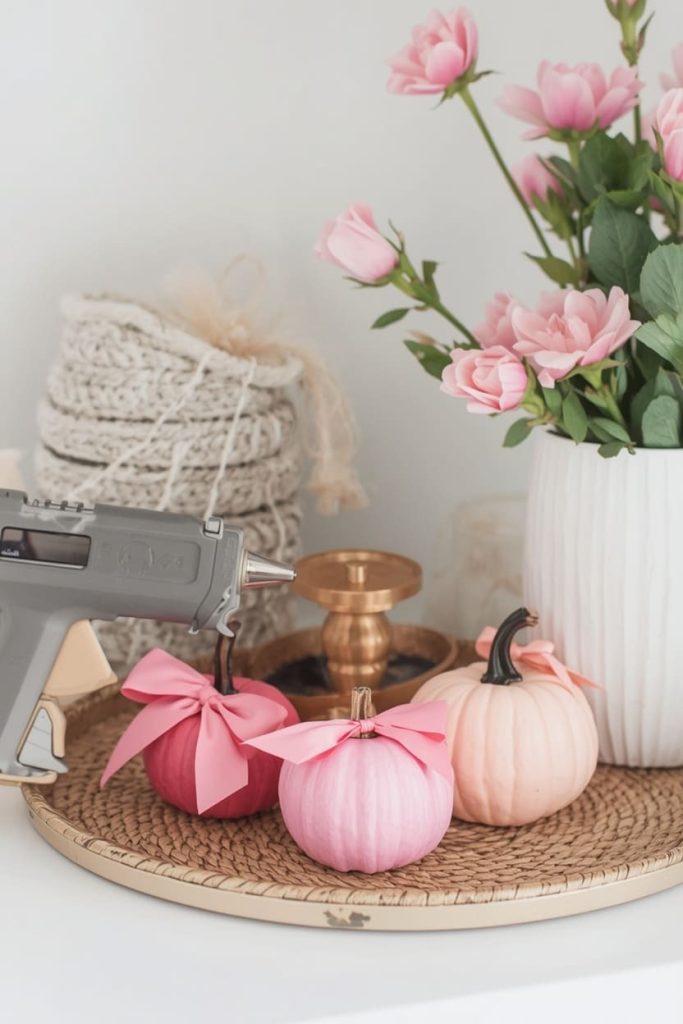
This is the perfect low effort project for a dorm room or apartment shelf.
What you need:
- 3 mini pumpkins in varying pink shades
- 3 satin bows in different sizes
- Hot glue gun
- Small decorative tray or plate
Steps:
- Arrange your three pumpkins in a small cluster on your tray.
- Glue one bow to the top of each pumpkin.
- Adjust bow placement so each one faces slightly outward.
- Set the finished trio on a shelf, nightstand, or windowsill.
Styling tip: Mix bow sizes. A small, medium, and large bow together looks more curated than three identical ones.
This trio also makes a great gift. Wrap it in cellophane with a ribbon and hand it off to a friend who loves pink just as much as you do.
Best Paint and Craft Supplies for a Kawaii Finish
Acrylic paint is your best friend for these projects. It gives you clean lines for whiskers and dots that spray paint cannot achieve. A fine detail brush is worth the small investment, since it makes tiny features so much easier to control.
For color, look for shades labeled blush, baby pink, or bubblegum pink. These tones read as soft and sweet, which is exactly the mood a Hello Kitty pumpkin should have. Bright, neon pink can work too, but it leans a little bolder and less soft.
A glossy topcoat can also make a big difference. It adds a candy coated shine that fits the kawaii look perfectly. Just make sure your base coat is fully dry before sealing, or the finish can look cloudy instead of glassy.
Where to Find Bows, Gems, and Cute Add-Ons
Craft stores and Amazon both carry bulk packs of satin bows and rhinestone gems made specifically for DIY projects. These are not official character merchandise. They are simple craft supplies that happen to fit the aesthetic perfectly.
If you want something more specific, search for fan made or independently sold kawaii craft kits instead of anything claiming official Sanrio branding. Small shops and independent sellers often make adorable pink and bow themed supplies that fit this trend beautifully.
Etsy is another great option alongside Amazon. Many small creators sell handmade bows, tiny gem sets, and pastel ribbon bundles that are perfect for this kind of project. Buying from independent sellers also supports small businesses instead of mass produced goods.
Styling a Pink and Pastel Pumpkin Display for Your Room or Shelf
Keep your color palette tight. Stick to two or three shades of pink, plus white, and your display will feel cohesive instead of scattered. Adding a few pastel accents nearby, like a small candle or a fuzzy tray, ties the whole look together.
Height matters too. Mix a tall pumpkin with a couple of shorter ones so your eye has somewhere to travel. A cute kawaii pumpkin display works best when it feels a little playful, not perfectly lined up in a row.
Lighting can elevate the whole display as well. A small strand of warm fairy lights tucked behind your pumpkins adds a soft glow without overpowering the pastel colors. Even a single flickering candle nearby can make the whole setup feel extra cozy once it gets dark.
FAQs
Can I use official Hello Kitty designs on my pumpkin? It is best to avoid using or sharing official Sanrio artwork without permission. Sticking with a general pink, bow, and whiskers look keeps things fun and safe at the same time.
What is the easiest kawaii pumpkin for beginners? The giant pink bow pumpkin is the simplest project on this list. It only requires paint and a bow, so there is very little room for mistakes.
How do I keep a mini painted pumpkin looking fresh? Keep it out of direct sunlight, since UV rays fade paint over time. A light coat of clear sealant spray can also help protect the color and finish.
Can I make this project with a real pumpkin instead of a faux one? Yes, real mini pumpkins work great for short term display. Just know they will not last as long as faux pumpkins, which you can reuse every year.
Will the paint crack if I use a real pumpkin? It can, especially as a real pumpkin naturally shrinks over time. Using a thin, even coat instead of a thick one helps the paint flex slightly as the pumpkin changes shape.
What is the best glue for attaching bows and gems? A hot glue gun works fastest for bows, since it sets almost instantly. For small rhinestones, a precision craft glue gives you more control and a cleaner finish.
Do I need special tools to paint tiny details like whiskers? No, a simple fine detail paintbrush from any craft store is enough. Steady hands and a little patience matter more than fancy tools here.

Jenny is a passionate writer specializing in home decor, design, and styling. With years of experience in transforming spaces, she shares expert tips on creating beautiful, functional homes. From interior design trends to DIY decor ideas, Jenny’s work helps homeowners craft spaces that reflect their unique style. Whether it’s a cozy living room, a modern kitchen, or a serene bedroom, her articles offer practical advice and inspiration to elevate any home.