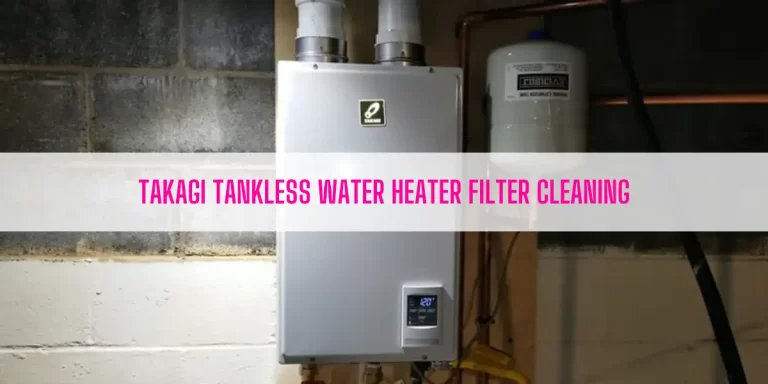
This is a complete guide on Takagi Tankless Water Heater Maintenance. From this article, what you are going to learn:
- Draining the water heater
- Cleaning the cold water inlet filter
- Cleaning the rod assembly
- How to clean combustion components like fan, burner, and heat exchanger
- How do you descale the water heater?
Indeed, you will learn what maintenance workflows you need to perform to keep the unit functional and increase its overall life expectancy.
So, let’s get started right here.
Table of Contents
Takagi Tankless Water Heater Maintenance [Maintain The Unit Like A Pro]
You must be familiar with components of the water heater before performing the maintenance workflows. You can find how each component looks and where they are located at the last few pages on the manual.
Once you learn about those components, go through every step I mentioned to maintain & clean your Takagi Water Heater.
Draining The Unit
You should drain the water heater every 5 or 6 months. It will help you remove sediment build ups from the unit. To drain the unit, go along with the following steps:
- Set the manual gas shut-off valve to the off position.
- Turn off the power and restore the power to the unit.
- After 30 seconds, turn off the unit again.
- Close the cold water inlet shut-off valve.
- Open all the hot water faucets in your house. Once residual water has stopped to flow, close the hot water faucets.
- Now, unplug the drain plugs to drain every single drop of water out of the unit. Don’t forget to place a plastic bucket to catch water from the drain plug.
Cleaning the Cold Water Inlet Filter
Cold water inlet filter requires your periodic inspection. In other words, you should inspect this filter every two or three months. If the filter gets restricted by dirt or mineral deposits, supply water won’t flow to the unit properly.
I already wrote an article on Takagi Tankless Water Heater Filter Cleaning. In that article, I showed how you can clean the filter following 9 simple steps. So, check that article.
Cleaning The Rod Assembly
From this chapter, you will learn what equipment and the procedure you need to follow to clean the rod assembly.
1. Accumulate the following pieces of equipment at your fingertips:
- Sheet of 100 Grit Sandpaper
- #2 Phillips Screwdriver
- A flashlight
2. Turn off electric power to the unit either unplugging it from the electric outlet or at the circuit breaker- it all depends on the set up you made.
3. Unscrew the two screws on the top corners of the unit that hold the front cover in place and pull out the front cover.
4. Now, it’s time to remove the rod assembly.
- Locate the three wires- black, yellow, and orange in the center of the unit.
- Unscrew the three Phillips head screws that hold the rod assembly in place.
- Pull the rod assembly out of the unit.
5. What you need to do now is- clean the sensors like the flame sensor and the air-fuel ratio rod gently. Otherwise, they will bend out. The position of these two pieces to the burner must be unchanged to let them work properly.
- Take the 100 grit sandpaper and use it to scrub the flame sensor gently. Ensure there is no carbon deposit remaining on the flame sensor.
- Similarly, clean the air-fuel ratio rod thoroughly to remove the dirt and debris by using the 100 grit sandpaper.
6. Once you clean the flame sensor and the air-fuel ratio rod, it’s time to reassemble the rod assembly. Just follow the steps in reverse to assemble the rod assembly. What you need to care about is-
- Ensure you connect all the three wires on the front of the burner.
- Check the condition of all the gaskets.
Cleaning The Combustion Components
Combustion components like fan, burner, flame sensor, and AFR require periodic and annual inspection & maintenance. If you don’t inspect and clean these components, it will affect the combustion of the unit. And this chapter will walk you through step-by-step procedures to clean those components.
1. You should gather the following pieces of equipment to clean the combustion components:
- Phillips screwdriver
- Needle-nosed pliers
- Air compressor
- Shop-vac
- Three pieces of towels
- Sandpaper
- Degreaser in a pump bottle
- Duct tape
- Flash light
2. Shut off the unit by unplugging the power cord from the electric outlet or at the circuit breaker.
3. Shut off the gas supply by turning the gas valve clockwise. The gas valve should be perpendicular to the gas line.
4. Remove the front cover from the unit by unscrewing the screws on the top two corners of the water heater.
5. It’s time to lift up the manifold & gas valve assembly:
- Locate the manifold plate screws that you can find on the edges of the stamped metal plate of the gas manifold. After that, remove those screws.
- Unscrew the brass gas valve screw.
- Untighten the wire that holds the Easy-link wires in place.
- Detach the clear plastic tube that leads into the combustion chamber.
- Remove the manifold & gas valve assembly from the gas inlet by lifting up it gently and let the assembly hang. Don’t lose the small filter screen in the bottom of the gas inlet.
6. Next, move forward to remove the burner assembly:
- Locate the five wide pan head Phillips screws that keep the burner to the combustion chamber in place. You can find three screws at the top of the burner. And the other two screws are located at the bottom of the burner to the back of the combustion chamber.
- Detach the rod assembly like the orange flame sensor, yellow AFR, and black igniter wire.
- Now, pull out the burner. In this case, use the pliers and grab between the oval air vents in the front of the burner on the far left and pull firmly. Do the same thing on the right vent.
- Check the condition of the gaskets.
7. Finally, it’s time to clean the burner:
- Keep the burner gasket from direct water pressure
- Use the degreaser in the action bottle and spray it thoroughly onto the burner. Make sure you wet the top, down through the slots, and openings in front of the burner with the cleaning solution.
- Leave the burner for five minutes to let it soak with the cleaning solution.
- Afterward, pull out the burner from the cleaning solution and set it in a sink in its normal upright position.
- Now, thoroughly wash the burner with a high flow of water.
- Use an air compressor to remove the excessive water from the burner after rinsing the burner.
8. In this step, I will show you how you can clean the fan if it gets coated with dirt.
- Cover the square port to the fan by placing a towel at the bottom of the heat exchanger.
- Use the air compressor to blow into the fan. It will rotate the fan and the debris or dirt will fly out of the fan housing into the towel.
9. Inspect the combustion chamber and blow away the dirt and debris out of the chamber.
- Check the combustion chamber with a flashlight.
- Place one towel at the bottom of the combustion chamber and the other one to cover the square opening of the combustion chamber.
- Turn on your shop-vac and vacuum out all the dirt and debris from the combustion chamber.
- Don’t forget to use the air compressor to blow away dirt & dust from the top of the heat exchanger through the vent collar.
10. Don’t hesitate to take a look at the heat exchanger. If you find a white, crusty solid buildup in the heat exchanger, call a professional to let him take care of it.
11. Clean the sensors with 100-grit sandpaper.
12. Lastly, reassemble the unit by following the steps in reverse. Just make sure:
- Every gasket is in good condition.
- Ensure the black O-ring and mesh filter is on the gas valve inlet.
- Don’t forget to reattach the clear plastic tube from the gas valve to the bottom of the combustion chamber.
- Reconnect all the components that the manifold screws secure in their places.
- Make sure you connect all the wires to the computer board and other clips.
- No screws should be left over.
Descaling The Water Heater
Hard water is dreadful for the copper in the heat exchanger. The heat exchanger won’t transfer heat if it gets clogged by mineral deposits. And the worst part is- heat exchanger damage from scale buildup is not covered by warranty.
That’s why you need to descale the water heater every year. If you live in a hard water heater, you should flush the unit every six months.
Now, the question you may ask- how do I descale my Takagi Tankless Water Heater?
Luckily, I wrote a complete guide on Takagi Tankless Water Heater Filter Cleaning. In that article, I also described how you can descale the your Takagi Water Heater. So, it will be worth checking the article.
FAQs
Yes, your tankless water heater demands or requires periodic and annual maintenance. It will help you operate the unit smoothly and prolong the life of the unit as well.
Typically, you need to perform these type of maintenance workflows on a tankless water heater:
- Draining the water heater
- Cleaning the cold water inlet filter
- Cleaning the rod assembly
- Cleaning the combustion components
- Descaling the water heater
Fortunately, I broke down all of them throughout this article.
It depends on the hard water level. Generally, you need to flush the unit once a year. However, if there is excessive mineral deposit in your supply water, you should flush the unit every six months.
The average cost to flush a tankless water heater is $150.
Yes, you can flush your tankless water heater if you know how to do it correctly.
End-Note
Like other tankless water heaters, your Takagi Tankless Unit also requires periodic and annual maintenance.
If you don’t maintain the unit according to the manual, it won’t service you for a long time. In other words, the efficiency of the water heater will keep going low.
So, bookmark this guide on Takagi Tankless Water Heater Maintenance on your browser and service the water heater when it demands.

Eric Alvarez is the head of content on LilDutchUncle.Com. He is an HVAC guy based in El Paso, Texas, United States. He obtained his Bachelor of Science degree from the University Of Texas at El Paso. Years of experience in the HVAC field have taught him many lessons, not the least of which is that the value of quality and knowledge far exceeds any promised initial savings. He has a good standing reputation for superior skills in heating, air conditioning, hot water tanks, and indoor air quality systems.