I used to think carving was the only way to make a pumpkin look impressive. Then I painted one on a whim. I used leftover craft paint and a cheap brush.
The result stopped me in my tracks. It looked intentional. Elegant, even. No seeds. No mess. No knife skills required. That one pumpkin changed how I decorate every fall now.
You don’t need to be an artist to get a polished look. You just need the right technique for the design you want.
Let’s go through five ideas that’ll make your porch look like it belongs on a mood board.
Top 3 Products to Make Pumpkin Painting Easier
- FolkArt Acrylic Paint Set – This set offers a wide range of pre-mixed fall colors, so you get consistent, opaque coverage without mixing shades yourself.
- Fine-Detail Paintbrush Set – These brushes come in multiple tip sizes, giving you the precision needed for clean lines and small details.
- Paint Pens for Pumpkins – These pens let you add crisp outlines, lettering, or fine details on top of your base coat without a shaky hand ruining the look.
Classic White Ghost Pumpkin
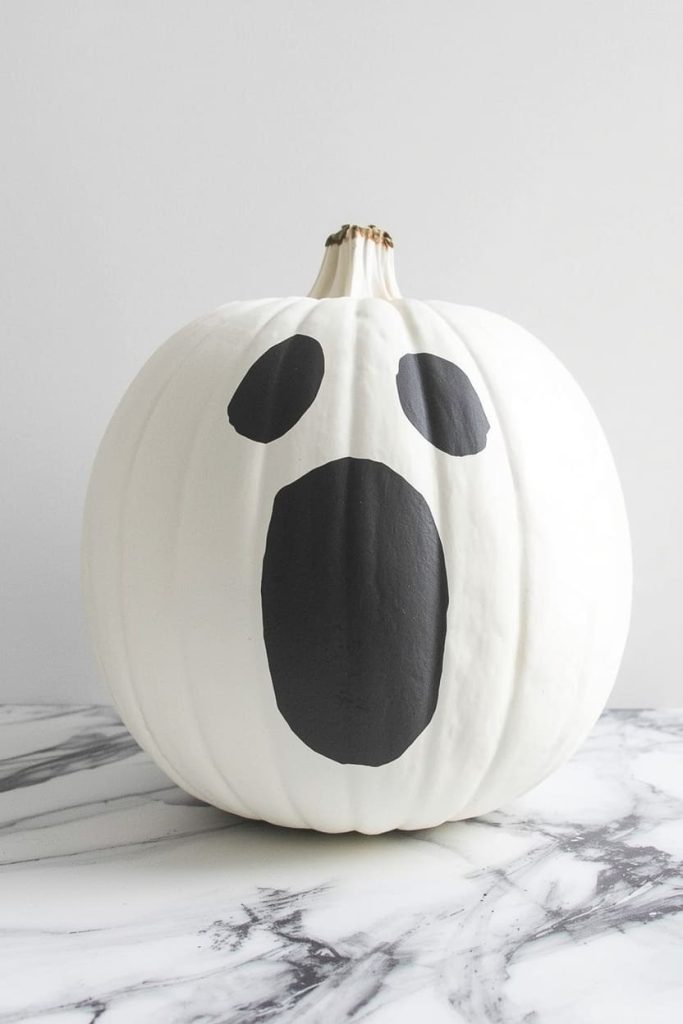
This design is timeless, and it’s the perfect starting point if you’re new to pumpkin painting.
What you’ll need:
- White acrylic paint
- A medium flat brush
- A black paint pen
- A pumpkin
Steps:
- Apply a thin, even coat of white paint using long, smooth strokes.
- Let the first coat dry fully, about 20 minutes.
- Apply a second coat to eliminate any streaks or see-through spots.
- Once completely dry, use the black paint pen to draw a simple ghost face — two dots and an oval mouth.
- Let the pen ink set for 10 minutes before moving the pumpkin.
Time: 45 minutes, including drying time.
Tip for a cleaner look: Paint in one direction only per coat. Switching directions between strokes is what causes visible brush marks.
Modern Minimalist Line Art Pumpkin
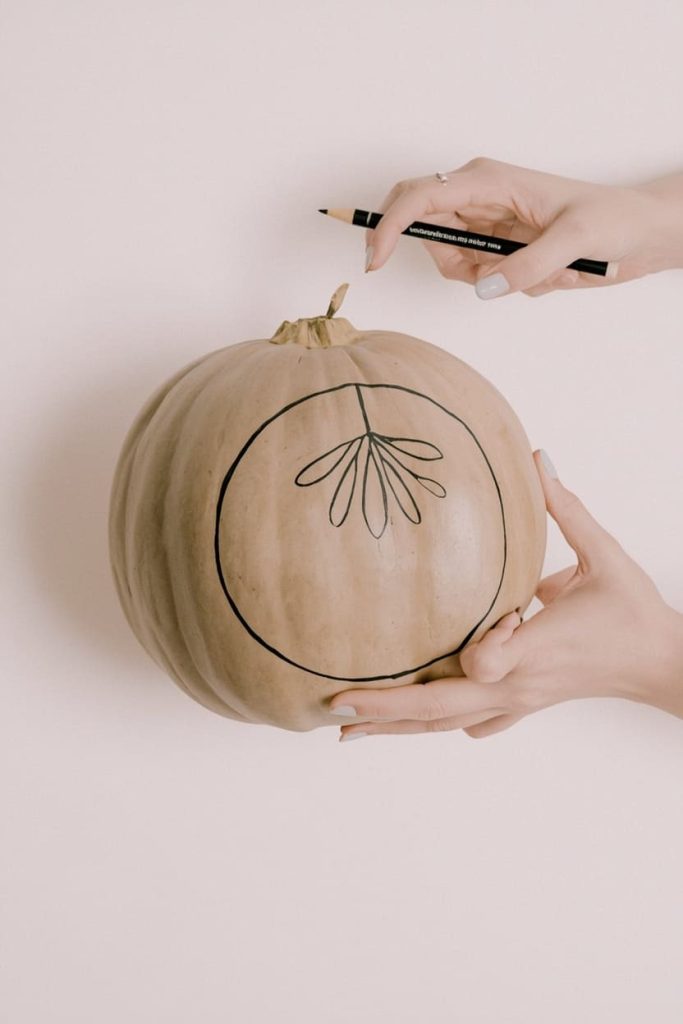
This one skips faces entirely for a clean, editorial look that fits almost any home aesthetic.
What you’ll need:
- A pumpkin in its natural color
- A black paint pen or thin brush with black acrylic paint
- A pencil (for light sketching first)
Steps:
- Lightly sketch your design onto the pumpkin with a pencil — think simple line art like a moon phase, a single flower stem, or an abstract face outline.
- Trace over your pencil lines slowly with the paint pen, using short, controlled strokes rather than one long line.
- Let each section dry before moving your hand across it, to avoid smudging.
- Erase any visible pencil marks once the paint is fully dry.
Time: 30–40 minutes.
Tip for a cleaner look: Rotate the pumpkin as you work instead of twisting your wrist. It keeps your lines steadier and more even.
Ombre Blended Pumpkin
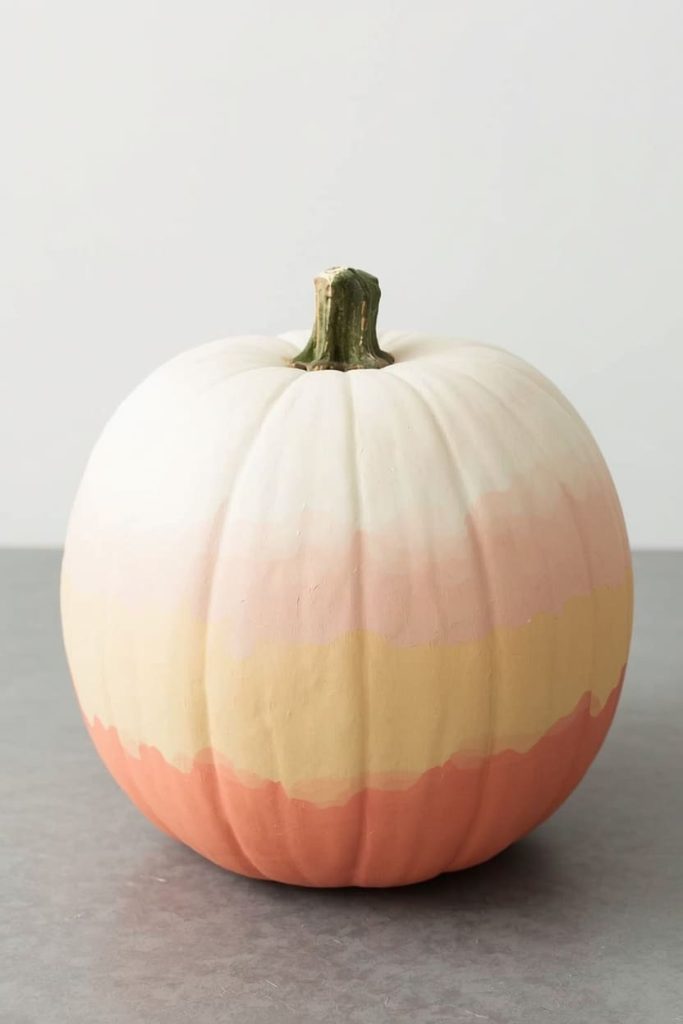
This design gives you a soft, gradient effect that looks much more advanced than it actually is.
What you’ll need:
- Two acrylic paint colors that blend well (like blush pink and cream, or orange and yellow)
- A sponge brush
- A small dish for mixing
Steps:
- Paint the bottom third of the pumpkin with your darker color.
- Paint the top third with your lighter color, leaving the middle section bare for now.
- Mix a small amount of both colors together to create a transition shade.
- Paint the middle section with this blended color while both edges are still slightly wet, blending the edges together with light sponge dabs.
- Let it dry fully, then add a second light coat if the blend needs smoothing.
Time: 45–60 minutes.
Tip for a cleaner look: Work quickly once you start blending. Acrylic paint dries fast, and blending only works well while the paint is still wet.
Black and White Neutral Pumpkin
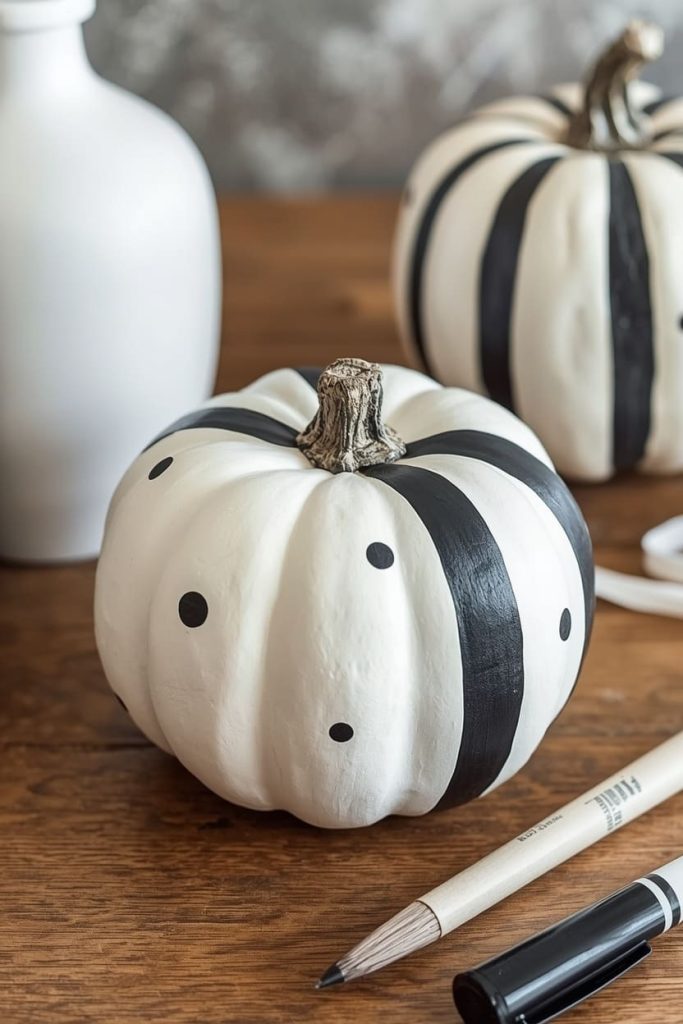
This design is elegant, versatile, and pairs beautifully with any modern fall décor.
What you’ll need:
- White acrylic paint
- Black acrylic paint or a paint pen
- A medium flat brush
- Painter’s tape (optional, for stripes)
Steps:
- Paint the entire pumpkin white and let it dry completely.
- If you’re doing stripes, apply strips of painter’s tape in your desired pattern before adding black paint.
- Paint black sections between the tape lines, or freehand simple black shapes like dots, crescents, or thin stripes.
- Peel off the tape carefully once the paint is dry to the touch, but not fully cured.
Time: 50 minutes, including drying time.
Tip for a cleaner look: Press tape edges down firmly before painting. Loose edges let paint bleed underneath and ruin your clean lines.
Nature-Inspired Botanical Pumpkin
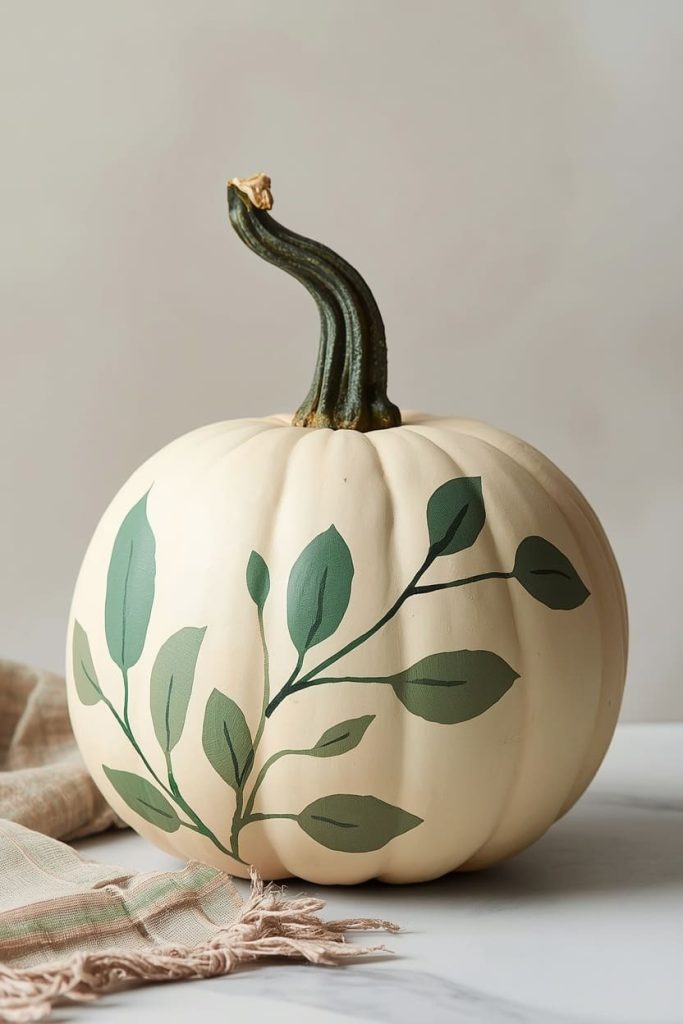
This design feels organic and elevated, perfect if you want something that looks hand-picked from a garden.
What you’ll need:
- Green, cream, and muted brown acrylic paint
- A thin detail brush
- A reference image of simple leaves or botanical shapes
Steps:
- Paint the base of the pumpkin in a soft cream or neutral tone, and let it dry.
- Using the detail brush, paint simple leaf or stem shapes scattered across the surface.
- Add small linear details inside each leaf, like veins, using a slightly darker shade of green.
- Let everything dry fully before handling.
Time: 60 minutes.
Tip for a cleaner look: Practice your leaf shapes on paper first. Botanical designs read as polished when the shapes are consistent in size.
What Kind of Paint Works Best on Pumpkins
Not all paint performs the same way on a curved, slightly porous surface.
- Acrylic craft paint is the best all-around choice. It’s affordable, dries fast, and gives strong, opaque coverage.
- Paint pens are ideal for fine details, lettering, or outlines you want to add on top of a base coat.
- Avoid watercolor paint. It doesn’t have enough pigment to show up well on pumpkin skin.
- Spray paint works for solid, all-over color, but it’s harder to control for detailed designs.
How to Prep a Pumpkin’s Surface Before Painting
A smooth start makes every design turn out better.
- Wipe the pumpkin down with a damp cloth to remove dirt, then dry it completely.
- Choose a pumpkin with a smoother surface if you’re doing detailed line work — fewer ridges means fewer awkward gaps in your design.
- Let the pumpkin sit at room temperature before painting. A cold, damp pumpkin can cause paint to bead instead of spreading smoothly.
- Do a light test swipe of paint on the bottom of the pumpkin first, just to check how it takes to the surface.
How to Get Clean Lines and Professional-Looking Details
This is what separates a “cute try” from a genuinely polished pumpkin.
- Sketch first with pencil before committing to paint, especially for anything with faces or symmetry.
- Use painter’s tape for straight lines or sharp geometric edges.
- Steady your painting hand by resting your pinky against the pumpkin as you work.
- Let each layer dry before adding the next. Painting over wet paint smears your lines and muddies your colors.
- Use a fine detail brush or paint pen for anything smaller than a quarter-sized shape.
How to Seal and Protect a Painted Pumpkin So It Lasts Longer
You spent real time on this, so protect the result.
- Use a clear acrylic sealant spray once your design is completely dry. This protects against smudging and light moisture.
- Keep painted pumpkins out of direct sun and rain. Both cause fading and peeling over time.
- Bring the pumpkin inside overnight if you can, especially in humid climates.
- Avoid touching the design for at least a few hours after painting, even if it feels dry to the touch.
FAQs
What’s the best paint for pumpkins?
Acrylic craft paint is the best choice. It’s affordable, dries quickly, and provides strong, even coverage on the pumpkin’s curved surface.
Do I need to seal a painted pumpkin?
It’s not required, but a light coat of clear acrylic sealant helps protect your design from smudging, moisture, and fading.
Can I paint a fake pumpkin the same way?
Yes. Foam and plastic pumpkins take acrylic paint just as well as real ones, and the design will last indefinitely since there’s no rotting involved.
How do I fix a painting mistake?
Let the mistake dry fully, then paint over it with your base color before redoing the detail. Acrylic paint covers well once fully dry.
How long does a painted pumpkin last?
On a real pumpkin, expect 1–2 weeks before the pumpkin itself starts to soften. On a fake pumpkin, the design can last for years.
Can I use regular craft paint, or does it need to be pumpkin-specific?
Regular acrylic craft paint works fine. There’s no need for a specialty “pumpkin paint,” as long as it’s opaque and fully dries.
How do I keep my lines from bleeding or looking uneven?
Sketch with pencil first, use painter’s tape for straight edges, and let each paint layer dry before adding the next one on top.
You don’t need carving skills or professional art training to make a pumpkin that looks like it belongs on a fall mood board. Pick a design that matches your space, take your time with each layer, and let the paint do the heavy lifting. Your porch is about to look a lot more polished this year.

Eric Alvarez is the head of content on LilDutchUncle.Com. He is an HVAC guy based in El Paso, Texas, United States. He obtained his Bachelor of Science degree from the University Of Texas at El Paso. Years of experience in the HVAC field have taught him many lessons, not the least of which is that the value of quality and knowledge far exceeds any promised initial savings. He has a good standing reputation for superior skills in heating, air conditioning, hot water tanks, and indoor air quality systems.