It was raining. It was a Tuesday. My kids were bouncing off the walls by 10am. I grabbed a stack of construction paper from the junk drawer and said, “Let’s make bats.” No plan. No Pinterest tab open. Just paper, scissors, and glue.
Twenty minutes later, we had six lopsided bats taped to the window. My daughter named hers Steve. That’s the whole story, really. Paper crafts don’t need to be perfect. They just need to happen.
If you want that same easy win, you’re in the right place. Here are 5 complete paper Halloween crafts you can make today, no special skills required.
The 3 Supplies I Always Keep Stocked
A multi-pack of construction paper in fall and Halloween colors — this covers nearly every craft below and never really runs out if you buy a big pack.
Kid-safe scissors with a rounded tip — this is the one tool that makes or breaks how independently your child can work.
A variety pack of googly eyes — cheap, reusable across projects, and somehow makes any shape instantly cuter.
Paper Plate Spiders for Toddlers and Preschoolers
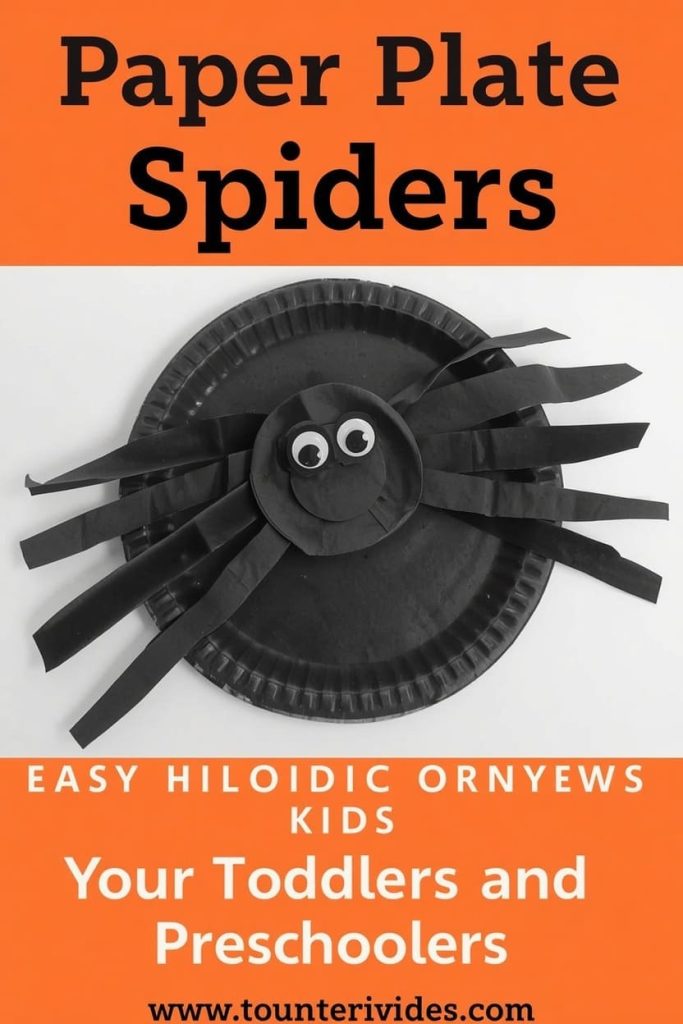
This is a black paper plate with paper leg strips glued around the edge and googly eyes on top. It’s one of the easiest crafts on this list, and it works for kids as young as 2.
Here’s why it holds up. There’s no cutting required if you pre-cut the legs. Little hands can glue and stick without much help. It also dries flat, so there’s no mess to manage while it sets.
How to Make It
You’ll need a black paper plate, black paper strips (about 1 inch wide), glue, and googly eyes. Best for ages 2 to 5. Takes about 15 minutes.
- Cut 8 strips of black paper ahead of time if your child is young.
- Have your child fold each strip like an accordion for a bendy leg look.
- Glue the legs around the back edge of the plate.
- Flip the plate over and glue on googly eyes.
- Let it dry flat for 10 minutes.
Display tip: Hang a row of these across a window with tape. They look great backlit by daylight.
Paper Chain Countdown to Halloween
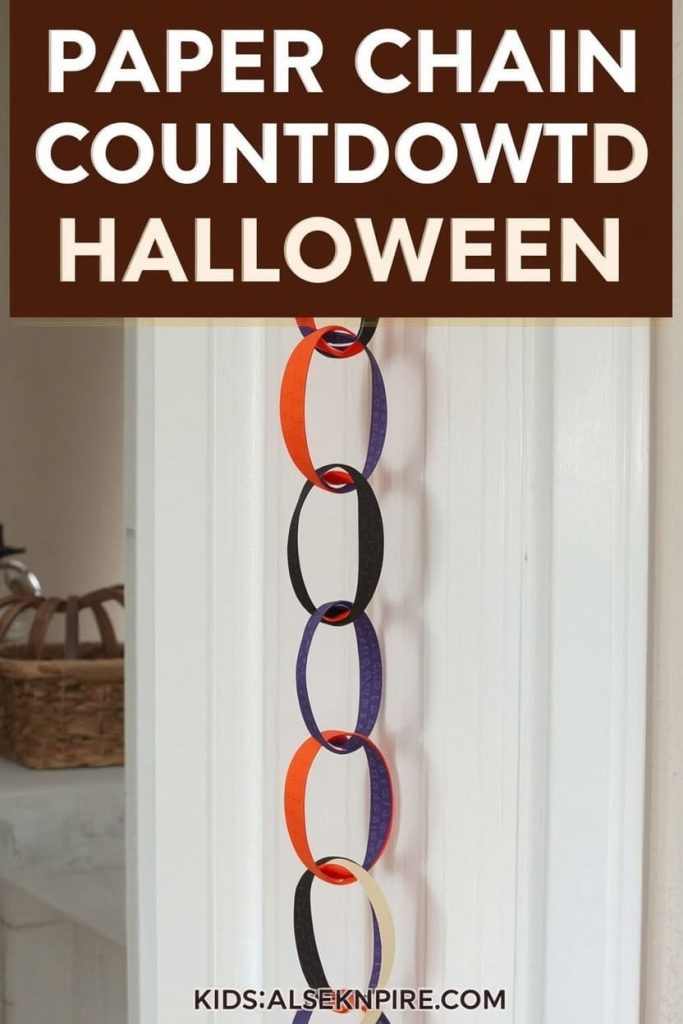
This is a classic paper chain, but themed for October, with each link representing a day until Halloween. It’s simple, it builds anticipation, and it turns into a daily activity instead of a one-time craft.
The proof is in the repeat engagement. My kids ask for “chain time” every night in October. It’s low effort per day, just one link, but it keeps them excited without needing a new project daily.
How to Make It
You’ll need orange, black, and purple paper strips, tape or a stapler, and a marker. Best for ages 4 and up. Takes 20 minutes to set up, then 1 minute a day.
- Cut strips of paper about 1 inch wide and 6 inches long. Cut enough for the number of days until Halloween.
- Loop the first strip and tape or staple it closed.
- Loop the next strip through the first before sealing it.
- Repeat until you’ve built the full chain.
- Hang it somewhere visible. Remove one link each morning or night.
Display tip: Hang it from a doorway or across a mantel where kids can reach the bottom link themselves.
Handprint Ghost Garland
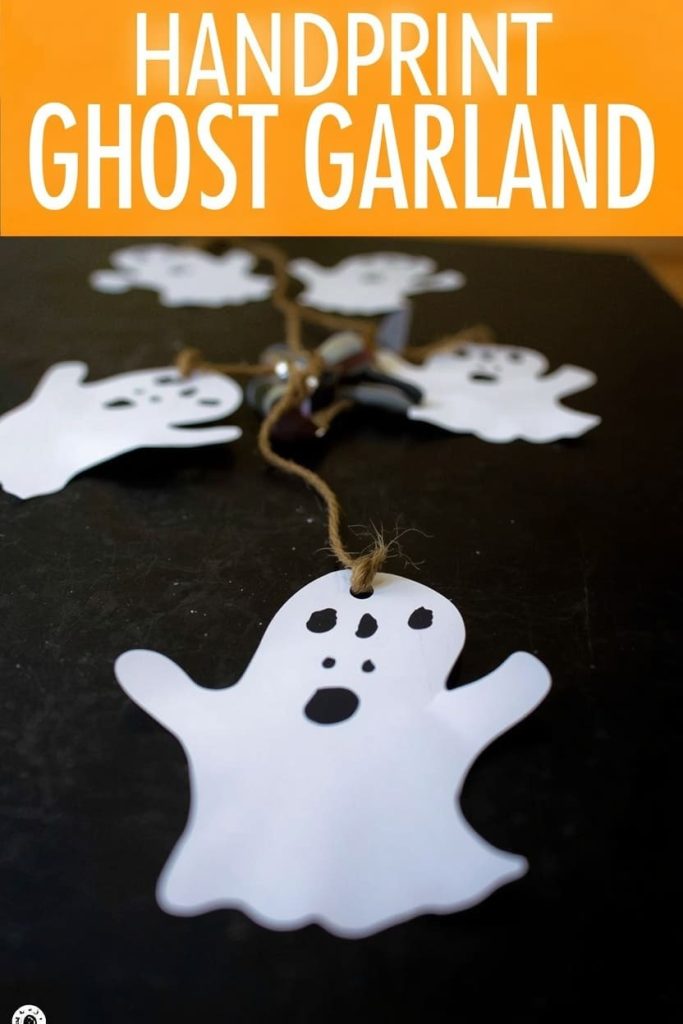
This is a string of paper ghosts traced from your child’s handprint, cut out, and strung together on twine. It’s sentimental, it’s easy, and it makes a keepsake you’ll want to reuse every year.
This one works because it’s low mess and high payoff. No paint needed. Just tracing and cutting. And because it’s shaped like their actual hand, it becomes something you’ll want to save, not toss after Halloween.
How to Make It
You’ll need white paper, a pencil, scissors, black marker, hole punch, and twine or string. Best for ages 3 and up with help holding scissors. Takes about 25 minutes for 5 ghosts.
- Trace your child’s hand with fingers together on white paper.
- Round out the bottom of the tracing so it looks like a ghost shape instead of a mitten.
- Cut out the shape.
- Add two small dot eyes with the marker.
- Punch a hole in the top of each ghost.
- String them together on twine, spacing them a few inches apart.
Display tip: Drape it across a mantel, bookshelf, or classroom bulletin board.
Paper Bag Jack-O-Lanterns
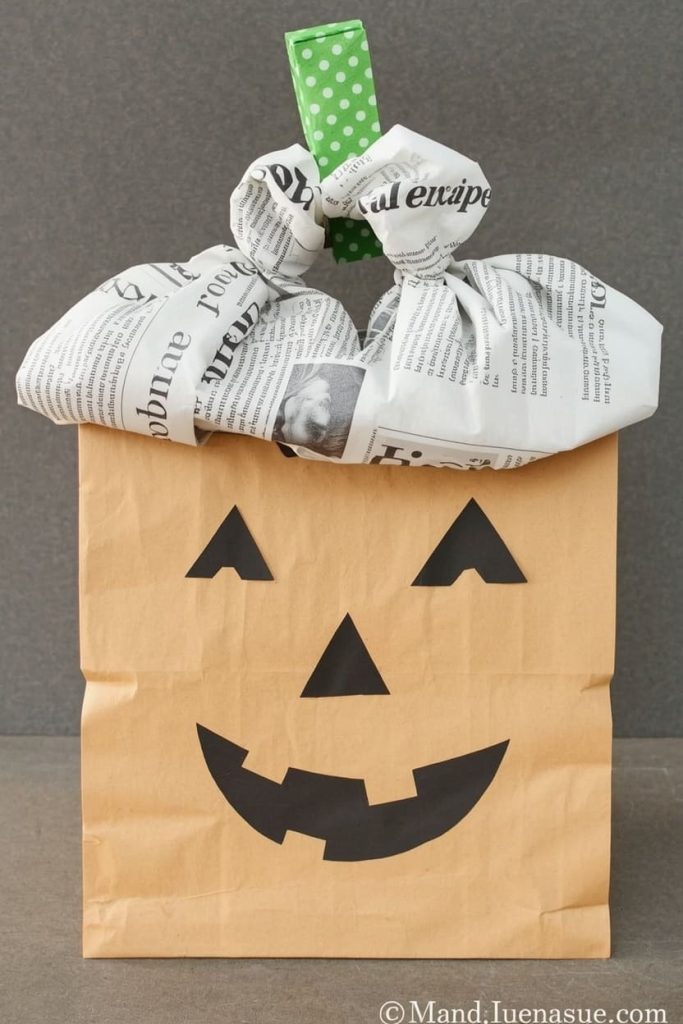
This is a brown paper lunch bag stuffed with newspaper and shaped into a pumpkin, with paper facial features glued on. It’s a great classroom craft because every kid ends up with something different, even with the same steps.
Here’s the proof it scales well. You can prep 20 bags in bulk for a classroom in under 10 minutes. Stuffing and shaping is the fun part for kids, and there’s very little cleanup since it’s just paper and newspaper.
How to Make It
You’ll need a brown paper lunch bag, newspaper or scrap paper for stuffing, orange paint or orange paper strips, black paper for the face, and a rubber band. Best for ages 4 and up, great for classrooms. Takes about 20 minutes.
- Stuff the paper bag loosely with crumpled newspaper.
- Gather the top and secure it with a rubber band to form a pumpkin shape.
- Paint the bag orange, or wrap it in orange paper strips if you want a no-dry-time option.
- Cut simple triangle eyes, a nose, and a jagged mouth from black paper.
- Glue the face on.
Display tip: Line them up on a windowsill or use them as a centerpiece row on a party table.
Accordion Paper Bats for Windows
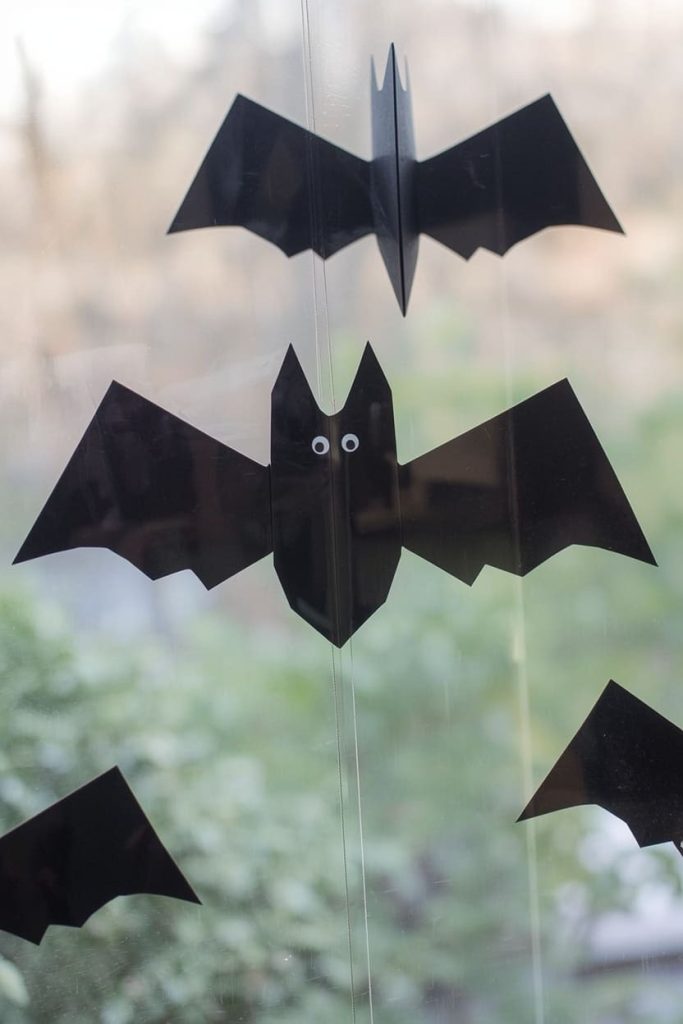
This is a black paper bat body attached to accordion-folded wings, so it has a little dimension instead of lying flat. It’s a step up from a basic cutout but still easy enough for a first-timer.
This one earns its spot because it looks more impressive than the effort it takes. The accordion fold does all the visual work. Kids feel proud of how “advanced” it looks, even though it’s really just folding and gluing.
How to Make It
You’ll need black construction paper, scissors, glue, and a printed bat body template if you want a cleaner shape. Best for ages 5 and up. Takes about 20 minutes.
- Cut out a simple bat body shape, or use a template.
- Cut two rectangles for the wings.
- Accordion-fold each wing rectangle.
- Glue the folded wings to the back of the bat body, fanning them out slightly.
- Add two small white paper eyes if you want extra detail.
Display tip: Tape a few to a window so the folds catch the light and cast little shadow lines.
FAQs About Halloween Paper Crafts
What Halloween crafts can I make with just paper?
You can make spiders, bats, ghosts, pumpkins, and garlands, all from construction paper or paper bags. I’ve made every craft on this list using paper I already had at home. You really don’t need anything fancy.
What age is best for paper crafts?
Most of these work from age 2 up, depending on how much you pre-cut. Toddlers can glue and stick. Kids 5 and up can handle scissors and folding steps on their own.
How do I make Halloween crafts mess-free for classrooms?
Stick to paper, glue sticks instead of liquid glue, and pre-cut shapes ahead of time. That’s exactly how I keep the paper bag pumpkins and paper plate spiders classroom-friendly.
What paper crafts work well for a group of kids?
The paper bag pumpkins and paper plate spiders are my go-tos for groups. Every kid can prep their own with minimal supervision, and no two turn out the same, which kids love comparing.
Can I make these crafts without a printer?
Yes. Only the accordion bat uses an optional template, and even that one works fine freehand. Every other craft here is fully printer-free.
How long do these crafts take to finish?
Most take 15 to 25 minutes, which is short enough to hold a young kid’s attention. The paper chain is the only one that’s an ongoing daily activity instead of a one-sitting project.
Give One a Try Today
You don’t need a craft room or a Pinterest-perfect setup. You need paper, scissors, and twenty minutes. Pick whichever craft matches your kid’s age and just start. The mess-free ones are the best confidence boost for a first try.

Jenny is a passionate writer specializing in home decor, design, and styling. With years of experience in transforming spaces, she shares expert tips on creating beautiful, functional homes. From interior design trends to DIY decor ideas, Jenny’s work helps homeowners craft spaces that reflect their unique style. Whether it’s a cozy living room, a modern kitchen, or a serene bedroom, her articles offer practical advice and inspiration to elevate any home.