Don’t know how to drain a Richmond Water Heater? Then, this how-to guide will walk you through a step-by-step procedure to flush both tank and tankless water heaters. So, keep reading.
Table of Contents
- How To Drain Richmond Water Heater?
- How To Flush A Richmond Tankless Water Heater?
- How Often Should You Drain A Water Heater?
How To Drain Richmond Water Heater?
Try these 5 simple steps to drain your Richmond Water Heater:
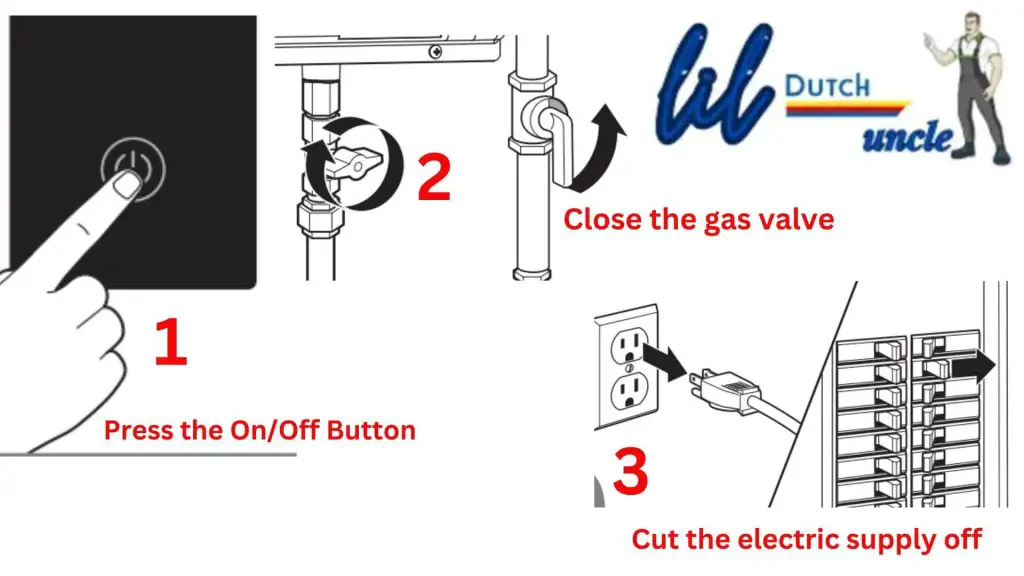
1. Turn Off the Water Heater
Before performing any maintenance workflow or draining the tank:
- Turn off the water heater first.
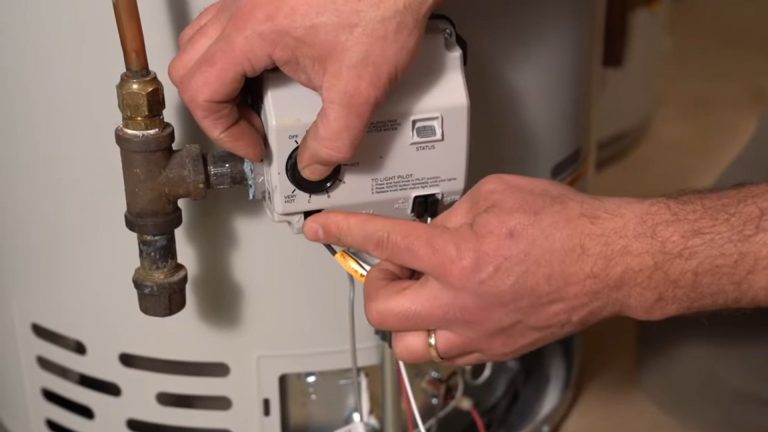
- If you have an electric water heater, flip down the circuit breaker for the water heater to cut off the electric supply.
- On the other hand, turn off the gas supply by turning the gas valve clockwise if you have a gas water heater.
2. Close The Cold Water Supply Valve
Once you turn off the unit, it’s time to shut off the water supply to the water heater. Regarding this, locate the cold water supply valve on the inlet line. Then, turn the valve clockwise to turn off the water supply to your water heater. Leave the unit for a few minutes to let the unit cool off.
3. Attach A Garden Hose, Open The Drain Valve, & Drain The Tank
Locate the drain valve at the bottom of the water heater tank. Some models of the Richmond Water Heater may have a cover over the opening.
After locating the drain valve, attach a garden hose to the drain valve and place the other end to the nearest floor drain or outside.
Next, open the drain valve. If the valve is screw-type, use an adjustable wrench to open the drain valve. Regarding this, grip the end of the drain valve and turn it left. However, some drain valves have a lever on them. Just use a screwdriver to open this type of valve.
Once you open the drain valve, water drains through the hose. Now, the question is- how long does it take to drain a water heater?
It depends on the size of the tank. Draining a typical 40- to 60-gallon tank will take 15 to 30 minutes. Conversely, a larger tank, like 80 gallons or more, will take around 60 minutes or more.
After draining the tank completely, detach the garden hose from the drain valve. Now, close the drain valve.
4. Refill the Tank
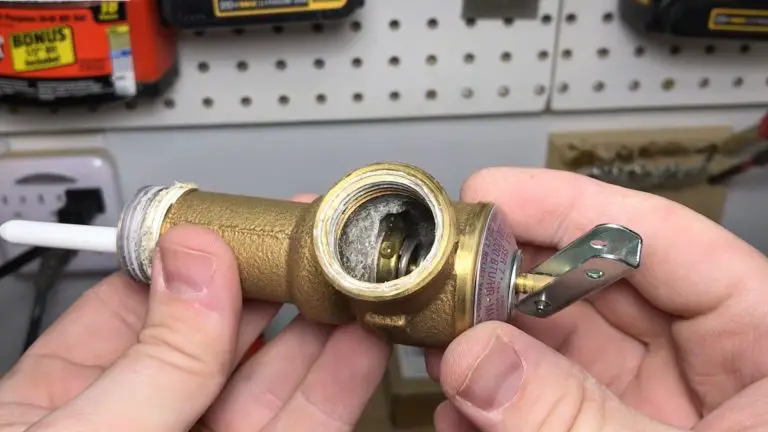
Ensure that the drain valve is closed. Open the pressure relief valve to release pressure from the tank. You can also turn on the hot water faucet to remove air from the tank. Then, close the T&P valve and shut off the hot water faucets.
Turn the cold water supply valve on to fill the tank with water. It will take 30 to 40 minutes to fill a 40-gallon tank. The household water pressure also impacts the time it will take to refill the tank.
5. Turn On The Water Heater & Check For Leaks
Turn on the power to the water heater after refilling the tank. If you have a Richmond Electric Water Heater, flip the circuit breaker to the On position to restore power. On the other hand, turn on the gas supply if you have a gas-powered water heater.
Check every fitting and connection for leaks. The water heater will take up to four hours to reheat the water.
Read Further:
Richmond Water Heater Troubleshooting
Richmond Electric Water Heater Troubleshooting
How To Flush A Richmond Tankless Water Heater?
Follow the below step-by-step procedure to flush the tankless water heater like a pro:
1. Turn off the Unit
- Press the On/Off button on the LCD to turn off your water heater.
- Close the shut-off valves.
- After 10 seconds, unplug the water heater or turn off the electric supply to the unit at the circuit breaker.
2. Close The Cold Water Supply Valve
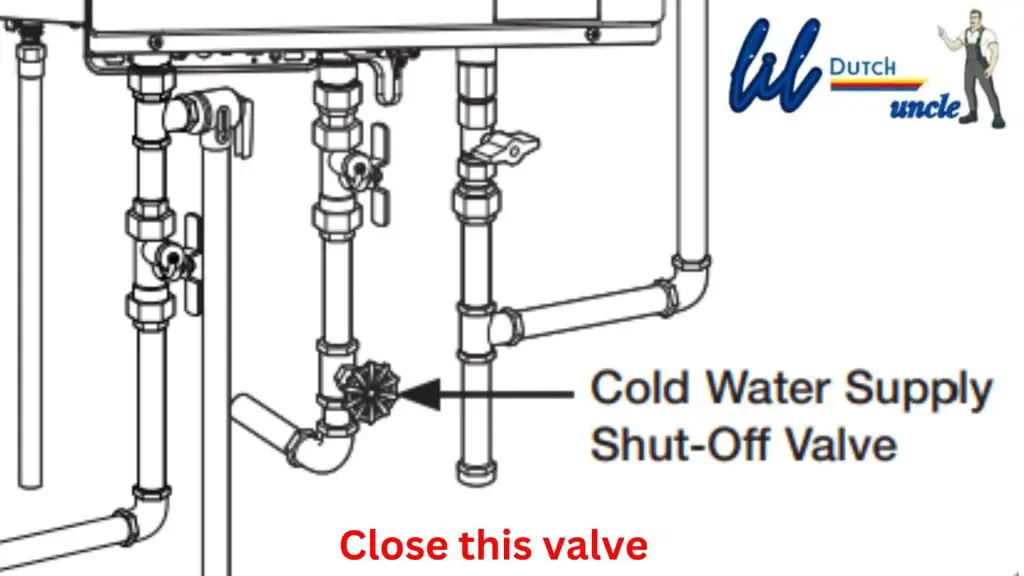
Turn on all the hot water faucets. Run water until it’s cold. Then, turn off those hot water faucets. Next, locate the cold water supply shut-off valve and turn it off.
3. Open The Drain Valve & Drain The Water
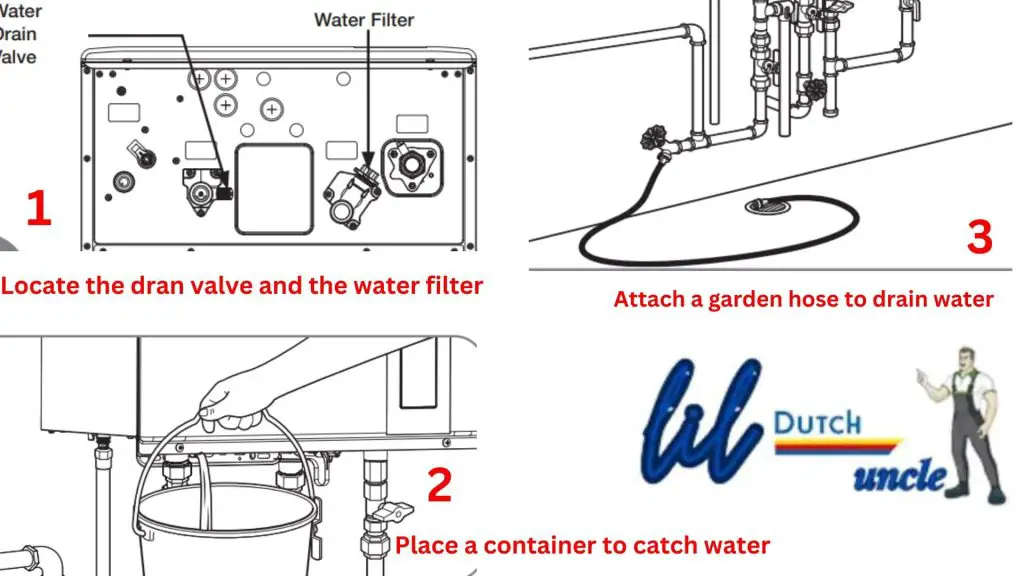
Locate the drain valve and the water filter at the bottom of the water heater.
Using a plastic bucket to catch water, remove the drain valve from the base of the hot water outlet line. Then, pull out the water filter from the base of the cold water inlet line.
Attach a garden hose to the drain valve and place the other end to the nearest floor drain. Open the drain valve until all the water has drained from the unit.
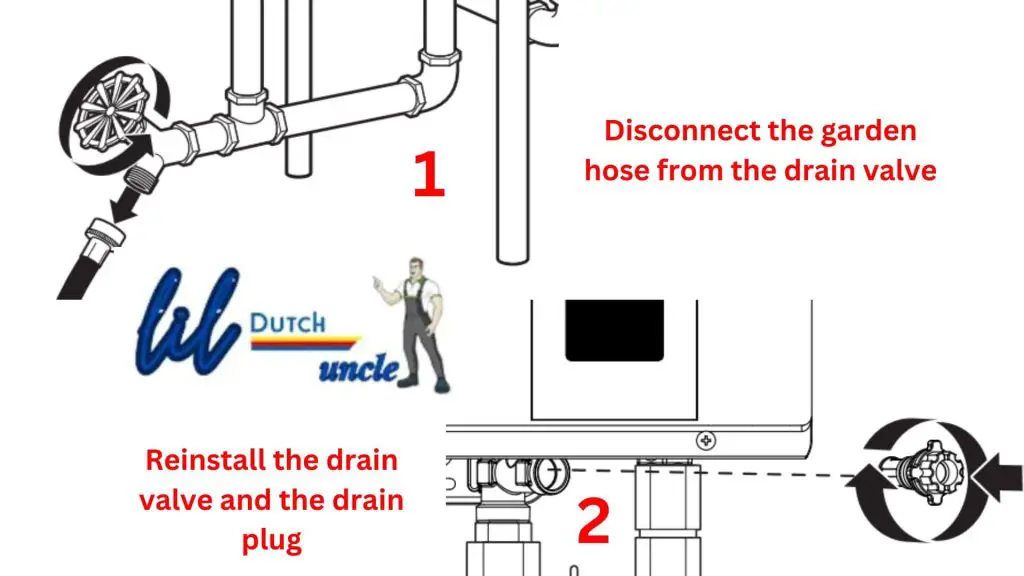
4. Close the Drain Valve & Reinstall Everything
Disconnect the garden hose from the drain valve. Then, close the drain valve. Put the water filter back into the base of the cold water inlet line and the drain valve, and reinstall the drain plug.
5. Purge The Air
Open the water shut-off valve. Then, purge the air from the lines by turning on all the hot water faucets. Next, close all the hot water faucets.
6. Restore Power & Turn On The Water Heater
Plug the power cord into the outlet or restore the electric supply at the circuit breaker. Then, turn on the gas shut-off valve. Finally, turn on the water heater by pressing the On/Off button on the remote control.
How Often Should You Drain A Water Heater?
It’s recommended to flush or drain a water heater once a year. However, if you live in a hard water area, drain the unit every six months. In short, the frequency of draining the water heater will depend on the water quality. Draining the water heater will prolong the life of it and increase the efficiency.

Sohel Rana is an expert writer (Of course, the owner and founder of this blog) on plumbing, HVAC, and appliance repair & troubleshooting. Since 2020, he has written on these specific topics, though his writing journey began in 2018.