This guide on Noritz Tankless Water Maintenance will break down:
- The schedule of water heater maintenance or when you need to service the unit
- A step-by-step procedure to clean different components of the unit like the outside surface, air screen filter, flame sensing rod, and the fan.
- How to descale a Noritz Tankless Water heater
In short, it is a complete guide for you that will help in servicing the water like a qualified technician. As a result, you can keep the water heater functional for years to come and get the best performance out of it.
Needless to say, it will also save you money as you don’t need to hire a plumber to service the unit for you.
Without further ado, let’s dive in.
Table of Contents
- Noritz Tankless Water Heater Maintenance Schedule
- Noritz Tankless Water Heater Maintenance [A Step-By-Step Procedure]
- How To Descale A Noritz Tankless Water Heater?
- FAQs
- End-Note
Noritz Tankless Water Heater Maintenance Schedule
We can categorize the maintenance schedule of Noritz in two broader senses- periodic and annual.
Most components of your tankless water heater fall under the periodic maintenance category. For example, air intake, exhaust vent terminal, and water drain valve filter require periodic inspection and service.
On the other hand, you should inspect and flush the heat exchanger annually. However, if you live in a hard water area, you should descale the unit every six months. In addition, you should operate the pressure relief valve manually once a year.
The next chapter will walk you through every step-by-step procedure to maintain and service your Noritz Tankless Water Heater.
Noritz Tankless Water Heater Maintenance [A Step-By-Step Procedure]
Periodic and annual maintenance should be performed once a year. It will let you know whether the water heater is functioning properly or not. If not, it will guide you what to do next to make the unit functional.
And this chapter comes into play when it comes to maintaining your Noritz Tankless Water Heater. It will highlight every maintenance workflow so that you can inspect and service the unit like a pro.
Here we go.
Safety Tips: Before beginning, don’t forget to take cautions. Disconnect electrical power from the unit and wait until the unit cools before performing maintenance. Be sure that you remove all the combustible materials like cloth or paints from the surrounding of the unit.
Cleaning The Outside Surface Of The Unit
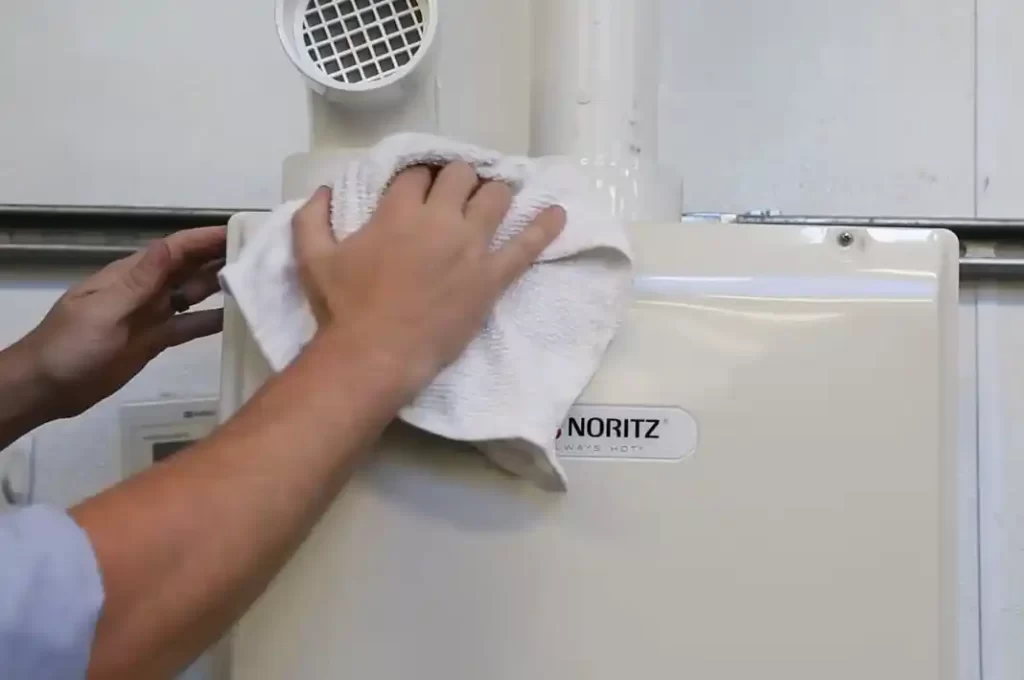
To begin with, I recommend you take a look at the outer surface of your Noritz Tankless Water Heater for stain or discoloration. Use a wet cloth and gently wipe away the outside surface of the water heater. To remove stains, you should try neutral detergent.
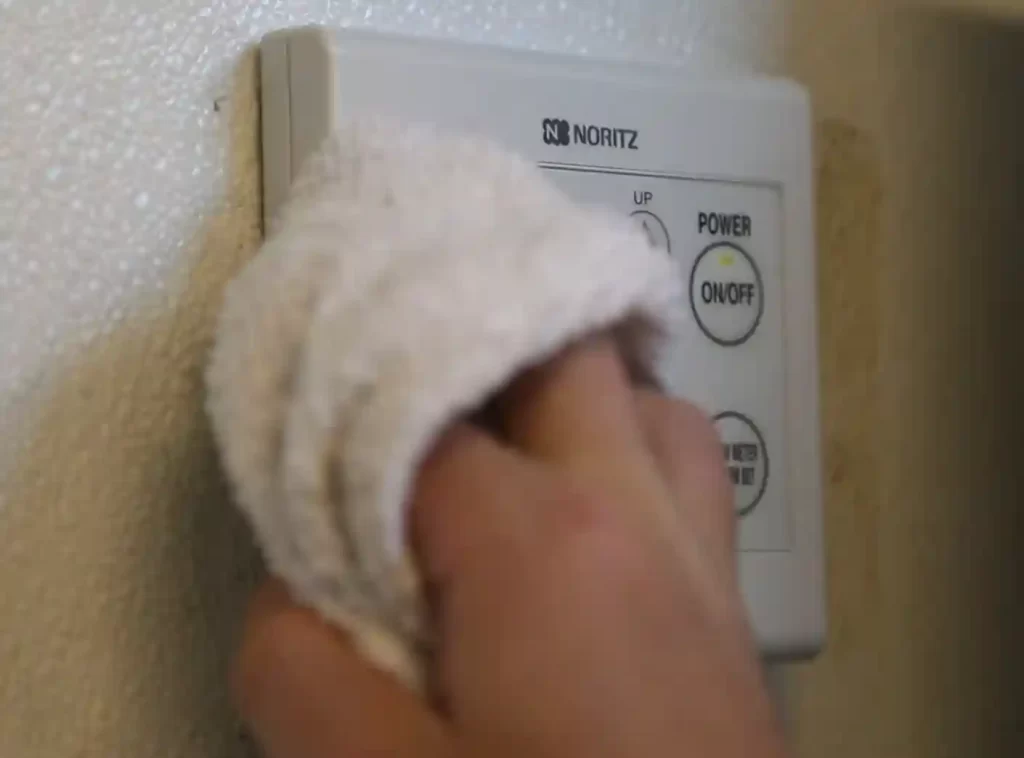
Similarly, wipe the surface of the remote controller with a wet cloth, ensuring all the connections are secure. Keep in mind; you should avoid fatty detergents by all means to clean the remote controller. It’s because the remote is water-resistant, not waterproof.
Clean The Air Screen Filter
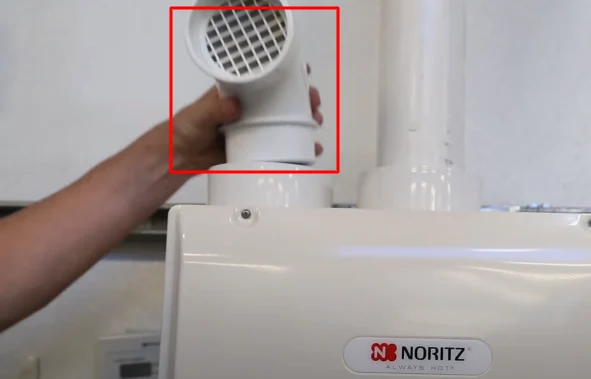
If you own the DB condensing model of Noritz, remove the SV conversion kit from the intake and check for dirt and dust in the exhaust.
Use the end of the screwdriver to pop out and remove the screen. Inspect the screen for dirt and soot. It is always best to clean the air screen with a toothbrush under running water.
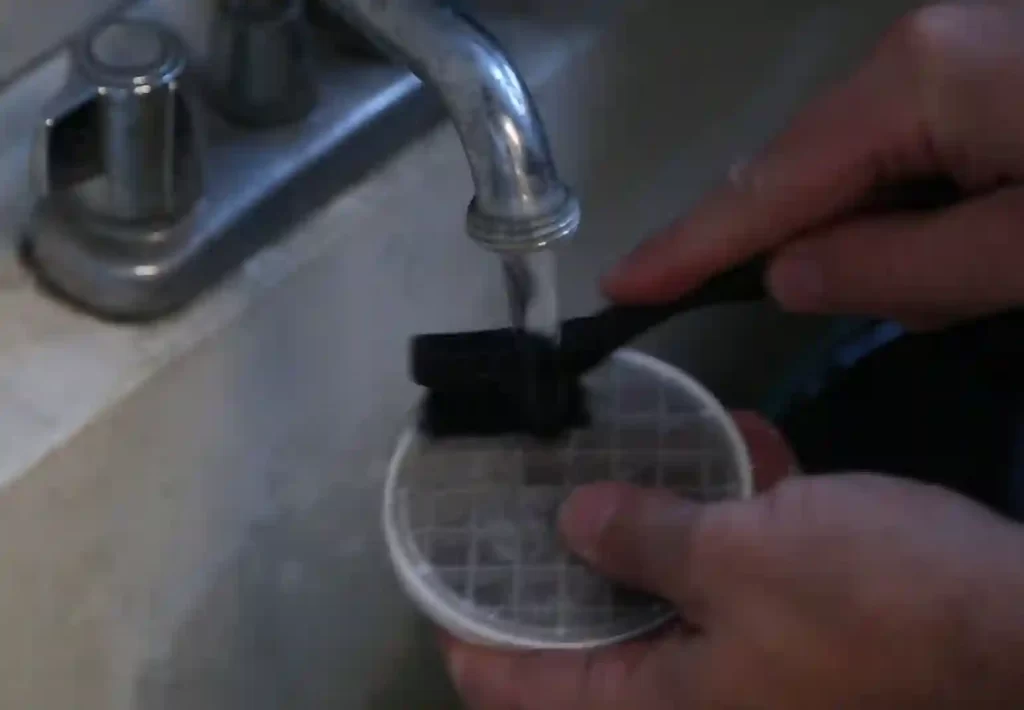
Ensure you thoroughly clean the screen so that a single speck of dirt will not remain there.
Once you clean the screen, let it dry. After that, reinsert the air screen into the conversion kit and replace the kit into its place.
Inspect The Pressure Relief Valve
Next, I recommend you inspect the pressure relief valve and ensure it doesn’t have any leaks. Continue to check all other connections for any possible leaks and verify everything is connected properly.
Open the pressure relief valve by lifting its lever and make sure everything is working in order. If the pressure relief valve is leaking or dripping, replacing it is a must. In this case, you should call a qualified plumber to do this task.
Inspect & Clean the Water Drain Valve Filter
A dirt-free water drain valve filter is indispensable for proper water heater operation. If the water drain valve (with filter) gets clogged by dirt, the hot water won’t run smoothly. To avoid such inconvenience, follow the steps I described below to clean the water drain valve filter.
Begin with closing the inlet water supply valve by turning the valve right. The valve should be in the horizontal position.
In addition, open a few hot water fixtures like the kitchen and bathroom sinks.
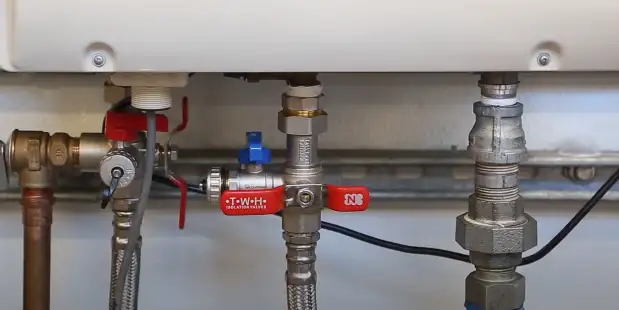
With the bucket ready, remove the inlet and outlet water caps on the isolator kits. Then, open up both drain valves.
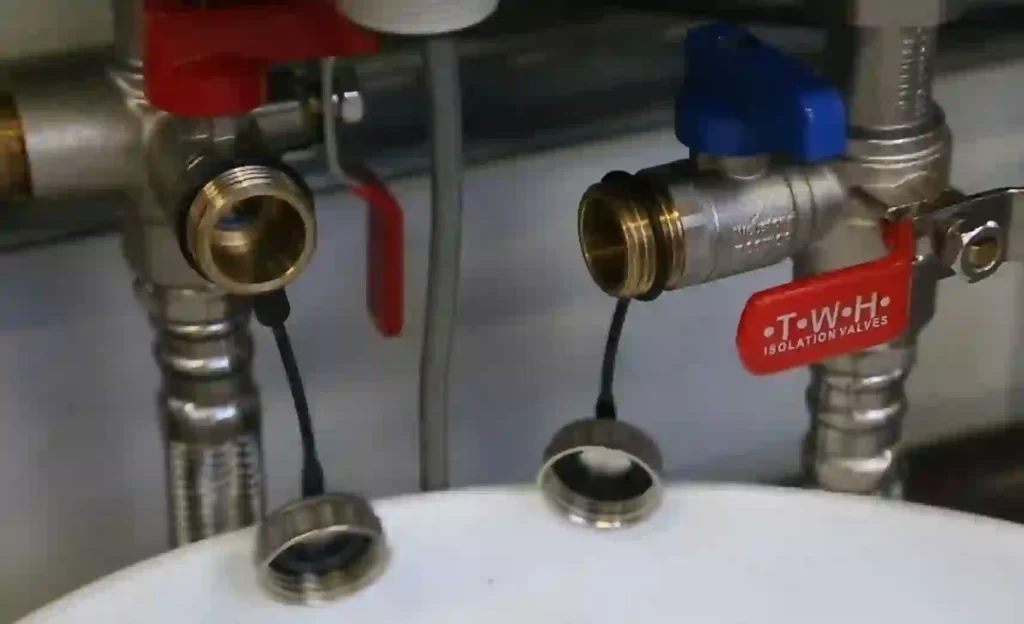
Afterward, remove the water drain valve filter from the inlet port and clean the filter under running water. Ensure you wash the filter thoroughly so that no debris will remain on the filter.
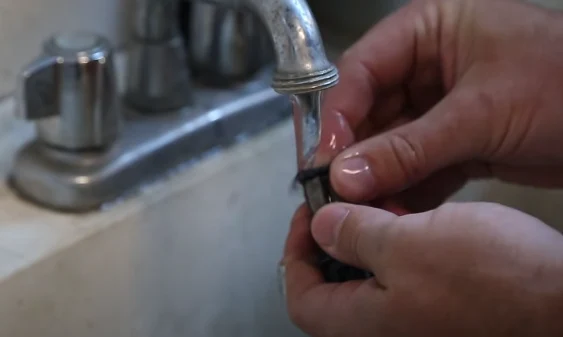
After cleaning the filter, let it dry and reinstall it into the inlet port. Ensure you close the drain plugs and replace the caps.
Now, head over to those fixtures you once opened and close them.
And last not the least, open the inlet water supply valve and verify no water is leaking from the drain plug or the water drain valve.
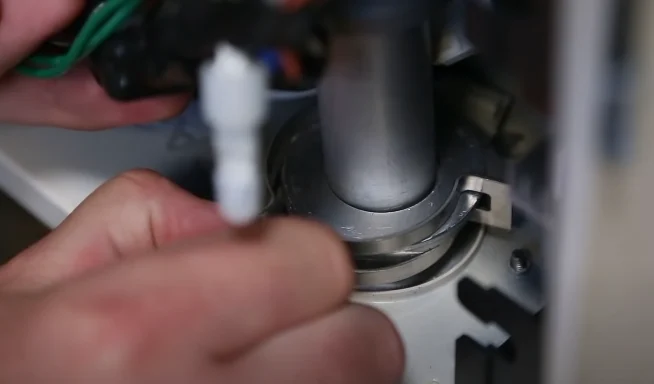
Cleaning The Flame Sensing Rod
Flame sensing rod is the component that senses the flame of the unit. If it fails to identify the flame, the unit will send wrong information to the computer. As a result, the water heater won’t turn on.
Over time, this flame sensing rod gets coated with carbon deposits or bent, which affect its functionalities. To avoid such a situation, you must clean the flame sensing rod periodically.
Complete the following procedure to remove carbon deposits from the flame sensing rod:
Start with ensuring that you turn off both the gas supply and electricity to the unit.
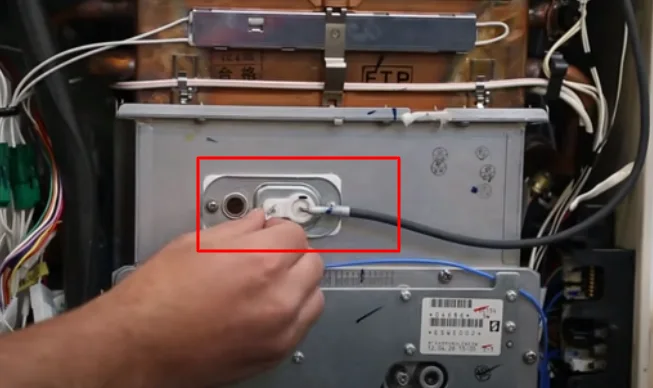
Then, disconnect the white connectors attached to the flame rod and ignition plug.
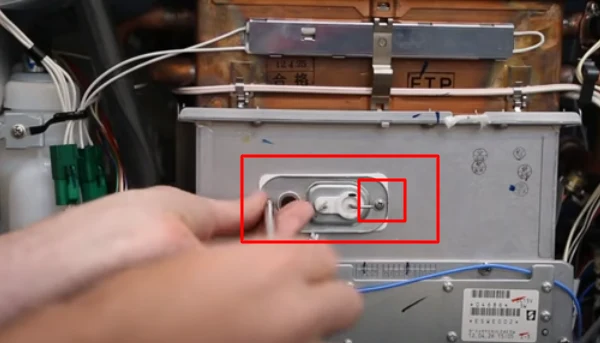
Remove the screws on the sides using a Phillips head screwdriver. Never use power tools. Otherwise, it will strip the screws.
In addition, take extra precautions when removing as the gasket is fragile and it’s prone to tear.
Next, remove the flame sensing rod and sensor carefully. Now, it’s time to clean the flame sensing rod and ignition plug. In this case, you can use either scotch-brit or fine grit sandpaper.
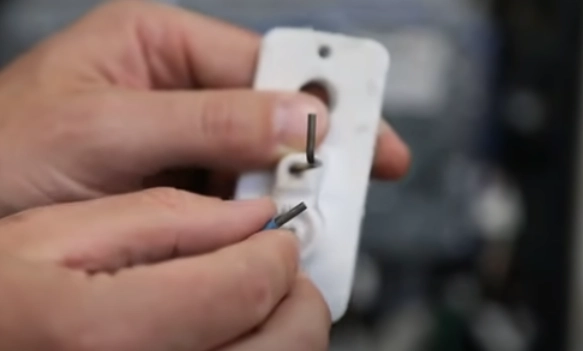
Make sure you don’t touch the end of the probes that go into the burner with your fingers. Also, ensure there is no buildup on the probes.
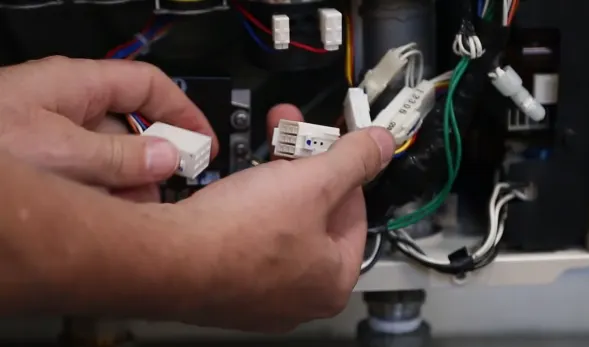
Finally, reinsert the flame sensing rod and sensor in its place and assemble everything following the steps in reverse.
Inspecting and Cleaning The Burner
It’s a must to check the burner flame periodically like every three or four months. Take your eyes through the sight-glass to verify the flame is blue and consistent. If you observe the flame turns yellow and inconsistent, the burner must be cleaned.
And the following procedure will walk you through every step to clean the burner like a pro:
1. Again, verify you shut off both the gas and electric supply to the unit.
2. Disconnect the gas manifold connection from the wiring harness by pressing the top connector.
3. Remove the seat clamp by holding the gas manifold pipe and pulling out the clamp.
4. Remove the gas manifold:
- Start by unscrewing the four large screws with the help of a Phillips head screwdriver. Keep the screws in a safe place.
- After unscrewing those screws, you will notice the manifold comes loose and will not fully release.
- Push up the gas manifold pipe and remove the gas manifold to reveal the burner chamber.
5. Now, it’s time to clean the burner chamber. I highly recommend you use an air compressor to blow away every piece of particle from the burner.
6. Once you thoroughly clean the burner, reassemble everything following the steps in reverse.
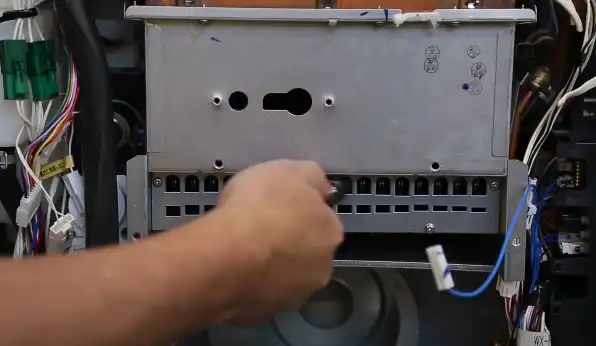
Cleaning the Fan
Walk through the steps I described below to inspect and remove buildup from the fan:
1. Pull out the gas manifold by following the steps I mentioned in the ‘Inspecting and Cleaning the Burner’ section.
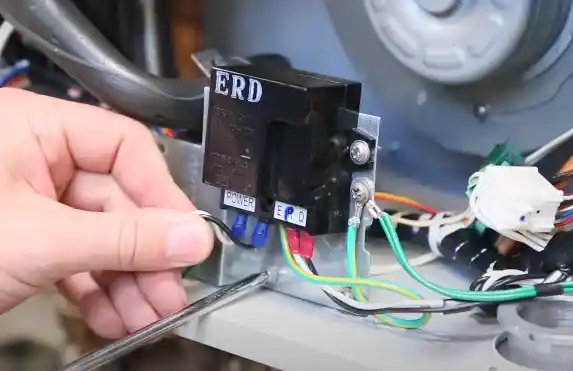
2. Remove the GFCI mounting bracket plate to get the fan. Make sure you carefully push the wires aside and unscrew the two screws.
3. Once you remove those screws, gently pull the plate aside so it comes out of the way.
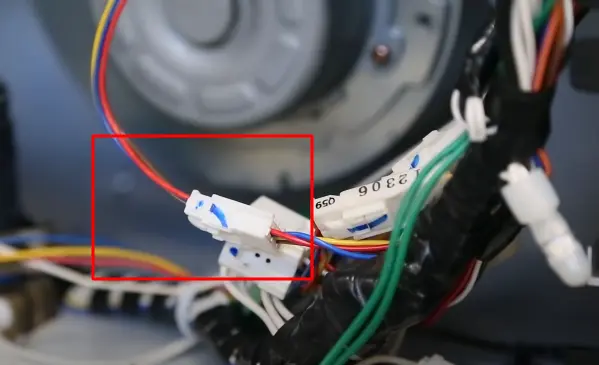
4. Disconnect the fan connection from the wiring harness by pressing the top connector.
5. Use a Phillips head screwdriver to remove the three fan screws. Don’t forget to keep those screws in a safe place.

6. After removing the fan screws, pull out the entire fan motor and blades from its housing. If the fan gets dirty or clogged with debris, use a brush to clean the fan and the burner plates. Keep brushing until you remove all the buildups from the in and around the fan.
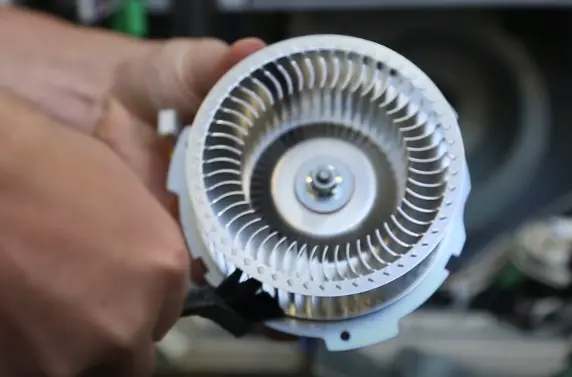
7. Lastly, put all the components (you disassembled) back to their places just as you pulled them out, but in reverse order.
How To Descale A Noritz Tankless Water Heater?
Descaling a Noritz Tankless Water Heater is simple if you know how to do it. And this chapter will make the descaling unit easy by walking you through the step-by-step procedure.
1. Flushing Kits You Should Have:
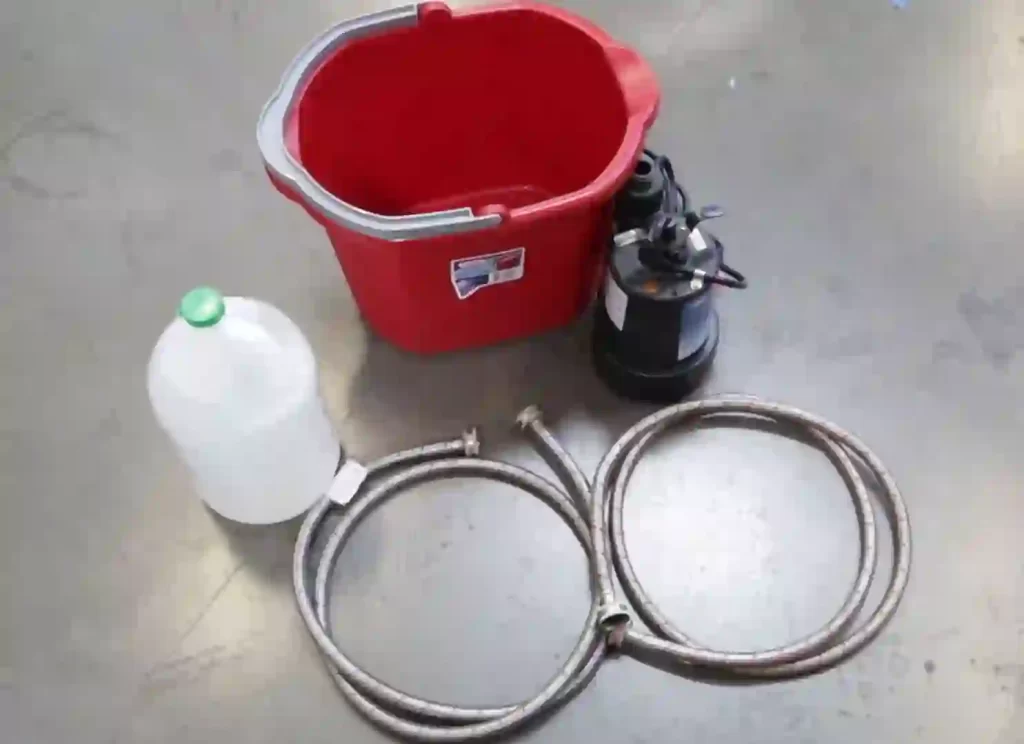
To descale the tankless water heater, you should have the following pieces of equipment:
- A 5-gallon plastic bucket.
- 3-4 gallons of distilled food-grade white vinegar.
- A set of ¾” connection drain hoses
- A submersible pump
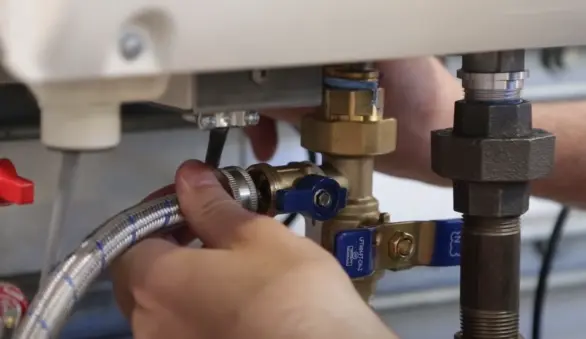
2. Make sure the unit is powered on. Follow the supply line to the gas valve and turn it off by moving it to the right.
3. Determine the hot water side and the cold water side. The red isolator valve indicates the hot water side while the blue indicates the cold.

4. Close both the hot and cold water main valves so that they are perpendicular to the pipes.
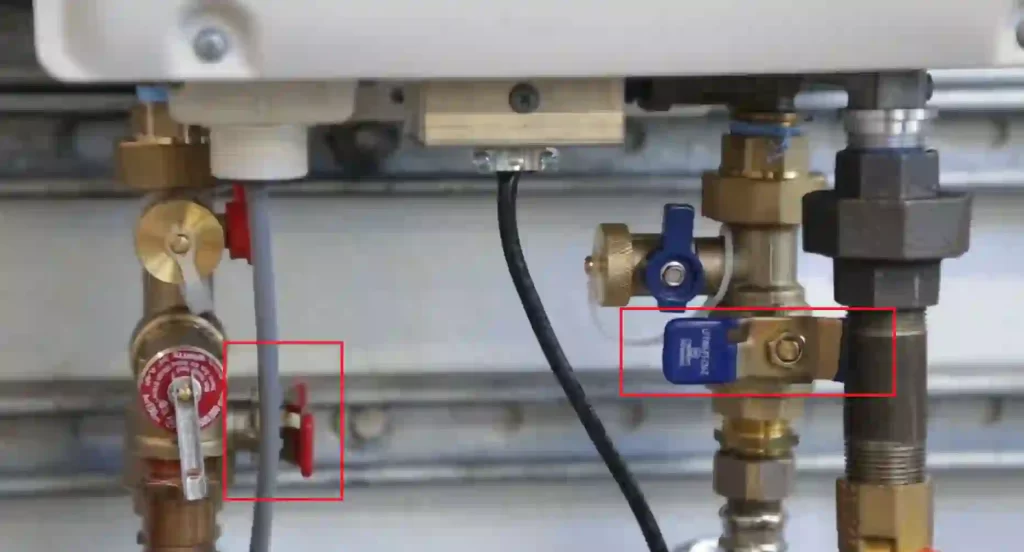
5. Remove drain caps on both hot and cold sides.
6. Place the bucket underneath the hot water side. Then, carefully remove the red drain valve to the on position and use the bucket to catch the water trapped inside the unit.
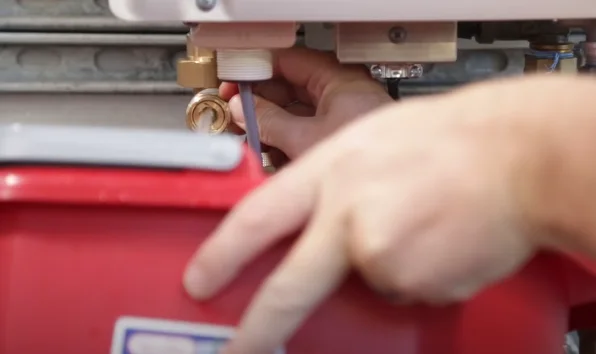
7. Repeat the same to the cold water side and drain the water.
8. Attach a hose to the submersible pump. Place the pump with the connected hose into the five-gallon plastic bucket with a power cord out.
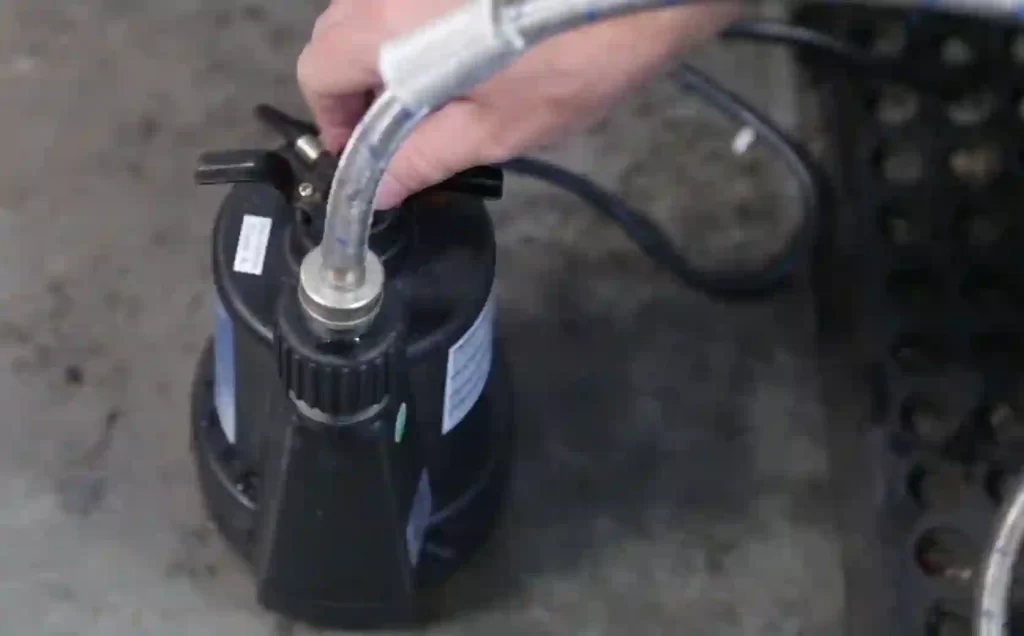
9. Connect the pump hose to the cold water inlet valve and make sure it’s screwed on tight.
10. Attach the other hose to the hot water drain valve and place the other end of the hose into the plastic bucket.
11. Pour about 3-4 gallons of distilled food-grade white vinegar into the plastic bucket so that the pump gets completely submersed.

12. Plug the pump into an electrical outlet and turn it on. Let the pump run for at least an hour maximum effectiveness.
13. After an hour, return the cold water inlet valve to the off position and unscrew & remove the pump hose. Replace the drain cap and tighten it up. Remove the pump from the bucket as well as the drain hose.
14. Drain out the liquid from the plastic bucket.
15. Place the drain hose back into the empty bucket and turn the main inlet valve to the On position.
16. Let the unit flush out through the hot water side for 20 gallons of water’s worth. For a condensing unit, place the bucket under the unit and twist open the drain plug located directly under the water heater to drain water.
17. Turn the main inlet valve to the off position. Then, turn the drain valve to the Off position. Unscrew and remove the drain hose. Don’t forget to replace the drain cap and tighten it up.
18. Turn the main hot and cold valves back to the On position. Also, turn on the gas supply valve.
19. Press the power on/off button to turn off the unit and turn it on again to reset the error code 11 (if it’s flashing and it’s normal).
FAQs
Yes, annual maintenance is a must for a tankless water heater if you want to operate the unit smoothly over years.
Some parts of the tankless water heater like the pressure relief valve, burner, and flame sensing rod require periodic maintenance. And you need to service the heat exchanger or descale the unit annually.
A Noritz tankless water heater will last for 20 years if you service and maintain the unit according to the manual.
Generally, you should descale the tankless water heater once a year. However, there is nothing wrong to flush the unit twice if the supply water you get contains a lot of deposits.
It will cost you around $150 to descale a tankless water heater.
End-Note
Periodic and annual maintenance is a must for a tankless water heater like Noritz. It will keep the water heater functional and increase the overall performance and life expectancy as well.
Fortunately, I broke down everything that you need to know to maintain your Noritz Tankless Water Heater. Just follow the maintenance steps I mentioned and service the unit like a pro.
If you still have any questions related to water heater maintenance, feel free to leave a comment below.
Read Also:
- Noritz Tankless Water Heater Problems
- Noritz Tankless Water Heater No Hot Water
- Noritz Tankless Water Heater Reset Button

Eric Alvarez is the head of content on LilDutchUncle.Com. He is an HVAC guy based in El Paso, Texas, United States. He obtained his Bachelor of Science degree from the University Of Texas at El Paso. Years of experience in the HVAC field have taught him many lessons, not the least of which is that the value of quality and knowledge far exceeds any promised initial savings. He has a good standing reputation for superior skills in heating, air conditioning, hot water tanks, and indoor air quality systems.