7 consecutive flashes on the water heater with Honeywell Control Valve indicates that the gas control or valve is defective.
To fix the issue (status light blinking 7 times), you need to reset the gas control valve or replace it.
And this guide on Honeywell Water Heater 7 Flashes Reset will help you reset or replace the gas control valve.
Without further ado, let’s dive in.
In This Content:
- What Does It Mean When The Status Light Blinks 7 Times?
- How To Reset Honeywell Water Heater 7 Flashes?
- How To Replace Gas Control Valve On Honeywell Water Heater?
- How To Light Honeywell Water Heater?
- FAQs
- Conclusion
What Does It Mean When The Status Light Blinks 7 Times?
Status light blinking 7 times indicates the gas control valve is at fault. Either you need to reset the gas control valve or replace it to fix this blinking light issue.
When the status light blinks 7 times, no gas will flow to the burner. And without gas, you can’t ignite the burner. In short, your water heater won’t function properly and deliver no hot water.
I will show you the ropes to reset the 7 flashes in the next chapter. So, keep reading.
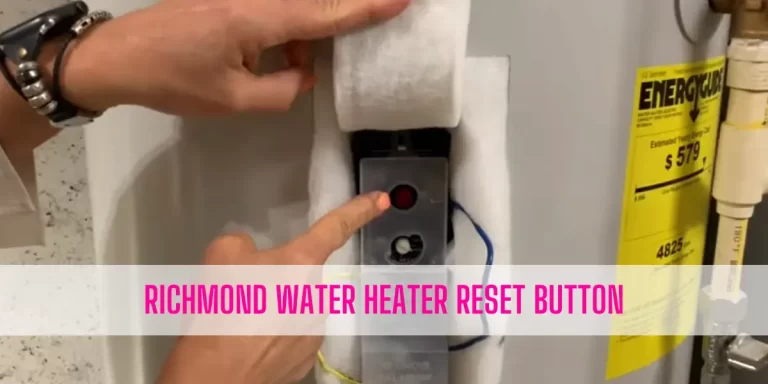
How To Reset Honeywell Water Heater 7 Flashes?
To reset Honeywell Water Heater 7 flashes, try these three simple steps:
- Turn the gas control knob clockwise to Very Hot position and wait 10 seconds.
- Set the control knob counter-clockwise to Hot position and start counting from 1 to 10.
- Move the control knob to Pilot position and wait for another 10 seconds. Then, set the knob to your desired temperature setting, which will reset the 7-flash error code successfully.
If resetting the gas control valve doesn’t bring any luck for you, I bet the gas control valve gets defective.
What you need to do in this case is- replace the gas control valve with a new one. And the next chapter will walk you through the step by step guide to make the replacement.
How To Replace Gas Control Valve On Honeywell Water Heater?
Complete these steps to replace the gas control valve successfully:
- Turn the gas supply off and set the gas control knob to Off position.
- Connect a garden hose to the drain valve at the bottom of the unit and place the other end of the hose to the nearest floor drain. Then, open the drain valve by using a flat head screwdriver to let the water drain.
- Once you drain the water, it’s time to detach every connection that leads into the gas control valve.
- Disconnect thermocouple wire, igniter wire, pilot tube, and others from the gas control valve.
- Don’t forget to detach the tee or piping attached with the gas control valve.
- Once you free up the control valve from everything, use a pipe to turn the gas control valve counterclockwise to loosen.
- Once it comes loose fairly, remove the gas control valve from the unit by hand.
- Now, prepare the replacement gas control valve by applying Teflon tape to the threads in a clockwise direction.
- Install the new gas control valve and tighten it up.
- Reattach everything that goes into the gas control valve. Ensure you close the drain valve.
- Refill the hot water tank and relight the pilot according to the instructions mentioned in the manual.
How To Light Honeywell Water Heater?
To light your water heater with Honeywell Gas Control Valve, go along with these 5 simple steps:
- Rotate the gas control knob to the Off position to clear the remaining gas.
- Turn the control knob to the Pilot position.
- Hold down the gas control knob and begin to hit the igniter or electric ignition button until the status light comes on.
- Release the gas control knob.
- Turn the gas control knob to the desired temperature settings.
FAQs
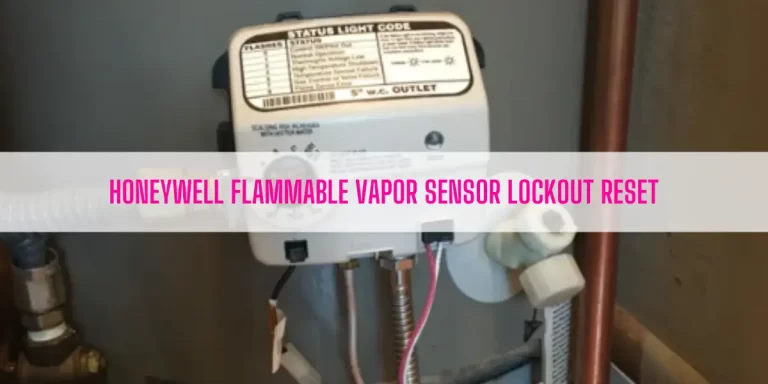
Flammable Vapor Sensor Lockout indicates the FV sensor detects flammable objects like paint, thinner, and debris near the unit. To reset this status, you should remove flammable contents and reset the unit.
First, remove the sensor from the bottom of the unit and detach its wiring. Second, get a multimeter and place its leads between the two wiring terminals of the FV sensor. Now, note the resistance. A properly functioning FV sensor gives a reading between 11K to 45K ohms. If the resistance goes out of the range, you must replace the FV sensor.
The burner light goes out if the flame sensor gets dirty or covered with carbon deposits. If you want to light the burner, you must clean the flame sensor.
To reset the flammable vapor sensor lockout on the water heater with a Honeywell Gas Control Valve, go along with these steps:
- Turn the power switch to the On position on the control valve
- Wait three seconds for the gas control to initialize.
- Rotate the gas control knob from Vacation to Very Hot. Do it twice within 30 seconds.
- Now, the water heater should come on, which indicates that you successfully reset the flammable vapor sensor.
Water Heater High-Temperature Shutdown is a built-in safety feature that shuts off the gas supply to the unit when the temperature inside the tank exceeds 180°F. Several factors, including defective thermostat, faulty gas control valve, sediment buildup, and dirty burner are responsible for activating water heater high-temperature shutdown.
Conclusion
As I mentioned earlier, 7-flashing error indicates the gas control valve is at fault. To fix this issue, first try to reset the error code.
In this case, turn the gas control knob to the Very Hot position for 10 seconds. Then, turn the knob counterclockwise to Hot position and hold it there for 10 seconds. Lastly, set the knob to Pilot position for another 10 seconds, which will reset the gas control valve successfully.
If the status light still flashes 7 times after resetting, I am 100% sure the gas control valve gets bad. So, replace the gas control valve by following the step-by-step guide I mentioned. Hope, it will solve the 7-blinking issue. Good Luck!
Read Also:

Eric Alvarez is the head of content on LilDutchUncle.Com. He is an HVAC guy based in El Paso, Texas, United States. He obtained his Bachelor of Science degree from the University Of Texas at El Paso. Years of experience in the HVAC field have taught him many lessons, not the least of which is that the value of quality and knowledge far exceeds any promised initial savings. He has a good standing reputation for superior skills in heating, air conditioning, hot water tanks, and indoor air quality systems.