Your State Select Water Heater is not heating water due to the following reasons:
- Low or no gas pressure to the actuator
- Actuator gas supply tube gets kinked
- Actuator or inlet damper door linkage gets disconnected
- Inlet damper door gets stuck in the closed position
- Defective Actuator
- Faulty thermostatic mixing valves
- Plumbing leak
- Sediment or lime in tank
- Reversed connections
Throughout this guideline, I will take you through every troubleshooting step to resolve those issues that cause the unit to not heat the water.
Disclaimer: This guide will be useful for the home owners who own the ProLine XE Polaris Series Tank Gas Water Heaters.
Without further ado, let’s dive in.
Table of Contents
- State Select Water Heater Not Heating Water [9 Easy Solutions]
- 1. Low Or No Gas Pressure To Actuator
- 2. Actuator Gas Supply Tube Is Crimped Or Plugged
- 3. Actuator/Inlet Damper Door Linkage Is Binding, Bent Or Disconnected
- 4. Inlet Damper Door Has Frozen In A Closed Position
- 5. Actuator Is Defective
- 6. Defective Thermostatic Mixing Valve
- 7. Plumbing Leak
- 8. Sediment or Lime In Tank
- 9. Reversed Connections
- End-Note
State Select Water Heater Not Heating Water [9 Easy Solutions]
Before explaining the reasons that cause the unit to not heat the water, check the pilot light first.
Dim your room light and take your eyes through the viewport while pressing the igniter button. If you don’t see a spark, ensure the igniter wire is attached firmly to the white connector.
On the other hand, if you see the spark, check the instructions here to light the pilot.
If the pilot light comes on, observe the movement of the actuator linkage as you turn the gas control knob to On and the thermostat dial to the triangle mark.
However, if the actuator linkage doesn’t move, I bet the following things are to blame and cause the unit to not heat the water.
1. Low Or No Gas Pressure To Actuator
The actuator linkage won’t move toward the water heater if there is low or no gas pressure to the actuator. And when there is no gas pressure to this component, your water heater will be unable to heat.
You must measure the pressure. Otherwise, you can’t determine what the gas pressure is at the actuator and adjust the pressure to resolve the issue.
How To Fix:
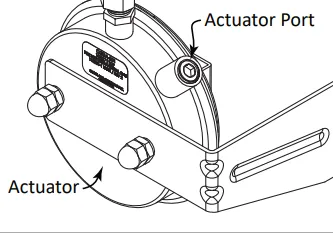
You can measure the burner or manifold pressure at the actuator port.
To measure the pressure, complete the following step-by-step procedure:
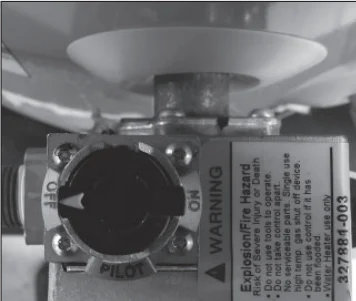
- Set the gas control temperature knob to the off position.
- Turn the gas manual shut-off valve on the gas supply line to the off position.
- Detach the gas-supply tubing from the actuator fitting connected to the gas valve. Connect a service pressure gauge to the actuator fitting.
- Now, set the gas manual shut-off valve to the on position.
- Turn the gas control temperature knob to the Pilot and light the pilot by following instructions mentioned in this article.
- Set the gas control valve knob to the On position and turn the temperature dial to the triangle mark.
- Finally, check the pressure gauge and ensure it gives a reading of 2.5” W.C. Keep in mind, the inlet damper door should be fully opened while measuring the manifold or burner pressure.
If the pressure is not within specification, call a service technician to resolve this issue.
2. Actuator Gas Supply Tube Is Crimped Or Plugged
If you find the actuator gas supply tube gets twisted or crimped, you should replace the actuator assembly.
What you need to do exactly is- remove the actuator, bracket, and the supply tube. Once you replace the actuator assembly, check for gas leaks by using a non-corrosive leak detection solution.
If that type of solution is not available, you can use the solution of hand dishwashing soap and water. To make the solution, use one part soap into 15 parts water.
Bubbles forming indicate a leak. If you detect any leaks, resolve that issue.
3. Actuator/Inlet Damper Door Linkage Is Binding, Bent Or Disconnected

The actuator or inlet damper door linkage can get vent if somehow the linkage cover got crushed during transport, rough handling, or installation.
Generally, you can find the linkage cover in the front of the unit under the jacket.
If the linkage cover gets bent, you must remove it and replace it. After replacing it successfully, you should also check the linkage for proper operation.
On the other hand, if the linkage itself is bent, I highly recommend you call a professional or contact the support team for assistance.
4. Inlet Damper Door Has Frozen In A Closed Position
If the burner and pilot flame goes off within 5 seconds of burning lighting, I bet there is a gas supply issue.
However, if you have identified and fixed the gas supply issue previously, there is a problem with the damper door.
It’s possible that the damper door gets stuck in the closed position.
To resolve this issue, you should call a certified technician.
5. Actuator Is Defective
A defective actuator is another culprit that can prevent the water heater from heating water.
If gas is leaking from the actuator, I bet the actuator is at fault. Unfortunately, it’s not a task to do it yourself as it involves dealing with gas.
What you need to do is- just shut the gas supply off to the unit at the gas manual valve. Then, call the Technical Support Center or a qualified plumber to fix this problem for you.
6. Defective Thermostatic Mixing Valve
A faulty thermostatic mixing valve is another culprit that causes the unit to heat the water insufficiently.
If one of the faucets has a failed mixing valve, it can reduce the amount of hot water the faucet delivers despite having enough hot water in the tank.
How To Fix:
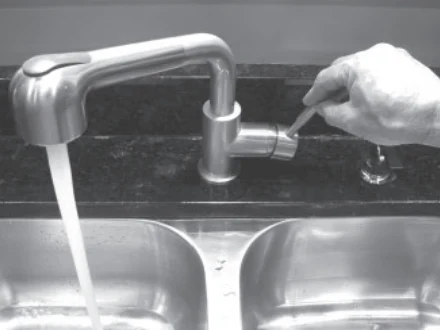
Most showers now come with built-in mixing valves. Inspect the water temperature at several faucets to ensure the problem is not in a faucet or shower control.
Then, replace the thermostatic mixing valve or the certain faucet to resolve the issue.
7. Plumbing Leak
A small leak in the hot water side of the home’s plumbing system can make your water heater produce little to no hot water.
In this case, the burner of the unit may be on all or almost all the time, yet you will get very little hot water.
How To Fix:
Locate the leaking point and repair it. If you are not mechanically inclined, hire a certified technician to solve the problem.
8. Sediment or Lime In Tank
You must flush the water heater every six months or once a year, depending on the hardness of water in your area.
If you don’t flush the unit timely, sediments make their way into the water tank. As a result, your water heater won’t heat the water sufficiently.
How To Fix:
To flush the water heater, follow the below step-by-step procedure:
1. Turn the gas control knob to the Off position.
2. Turn off the gas supply to the unit at the manual shut-off gas valve.
3. Open a hot water faucet and let the unit run until it’s cool.
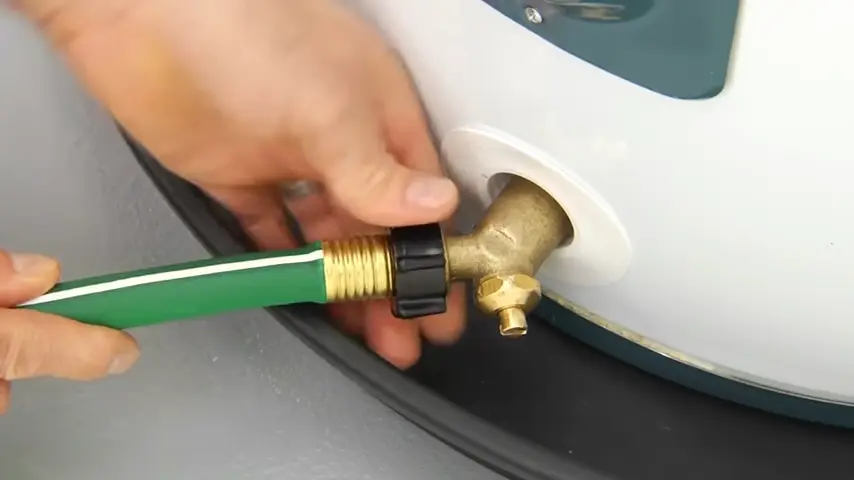
4. Attach a garden hot to the drain valve and place the other end of the hose in a drain or outside.
5. Ensure you turn off the cold water supply valve.
6. Open the drain valve on the unit. Also, don’t forget to open a hot water faucet to make the draining process faster.
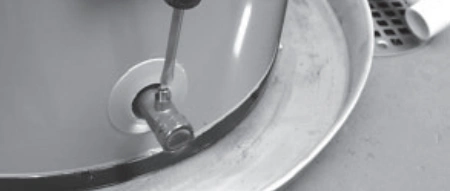
7. Use a 1-1/16” socket to remove the anode rod and inspect its condition. Don’t hesitate to replace it if needed.
8. If there remains a large chunk of sediment buildup after draining the tank, flush the tank by turning on the cold water supply valve. Keep the water running until no more sediment drains from the tank. Once you are done, close the drain valve.
9. Refill your water heater by opening the cold water supply valve. Ensure you turn on a hot water faucet while the drain valve is closed.
10. Relight your water heater and set it to your desired temperature setting. It will take up to an hour for the tank of cold water to heat up.
9. Reversed Connections
It’s a common issue on a new installation.
Check the hot and cold water connections and ensure the home hot water pipe is attached to the hot water outlet on your water heater.
If not, make the connections right.
End-Note
Undoubtedly, a malfunctioning water heater brings untold sufferings in the ice-cold days of winter.
Luckily, I broke down all the possible issues that cause the unit to not heat the water. What you need to do is- just go along with the troubleshooting steps I mentioned to resolve that problem.
However, if you fail to resolve this water heater problem after trying this guideline, don’t hesitate to call a certified plumber.
Good Luck!
Read Also:

Eric Alvarez is the head of content on LilDutchUncle.Com. He is an HVAC guy based in El Paso, Texas, United States. He obtained his Bachelor of Science degree from the University Of Texas at El Paso. Years of experience in the HVAC field have taught him many lessons, not the least of which is that the value of quality and knowledge far exceeds any promised initial savings. He has a good standing reputation for superior skills in heating, air conditioning, hot water tanks, and indoor air quality systems.