We had six Amazon boxes stacked by the recycling bin. My son looked at them and said, “Can we make a robot costume?” I looked at the boxes, then at the calendar. Halloween was five days away.
We didn’t buy a single thing. Just boxes, paint, and a roll of foil we had in the pantry. By the weekend, he had a full robot costume, arms and all.
That’s what I love about cardboard. It’s free. It’s already in your house. And it turns into something bigger than paper or pipe cleaners ever could.
If you’ve got boxes piling up, here are 5 complete cardboard Halloween crafts you can build this week.
The 3 Supplies I Always Keep for Cardboard Builds
A sturdy box cutter or utility knife — this cuts through thick cardboard cleanly in a way scissors just can’t, and it’s the one tool that makes these builds possible.
A bottle of black acrylic craft paint — cardboard soaks up color fast, and black is the base for almost every project below, from tombstones to costume armor.
A hot glue gun with extra glue sticks — this holds cardboard pieces together far better than tape, especially for anything that needs to stand up outside or move with a kid wearing it.
DIY Cardboard Tombstones for the Yard
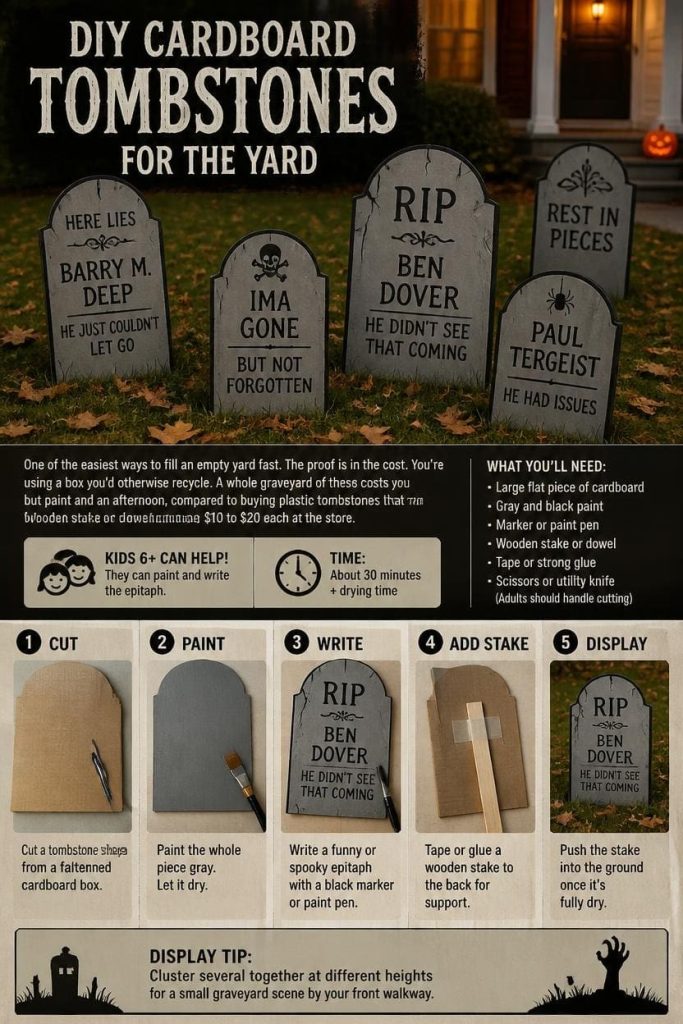
This is a flat cardboard tombstone shape, painted gray with a spooky epitaph, propped up in the yard with a stake or leaned against something sturdy. It’s one of the easiest ways to fill an empty yard fast.
The proof is in the cost. You’re using a box you’d otherwise recycle. A whole graveyard of these costs you nothing but paint and an afternoon, compared to buying plastic tombstones that run $10 to $20 each at the store.
How to Make One
You’ll need a large flat piece of cardboard, gray and black paint, a marker for the epitaph, and a wooden stake or dowel to prop it up. Adults should handle the cutting. Kids 6 and up can paint and write. Takes about 30 minutes plus drying time.
- Cut a tombstone shape from a flattened cardboard box.
- Paint the whole piece gray and let it dry.
- Write a funny or spooky epitaph with a black marker or paint pen.
- Tape or glue a wooden stake to the back for support.
- Push the stake into the ground once it’s fully dry.
Display tip: Cluster several together at different heights for a small graveyard scene by your front walkway.
Cardboard Robot Costume
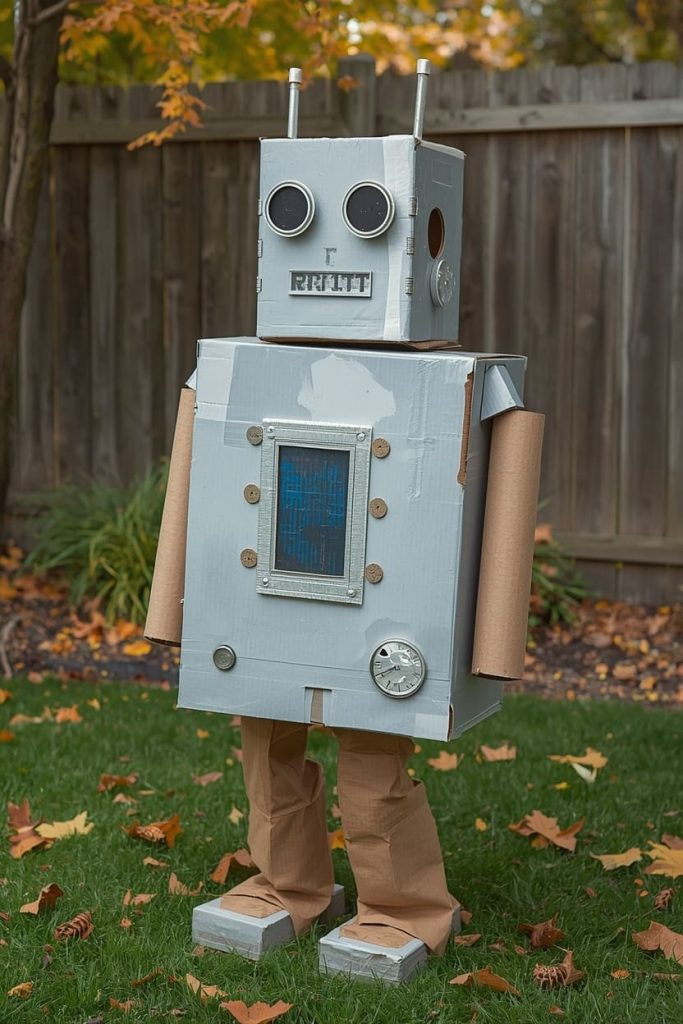
This is a wearable costume built from two boxes, one for the body and one for the head, decorated with painted dials, foil details, and pool noodle or cardboard tube arms. It’s a bigger build, but it’s genuinely impressive for the effort involved.
This one works because kids can wear it proudly, and it costs almost nothing. We built ours entirely from recycling. The only real expense was paint we already had.
How to Make One
You’ll need 2 medium boxes, a box cutter, silver or gray paint, foil, and cardboard tubes or pool noodles for arms. Adults must handle all cutting. Best for ages 7 and up who will wear it. Takes about 2 hours across an afternoon, including drying time.
- Cut arm, leg, and neck holes into the body box.
- Cut a viewing hole into the head box.
- Paint both boxes silver or gray and let dry completely.
- Glue on foil circles, bottle caps, or cardboard scraps as robot details.
- Attach cardboard tube or pool noodle arms with glue or brads at the shoulders.
Display tip: This one’s built for wearing, not displaying. Save it as the trick-or-treat costume, not just yard decor.
Standee Monster for the Porch
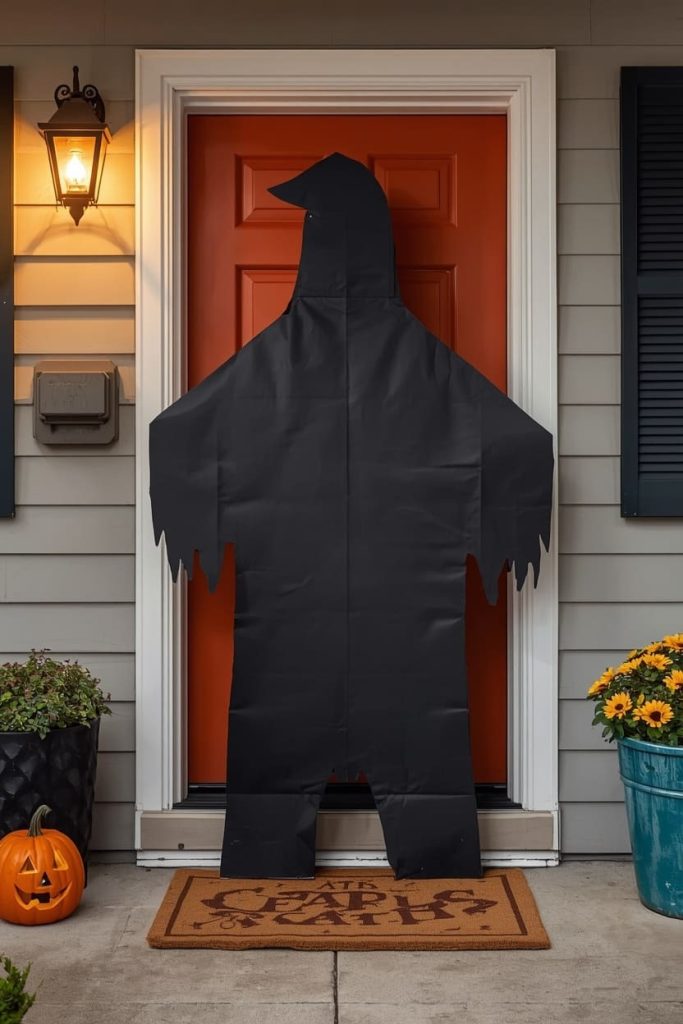
This is a large, flat cardboard cutout shaped like a monster, ghost, or witch, painted and propped against a wall or door for a spooky porch welcome. It’s a great option if you want something big without the complexity of a full 3D build.
The proof is in the visual size-to-effort ratio. A single large box gives you a huge cutout for almost no work. It reads as a big investment from the sidewalk, even though it’s one box and some paint.
How to Make One
You’ll need one large flattened box, black paint or a black trash bag for a silhouette look, and something to prop it against. Adults should handle cutting the shape. Kids 6 and up can paint. Takes about 45 minutes plus drying time.
- Sketch a large monster, witch, or ghost silhouette directly onto the flattened cardboard.
- Cut out the shape.
- Paint it solid black for a silhouette look, or add color and detail if you want more personality.
- Let it dry completely.
- Prop it against your porch wall, railing, or door.
Display tip: Backlight it with a spotlight at night so the silhouette really pops from the street.
Cardboard Candy Corn Boxes
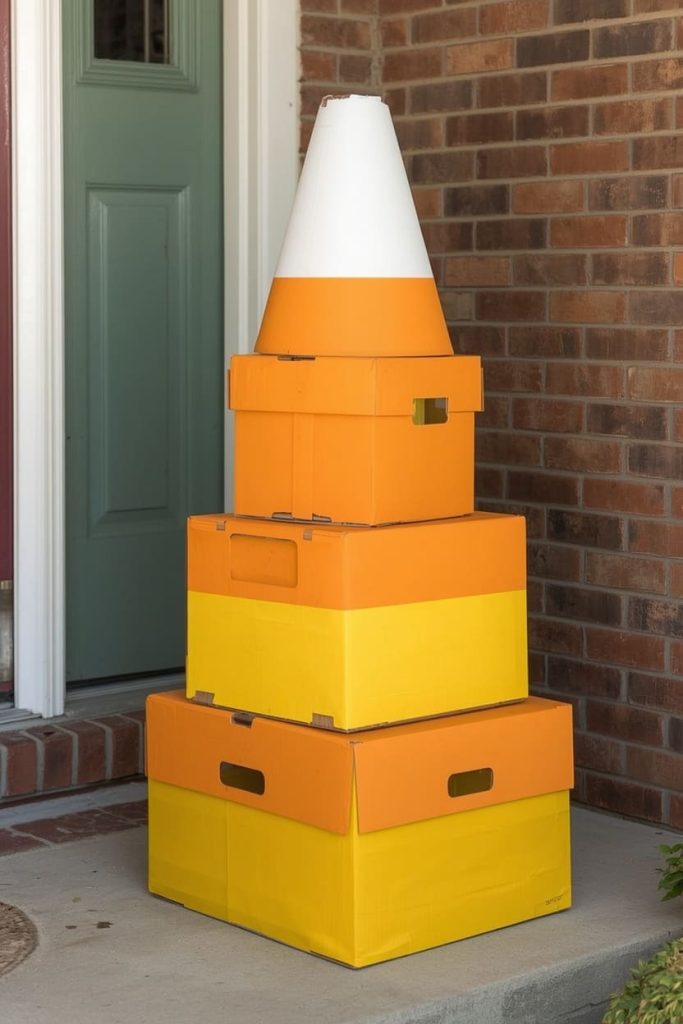
This is a set of stacked, painted cardboard boxes shaped and colored to look like giant candy corn, perfect as porch or yard decor. It’s a strong option if you want something colorful instead of spooky.
This one works because it uses whatever box sizes you already have. Bigger boxes stack into bigger candy corn pieces. There’s no wrong size, which makes it forgiving for a first cardboard build.
How to Make One
You’ll need 2 to 3 boxes of different sizes, yellow, orange, and white paint, and packing tape to help shape them. Kids 7 and up can help paint and tape. Takes about 1 hour plus drying time between coats.
- Tape the flaps of each box closed so they hold a solid shape.
- Stack the boxes largest to smallest to form the classic candy corn taper.
- Paint the bottom section yellow, the middle orange, and the top white.
- Let each color dry before starting the next to avoid smearing.
- Stack and secure the sections together once fully dry.
Display tip: Set a few different sizes along your front steps for a colorful, kid-friendly welcome that isn’t spooky.
Cardboard Knight or Warrior Armor
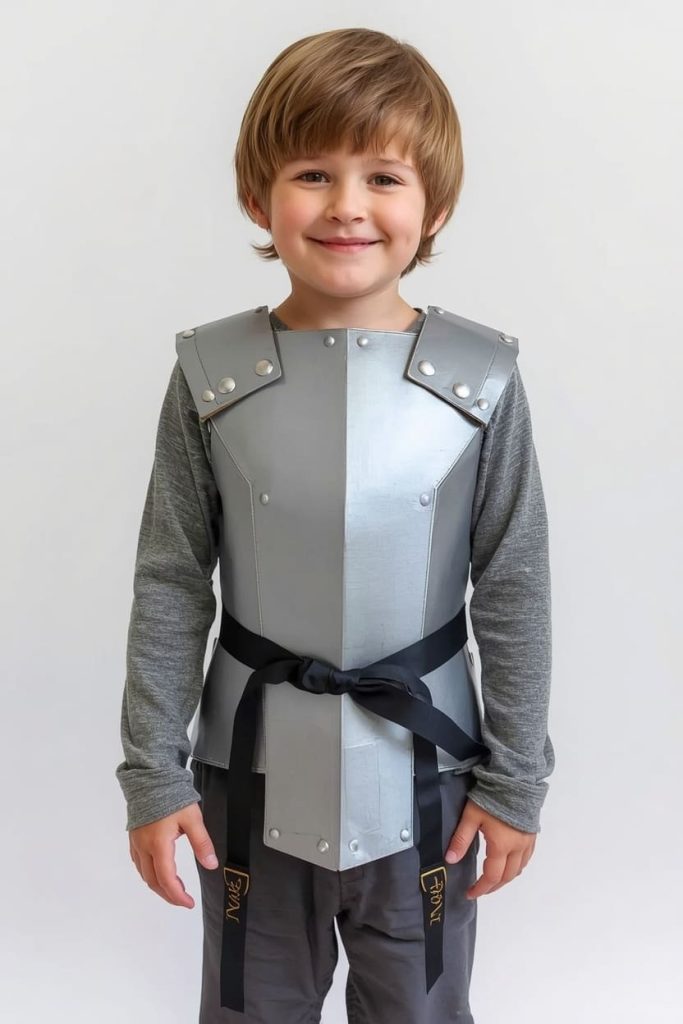
This is a wearable chest plate and arm guards cut from cardboard, painted metallic, and tied on with fabric straps. It’s a favorite for kids who want a costume with some real construction to it, not just a onesie from the store.
The proof is in the durability. Unlike thin costume plastic, cardboard armor holds its shape through a full night of trick-or-treating, and it’s sturdy enough to survive being packed away for next year.
How to Make One
You’ll need 1 large flattened box, silver or gray paint, a hole punch, and ribbon or fabric strips for straps. Adults should handle all cutting. Best for ages 7 and up. Takes about 1.5 hours including drying time.
- Cut a chest plate shape sized to fit over your child’s torso.
- Cut two smaller matching pieces for the back, if you want front and back coverage.
- Paint all pieces silver or gray and let dry.
- Punch holes at the shoulders and sides.
- Thread ribbon or fabric strips through the holes to tie the armor together over the shoulders and around the waist.
Display tip: Pair it with a cardboard sword or shield from scrap pieces for a full costume set.
FAQs About Cardboard Halloween Crafts
What can I make with cardboard for Halloween?
You can make tombstones, costumes, porch standees, candy corn decor, and armor, all from boxes you probably already have. I’ve made every craft on this list without buying a single piece of cardboard.
Is cardboard sturdy enough for outdoor Halloween decor?
For a few days, yes, especially if it stays dry. I always bring mine in overnight or during rain, since cardboard softens quickly once it gets wet.
What age is safe for cutting cardboard crafts?
I handle all the cutting myself, even for my older kids. Cardboard is thicker than paper, and a box cutter needs steady adult control. Kids can absolutely help with painting, gluing, and decorating once the shapes are cut.
How do I make cardboard decorations weatherproof?
A coat of clear sealant spray helps some, but I still treat outdoor cardboard as temporary decor. I bring pieces inside before rain and only leave them out during dry stretches.
Can cardboard crafts be used for costumes?
Yes, and honestly, they’re some of my favorite costumes to make. The robot costume and knight armor both hold up through a full night out, and they cost next to nothing compared to store-bought options.
How long does a cardboard project usually take?
Most of these take under an hour of hands-on work, though drying time between paint coats can add another hour or two. I usually spread a build across an afternoon rather than rushing it in one sitting.
Give One a Try This Week
You don’t need new supplies or a big budget. You need a few boxes and an afternoon. Pick the project that matches your kid’s excitement level, grab that box cutter, and start building something bigger than paper can give you.

Jenny is a passionate writer specializing in home decor, design, and styling. With years of experience in transforming spaces, she shares expert tips on creating beautiful, functional homes. From interior design trends to DIY decor ideas, Jenny’s work helps homeowners craft spaces that reflect their unique style. Whether it’s a cozy living room, a modern kitchen, or a serene bedroom, her articles offer practical advice and inspiration to elevate any home.