Error code 13 on Rheem Tankless Water Heater means poor or bad combustion. The unit will throw this fault code due to:
- Dirty water inlet filter
- The exhaust vent gets clogged
- Clogged burner orifice
- Dirty combustion sensor
- Ignition issues
You can easily reset the error code 13 by addressing and troubleshooting those issues. And this guide will walk you through each troubleshooting step to resolve the combustion issue.
Let’s scroll down.
Table of Contents
- What Is Error Code 13 On Rheem Tankless Water Heater?
- What Causes Error Code 13 On Rheem Tankless Water Heater?
- How To Fix Error Code 13 On Rheem Tankless Water Heater?
- Check The Vent Installation Is Correct
- Remove Blockage From the Vent
- Ensure The Inlet Gas Pressure Is Correct and Gas Is Flowing Continuously
- Clean The Burner
- Call A Plumber to Clean the Combustion Sensor
- Tighten up the ODS wiring or Replace the Sensor
- Clean the Water Inlet Filter
- Clean the Flame Rod
- How Do You Maintain Tankless Water Heater To Avoid Encountering Code 13?
- FAQs
- End-Note
Relevant:
What Is Error Code 13 On Rheem Tankless Water Heater?
Error code 13 on the Rheem Tankless Water Heater means improper combustion due to a problem with the gas supply or gas valve and improper air-fuel ratio.
You will experience improper combustion with your tankless water heater when there is an imbalance between the gas supply and the combustion air.
The air supply for proper combustion typically gets restricted because of improper ventilation or because the vent gets clogged.
The control board of your water heater monitors the proportion of gas supply and the combustion air for safe and efficient heater operation.
When the control board detects the improper air-fuel ratio, it shuts off the unit to protect you and beep the error code 13.
What Causes Error Code 13 On Rheem Tankless Water Heater?
The primary causes of error code 13 on Your Rheem Tankless Water Heater are clogged vents, improper vent installation, and problems with the gas supply or gas valve.
Improper Vent Installation
90% of the time, improper vent installation is responsible for error code 13 on the Rheem Tankless Water Heater.
For instance, venting installation must adhere to national and local codes as well as manufacturer instructions.
From venting lengths to venting materials, you should meet the requirements of national codes, local codes, and manufacturer guidelines.
Otherwise, it may pose a safety risk and cause the water heater to pop up the error code 13.
Clogged or Restricted Vent
A restricted vent (intake or exhaust) is the main culprit that throws a wrench into work. Typically, the vent gets clogged due to snow, debris, or bird nests in the exhaust vent.
Due to blocked vents, the unit may not draw in enough fresh air or expel carbon dioxide properly.
But sufficient air supply is required for proper or complete combustion. To ensure safe operation, it is also essential to expel carbon dioxide from the building.
If this requirement isn’t met due to a clogged vent, the tankless unit will throw the error code 13.
Gas Supply Problems
Issues with gas supply are also responsible for poor combustion or error code 13 on the Rheem Tankless Water Heater.
For example, if the inlet gas pressure is not within specification, your tankless water heater won’t ignite the burner, leading to incomplete combustion.
Besides, obstructions in the gas supply line can disrupt the continuous gas flow to the burner chamber, causing poor combustion.
Nonetheless, a defective gas supply valve can also be the reason for the error code 13.
Dirty Burners
The burner or burner orifices generally get clogged by dirt, debris, or residue from the combustion.
Due to a clogged burner orifice, no gas can flow through the burner chamber to begin the combustion process.
Consequently, your Rheem Tankless Water Heater will throw the error code 13 and shut off the unit automatically.
Dirty Combustion Sensor
Debris or dirt from the burner may fall on the combustion sensor, which can make the sensor ineffective.
Due to this, the sensor fails to send a signal to the control board to initiate the combustion process.
Consequently, the tankless unit will flash the error code 13 on the controller display.
Issue With ODS (Oxygen Depletion Sensor)
Rheem Tankless Water Heater has an ODS or Oxygen Depletion Sensor that detects whether the unit is getting sufficient air for proper combustion.
If the wiring of the ODS comes loose, it can’t send any signal to the control board.
When the control board receives no signal from the ODS, it thinks there is insufficient air supply for initiating the combustion process.
The error code 13 you see on the controller display is the effect of the defective ODS.
Restricted Water Inlet Filter
The water inlet filter is the first component you need to check if the unit flashes the error code 13.
If the water inlet valve gets clogged by lint or debris buildup, no water can flow through the unit. Without sufficient water supply, the unit fails to start the combustion process.
Problem With Flame Rod
A flame rod on a tankless water heater detects the flame and sends a signal to the control board.
Based on the signal, the control board begins the combustion process.
If the flame rod gets dirty or fragile, it can’t detect the flame and send no signal to the control board.
As a result, the control board fails to initiate the combustion process and throws the error code 13 to grab the user’s attention.
Environmental Factors
Water heater installation under high winds or extreme temperatures can impact the water heater’s ventilation and combustion.
Besides, if you install your water heater in a confined space, the unit will get insufficient air supply for proper combustion.
Due to this reason, the unit will throw the error code 13 to grab your attention so that you can take action to fix this issue.
How To Fix Error Code 13 On Rheem Tankless Water Heater?
Try these troubleshooting steps to fix the error code 13 on Rheem Tankless Water Heater:
Check The Vent Installation Is Correct
Read the manufacturer’s manual and ensure the vent installation meets the requirements of national and local codes as well as the manufacturer’s instructions.
Keep in mind that it’s not a DIY project. Contact a certified plumber to have the vent installation checked and resolved.
Remove Blockage From the Vent
Inspect the venting system and ensure nothing is blocking the vent. Remove any obstructions in the combustion air intake and exhaust vent. You can snake the vent pipe to remove restrictions like bird nests, debris buildup, and corrosion.
Ensure The Inlet Gas Pressure Is Correct and Gas Is Flowing Continuously
For proper combustion, the inlet gas pressure for natural gas should be between 4″ W.C and 10.5″ W.C.
On the other hand, the gas pressure should be 8.00″ W.C – 13.5″ W.C if you fuel up your tankless water heater with propane.
Get a manometer and connect it to the gas port. Then, measure and adjust the gas pressure.
Alternatively, call a certified plumber to adjust the inlet gas pressure.
Second, check the gas supply line and ensure there is no blockage.
And lastly, inspect the gas valve and replace it if the valve doesn’t work properly.
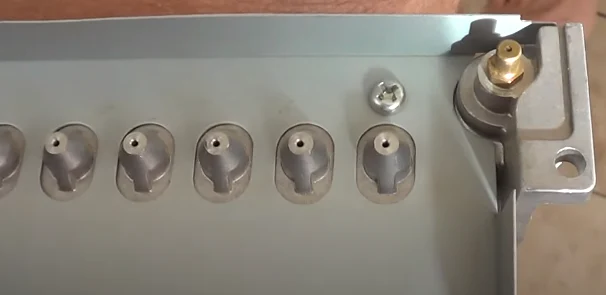
Clean The Burner
Cleaning the burner or burner orifice is the simple fix to this issue. But the heck is- it requires a lot of expertise and technical knowledge to clean the burner.
However, if you are technically inclined, remove the burner. Inspect all the burner orifices to see whether they get clogged with white crud.
Use a very small drill bit by hand to clean the gunk up from the orifice. You can check out this tutorial below as a helping hand:
Call A Plumber to Clean the Combustion Sensor
Unfortunately, it takes a lot of time and technical details to remove the burner and clean the combustion sensor. So, I highly recommend you contact a certified service guy to let him handle this issue.
Tighten up the ODS wiring or Replace the Sensor
Check the wiring from the ODS to the control board. If it comes loose, reconnect it.
Then, measure the voltage on this wiring. If the voltage reading shows 0, you need to replace the ODS.
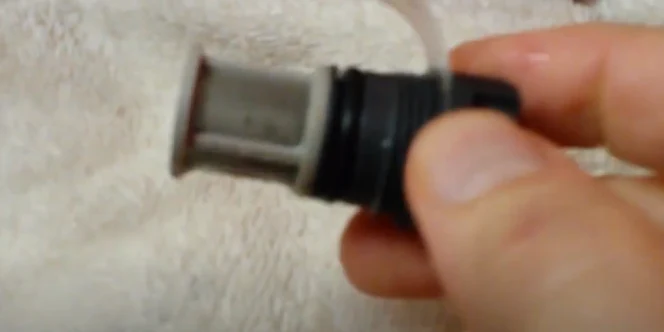
Clean the Water Inlet Filter
The water inlet valve or filter is on the front of the unit.
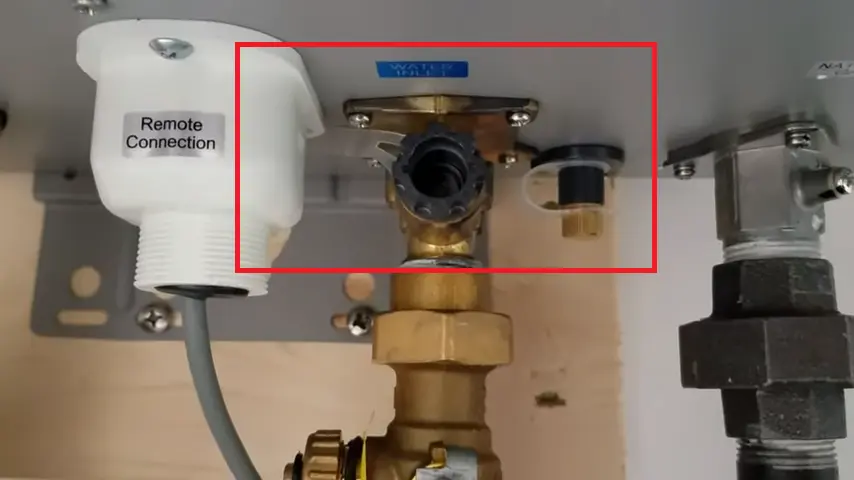
To remove it, shut off the electric supply to the unit by tapping the power button on the controller. Then, unplug the power cord from the electric outlet.
Second, close the cold water inlet valve and the hot water valve. Now, it’s time to unscrew the cold water inlet filter.
Use your hand to remove the water inlet valve because it’s hand tightened. Don’t forget to put a plastic bucket under it to catch water drippings.
Once you remove the water inlet filter, bring it under the sink and clean it with running water.
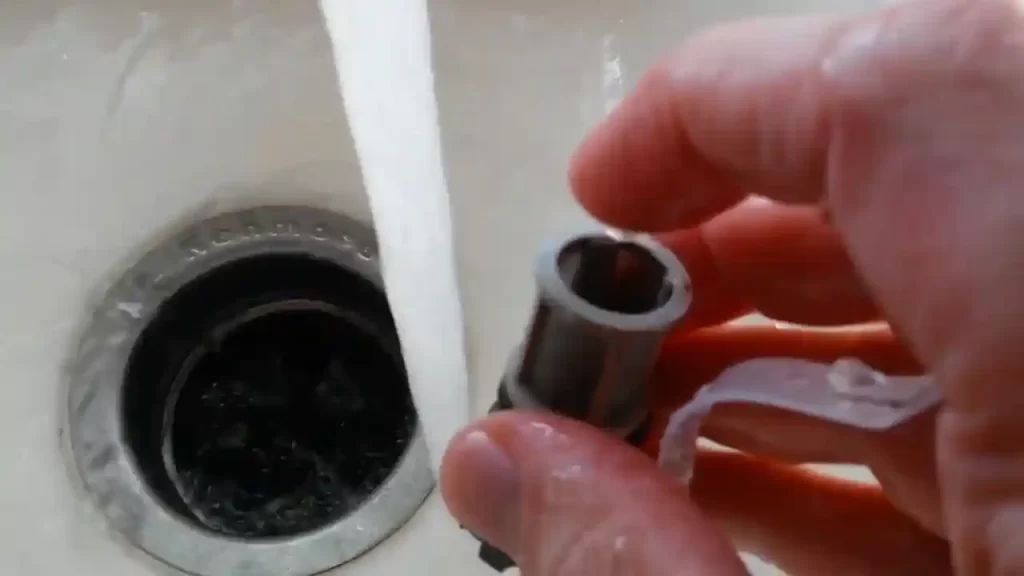
After cleaning the water inlet valve screen, reinstall it and tighten it up.
Finally, turn on the cold water supply and the hot water supply. Next, restore the power to the unit.
Clean the Flame Rod
Clean the flame rod using 100-grit sandpaper. Don’t rub the flame rod hard as it’s so fragile and prone to break.
You can read this guide on Rheem Tankless Water Heater Flame Rod Cleaning to learn how to clean the flame rod correctly.
How Do You Maintain Tankless Water Heater To Avoid Encountering Code 13?
To prevent the unit from throwing the error code 13, go along with these maintenance and proper installation practices:
Regular Maintenance
Clean the air intake and exhaust vent periodically. Ensure that the air intake and exhaust vents remain blockage-free.
Apart from weekly maintenance, clean the tankless unit once a year. For example, you should flush the tankless water heater every year.
I recommend you read this article on Rheem Tankless Water Heater Maintenance to learn how to maintain the tankless unit properly.
Proper Installation
Proper water heater installation is the key to the trouble-free operation of the unit.
Ensure that the venting and gas supply requirements are adhered to the specifications of the national & local codes and the codes by Rheem.
I highly suggest you hire a certified plumber to install the tankless water heater to avoid installation mistakes.
Environmental Considerations
Ensure you install the tankless water heater in a well-ventilated area. Besides, install protective covers to protect the water heater from extreme weather.
FAQs
Go along with the following steps to troubleshoot the error code 13:
- Check the gas supply and ensure you open the gas valve fully
- Ensure the gas pressure is within specifications
- Inspect the venting system and ensure there is no blockage
- Inspect the ignition components like the igniter, flame rod, and ignition electrodes for damage
Resetting the Rheem Tankless Water Heater is simple. Turn off both the electric supply and gas supply to the unit and leave the water heater for 30 seconds. Then, restore the power and turn on the gas supply. Next, turn on the water heater, which should reset the unit. To learn more about it, read this article: How To Reset Rheem Tankless Water Heater.
You can reset your tankless water heater to clear the error code 13. However, if you don’t resolve the underlying issues causing the error code 13, this code will reappear.
End-Note
Combustion failure is what the error code 13 resembles. It occurs due to a clogged water inlet filter, venting problem, and dirty burner.
Follow each troubleshooting step I mentioned to resolve this issue. If the efforts fail to resolve the error code, contact Rheem Customer Service or a certified technician for professional assistance.

Eric Alvarez is the head of content on LilDutchUncle.Com. He is an HVAC guy based in El Paso, Texas, United States. He obtained his Bachelor of Science degree from the University Of Texas at El Paso. Years of experience in the HVAC field have taught him many lessons, not the least of which is that the value of quality and knowledge far exceeds any promised initial savings. He has a good standing reputation for superior skills in heating, air conditioning, hot water tanks, and indoor air quality systems.