Rheem Water Heater status light that doesn’t blink will be due to:
- The combination gas control remains in the off position, or it gets defective
- The pilot is not lit because of a disconnected igniter wire.
- The igniter wire gets defective
- Thermal switch gets tripped
Table of Contents
- Why Does The Rheem Water Heater Status Light Not Blinking? 5 Underlying Reasons & Their Solutions
- How Long Does It Take For The Status Light To Blink On A Water Heater?
- What Does Blue Light on the Rheem Water Heater Mean?
- How Often Should Water Heater Light Blink?
- End-Note
Why Does The Rheem Water Heater Status Light Not Blinking? 5 Underlying Reasons & Their Solutions
Rheem Water Heater Light is not blinking because of the turned off combination gas control, pilot is not lit, and insufficient power supply.
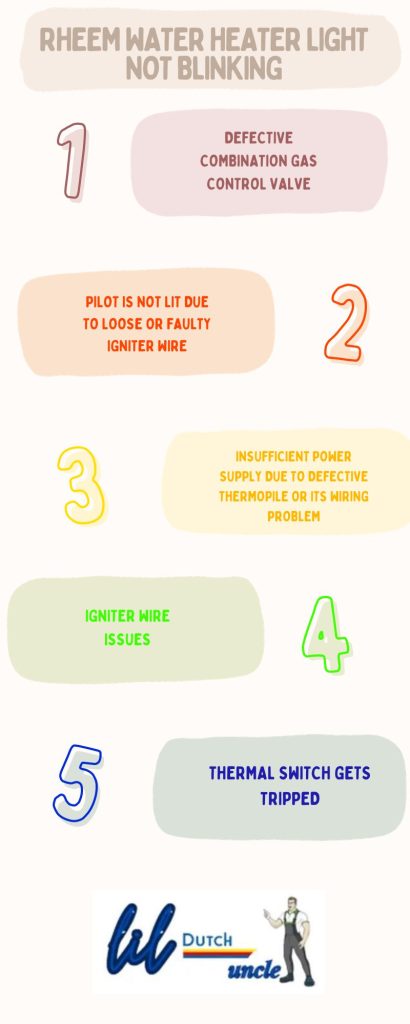
Besides, igniter wires issues and a faulty or tripped thermal switch are other two culprits that prevent the status light from flickering.
Below, I will describe each of those issues and provide the potential solutions to them.
01. Combination Gas Control Turned Off
Without fuel, it’s impossible to turn on the water heater. When the combination gas control will remain in off position, no fuel will go to the combustion chamber. As a result, the status light will also not gleam as you can’t light the water heater without gas.
How To Fix:
Just turn the combination gas control to the on position. If you turn on the heater for the first time, you should first turn on the pilot light. In the next chapter, I will let you know how to light the pilot light on the Rheem water heater. Once you successfully light the pilot, set the gas combination control knob to your desired setting.
Read Further:
02. Pilot Is Not Lit
Your Rheem Water Heater status light won’t blink if you fail to light the pilot. For proper operation, it’s indispensable to light the pilot correctly. Otherwise, you can’t run the water heater to heat water for the shower.
How To Light Pilot On Performance Rheem Water Heater:
Follow the below step-by-step instructions to light the pilot light on your Rheem Water Heater:
- Set the combination gas control knob to the Off position by rotating it counter-clockwise.
- Wait five minutes to let all the gas clear out.
- Take off the outer door and locate the piezo-electric spark generator button. It’s just below the thermostat control knob.
- Rotate the thermostat knob clockwise to the Pilot position.
- Now, depress and hold the thermostat or gas control knob all the way in and keep depressing the piezo-electric spark generator button at the same time. Do this several times until the status light starts blinking.
- Once the status light begins to blink, verify the pilot is lit by viewing the pilot flame through the sight glass window. You may need to dim your room lights to see the pilot light.
- If the status light doesn’t start blinking after 90 seconds, follow the steps from 1-4 again to light the pilot light. For lighting a new water heater, the pilot light should come on within two-three attempts.
- Release the combination gas control knob and put the outer door back on.
- Finally, set the thermostat knob to your desired temperature setting.
Precaution:
If you smell gas while lighting the water heater, turn off the heater immediately. Neither try to light any appliances nor touch any electrical switches. Call the gas supplier from your neighbor’s phone. If you fail to reach the gas supplier, call the fire department.
You should avoid every type of tool to turn the gas control knob. If you fail to turn the knob by hand, call a certified technician to help you.
Lastly, avoid using your water heater if any of its parts go under water.
03. Insufficient Power Supply
A water heater demands sufficient electric power for normal operation. If it doesn’t get the power it needs, the status light will not flicker.
If the thermopile connector to the gas combination control is not connected properly or comes loose, the thermopile will not receive enough electric power. Either way, damaged thermopile wires are also responsible for insufficient power supply.
Lastly, a defective pilot assembly can also be the culprit behind providing inadequate power supply to your water heater.
How To Check Thermopile On Rheem Water Heater:
Without testing the thermopile electrically, you can’t firmly say your water heater gets insufficient power. To test the thermopile, take a multimeter and set it to millivolts (less than 1 volts).
Then, remove the thermopile wiring connector from the gas control. You may need to rock the wiring harness back and forth to remove the wire connector.
Next, attach the red positive lead to the red thermopile wire and the black lead to the white thermopile wire.
Now, turn your gas control knob to Pilot and light the pilot as per manufacturer’s instructions by depressing the thermostat knob & sparking the igniter. As the pilot is lit, the voltage will start climbing.
Continue to hold down the gas control thermostat knob until it reaches the maximum voltage. It will require up to three minutes.
A healthy thermopile and an open circuit test will read anywhere from 650 to 850 millivolts. If you don’t get the reading between this range, you should replace the thermopile.
Of course, don’t forget to check the thermopile wire connector connection to the gas control. If it comes loose, tighten it up.
04. Igniter Wire Issues
Igniter wires should be firmly inserted into the white connector. If the white or orange igniter wiring comes loose from the white connector, your water heater will not ignite. And guess what, it causes the status light to remain off.
Besides, the water heater status light will not blink if the white connector touches the metal pilot tube, manifold tube, or the manifold door.
How To Fix:
Ensure the white or orange igniter wires don’t come loose from the white connector. If they come loose, insert them into the white connector firmly.
Secondly, keep the white igniter away from the metal pilot tube, manifold tube, or the manifold door. If needed, bend the white connector.
Still, if you don’t see any spark, don’t hesitate to remove the pilot assembly by pulling the access panel out. Now, click the igniter button several times and check the igniter. If there is still no spark, put the pilot assembly back on and call a professional to handle this issue.
05.Thermal Switch Gets Tripped
Every water heater manufactured from 2003 comes with a built-in thermal cut-off switch as a safety device. When the temperature in the combustion chamber is climbing too high, the switch will trip and cut power to the valve.
The switch also trips when it senses flammable vapors such as gasoline, paint, thinners, and solvents. Additionally, if the switch gets faulty, it will prevent the pilot from staying lit. And when the pilot won’t light, the status light of your water heater will never blink.
How To Fix:
Begin with checking the continuity of the thermal switch. In this case, you need two pieces of equipment, including a multimeter and a screwdriver.
Before getting into the testing workflow, make sure you turn the gas supply off. The handle should be perpendicular to the pipe just like the below screenshot:
After that, take the bottom cover out and set the thermostat control to the pilot position. Then, set the control valve to the Off position.
Now, take a look at the thermal switch. If it has a button, it’s likely resettable. Simply press the button to reset the switch. Keep in mind; not every thermal switch comes with a reset button. Some will reset automatically and some water heaters will use a one time switch.
However, you can check the continuity of every thermal switch whether they have a reset button or not.
Firstly, set the multimeter to the Ohms setting.
Secondly, disconnect the wires to the switch.
And finally, place the probes on the terminals. If the multimeter reads OL or Open Loop, I bet there is no continuity.
In this case, you should replace the thermal switch.
If the thermal switch has continuity, it will be best to test the thermopile. Fortunately, I mentioned it in the previous section.
Also, make sure there is no flammable vapor or liquid near the water heater. If yes, remove them and don’t try to relight the unit. The sad news for you is- you should replace the entire water heater unit if it’s subjected to flammable vapor incidents.
On the other hand, if there is no flammable vapor, check both the base-ring filter and the flame arrestor for dirt & debris. If needed, clean them using a household cleaning brush.
How Long Does It Take For The Status Light To Blink On A Water Heater?
If it’s a newly installed water heater, it will take 2-3 lighting attempts before the pilot lights and the status light come on.
On the other hand, it may take up to 90 seconds before the pilot lights and the status light begins to blink if there is air in the gas line. If the status light doesn’t start blinking after 90 seconds, release the gas control knob. Then, turn the gas valve off and wait 10 minutes before attempting to relight the pilot.
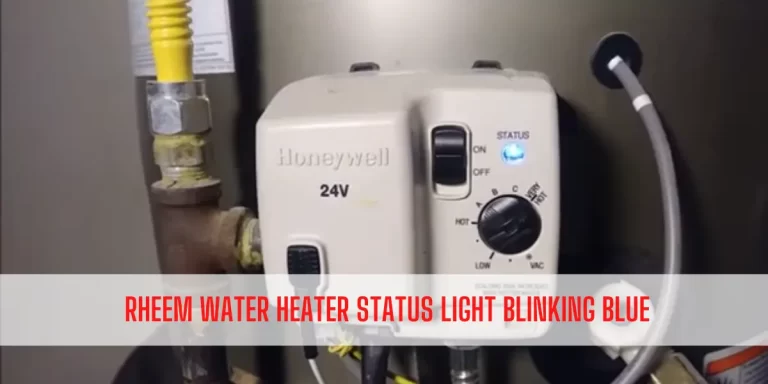
What Does Blue Light on the Rheem Water Heater Mean?
The blue light on the Rheem Water Heater indicates either a problem or normal operation of the unit. It depends on the model of your water heater.
For example, if you have a Rheem Gas Water Heater like Performance Plus, it will indicate the unit is functioning normally. On the other hand, the blue status light on a power vent model will indicate a water heater problem.
What problem the blinking light indicates will depend on the number of flashes on the status light. If the status light blinks three (3) times, I bet the draft pressure switch is open.
Read this article on Rheem Water Heater Status Light Blinking Blue to learn more.
How Often Should Water Heater Light Blink?
In normal operation, the water heater status light should blink once every three seconds. It indicates that the water heater and the gas valve are working in tip-top condition. However, if the status light doesn’t blink or come on, I recommend you relight the pilot. Still, if the status light doesn’t come on, follow the troubleshooting steps I mentioned.
End-Note
It indicates something is not working properly or the problem is pretty simple like: you turn the gas combination control off if the status light is not blinking.
What you need to do, in this case, is- just follow the troubleshooting steps I suggested. I am pretty much sure you can solve the blinking issue.

Eric Alvarez is the head of content on LilDutchUncle.Com. He is an HVAC guy based in El Paso, Texas, United States. He obtained his Bachelor of Science degree from the University Of Texas at El Paso. Years of experience in the HVAC field have taught him many lessons, not the least of which is that the value of quality and knowledge far exceeds any promised initial savings. He has a good standing reputation for superior skills in heating, air conditioning, hot water tanks, and indoor air quality systems.