This is a how-to guide on Richmond Water Heater Thermocouple Replacement. In this article, I will walk you through:
- How to replace a thermocouple on a Richmond Water Heater?
- How to light the pilot on your Richmond Water Heater?
Without further ado, let’s get started right here.
Table of Contents
- Richmond Water Heater Thermocouple Replacement: The How-To Steps
- How To Light The Pilot On A Richmond Water Heater?
- FAQs
- End-Note
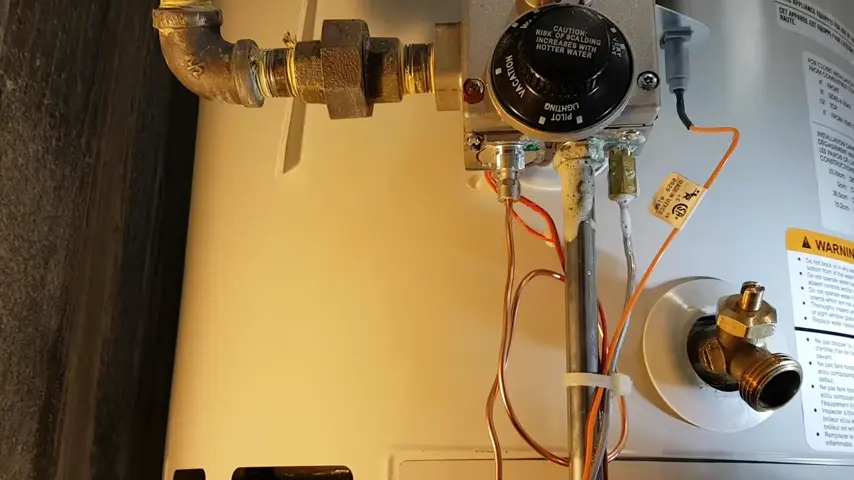
Richmond Water Heater Thermocouple Replacement: The How-To Steps
First off, determine which size and style of thermocouple you need for your Richmond water heater. Once you get the correct thermocouple for your water heater, follow the below step-by-step guide to replace the old thermocouple with a new one.
01. Shut Off The Gas Supply
Start with turning off the gas supply to your water heater. Just set the gas valve to the off position.
02. Unhook Everything From the Gas Valve
Secondly, remove the bottom plate that hides burner door in-sight glass. Then, detach everything like the thermocouple, igniter wire, pilot tubing, and main burner supply. You should use an adjustable wrench to remove those connections from the gas control valve.
Don’t forget to disconnect the wiring from the high-limit or temperature cut-off switch.
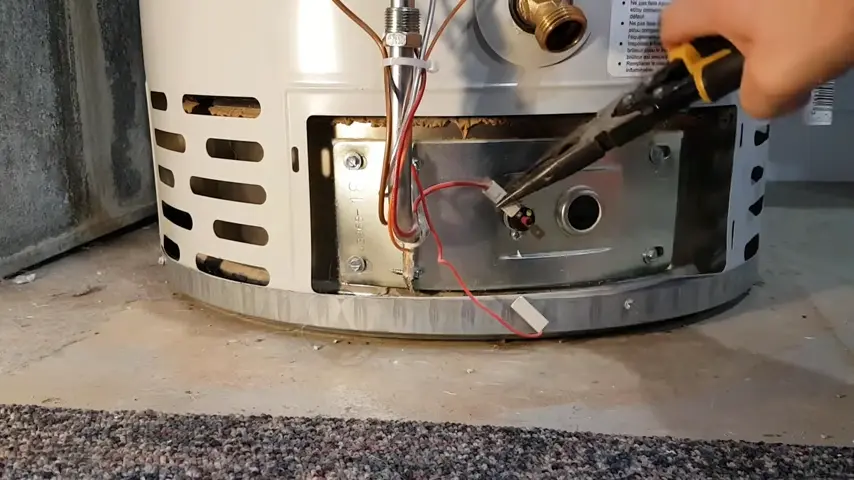
03. Remove The Burner Assembly

What you need to do now is- use a flathead screwdriver to remove the nuts that hold the burner door in place. Once you unscrew those nuts, remove the burner door and slide out the burner assembly from the unit.
04. Remove The Thermocouple From The Pilot Assembly
Now, just remove the thermocouple from the pilot assembly. Just keep your left hand on the burner and use your right hand to hold the thermocouple and put it out towards you.
05. Install The New Thermocouple
And it’s time to install a new thermocouple on the pilot assembly. The push-fit adapter your thermocouple has may not be the right size for the new one. So, remove the old push-fit adapter and install the new one that comes with your replacement part.
Then, run the thermocouple through the push-fit adapter to end the thermocouple installation.
06. Put Everything Back Into Its Place
Reinstall your burner assembly into the combustion chamber. It’s indispensable that if your burner has a bracket core slot it helps to place the burner in its original position.
Next, connect all those things like pilot tubing, igniter wires, main burner supply, and others to the gas valve. Ensure you hand-tighten them first to avoid stripping any of the threads.
Afterward, reinstall the burner door and tighten up those screws. Reconnect the cut-off switch and the igniter wiring.
07. Turn On Gas Supply And Check for Leaks
Finally, turn the gas supply back to your water heater and relight the pilot. In the next chapter, I will break down how to light the pilot.
And then, use a soap solution to test for gas leaks at the main burner and pilot connections. The burner has to be firing to properly inspect for gas leaks. What you need to look for is- any bubbles are coming or growing.
If you smell any gas, turn the gas control valve to the off position and recheck your connections. Alternatively, you can call the gas supply company for help.
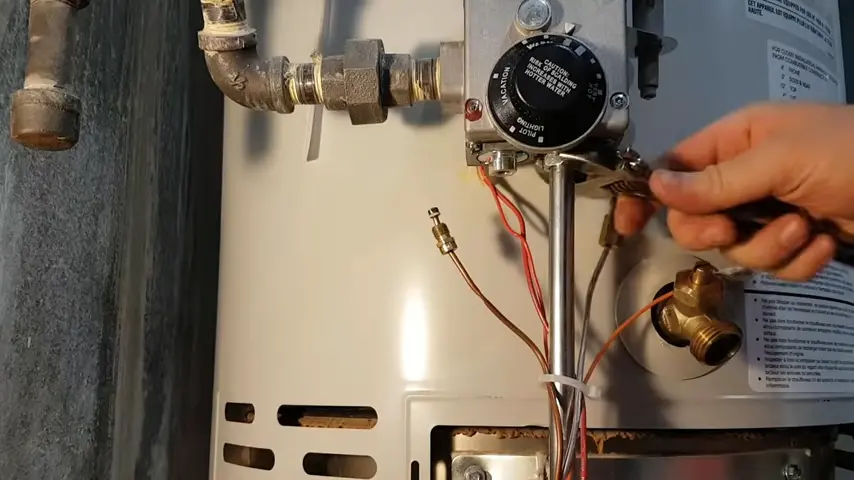
How To Light The Pilot On A Richmond Water Heater?
Here’s the step-by-step guide to light the pilot on your Richmond Water Heater:
- Set the pilot knob to the off position. Leave this button to the off position for 5 minutes to let the gas clear out.
- Turn the pilot knob to the pilot position again.
- Push down the pilot knob and press down the igniter button. This will make a little spark down there. You can see it through the screen.
- You should keep pressing the igniter button several times while you need to push down the pilot knob at the same time.
- When the pilot is lit, you can see the blue light flashing intermittently. It means your pilot light is lit
- Finally, set the temperature dial to your desired hot setting.
FAQs
Are thermocouples Universal for water heaters?
All the universal thermocouples come with a length between 15” to 36”. But for residential water heaters, a 18” or 24” thermocouple is sufficient and fits your existing water heater.
Can I replace a thermocouple myself?
Yes, you can replace a thermocouple by yourself. Just follow the steps I mentioned above and you can successfully install the thermocouple.
Why won’t my Richmond hot water heater stay lit?
Your Richmond hot water heater won’t stay lit due to a faulty thermocouple, bad thermal release device, and faulty gas control valve. I already covered a complete guide on this. So, you can check out the article here.
How much does it cost to replace a thermocouple on a water heater?
It costs you around $150 if you replace a thermocouple on a water heater professionally when the price of this part is only $20.
What tools do I need to change a thermocouple?
An adjustable wrench and a flathead screwdriver is enough to change a thermocouple.
End-Note
A faulty thermocouple prevents the water heater pilot light from styling lit. And without a steady pilot light, you can’t get hot water out of the unit. So, it’s a must to replace the thermocouple.
Just get a new thermocouple and follow the 7 steps I mentioned. It will save you at least $100 if you replace the thermocouple professionally.
Read Also:
- Richmond Water Heater Troubleshooting
- Richmond Water Heater Reset Button
- Richmond Water Heater Gas Valve Problems

Eric Alvarez is the head of content on LilDutchUncle.Com. He is an HVAC guy based in El Paso, Texas, United States. He obtained his Bachelor of Science degree from the University Of Texas at El Paso. Years of experience in the HVAC field have taught him many lessons, not the least of which is that the value of quality and knowledge far exceeds any promised initial savings. He has a good standing reputation for superior skills in heating, air conditioning, hot water tanks, and indoor air quality systems.