This is a complete guide on Rinnai Tankless Water Heater Maintenance Manual. From this guideline, what you will learn:
- How often should you clean and service the Rinnai tankless water heater?
- How to clean a Rinnai tankless water heater?
- And so on…
In short, you can discover the proper way of servicing the unit, which will prolong the durability of the water heater. And of course, proper maintenance will also help you operate the unit optimally.
So, let’s dive in.
Table of Contents
- Rinnai Tankless Water Heater Maintenance Schedule
- Rinnai Tankless Water Heater Maintenance Manual: The Step-by-Step Procedure
- How To Protect Tankless Water Heater From Freezing Weather?
- FAQs
- End-Note
Rinnai Tankless Water Heater Maintenance Schedule
Maintaining or servicing the water heater periodically and annually is a must for proper operation.
| Maintenance Activity | Schedule/Time |
| Cleaning Burner | Periodic |
| Disposing condensate system | Periodic |
| Cleaning Vent System | Periodic |
| Cleaning Motors, Fan Blade | Periodic |
| Wiping Temperature Controller | Periodic |
| Cleaning Scale Buildup | Depends on How hard the water is |
| Draining Water Heater | Periodic |
| Cleaning Air Filter | Periodic |
| Flushing Heat Exchanger | Annual |
| Operating Pressure Relief Valve | Annual |
Some components of your tankless water heater should be inspected and serviced periodically. For example, you should check the burner periodically and clean it (if needed) to get a clear, blue stable flame.
Besides, the vent system, air filter, motors, temperature controller, and condensate collection system are other parts of the unit you should inspect and service periodically.
On the other hand, you should flush the unit or the heat exchanger annually. However, how often you should flush the water heater typically depends on how hard the water is. If you live in a very intensive hard water area, I highly recommend you flush the tankless unit twice a year.

Similarly, you should operate the pressure relief valve manually once a year. Don’t forget to take necessary precautions while discharging potentially scalding hot water. Otherwise, it will burn your body.
In the next chapter, I will walk you through every step-by-step cleaning procedure to inspect and service those parts of your tankless water heater.
Before performing maintenance according to this schedule, maintain these safety tips to protect yourself from harm:
- Turn off electric supply to the unit. You can do it by unplugging the power cord from the outlet or turning off the electric power at the circuit breaker.
- Shut off the gas supply to your tankless water heater by turning the manual gas control valve clockwise.
- Don’t forget to turn off the incoming water supply. You can do it by turning off the water supply to the building.
- Keep the water heater area clear and free from any combustible and flammable objects.
Rinnai Tankless Water Heater Maintenance Manual: The Step-by-Step Procedure
It’s a must to clean the burner, vent system, air filter, temperature controller, and heat exchanger periodically or annually. And this chapter will show you how to clean each component of your Rinnai tankless water heater.
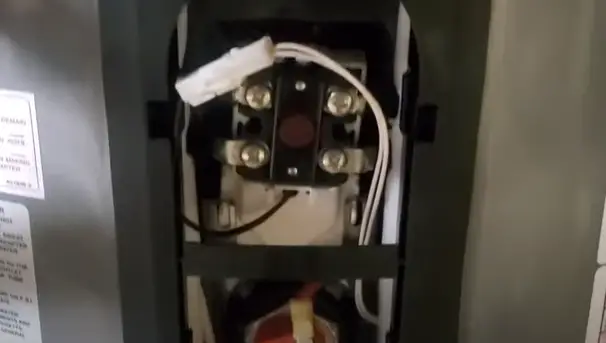
Clean The Burner
Before cleaning the burner, check out the flame color. A functional and clean burner should give a flame that will burn clear and blue. If you don’t get this burner flame appearance, you must clean the burner.
Here are the steps you should complete to clean the burner:
- Turn off electric supply to the unit by unplugging the power cord or at the circuit breaker. Leave the water heater for several minutes to let it cool down.
- Use a flat head screwdriver to unscrew the nuts that hold the front access panel in place and pull out the access panel.
- Locate the burner, which you can find at the upper part of the unit. Remove the faceplate and unscrew some nuts.
- Then, slide out the burner from the burner chamber.
- Use a vacuum cleaner to blow away dirt, debris, and spider nests from the main burner and fan blades.
- Use a soft cloth to wipe the burner cabinet.
- Once you clean the burner, put it back into its place and install its faceplate.
- Finally, replace the front access panel and screw it up.
Dispose Condensate Collection
Periodic inspection of the condensate disposal system and cleaning it is a must. To drain the condensate collection system, just attach a tubing to the condensate port. Ensure the condensate is flowing through the tube. I highly recommend you discharge the acidic fluid (condensate) in the laundry drain. The alkaline residue in the laundry drain will neutralize the acidic condensate.
Clean The Vent System
Inspecting the vent system periodically is also a must. Just check the vent system including the screens in the vent termination. Ensure there is no blockage in the vent system.
If you find any restrictions in the vent, release the blockage. Disconnect the joints of the vent system and clear away the buildup of debris, dust, and snow. Don’t hesitate to call a trained professional if the vent is clogged and you find it difficult to remove the blockage.
Clean Motors
Motors of your Rinnai tankless water heater are permanently lubricated. So, you don’t need to inspect it periodically. However, it requires keeping the fan and motors free of dirt, dust, and spider nests.
If needed, remove the motor and check the fan wheel, housing, and air duct for debris buildup. Use an air compressor to blow away dirt and debris from these places.
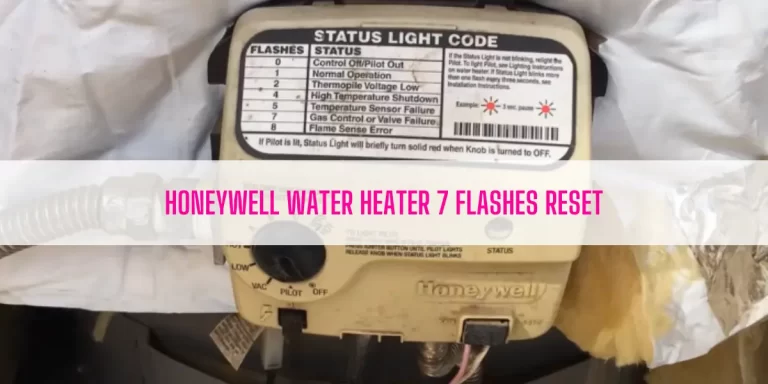
Wipe The Temperature Controller
It’s pretty straightforward to clean the temperature controller. Just get a soft damp cloth and use it to wipe away dirt from the temperature controller. Never try to use any kind of solvent to clean the temperature controller.
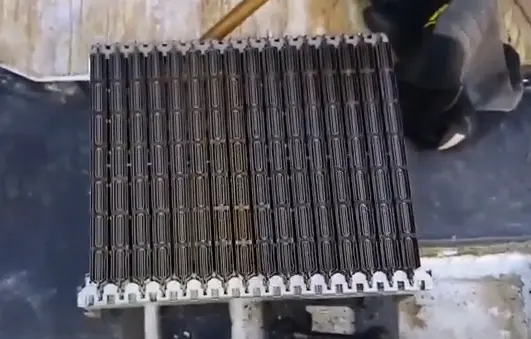
Lime or Scale Buildup Cleaning
Scale buildup formation in the heat exchanger of your Rinnai tankless unit is normal. Hard water is the main culprit that forms lime buildup. Turns out, setting the water temperature at the higher setting can also accelerate the process of forming scale buildup.
Depending on the level of hard water, you should flush the unit once a year or twice to remove the lime or scale buildup. In the ‘Flush Heat Exchanger’ section, I will show you how to remove scale formation. So, keep reading.
Drain Your Water Heater
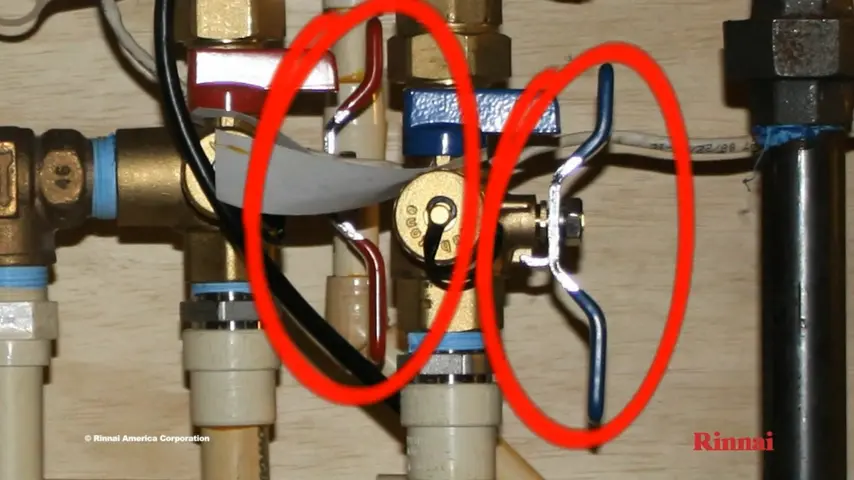
It doesn’t require elbow grease to drain your tankless water heater. Just go along with these steps and drain the water out of the unit:
- Turn off both cold water supply and gas supply to the unit. In this case, you must turn those two valves perpendicular to the corresponding pipes.
- Don’t forget to turn the temperature controller off.
- Disconnect electric power to the unit at the circuit breaker.
- Remove the drain caps at both isolation valves. You should place a container or water as you drain the pipes.
- Open the pressure relief valve by turning its lever.
- Open both hot and cold water drain valves. Also, remove the water filter to drain the cold water.
- Pull out the condensate trap train plug and let it drain.
Precautions: Once you turn off the unit, ensure the unit is cool. Wait until the water heater cools down before draining water. Otherwise, it will burn your skin as the water inside the unit remains hot after turning it off.
Air Filter Cleaning
Air filter is another water heater component that requires your periodic inspection. If the air filter gets clogged by dirt or lint buildup, follow the below cleaning procedure:
- Turn the electric power off to the unit by pushing the On/Off button on the temperature controller.
- Remove the front access cover by unscrewing the nuts. Then, locate the air filter. You can find it at the upper right-hand corner of the unit. Once you get the air filter, remove it by pulling the ‘Filter, Pull to clean’ tab.
- Now, it’s time to clean the air filter. Apply mild dish soap to the filter area and brush it with a soft scrubbing brush. Once you scrub the air filter evenly, rinse it with clean water.
- Take a lint free towel and dry the air filter with it.
- Replace the air filter in its place after cleaning and drying it. Finally, turn the power on.
Flush The Heat Exchanger
As I mentioned earlier, you must flush the heat exchanger once a year. If there is too hard water in your area, flushing the heat exchanger twice a year is a must. Failure to flush the unit timely can cause damage to the heat exchanger.
Below, I will walk you through a step-by-step guide to show you how easy it’s to flush the Rinnai tankless water heater.
Firstly, ensure you have the following pieces of equipment at your fingertips:
- A 5-gallon capacity plastic bucket
- Two standard washer hoses
- A submersible pump
- Four gallons of food-grade white vinegar.
Once you have all of these materials, ensure you unplug the unit from electric power. What you need to do next is- isolate the water flow from the cold inlet and hot outlet.
Next, connect the washer hoses to the service ports on the isolation valves. The cold side will connect to the and the hot side will drain into the plastic bucket.
Now, pour 4 gallons of vinegar into the bucket and turn on the circulating pump. You should operate the pump for at least an hour, which allows the vinegar to circulate through the water heater. Keep in mind; you should set the pump at a rate of 4 gallons per minute.
After flushing the unit thoroughly with vinegar, you should flush out the vinegar residue from the unit. To do so, follow the procedure described below:
- Turn off the circulation pump.
- Close the service valve at the cold inlet.
- Disconnect the hose to the cold inlet and ensure you have a drain or catch for the flushed water from the hot outlet.
- Open the cold isolation valve and allow fresh water to run through the unit for a minute. Once you have done, close the cold side again.
- Shut the service valve from the hot side and remove the hose from the hot side.
- Reopen both the cold and hot isolation valves. Ensure you close the service ports so that you don’t end up with water everywhere.
And lastly, restore the electric power back to your water heater.
How To Protect Tankless Water Heater From Freezing Weather?
Ensure your tankless unit and its water lines are well-protected to prevent freezing. You should insulate the hot and cold water pipes to shield them against freezing weather.
However, your Rinnai tankless water heater will not freeze when the outdoor temperature is as cold as -22°F if the unit is connected with gas and 120-volt power supply. In this case, the prerequisite is you must keep the unit protected from direct wind exposure.
But what happens if there occurs power failure or gas supply interruption at below freezing temperature? Regarding this, you must drain the water heater manually to shield the unit against freezing damage.
It will be best if you install a Drain Down Kit accessory that will help you drain the water heater in the event of power failure.
Keep in mind; the freeze protection feature can’t prevent the external lines and valves from freezing.
FAQs
It depends on what part of the tankless unit you are going to service. For example, you need to flush the unit once a year. If you live in a hard water area, you should flush the water heater twice a year. On the other hand, some parts require your periodic inspection like the vent system and air filter.
It will cost you around $150 to flush a tankless water heater.
Rinnai tankless water heater features a service indicator called Service Soon, 55. If you select it in the parameter setting, the error code 55 will appear on the controller display. It indicates you need to flush and service your tankless water heater.
End-Note
I disclosed everything you need to know about the Rinnai tankless water heater maintenance. Now, what you should do is just follow this guideline and service the unit according to it. It will prolong the life expectancy of your tankless water heater and let you run the unit optimally for years. So, it’s worth bookmarking this guide.
Read Also:
- Rinnai Tankless Water Heater Problems
- Rinnai Tankless Water Heater No Power
- Rinnai Tankless Water Heater Control Panel Not Working

Eric Alvarez is the head of content on LilDutchUncle.Com. He is an HVAC guy based in El Paso, Texas, United States. He obtained his Bachelor of Science degree from the University Of Texas at El Paso. Years of experience in the HVAC field have taught him many lessons, not the least of which is that the value of quality and knowledge far exceeds any promised initial savings. He has a good standing reputation for superior skills in heating, air conditioning, hot water tanks, and indoor air quality systems.