This guide on Richmond Water Heater Element Replacement will walk you through:
- A step-by-step procedure to replace the heating element
- Testing and troubleshooting step once you replace the heating element
- Maintenance tips to prolong the lifespan of the water heater element
Table of Contents
- Richmond Water Heater Element Replacement [7 Easy Steps]
- Testing And Troubleshooting
- Maintenance Tips To Prolong the Lifespan of the Heating Element
- FAQs
- End-Note
Richmond Water Heater Element Replacement [7 Easy Steps]
Tools or Equipment You Need At Your Fingertips:
- A new heating element. Ensure the new heating element has the same mount and gasket, either screw-in or flange and the same wattage & voltage as the element being replaced.
- A #2 Phillips screwdriver
- A 1 1/2″ element wrench for screw-in heating elements or a 3/8″ socket wrench for flange heating elements
- Flat blade screwdriver
- Teflon tape
- A voltmeter
- A garden hose
- Rags or towels
Once you have these tools handy, let’s follow these step-by-step guides to replace the heating element like a champ:
1. Safety first! Turn off the electric supply to your water heater by flipping down the circuit breaker for the unit.
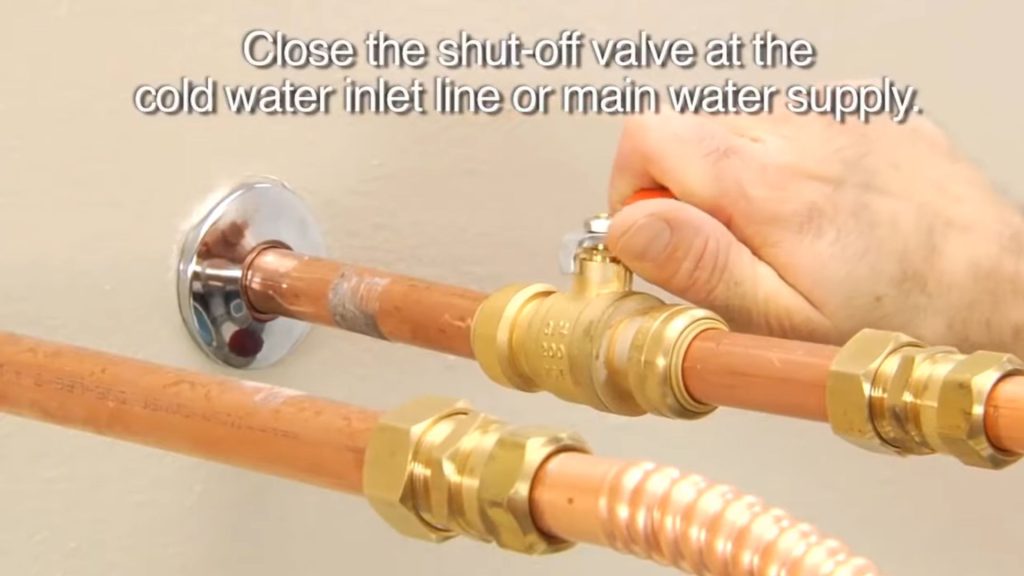
2. Close the water supply to your water heater. Regarding this, shut off the valve at the cold water inlet line or main water supply. Then, open a hot water faucet somewhere in your house. It will help relieve system pressure inside the tank.
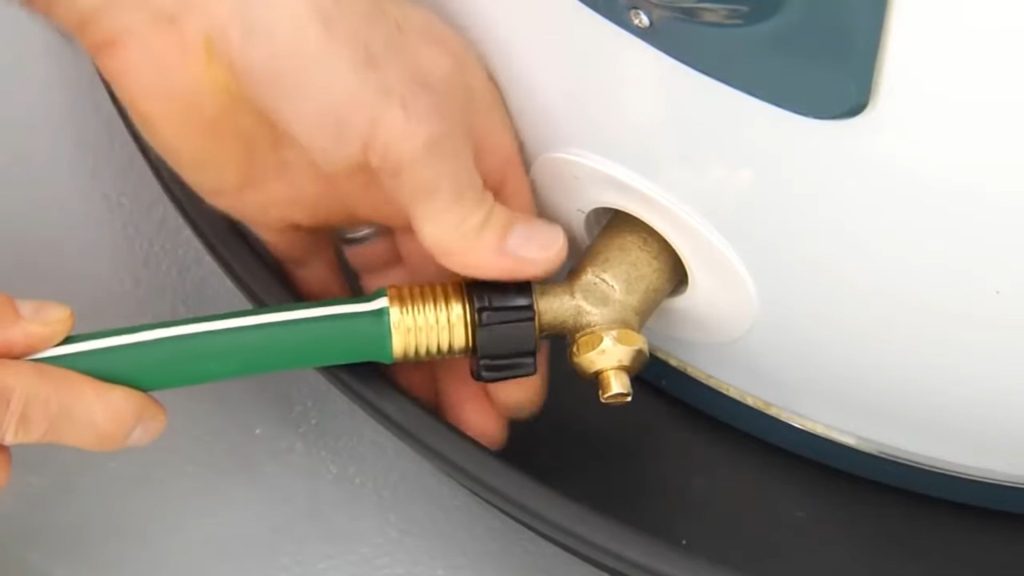
3. Drain your water heater. To drain the water heater, attach a garden hose to the drain valve and place the other end to the nearest floor drain. Open the drain valve by using a screwdriver and let the water drain. You can read this guide to learn how to drain Richmond Water Heater.
Note: For upper heating element replacement, you should drain approximately half of the tank. Otherwise, drain the entire tank if you want to replace the lower heating element.
4. Locate the heating element. Depending on the model of your Richmond Water Heater, you can find the element behind the access panel on the front or side of the tank. Unscrew the access panel, remove the insulation, and take out the plastic protective cover to expose the heating element.
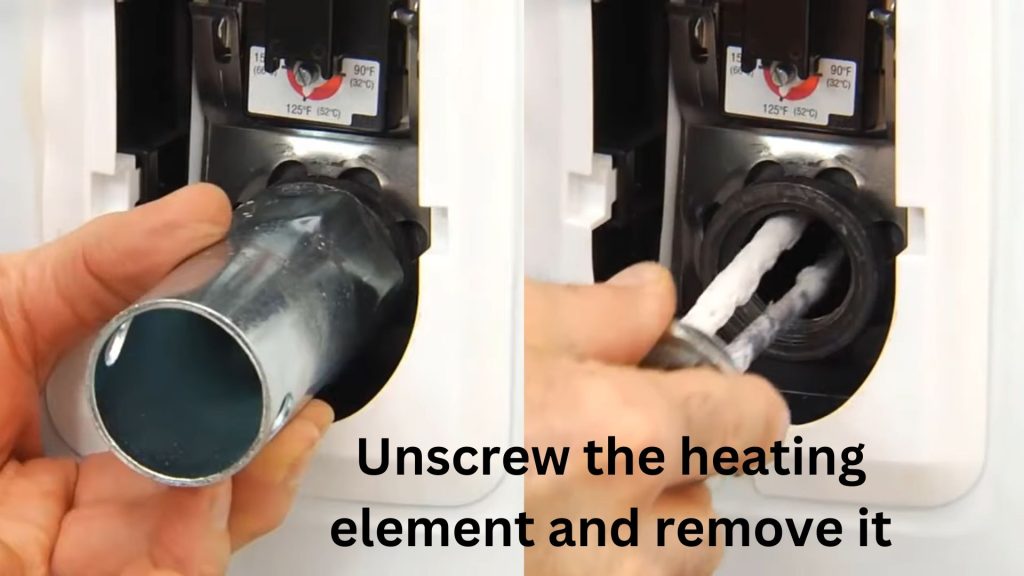
5. Once you drain the tank, you are ready to remove the old heating element. Disconnect the wires attached to the heating element. Then, remove the heating element using a socket wrench.
Safety Tips: Before removing the faulty heating element, verify that there is no electric power at the heating element using a voltmeter. Touch one probe to grounded metal and place another probe to all thermostat terminals and heating element terminals. Voltmeter should indicate no voltage at all times.
6. Install a new heating element and gasket. Apply Teflon tape to the threads of the heating element to ensure a watertight seal. Insert the heating element into the water heater tank and secure it by tightening until it’s snug. Attach the wires to the heating element; it doesn’t matter which wire goes to which screw terminal. Next, replace the plastic protective cover and the insulation. Then, turn on the electric supply at the circuit breaker.
7. Refill the water heater tank. Regarding this, open the shut-off valve at the cold water inlet line and you will hear the water heater start to fill. Close the hot water faucet when you have a steady stream of water from the open faucet. After restoring power to the unit, you will get a full tank of hot water about an hour later.
Testing And Troubleshooting
After replacing the heating element successfully, test the water heater to verify that it’s working properly.
Restore the power to your water heater at the circuit breaker. Then, set the thermostat to your desired temperature setting. You can also check out this article: Richmond Water Heater Temperature Adjustment. Wait for an hour for the water heater to heat up, and then check for leaks or unusual noises.
If you face issues like leaks or insufficient heating, read this article on Richmond Electric Water Heater Troubleshooting. Or, you can consult a certified plumber for further assistance.
Maintenance Tips To Prolong the Lifespan of the Heating Element
Go along with these maintenance tips to increase the lifespan of the water heater element:
- Inspect the heating element every two-three months for signs of corrosion and damage.
- Flush the tank once a year. If you live in a hard water heater, you should flush the water heater every six months. Flushing the tank will remove sediment buildup from the bottom of the tank.
- Install a water softener to maintain water quality, which will prevent sediment buildup at the bottom of the tank.
FAQs
Yes, you can replace a water heater element yourself as it’s a straightforward task. Just take enough precaution and turn off the electric power to your water heater at the circuit breaker. Then, follow the step-by-step procedure mentioned in this article. DIY replacement of the water heater element will save you a lot of bucks.
It will cost you between $200 and $300 to repair the heating element by a professional, where the part itself will cost you around $20-$60. However, you can save the repair cost by installing a new heating element yourself.
End-Note
Replacing the heating element on a Richmond Water Heater is simple. Follow the step-by-step guidelines mentioned in this article and have the element replaced like a charm. Prioritize the safety first while replacing the heating element. Feel free to contact a professional if you encounter difficulties during the replacement process.
Related: Richmond Gas Water Heater Troubleshooting

Eric Alvarez is the head of content on LilDutchUncle.Com. He is an HVAC guy based in El Paso, Texas, United States. He obtained his Bachelor of Science degree from the University Of Texas at El Paso. Years of experience in the HVAC field have taught him many lessons, not the least of which is that the value of quality and knowledge far exceeds any promised initial savings. He has a good standing reputation for superior skills in heating, air conditioning, hot water tanks, and indoor air quality systems.